Zodiac Gemini Nail Designs: Must-Have Looks for Your Twin Spirit!
Unleash your Gemini power with stunning nail designs! From playful dual colors and celestial accents to creative patterns reflecting your adaptable nature, these Gemini nail ideas are easy to recreate and perfect for expressing your vibrant personality. Let’s dive into the coolest looks!
Hey, nail lovers! Lisa Drew here from Nailerguy. Ever feel like your nails are just… nails? We get it! Sometimes, you want your manicure to say something special about you. If you’re a Gemini, or just love the energy of the Twins, you’re going to adore exploring zodiac-inspired nail designs. Gemini season is all about duality, communication, and a whole lot of fun, and your nails can totally reflect that! This guide is here to make creating amazing Gemini nail art totally stress-free. Get ready to be inspired!
Gemini Nail Designs FAQ
What Makes a Nail Design Gemini-Themed?
Gemini-themed nail designs often incorporate the twins’ dual nature, communication symbols, and the ruling planet Mercury. Think split colors, contrasting patterns, playful motifs, and celestial elements like stars and moons, all in vibrant or contrasting shades.
What Are Gemini Colors?
Geminis are often linked to bright, vibrant, and contrasting colors. Yellow, light blue, silver, and white are classic Gemini colors. You might also see them represented with two complementary or contrasting shades to symbolize their duality.
Are Gemini Nail Designs Hard to Do?
Not at all! Many Gemini nail designs are beginner-friendly. Simple split colors, geometric patterns, or adding a few star decals are easily achievable. We’ll cover some easy techniques!
What Symbols Represent Gemini?
The most prominent symbol is the Gemini twins (represented by the Roman numeral II). Other symbols include the constellation, stars, moons, and anything related to communication, such as speech bubbles or playful patterns that evoke a sense of movement and conversation.
Can I Combine Gemini Themes with Other Zodiac Signs?
Absolutely! You can create unique designs by blending Gemini elements with your partner’s or a friend’s zodiac sign. This makes for a very personal and thoughtful manicure.
What Are Some Easy Gemini Nail Art Tools for Beginners?
For easy Gemini designs, you’ll want dotting tools, thin nail art brushes, striping tape, and glitter polish. Even simple nail polish colors and a steady hand can create beautiful Gemini-inspired looks!
How Long Do Zodiac Nail Designs Usually Last?
Like any manicure, the longevity depends on the type of polish used, your nail care routine, and how much you use your hands. Gel polish manicures typically last 2-3 weeks, while regular polish might last 5-7 days with proper care.
Understanding the Gemini Spirit for Nail Art
Geminis, you’re known for being the “Twins” of the zodiac! This means you’re often seen as adaptable, curious, and full of life. You’re excellent communicators, always ready with a witty remark or an interesting story. Your energy is vibrant, and you love to explore different ideas and experiences. This duality and zest for life are perfect inspiration for nail art!
When we translate the Gemini spirit into nail designs, we’re looking at a few key themes:
- Duality: The most obvious theme! This can be expressed through split colors on one nail, or alternating designs on different nails.
- Communication & Intellect: Ruled by Mercury, the planet of communication, Geminis are quick-witted and communicative. Designs that feel a bit playful or even have subtle nods to communication symbols can be fun.
- Curiosity & Versatility: You love to try new things, right? Gemini nails can be versatile, shifting from one style to another, or incorporating various elements.
- Lightness & Brightness: Geminis often have a light, airy, and cheerful demeanor. Think bright colors, playful patterns, and sparkly accents.
The beauty of Gemini nail designs is their flexibility. You can go bold and graphic, or subtle and celestial. Whatever your style, there’s a Gemini-inspired look waiting for you!
Essential Tools for Your Gemini Manicure
Before we dive into the fun designs, let’s get you set up with some handy tools. Don’t worry, you don’t need a professional salon to create these looks! Most of these are budget-friendly and easy to find online or at your local beauty supply store.
| Tool | Purpose | Why it’s Great for Gemini Designs |
|---|---|---|
| Nail Polish Colors (Base, Top Coat, and Art Colors) | The foundation and art of your design. | Crucial for capturing Gemini’s dual colors and vibrant personality. Think yellows, blues, silvers, and neons! |
| Thin Nail Art Brushes | For drawing fine lines, details, and intricate patterns. | Perfect for creating dual-color splits, geometric lines, or celestial details like tiny stars. |
| Dotting Tools | Creating dots of various sizes. | Ideal for adding stars, moons, or creating playful, scattered patterns that reflect Gemini’s energetic vibe. |
| Striping Tape | Creating clean, straight lines and geometric sections. | A lifesaver for achieving sharp divides between two colors or creating cool geometric art. |
| Nail Decals or Stickers (Stars, Moons, II symbol) | Easy embellishments. | Quickly add celestial or twin-themed elements without freehand drawing. |
| Clean-up Brush/Q-tips and Nail Polish Remover | To tidy up any polish that gets where it shouldn’t. | Essential for a polished finish, making even beginner designs look professional. |
| Holo Top Coat | Adds a shimmering, holographic finish. | Brings extra sparkle and dimension, perfect for Gemini’s love of attention and fun! |
Having these on hand will make creating your Gemini nail designs a breeze. Remember, practice makes perfect, and even a small mistake can often be fixed with a little clean-up!
Must-Have Gemini Nail Designs for Beginners
Ready to get creative? Here are some Gemini nail designs that are super fun and surprisingly easy to achieve, even if you’re just starting out with nail art. We’ll break them down step-by-step!
Design 1: The Classic Dual Split
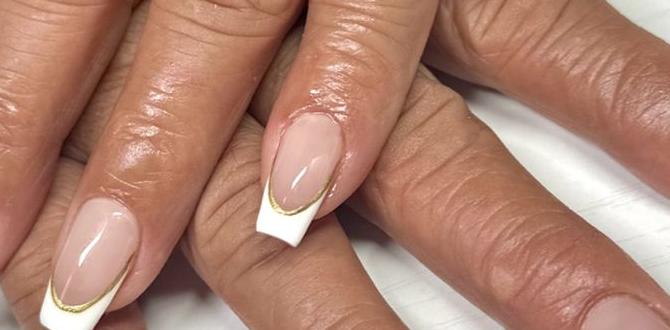
This is the quintessential Gemini look. It’s all about showcasing two contrasting or complementary colors on a single nail. It’s elegant, modern, and speaks volumes about Gemini’s duality.
What you’ll need:
- Your favorite base coat and top coat.
- Two complementary or contrasting nail polish colors (e.g., bright yellow and sky blue, silver and black, coral and teal).
- Thin nail art brush OR striping tape.
- Nail polish remover and Q-tips for clean-up.
Here’s how to do it:
- Prep your nails: Start with clean, dry nails. Apply a base coat for protection.
- Apply First Color: Paint one half of your nail with your first chosen color. Let it dry completely.
- Apply Second Color: Paint the other half of your nail with your second color.
- Create the Split (Method A – Nail Art Brush): Once both colors are dry, use your thin nail art brush dipped in a bit of polish remover to carefully clean up the line where the two colors meet, creating a crisp division. You can also use a detailing brush with a metallic polish (like silver) to draw a fine line right down the center for extra definition.
- Create the Split (Method B – Striping Tape – Easier!): After the first color is completely dry, apply a piece of striping tape down the center of your nail. Paint the second color over the tape and the free half of the nail. Immediately after applying the polish, carefully peel off the striping tape while the polish is still wet. This will leave you with a super clean line.
- Add a Top Coat: Once everything is dry, seal your design with a good top coat.
Design 2: Celestial Twins
This design captures the Gemini fascination with the cosmos and their ruling celestial bodies. It’s subtle yet magical, perfect for a more understated Gemini vibe.
What you’ll need:
- Base coat and top coat.
- A light base color (like milky white, pale blue, or sheer silver).
- Metallic or glitter polish (gold, silver, or iridescent).
- Dotting tool OR a fine-tipped nail art brush.
- Optional: Star and moon nail decals.
Here’s how to do it:
- Prep and Base: Start with a clean base coat. Apply your light base color and let it dry completely.
- Add Celestial Details: Using your dotting tool or fine brush, dip into your metallic or glitter polish.
- Stars: Create small dots scattered across your nail. You can group them together in a constellation-like pattern or spread them out for a starry night effect.
- Moons: Draw small crescent moons, perhaps on accent nails.
- Use Decals (Optional): If freehand drawing isn’t your thing, apply star or moon decals carefully with tweezers.
- Gemini Symbol (Optional): You can even add a tiny “II” symbol using your fine brush or a special decal!
- Seal it: Apply a clear top coat to protect your celestial artwork. A top coat with a holographic finish can add even more sparkle!
For an extra touch, you could do a different color on each hand, or alternate between a full celestial design and a simple dual-color split.
Design 3: Playful Geometric Duo
This is a more modern take on the dual-color theme. Instead of a simple split, we’re using geometric shapes to divide and conquer!
What you’ll need:
- Base coat and top coat.
- Two (or more!) vibrant nail polish colors.
- Striping tape OR a thin nail art brush.
- Scissors or a small craft blade (if using tape).
Here’s how to do it:
- Prep and Base: Start with clean nails and a base coat.
- Apply First Color: Paint your base color on all nails, or on a few accent nails. Let it dry thoroughly.
- Apply Second Color with Tape:
- Cut small pieces of striping tape and stick them onto the dried polish in geometric patterns – think triangles, chevrons, or zig-zags.
- Carefully paint over the tape with your second color.
- While the second color is still wet, gently peel off the striping tape using tweezers or a craft blade. This reveals the base color underneath in sharp, geometric shapes!
- Freehand Geometric (Alternative): If you don’t have tape, use a thin nail art brush to paint geometric lines and shapes in your second color over the first. This requires a steadier hand but offers more creative freedom.
- Experiment with Placement: You can do this on all nails, or just accent nails. Try splitting nails diagonally, creating a French tip with a twist, or layering different geometric sections.
- Finish: Once completely dry, apply your favorite top coat.
This design is excellent for showcasing Gemini’s quick wit and sharp intellect!
Design 4: Mercury-Inspired Metallics
With Gemini ruled by Mercury, the planet of communication and speed, a metallic, futuristic, or chrome-inspired look fits perfectly! It’s sleek, eye-catching, and full of energy.
What you’ll need:
- Base coat and top coat.
- Silver, chrome, or metallic polish.
- Optional: Black or white polish for contrast, nail art brushes, loose metallic pigments/chrome powder and a special chrome top coat.
Here’s how to do it:
- Prep: Clean and prep your nails, apply a base coat.
- Solid Metallic (Easiest): Apply 2-3 thin coats of a high-shine silver, chrome, or metallic polish. A good quality metallic polish can give a mirror-like finish on its own.
- Two-Tone Metallic: Paint half your nails with silver and the other half with another metallic color (like rose gold) or a contrasting color like black. You can use striping tape for a clean split.
- Chrome Effect (Slightly More Advanced): For a true chrome look, you’ll need a special no-wipe chrome gel top coat and loose chrome powder pigment.
- Apply your base color (black is great for contrast) and cure under a UV/LED lamp.
- Apply the special no-wipe chrome top coat and cure again.
- Before the top coat fully sets, rub the chrome powder onto the nail with an applicator or your fingertip. It will create a stunning, high-shine metallic effect.
- Apply another layer of the no-wipe chrome top coat and cure to seal it.
(Check out resources like this NailPro guide on chrome nails for more detailed steps on the application of chrome pigments.)
- Details: Add fine lines or dots with a contrasting metallic shade or black/white polish with a thin brush.
- Seal: Apply a good top coat to lock in the shine.
This design reflects Mercury’s bright, fast, and attention-grabbing nature.
Design 5: The Gemini Emblem (II Symbol)
Sometimes, a simple, direct symbol is the most powerful. Embracing the classic Gemini emblem (II) can be chic and symbolic.
What you’ll need:
- Base coat and top coat.
- Your chosen base color (can be a solid color, a subtle glitter, or even a nude).
- A contrasting color for the emblem (e.g., black, white, gold, silver).
- Fine-tipped nail art brush OR a stencil/stamp.
Here’s how to do it:
- Prep: Clean nails, base coat.
- Apply Base Color: Paint your nails with your base color and let them dry completely.
- Add the Emblem:
- Freehand: Using your fine-tipped brush dipped in the contrasting color, carefully draw the Roman numeral II. You can place it in the center of the nail, on one side, or near the cuticle.
- Stamping: If you have a stamping plate with the Gemini symbol (II), apply stamping polish, scrape, and transfer the image to your nail.
- Stencil: Use a geometric stencil or sticker to create clean lines for your emblem.

