YSL Nail Designs: Essential & Stunning Looks for Every Style. Learn how to create chic, sophisticated manicures inspired by Yves Saint Laurent with easy-to-follow tips and tricks. Elevate your at-home nail game with these trendy and achievable YSL-inspired ideas.
Dreaming of nails that exude effortless luxury and iconic style? YSL nail designs are all about embracing that sophisticated, chic vibe. Think sleek lines, classic color palettes, and a touch of glamorous flair. Whether you’re a nail art beginner or looking to step up your game, achieving that YSL-inspired manicure is totally within reach. Don’t worry if you’re just starting out; we’ll break it down step-by-step. Get ready to transform your nails into miniature works of art with these essential and stunning ideas!
Unveiling the YSL Nail Aesthetic: Chic Simplicity Meets Bold Statement
Yves Saint Laurent, a name synonymous with timeless fashion and bold elegance, translates beautifully onto our nails. YSL nail designs aren’t about over-the-top complexity; they’re about refined taste and impactful statements made with simple yet powerful elements. The YSL aesthetic embodies a certain fearless glamour, a blend of classic sophistication and modern edge. It’s about confidence, individuality, and a touch of rebellious chic. When we talk about YSL on nails, we’re often referring to a clean, polished look that still turns heads.
Key Elements of YSL-Inspired Nail Art
What makes a nail design scream YSL? It’s a combination of factors that create that unmistakable allure:
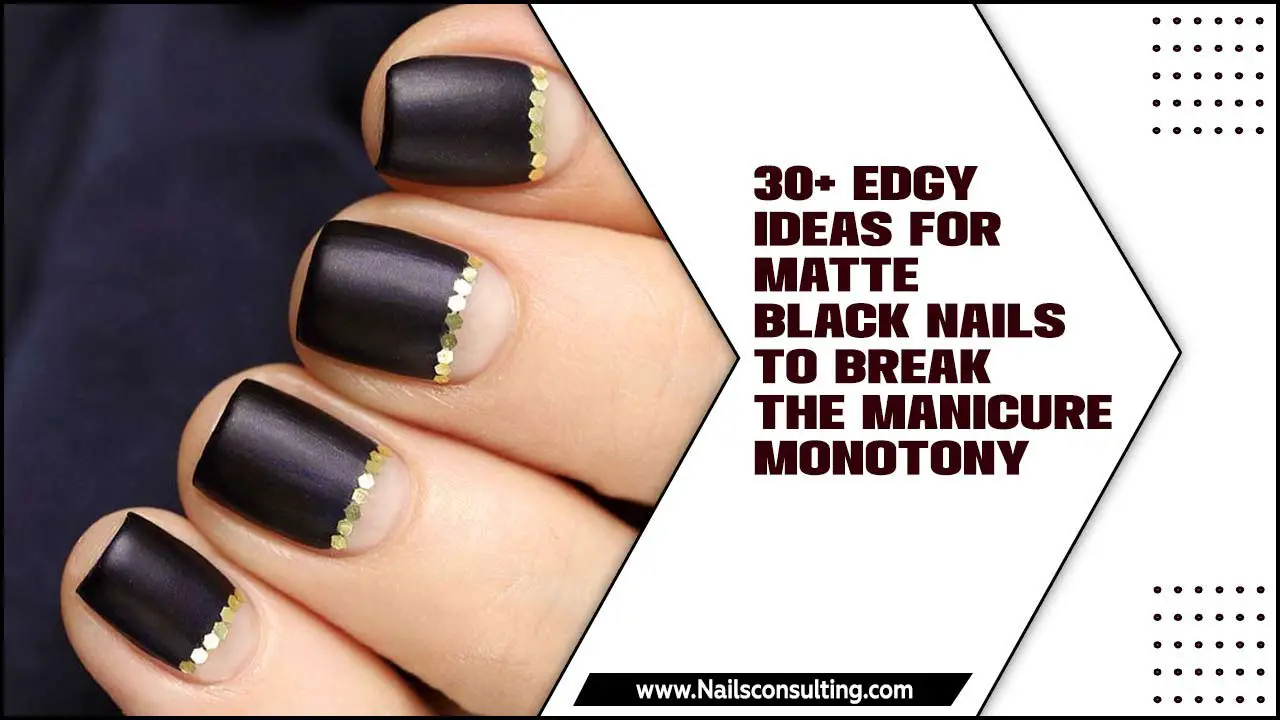
- Color Palette: Deep reds, classic blacks, crisp whites, sophisticated nudes, and occasional pops of gold or silver are staples.
- Minimalism: Often, less is more. Think clean lines, geometric shapes, and subtle accents.
- Iconic Motifs: The Cassandre logo, stripes, and checkerboard patterns are frequently seen.
- Luxurious Finish: A high-shine top coat is crucial for that polished, high-end feel.
- Shape: Almond or stiletto shapes often complement the sharp, elegant lines often associated with the brand’s aesthetic.
Essential Tools for Your YSL Nail Design Journey
Before we dive into specific designs, let’s gather our nail art toolkit. You don’t need a professional salon setup to create stunning YSL-inspired nails at home. With a few basic items, you’ll be well on your way to runway-ready fingertips.
The Must-Have Nail Art Supplies:
- Base Coat & Top Coat: These are non-negotiable for protecting your natural nails and ensuring your design lasts. A good quality top coat will give that signature YSL shine.
- Nail Polish Colors: Stock up on the essential YSL palette: black, white, deep red, nude, and a metallic gold or silver.
- Fine-Tip Nail Art Brushes: For drawing those precise lines and details. You can find affordable sets online or at beauty supply stores.
- Dotting Tools: Perfect for creating small dots, accents, or even replicating patterns.
- Striping Tape or Stencils: For creating clean, sharp lines and geometric patterns with ease.
- Nail Polish Remover & Cotton Pads: For cleaning up any mistakes and prepping your nails.
- Cuticle Oil: To keep your nails and the surrounding skin looking healthy and nourished – a hallmark of sophisticated beauty.
DIY YSL Nail Designs: Step-by-Step Guides for Beginners
Let’s get creative! Here are a few iconic YSL-inspired nail looks you can easily recreate at home. We’ll start with the basics and move to slightly more intricate designs.
Design 1: The Classic YSL Black & White Stripe
This design is a timeless tribute to Yves Saint Laurent’s signature use of bold stripes.
Tools Needed:
- Base Coat
- Black Nail Polish
- White Nail Polish
- Fine-Tip Nail Art Brush
- Striping Tape (optional, for cleaner lines)
- Top Coat
Steps:
- Prep Your Nails: Start with clean, dry nails. Apply a base coat to protect your natural nails.
- Apply Base Color: Paint all your nails with a solid black nail polish. Let it dry completely. You might need two coats for opaque coverage.
- Create the Stripes:
- Using a Brush: Dip your fine-tip brush into white nail polish. Carefully draw thin, crisp horizontal or vertical stripes across your nails. Keep them uniform in thickness for a polished look. Start with one or two stripes per nail.
- Using Striping Tape: Once the black polish is totally dry, apply thin strips of nail tape onto your nails in a stripe pattern. Paint over the tape with white polish. Let the white polish dry for a minute or two (not completely hard), then carefully peel off the tape. This creates super sharp, clean lines.
- Add Details (Optional): You can add a thin gold stripe along your cuticle or nail tip for an extra touch of luxury.
- Seal the Look: Once all polish is dry, apply a generous layer of glossy top coat. This seals your design and gives it that irresistible YSL shine.
Design 2: The Chic Red & Gold Accent
This design channels the brand’s love for bold reds paired with a touch of opulent gold.
Tools Needed:
- Base Coat
- Classic Red Nail Polish
- Metallic Gold Nail Polish
- Fine-Tip Nail Art Brush or Dotting Tool
- Top Coat
Steps:
- Prep and Base: Apply base coat and let it dry.
- Apply Red Polish: Paint all your nails with a rich, classic red nail polish. Allow it to dry completely, applying a second coat if needed.
- Add the Gold Accent:
- Gold Tip: Using your fine-tip brush, carefully paint a thin gold line along the tip of each nail, creating a chic French tip effect.
- Gold Dot: Alternatively, use a dotting tool to place a few small, precise gold dots near the cuticle or along the side of one accent nail (like your ring finger).
- Let it Dry: Ensure both the red and gold polish are completely dry.
- Seal with Shine: Apply a clear, high-shine top coat over the entire nail to lock in the design and add that luxurious gleam.
Design 3: The Sophisticated Nude with Logo-Inspired Detail
This minimalist design is perfect for everyday wear, featuring a sophisticated nude base with a subtle nod to the YSL Cassandre logo.
Tools Needed:
- Base Coat
- Sheer or Opaque Nude Nail Polish
- Black Nail Polish
- Very Fine-Tip Nail Art Brush
- Top Coat
Steps:
- Prep and Base: Apply your base coat.
- Apply Nude Polish: Paint your nails with your chosen nude polish. Two coats usually provide the best coverage. Let dry completely.
- Create the Logo Detail (Accent Nail):
- On one or two accent nails (typically the ring finger), use your thinnest brush and black nail polish to carefully draw a simplified, abstract version of the YSL Cassandre logo. This often involves creating two interlocking ‘Y’ shapes or a stylized initial. It doesn’t have to be perfect; the idea is a subtle, chic suggestion of the logo. Think clean, sharp lines.
- Alternatively, for a softer take, you could simply draw two neat, parallel black lines on one nail, mimicking the iconic interlocking nature.
- Dry Thoroughly: Allow the black details to dry completely.
- Seal the Elegance: Apply a clear top coat to protect the design and give your nails a smooth, polished finish.
Exploring Advanced YSL Nail Design Techniques
Once you’re comfortable with the basics, you can experiment with more intricate YSL-inspired designs. These may require a steadier hand or specific tools, but the results are incredibly rewarding.
The YSL Le Smoking Inspired Tuxedo Nails
“Le Smoking” is one of YSL’s most iconic creations, and it translates beautifully to nails. This design mimics the sharp lines of a tuxedo.
Tools Needed:
- Base Coat
- Black Nail Polish
- White Nail Polish
- Fine-Tip Nail Art Brush
- Dotting Tool (optional)
- Top Coat
Steps:
- Base & Black: Apply base coat, then paint all nails black. Let dry.
- Create the Lapels: On each nail, use your fine brush and white polish to paint two V-shaped “lapels” at the tip of the nail, resembling the collar of a tuxedo jacket.
- Add the Bow Tie (Optional): On an accent nail, paint a small black rectangle in the center where the lapels meet, creating a bow tie effect. You can add tiny white dots on either side of the bow tie with a dotting tool if desired.
- Refine Lines: Ensure all lines are crisp and clean.
- Seal and Shine: Apply a high-shine top coat.
Geometric and Color Block Masterpieces
YSL’s fashion often features bold geometric patterns and color blocking. Translate this onto your nails for a modern, artistic look.
Tools Needed:
- Base Coat
- Various YSL-inspired polishes (black, white, red, nude, gold)
- Striping Tape or Stencils
- Fine-Tip Brush
- Top Coat
Steps:
- Base Polish: Apply a base color (e.g., white or nude) to all nails. Let dry.
- Sectioning with Tape: Use striping tape to divide nails into geometric sections (triangles, squares, rectangles).
- Color Blocking: Paint each section with different YSL-inspired colors. Ensure you paint up to the edge of the tape.
- Peel Tape: While the polish is still slightly tacky (not fully dry), carefully peel off the tape to reveal sharp, clean lines between the colors.
- Add Accents: Once dry, you can add subtle gold lines or black details along the edges if desired.
- Seal: Finish with a top coat.
Maintaining Your YSL Nail Designs
Creating beautiful YSL nail designs is only half the battle; keeping them looking flawless is key. A little care goes a long way in preserving that sophisticated look.
Tips for Longevity:
- Reapply Top Coat: Every 2-3 days, apply an extra layer of top coat. This refreshes the shine and helps protect the design from chipping.
- Moisturize: Keep your hands and cuticles hydrated with cuticle oil or hand cream. Dry, cracked cuticles can make even the most luxurious manicure look unkempt. For effective cuticle care, consider resources from dermatological associations like the American Academy of Dermatology.
- Be Gentle: Avoid using your nails as tools – this means no scraping, prying, or opening packages with them.
- Gloves for Chores: Wear rubber gloves when washing dishes or cleaning with harsh chemicals.
- Touch-Ups: For minor chips, you can sometimes carefully touch them up with a matching polish color or a tiny bit of glitter polish to disguise the flaw.
YSL Nail Colors: The Palette of Parisian Chic
The color selection for YSL nail designs is crucial for capturing the brand’s essence. It’s about making sophisticated choices that are both impactful and elegant.
Key YSL Color Family
| Color Family | Shades | YSL Association | Design Application |
|---|---|---|---|
| Neutrals | Nudes, Beiges, Soft Greys | Understated luxury, Parisian sophistication | Full nail base, delicate accents |
| Classics | Black, White, Deep Red (e.g., Rouge Pur Couture shades) | Bold, iconic, timeless | Full nail color, graphic elements, stripes |
| Metallics | Gold, Silver, Rose Gold | Glamour, opulence, statement pieces | Accent lines, tips, dots, small details |
| Muted Tones | Dusty Rose, Deep Forest Green, Navy | Modern elegance, surprising sophistication | Color blocking, geometric designs |
When choosing your shades, think about the mood you want to convey. A deep crimson speaks of confidence and passion, while a matte nude whispers understated chic. Gold always adds that touch of unapologetic glamour.
Frequently Asked Questions About YSL Nail Designs
Got questions? We’ve got answers! Here are some common queries about creating YSL-inspired nail art.
Q1: Can I really create YSL nail designs without being a pro?
Absolutely! The beauty of YSL designs often lies in their simplicity and clean execution. With basic tools like fine brushes and striping tape, anyone can achieve stunning results at home.
Q2: What are the easiest YSL nail designs for beginners?
The easiest designs include solid color manicures in YSL’s signature shades (like a perfect black or deep red), simple stripes using striping tape, or adding a single metallic accent line or dot on an otherwise plain nail.
Q3: How do I make my nail art last longer?
Always start with a good base coat and finish with a high-quality, glossy top coat. Reapply the top coat every 2-3 days. Avoid using your nails as tools and wear gloves for household chores.
Q4: My lines aren’t straight. What can I do?
Don’t get discouraged! For straighter lines, try using nail art striping tape or stencils. If freehanding, ensure your brush is clean and has the right amount of polish. Practice on a piece of paper first, and remember that a slightly imperfect, hand-painted line can also add charm.
Q5: Can I incorporate the YSL logo?
Yes, but do so subtly! For YSL-inspired designs, a very simplified, abstract representation of the Cassandre logo or even just two interlocking lines on an accent nail can be highly effective. It’s about capturing the essence, not a perfect replica.
Q6: What nail shape best suits YSL designs?
While YSL designs can look great on any nail shape, almond, squoval, and classic oval shapes tend to complement the sophisticated and elegant aesthetic. The sharp lines of stiletto nails can also work well for more dramatic YSL-inspired looks, echoing the brand’s edgy side.
Conclusion: Embrace Your Inner Icon with YSL Nails
You’ve now got the essential knowledge and step-by-step guides to bring the iconic YSL aesthetic to your fingertips. From the timeless black and white stripes to the subtle elegance of a nude base with a golden accent, these designs are all about celebrating refined style and personal expression. Don’t be afraid to experiment with the essential YSL color palette and unique element combinations. Remember, YSL nail designs are more than just polish; they are a statement of confidence, a touch of luxury, and a celebration of your unique fashion sense. So, gather your tools, dip into your favorite shades, and let your nails do the talking. Go forth and create manicures that are as essential and stunning as the brand itself!

