Ready for gorgeous winter nails? Discover essential, easy-to-create winter nail designs that blend cozy vibes with chic style. From simple snowflakes to elegant deep tones, these genius looks are perfect for beginners to elevate their winter manicure game!
Winter can feel a little dull, and sometimes our nails do too. We crave a fresh look that captures the season’s magic without being overly complicated. You’ve probably seen stunning, intricate nail art online and thought, “I could never do that!” But guess what? You absolutely can! Creating beautiful winter nail designs is totally achievable, even if you’re just starting out.
Forget the frustration of complicated techniques. We’re focusing on genius, essential looks that embrace winter’s charm with simple steps and delightful results. Get ready to transform your fingertips into tiny winter wonderlands. We’ll cover everything from selecting the perfect color palettes to mastering a few key design elements that scream ‘winter chic.’
Your Winter Nail Design Toolkit: What You’ll Need
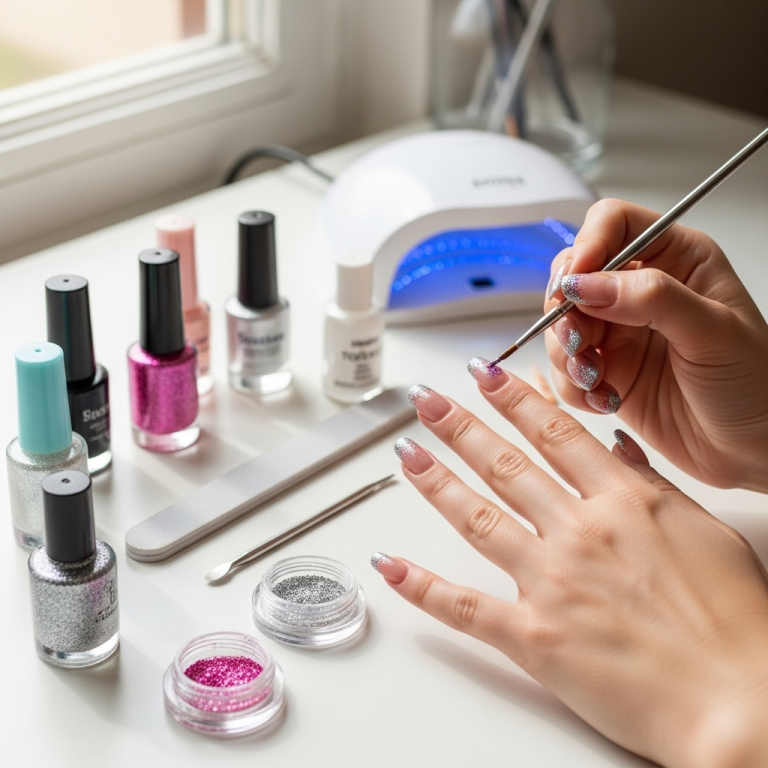
Before we dive into the dazzling designs, let’s gather your essential tools. You don’t need a professional salon setup to create salon-worthy nails. Most of these items are readily available and will serve you well for many manicures to come.
Must-Have Nail Polish & Tools
- Base Coat: This is crucial for protecting your natural nails and helping your polish last longer. Look for one with strengthening properties if your nails tend to be brittle.
- Top Coat: The secret to a shiny, durable finish. A good top coat seals your design and prevents chipping.
- Your Choice of Nail Polish Colors: Think deep blues, frosty whites, shimmering silvers, rich grays, cozy browns, and festive reds.
- Dotting Tools or Toothpicks: Perfect for creating dots, small stars, or even simple snowflake patterns. A set of dotting tools comes with various tip sizes for different effects.
- Fine-Tipped Nail Art Brush: Essential for drawing lines, swirls, or delicate details.
- Nail Polish Remover & Cotton Pads: For easy clean-up and fixing mistakes.
- Cuticle Oil: To keep your cuticles moisturized and healthy – happy cuticles make for happier nails!
- Optional: Glitter Polish, Nail Stamping Plates, or Small Rhinestones: For adding extra sparkle and dimension.
Essential Winter Color Palettes
The right colors can instantly evoke a wintery feel. These palettes are versatile and form the foundation for many gorgeous designs.
Deep & Moody Hues
- Midnight Blue & Navy: Think of a clear, starry winter night.
- Emerald Green & Forest Green: The rich colors of evergreen trees.
- Burgundy & Deep Red: Cozy, sophisticated, and festive.
- Charcoal Gray & Black: Sleek, modern, and always chic.
- Chocolate Brown: Warm and inviting, like a hot cocoa.
Icy & Frosty Tones
- Pure White: Like fresh fallen snow.
- Icy Blue & Sky Blue: Evokes frosty mornings and clear skies.
- Silver & Pale Gold: Adds a touch of sparkle and shine.
- Pale Lavender & Muted Pink: A softer, ethereal winter vibe.
Cozy Neutrals
- Cream & Beige: Warm and comforting.
- Light Gray: A softer alternative to charcoal.
- Nude Tones: For an elegant, understated look.
Genius Winter Nail Designs for Beginners
Let’s get creative! These designs are chosen for their visual impact and ease of execution. You’ll be amazed at what you can achieve with a little patience and the right steps.
1. The Classic “Snowy Day” Ombre
This design mimics the soft fade of snow falling or a gentle gradient of winter sky. It’s elegant and surprisingly simple!
How-To Steps:
- Apply a base coat and let it dry completely.
- Paint all your nails a light, icy blue or pure white. Let dry.
- For the ombre effect:
- Pour a small amount of white polish onto a flat surface (like a piece of foil or a paper plate).
- Use a makeup sponge (a clean cosmetic sponge works great – you can cut a piece off) or a nail art sponge.
- Dab the sponge onto the white polish.
- Gently tap the sponge onto the tip of your nail, starting about halfway down and working your way up. Repeat a few times to build the color.
- You can add a touch of pale blue polish to the sponge as well for more depth.
- While the polish is still slightly damp, carefully apply a layer of clear top coat or a glitter top coat over the entire nail. This helps to blend the lines of the ombre and seal the design.
- Clean up any polish that got on your skin using a cotton swab dipped in nail polish remover.
- Apply a final layer of top coat to seal everything and add shine.
2. Dotted “Snowflake” Accents
This is a super-easy way to add a wintery touch without complex drawing. Perfect for a minimalist yet festive look.
How-To Steps:
- Apply your favorite deep blue, gray, or burgundy nail polish as a base. Let it dry completely.
- Using a small dotting tool or the tip of a toothpick, dip it into white or silver polish.
- On one or two accent nails (like your ring finger), create a simple snowflake pattern. Start with a central dot, then add four smaller dots extending from it, or try a six-point star by making a cross and then adding dots in between.
- Alternatively, create random small dots all over one or two nails for a “snowfall” effect.
- Let the dots dry thoroughly.
- Apply a clear top coat over all your nails to protect the design and add shine.
3. Cozy Knit Sweater Nails (Textured Effect)
This design gives the illusion of a cozy, textured knit sweater. It looks impressive but is achievable with a specific painting technique.
How-To Steps:
- Start with a base coat and your desired solid winter color (like cream, gray, or a deep berry). Apply two coats for full opacity and let them dry completely.
- Using a slightly thicker layer of the same polish color (or a slightly darker/lighter shade for contrast), use a clean nail art brush or a toothpick to carefully draw thin, parallel lines across your nail. Imagine the lines of a knitted fabric row.
- Next, draw diagonal lines that intersect the first set of lines, creating a criss-cross or ‘X’ pattern, mimicking the knit texture.
- Focus on creating a natural, slightly raised texture. Don’t make it too perfect!
- Let the textured polish dry completely. This might take a bit longer.
- Skip the top coat on the textured nails if you want to maintain the raised effect. You can apply a regular top coat to your other nails for shine and protection.
- Pro Tip: For a more intense texture, you can use a textured nail polish specifically designed for this effect, or even a matte top coat after the design is dry for a velvety finish.
4. Glitter Gradient
Adding a touch of glitter is an instant way to make any manicure feel festive and winter-ready. This gradient is super simple and effective.
How-To Steps:
- Apply your base coat and your chosen solid C(e.g., deep navy, true red, or even a sheer nude). Let it dry.
- Take a glitter polish (silver, gold, iridescent, or chunky holographic glitter works wonderfully for winter).
- Apply the glitter polish directly to the tips of your nails, building up the sparkle.
- For a smoother transition, use a cosmetic sponge to gently dab the glitter polish onto the tips, blending it downwards towards the cuticle.
- Alternatively, use the brush from the glitter polish to carefully paint the glitter onto the tips, then feather it down slightly with the brush.
- Apply one or two coats of clear top coat to smooth out the glitter texture and make it last.
5. Minimalist French Tips with a Winter Twist
The classic French manicure gets a winter makeover. Instead of stark white, think subtle, chic colors.
How-To Steps:
- Apply a sheer nude, pale pink, or a light gray polish all over your nails. Let dry.
- Using a fine-tipped nail art brush or a dedicated French tip guide sticker, paint the tips of your nails in a contrasting winter color.
- Try a metallic silver, a glossy black, an icy blue, or even a deep, shimmery green.
- For an even more modern look, try a “reverse French” where the color is applied at the cuticle line instead of the tip.
- Let the tips dry completely.
- Apply a clear top coat to seal the design.
6. Geometric Winter Patterns
Simple geometric shapes can create a modern, sophisticated winter look. Think clean lines and contrasting colors.
How-To Steps:
- Paint your nails with a solid base color (like a dark gray, deep teal, or even a metallic silver). Let dry.
- Using a fine-tipped nail art brush, draw simple geometric lines. This could be:
- Thin horizontal or vertical lines.
- Diagonal lines creating triangles.
- A simple box or square shape.
- Use a contrasting color for the lines, like white, silver, gold, or a deep jewel tone.
- Alternatively, you can use nail stamping plates with geometric designs. Apply polish to the plate, scrape off excess, and stamp onto your nail. Ensure you use a good stamping polish for clear transfer.
- Let the designs dry thoroughly.
- Apply a clear top coat to seal your geometric art.
Adding Sparkle: The Power of Glitter and Gems
Winter is the perfect season to embrace a little sparkle! Glitter and small nail gems can elevate even the simplest designs.
Glitter Polish Application Tips
- All-Over Sparkle: Apply one or two coats of glitter polish over a solid base color for a full-coverage glitter effect.
- Accent Nail: Apply glitter to just one or two nails for a statement accent.
- Glitter Borders: Use a fine brush to paint a thin line of glitter around your cuticle or at the tip of your nail.
- Tip: If your glitter polish has large pieces, it can be tricky to get smooth coverage. Try dipping your brush into the polish, then dabbing the larger pieces onto the nail where you want them, and filling in gaps with the polish’s base liquid or smaller glitter particles. A thicker top coat can also help embed larger glitters.
Using Nail Gems (Rhinestones)
- Placement: Apply a small dot of top coat or nail glue to the nail where you want to place the gem.
- Tools: Use a fine-tipped tweezer or a wax pencil (like a colored pencil with the lead sharpened to a fine point) to pick up and place the gems accurately.
- Designs: Create a simple line of gems down the center of your nail, a cluster at the cuticle, or a single gem as an accent.
- Securing: Once the gem is in place, carefully apply another thin layer of top coat around the edges of the gem, ensuring it’s fully sealed but trying not to cover the top surface of the gem itself.
| Design Type | Key Colors | Ease for Beginners | Sparkle Factor | Tools Needed |
|---|---|---|---|---|
| Snowy Day Ombre | White, Icy Blue, Silver | Easy | Moderate (with glitter top coat) | Sponge, Dotting Tool/Toothpick |
| Dotted Snowflakes | White/Silver on Dark Base | Very Easy | Low to Moderate | Dotting Tool/Toothpick |
| Knit Sweater Texture | Cream, Gray, Deep Berry, Beige | Moderate (requires steady hand) | Low | Fine Nail Art Brush/Toothpick |
| Glitter Gradient | Any Base + Glitter Polish | Easy | High | Glitter Polish, Sponge (optional) |
| Minimalist French Tips | Nude/Gray base + Metallic/Dark tip | Easy (with guides or steady hand) | Low to Moderate | Fine Nail Art Brush/Stickers |
| Geometric Patterns | Contrasting Colors (e.g., Gray & Silver) | Moderate to Easy | Low | Fine Nail Art Brush/Stamping Plates |
Maintaining Your Winter Manicure
Once you’ve created your masterpiece, you want it to last! Winter air can be drying, which can affect both your nails and your polish.
- Hydration is Key: Apply cuticle oil daily, especially after washing your hands. This keeps your cuticles soft and prevents them from drying out and affecting your polish. A good cuticle oil can be made with Jojoba oil, vitamin E, or almond oil.
- Wear Gloves: Protect your hands and nails from harsh weather. Cold, dry air can make nails brittle and prone to chipping.
- Avoid Harsh Chemicals: When doing chores, wear gloves to protect your nails from strong cleaning products.
- Top Coat Touch-Ups: If you notice any wear on your top coat, apply an extra layer every few days to reinforce the shine and protection.
- Gentle Removal: When it’s time to change your polish, use a good quality, acetone-free nail polish remover to avoid drying out your nails.
Frequently Asked Questions About Winter Nail Designs
Q1: What are the most popular colors for winter nail designs?
Popular winter colors include deep blues, emerald greens, burgundy, charcoal gray, classic red, and frosty whites or silvers. Cozy neutrals like cream and beige are also trending for a chic, understated look.
Q2: How can I make nail art last longer in winter?
Start with a good base coat, apply your colored polish evenly, and always finish with a high-quality, durable top coat. Reapply top coat every 2-3 days. Wearing gloves outdoors also protects your nails from dryness and damage.
Q3: I’m a total beginner. Which winter nail design is easiest for me?
The Dotted “Snowflake” Accent and the Glitter Gradient are fantastic starting points! They require minimal artistic skill and use simple tools like dotting tools or just the polish brush.
Q4: Can I achieve textured nail designs without special tools?
Yes! The knit sweater design can be achieved with a slightly thicker application of regular polish and a steady hand with a fine brush or toothpick. You can also find textured polishes at most beauty stores.
Q5: How do I prevent my nail polish from chipping in winter?
Ensure your nails are clean and dry before applying polish. Use a good base coat and seal everything with a strong top coat. Avoid using your nails as tools (like opening cans) and wear gloves when exposed to cold or water for extended periods.
Q6: Where can I find inspiration for more winter nail designs?
Pinterest and Instagram are excellent visual platforms for nail art inspiration. Search for hashtags like #winternails, #nailart, #wintermanicure, and #naildesignideas. Reputable nail magazines and beauty blogs also offer curated trend reports.
Q7: Are there any specific nail care tips for winter?
Absolutely! Winter can dry out nails, making them brittle. Focus on moisturizing: use cuticle oil daily, drink plenty of water, and consider a hydrating hand cream. Avoid overly harsh nail polish removers if possible.
Conclusion: Embrace Your Inner Winter Nail Artist!
See? Creating beautiful, on-trend winter nail designs doesn’t require a degree in art or a trip to the salon. By understanding a few key color palettes, mastering simple techniques, and using your essential toolkit, you can confidently bring the magic of winter to your fingertips.
Whether you opt for the subtle elegance of a glitter gradient, the cozy charm of a textured knit design, or the crispness of snowy accents, your nails can be a canvas for self-expression all season long. Embrace the fun of trying new things, don’t be afraid to experiment, and remember that the most important part


