Find stunning wedding nail designs for brides to perfectly complement your big day! From classic elegance to modern chic, discover breathable, beautiful options that make your hands shine.
Your wedding day is a whirlwind of joy, love, and a million tiny beautiful details. Among them? Your nails! They’ll be on display in photos, flashing your new bling, and holding hands with your partner. You want them to look and feel absolutely perfect, right? But with so many choices, picking the right wedding nail design can feel like another big decision on an already packed list. Don’t let it stress you out! At Nailerguy, we believe your wedding nails should be as unique and special as you are, and achieving them should be fun and easy. Get ready to discover the most gorgeous, bridal-approved nail looks that will have everyone saying, “Wow!”
Why Your Wedding Nails Matter
Think about it: your hands will be featured in countless photos, from the ring exchange to the cake cutting. Beautifully manicured nails are the perfect finishing touch to your bridal ensemble, adding a touch of elegance and personality. They’re a small detail that can make a big impact. A well-chosen design can tie together your overall look, whether you’re going for timeless romance, bohemian chic, or modern glamour. Plus, feeling confident about your hands can boost your overall sense of polished readiness for the day!
Choosing Your Bridal Nail Style
Before we dive into specific designs, let’s talk about finding your perfect bridal nail vibe. This is all about matching your nails to your personality, your dress, and the overall theme of your wedding. Are you a classic bride dreaming of pearls and lace? Or perhaps a modern bride drawn to sleek lines and minimalist details? Maybe you’re a free spirit who loves a touch of bohemian flair.
Consider these points:
- Your Dress: Is it simple and elegant, or ornate and detailed? Your nails can either complement or contrast.
- Your Theme: A rustic barn wedding might call for different nails than a glamorous ballroom affair.
- Your Personality: Do you prefer subtle beauty or a pop of sparkle?
- Season: Lighter pastels for spring, richer tones for autumn.
- Your Skin Tone: Certain shades look particularly flattering on different complexions.
Essential Bridal Nail Designs For Every Bride
Now for the fun part! Here are some of the most popular and stunning wedding nail designs for brides, broken down by style. We’ll focus on looks that are achievable, elegant, and totally make your hands feel like a million bucks.
Classic and Timeless Designs
These designs are perfect for the bride who loves tradition and understated elegance. They never go out of style and always look sophisticated.
1. The Perfect Neutrals (The “Clean Girl” Aesthetic)
What it is: Think milky whites, soft nudes, sheer blush pinks, and creamy beige polishes. It’s about perfectly shaped nails with a flawless, almost-barely-there polish that looks incredibly chic. This is the epitome of effortless elegance and a favorite among brides who want a polished yet natural look.
Why it works: These shades are universally flattering, complement any skin tone, and match absolutely any wedding attire. They create a clean, sophisticated canvas that lets your engagement ring be the star.
Achieve it:
- Prep: Start with a good nail file to shape your nails into a soft square or almond.
- Base Coat: Apply a strengthening or ridge-filling base coat.
- Color: Apply two to three thin coats of your chosen neutral polish for full opacity.
- Top Coat: Finish with a high-shine, quick-dry top coat for lasting power.
2. The French Manicure, Reimagined
What it is: The classic French tip gets a modern update! Instead of stark white tips, think softer, sheerer bases with subtle white, cream, or even pearlescent tips. Another popular variation is the “micro French,” featuring a very thin, delicate line.
Why it works: It’s a nod to tradition but feels fresh and contemporary. The subtle color variations are more forgiving and elegant than the traditional stark white.
Achieve it:
- Option A (DIY with ease): Use a fine-tip brush after applying your base color. Dip the brush in white or cream polish and carefully draw a thin line along the edge of your nail. Don’t worry if it’s not perfect – slight imperfections add charm!
- Option B (Stencils): Use French tip guide stickers for a crisper line. Apply your base color, let it dry completely, apply the sticker, then paint the tip. Remove the sticker while the polish is still slightly wet for a clean edge.
- Pro Tip: For a softer look, try a “reverse French” where the color is at the base of your nail, or a “gradient French” where the tip blends into the base.
3. Pearly Innocence
What it is: Nails adorned with tiny, delicate pearls or pearl-like embellishments. These can be a single pearl accent on one or two nails, a subtle scattering, or even a full pearl-covered nail for the bold bride.
Why it works: Pearls are synonymous with bridal elegance and add a touch of vintage romance. They’re subtle enough not to overpower but definitely noticeable.
Achieve it:
- Apply your base polish (a classic nude or soft pink works beautifully).
- While the top coat is still slightly wet, use tweezers or a wax pencil to carefully place small pearl beads onto the nail.
- Alternatively, use nail glue for more security, especially for larger embellishments.
- Seal with a gel top coat or a clear top coat, being careful not to cover the pearls entirely if you want them to stand out.
Modern and Chic Designs
For the bride who loves clean lines, subtle details, and a touch of contemporary sophistication.
1. Minimalist Metallic Accents
What it is: Think thin gold or silver lines, geometric shapes, or a single metallic stripe on a neutral background. It’s about adding a touch of glamour without being overwhelming.
Why it works: Metallic accents provide a welcome pop of interest and a modern edge. They’re sophisticated and can tie in with your jewelry or wedding colors.
Achieve it:
- Striping Tape: Apply your base color and let it dry. Carefully place metallic striping tape onto the nail to create lines or shapes. Seal with a top coat.
- Metallic Polish: Use a fine-tipped metallic polish to draw delicate lines yourself. Practice on paper first!
- Foil Transfer: Apply a special foil glue, let it dry until tacky, then press a metallic foil onto the nail. Seal with a top coat.
2. Subtle Geometric Patterns
What it is: Clean lines, dots, or minimalist abstract shapes in complementary or contrasting colors. This could be a single dot on each nail, a few lines across a single accent nail, or even negative space designs.
Why it works: Geometric patterns offer a contemporary feel. They’re visually interesting and allow for personal expression without being overly fussy.
Achieve it:
- Dotting Tools: Use dotting tools of various sizes to create perfect circles.
- Thin Brushes & Stencils: Fine nail art brushes or geometric stencils can help create crisp lines and shapes.
- Negative Space: This involves leaving parts of the natural nail exposed, often by applying polish in geometric patterns.
3. Ombre Elegance
What it is: A smooth transition of color, typically from a sheer nude or pink at the cuticle to a soft white or cream at the tip. It’s like a softer, blended French manicure.
Why it works: Ombre is subtle, beautiful, and incredibly flattering. It creates a smooth, elongated look for the nails and feels very romantic.
Achieve it:
- Sponge Method: Apply two base colors to a makeup sponge (one at the cuticle, one at the tip). Gently dab the sponge onto the nail to blend the colors. Repeat for more opacity.
- Brush Method: Use a clean, dry brush to blend the polishes directly on the nail.
- Professional Application: Often achieved seamlessly with gel polishes for the best blend and durability.
Bohemian and Romantic Designs
Perfect for the bride who embraces natural beauty, flowing fabrics, and a touch of whimsical charm.
1. Delicate Floral Accents
What it is: Tiny, hand-painted flowers, vines, or leaves on an accent nail or scattered subtly across a few nails. Think dainty blossoms in soft colors.
Why it works: Floral details add a touch of natural beauty and romance, fitting perfectly with boho or garden-themed weddings. They’re delicate and feminine.
Achieve it:
- Nail Art Brushes: Use ultra-fine brushes to paint tiny petals and leaves.
- Decals/Stickers: High-quality nail art stickers or water decals offer a simpler way to achieve a beautiful floral look.
- Stamping Plates: Nail stamping can create intricate floral patterns with ease.
2. Glitter and Shimmer Accents
What it is: A subtle wash of fine glitter or a touch of iridescent shimmer on one or two nails. It’s about adding a hint of sparkle that catches the light beautifully, rather than an all-out glitter bomb.
Why it works: It adds a touch of magic and festivity. A subtle shimmer can make your nails look ethereal and radiant, especially under lights.
Achieve it:
- Glitter Polish: Apply a sheer glitter polish over your base color.
- Loose Glitter: While the top coat is wet, dip your nail into fine cosmetic-grade glitter. Tap off excess and seal thoroughly.
- Glitter Gradient: Apply a thicker layer of glitter polish towards the tip or cuticle for a subtle fading effect.
3. Subtle Texture with Embossing or 3D Elements
What it is: A more adventurous option, this could involve delicate 3D sculpted flowers, lace patterns applied with gel, or subtle texturized finishes that add depth and interest.
Why it works: These designs add a unique, tactile element that is incredibly memorable and luxurious. They are perfect for brides who want something truly unique.
Achieve it:
- 3D Gel: Using specialized 3D gel paints allows artists to sculpt intricate designs like roses or lace directly onto the nail.
- Embossing Tools: Some salons offer nail embossing services that create raised patterns.
- Jewelry Charms: Tiny, delicate charms can be adhered for a striking effect.
Nail Shapes for the Big Day
The shape of your nail can significantly influence the overall look of your design. Here’s a quick guide to popular shapes:
| Shape | Description | Best For | Bridal Vibe |
|---|---|---|---|
| Square | Straight edges with sharp corners. A classic and strong look. | Shorter, wider nails. Prevents chipping on the edges. | Modern, minimalist, and chic. |
| Squoval | Soft, rounded corners. A blend of square and oval. | Most nail lengths and widths. Very practical. | Versatile – fits classic to contemporary. |
| Round | Follows the natural curve of the fingertip. | Shorter nails; makes fingers appear longer. | Classic, subtle, and elegant. |
| Almond | Tapered sides leading to a rounded tip. Elongates fingers. | Medium to long nails. | Romantic, feminine, and elegant. |
| Stiletto | Long and dramatically pointed. | Long, artificial nails (acrylic or gel). | Bold, daring, and glamorous. |
| Coffin/Ballerina | Tapered sides with a flat, squared-off tip. | Medium to long nails. | Modern, chic, and trendy. |
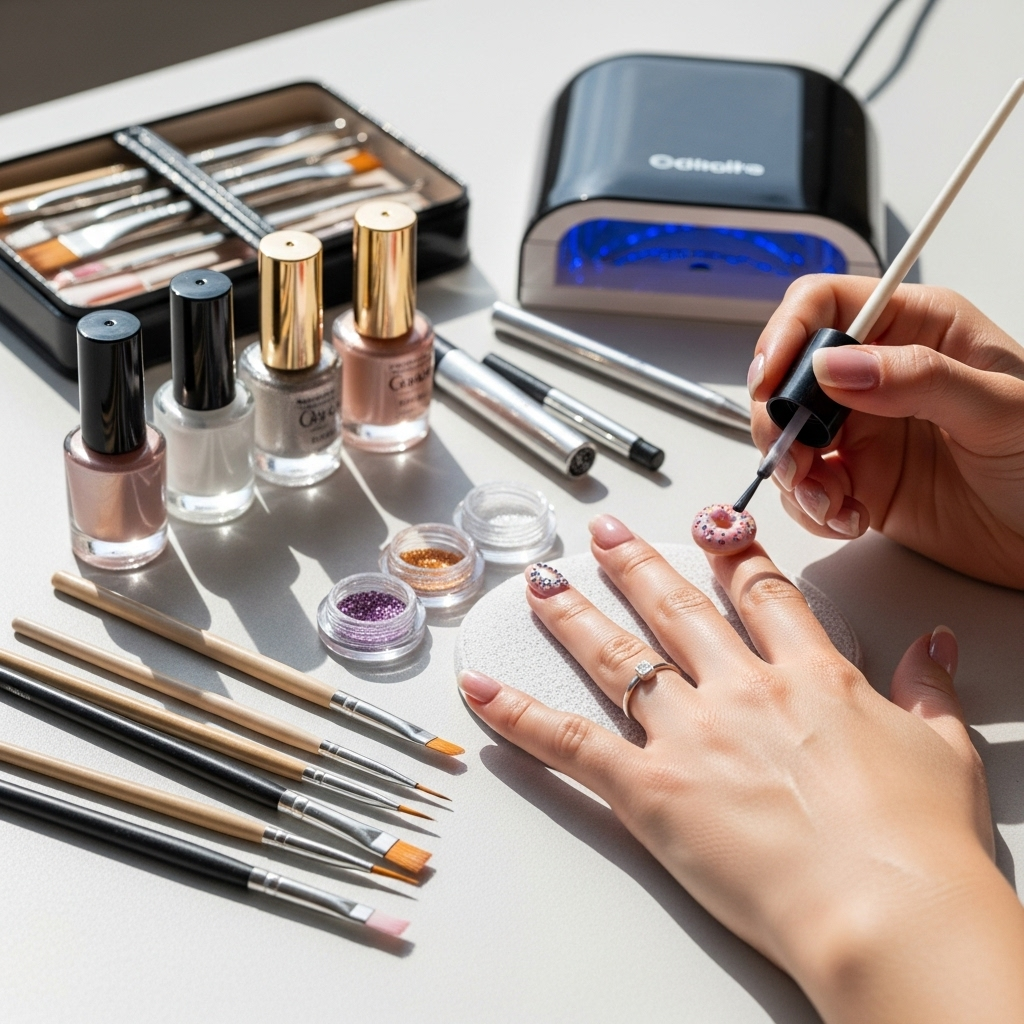
How to Prep Your Nails for Perfection
A stunning design starts with healthy, well-prepped nails. Don’t skip this crucial step!
- Cleanse: Remove all old polish with an acetone-free remover to avoid drying out your nails.
- Shape: File your nails to your desired shape using a fine-grit file. Always file in one direction to prevent splitting. For example, nail shaping techniques can be improved with practice.
- Cuticle Care: Gently push back your cuticles with an orange stick or cuticle pusher. Avoid cutting them unless absolutely necessary, as they protect your nail matrix. If you have dry cuticles, apply cuticle oil and massage it in.
- Buff: Lightly buff the surface of your nails with a fine-grit buffer. This smooths out any ridges and helps polish adhere better. Use a gentle touch!
- Clean Again: Wipe your nails with a lint-free pad soaked in rubbing alcohol or nail polish remover to remove any dust or oils. This ensures your base coat adheres properly.
DIY vs. Salon Wedding Nails
Deciding where to get your wedding nails done is a personal choice. Here’s a look at the pros and cons of each:
| DIY (Do It Yourself) | Salon Appointment | |
|---|---|---|
| Cost | Lower (cost of polishes, tools) | Higher (professional service fee) |
| Convenience | High (can do anytime, anywhere) | Lower (requires booking and travel) |
| Skill Level | Requires practice and skill for intricate designs | Professionals have expertise for flawless execution |
| Variety of Options | Limited by your skill and available products | Wider range of professional products and techniques |
| Stress Factor | Can be stressful if not experienced; enjoyable if you love it | Relaxing, but requires scheduling |
| Test Run Recommended | Essential to practice designs | Highly recommended to trial designs and technician |
Tips for Long-Lasting Wedding Nails
You want your nails to look perfect not just on the wedding day, but throughout your honeymoon too! Here’s how to make them last:
- Invest in Quality Products: Use a good base coat, chip-resistant top coat, and reputable polish brands.
- Proper Application: Apply thin coats rather than thick ones. Always cap the free edge of your nail by swiping the polish brush horizontally across the tip.
- Seal the Deal: Every day or two, reapply a thin layer of your top coat. This refreshes the shine and seals in the color.
- Wear Gloves: When doing dishes, cleaning, or any task involving water or harsh chemicals, wear rubber gloves. Water is the enemy of nail polish longevity!
- Protect Your Cuticles: Keep your cuticles moisturized with cuticle oil or a good hand cream. Healthy cuticles