A bride’s hands are often in the spotlight, from the moment she slips on her ring to the toast at her reception. Choosing the perfect wedding nail design is a beautiful way to complete your bridal look. This guide offers a variety of stunning, beginner-friendly wedding nail ideas to make your hands as radiant as your smile.
Congratulations on your upcoming wedding! Your big day is all about celebrating your love, and every detail, down to your fingertips, should sparkle. But with so many beautiful options, how do you pick the perfect wedding nail design? You want something elegant, something that complements your dress, and something that feels authentically “you.” Don’t worry, this guide is here to help! We’ll explore stunning wedding nail ideas that are perfect for every bride, from classic minimalists to glamorous trendsetters. Get ready to discover your dream bridal manicure!
Wedding Nail Design Ideas For Brides: Stunning Bridal Looks
Your wedding day is a once-in-a-lifetime event, and your nail design should reflect this special occasion. It’s more than just polish; it’s a tiny piece of art that enhances your overall bridal style. Whether you’re looking for something understated and chic or bold and breathtaking, there’s a wedding nail design out there for you. Let’s dive into some swoon-worthy ideas!
Classic & Timeless Bridal Nails
For the bride who loves tradition and elegance, classic bridal nails are a fail-safe choice. These designs are sophisticated, never go out of style, and beautifully frame your engagement ring.
The Perfect French Manicure
The French manicure is the ultimate timeless classic. Its clean lines and subtle elegance make it a favorite for brides.
What makes it bridal? The crisp white tip against a sheer or pale pink base is universally flattering and incredibly chic.
Variations to consider:
Modern French: Think a sheer nude or milky white base with a sharper, thinner white tip.
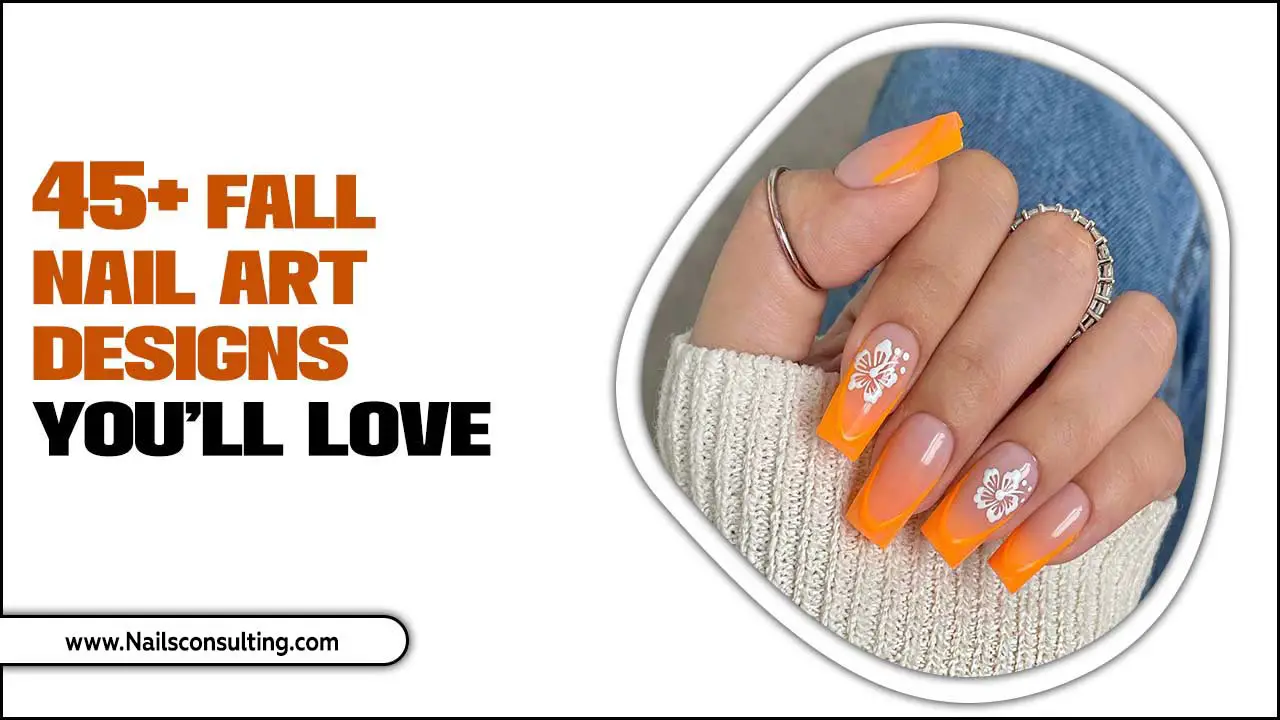
Colored French: Swap the white for a soft pastel like blush pink, baby blue, or even a pearly shimmer.
Glitter French: A subtle line of glitter at the tip for a touch of sparkle.
Sheer Nudes and Blush Pinks
Sometimes, the simplest choices are the most impactful. A well-executed sheer nude or soft blush pink polish offers a polished and refined look.
Why it works: These shades enhance the natural look of your nails, making them appear healthy and well-groomed. They also pair beautifully with any wedding dress style and color.
Pro Tip: Opt for shades that complement your skin tone. A quick trip to a salon for advice on the best nude shade for you can be very helpful. Check out resources on finding your perfect nude lipstick shade, as the principles often apply to nail polish too!
Milky White & Creamy Tones
A step up from sheer polishes, milky white and creamy off-white shades offer a bit more opacity while maintaining a soft, elegant feel.
The bridal appeal: They provide a clean, almost ethereal look that’s pure bridal bliss. This shade is also a fantastic canvas for subtle nail art.
Elegant Touches of Sparkle
Who says you can’t add a little shimmer to your special day? Subtle sparkle can elevate classic designs to wedding-worthy perfection.
Subtle Glitter Accents
A touch of glitter can add just the right amount of festivity without being overwhelming.
Ideas for sparkle:
Glitter Ombre: A gradient of fine glitter fading from the tip or cuticle.
Accent Nail Sparkle: A full glitter accent nail on one or two fingers.
Glitter Cuticle Line: A delicate line of micro-glitter traced along the cuticle.
Glitter Top Coat: A sheer top coat infused with fine glitter over a nude or pink base.
Pearl Embellishments
Tiny pearls or pearlescent accents are incredibly romantic and add a vintage-inspired charm.
How to use them:
Pearl French Tips: Replace the white tip with a line of tiny pearls.
Pearl Dots: Small pearls strategically placed in a line or cluster on a sheer or milky base.
Full Pearl Accent: A few tiny pearls adhered to one accent nail.
Important Note: Ensure any embellishments are securely attached by a professional to avoid snagging or falling off.
Shimmer and Chrome Finishes
For a modern twist on bridal sparkle, consider shimmer or chrome finishes.
Shimmer Polishes: These offer a subtle, multi-dimensional sheen that catches the light beautifully.
Chrome Powder: Applied over a base color, chrome powder creates a high-impact, mirror-like finish. Opt for softer chrome shades like rose gold, silver, or iridescent white for a bridal feel.
Modern & Trendy Bridal Nails
Ready to embrace your inner trendsetter? These modern designs are chic, stylish, and perfect for the contemporary bride.
Minimalist Nail Art
Less is often more when it comes to modern bridal nail art. Think simple lines, subtle geometric shapes, or delicate details.
Examples:
Thin Gold or Silver Line: A single fine line running horizontally, vertically, or diagonally across a nude or sheer base.
Tiny Dot Detail: A small metallic or white dot at the base of one or two nails.
Negative Space Designs: Geometric shapes or patterns in clear polish, allowing your natural nail to show through.
Subtle Ombre Designs
The ombre effect, a gradual blend from one color to another, is a chic and sophisticated choice for brides.
Bridal Ombre Ideas:
Classic French Ombre (Baby Boomer): A soft blend of pink and white that mimics a natural nail but with more dimension.
Nude to White Ombre: A smooth transition from a soft nude at the cuticle to a clean white tip.
Subtle Color Ombre: A very light blend of two similar pastel shades.
Matte Finishes
A matte top coat can completely transform a polish, giving it a sophisticated, velvety texture.
Matte Magic: A matte nude, blush, or even a soft gray can look incredibly chic and modern. You can also pair a matte finish with a glossy accent, like a single glossy line.
Romantic & Feminine Bridal Nails
Embrace your romantic side with designs that are soft, sweet, and utterly enchanting.
Floral Accents
Delicate floral details, whether hand-painted or tiny decals, add a touch of romance perfect for a wedding.
How to incorporate them:
Single Blooming Flower: A delicate flower on one accent nail.
Floral French Tips: Tiny flowers integrated into the French tip design.
Vine or Leaf Details: Subtle green vines or leaves accenting a neutral base.
Lace-Inspired Designs
Inspired by the intricate beauty of lace, these designs are the epitome of bridal elegance.
Achieving the look:
Delicate Stamping: Using lace pattern stamping plates.
Hand-Painted Details: Skilled artists can recreate delicate lace patterns with polish.
Lace Decals: Pre-made lace-patterned decals can be a simpler option.
Heart Details
Subtle heart motifs can add a sweet and personal touch to your bridal manicure.
Ideas:
Tiny Heart at the base: A small heart painted at the cuticle of an accent nail.
Heart French Tip: A heart shape at the tip of the nail.
Bold & Glamorous Bridal Nails
For the bride who isn’t afraid to make a statement, these glamorous designs are sure to turn heads.
Metallic Accents & Foils
Gold, silver, rose gold, or even iridescent foils can add a luxurious, eye-catching element.
Stunning applications:
Full Foil Nail: One or two nails covered entirely in metallic foil for maximum impact.
Foil French Tips: A bold metallic tip.
Foil Inlays: Pieces of foil embedded into the polish for a mosaic effect.
Gemstone Embellishments
Crystals, rhinestones, and other embellishments can bring serious sparkle and luxury.
Placement matters:
Accent Nail Clusters: A collection of gems on an accent nail.
Scattered Gems: Small gems scattered subtly across a few nails.
Full Nail Coverage (for the daring!): Opulent and attention-grabbing.
Pro Tip: Consult with your nail technician about secure application methods to ensure they last through the festivities. Consider the weight and potential for snagging.
Deep Jewel Tones (for Alternative Brides)
While many opt for light shades, some brides embrace bolder colors. Deep, rich jewel tones like emerald green, sapphire blue, or ruby red can be incredibly striking, especially for fall or winter weddings, or for brides seeking a unique look.
Pairing: These colors can be stunning on their own or paired with subtle metallic accents.
Choosing the Right Wedding Nail Shape
The shape of your nails plays a crucial role in how your chosen design will look. Consider what flatters your hands and complements your overall style.
Popular Wedding Nail Shapes
| Shape | Description | Best For |
| :————– | :———————————————– | :————————————————————– |
|
Square | Straight edges with sharp corners. | Strong, modern look; good for shorter nails. |
| Squoval | Square with rounded corners. | A softer version of square; universally flattering. |
| Round | Follows the natural curve of the fingertip. | Natural look; great for short nails, prevents breakage. |
| Oval | Elongated with a rounded tip; mimics the cuticle. | Elegant, elongates fingers; flattering for most hand shapes. |
| Almond | Tapered towards a rounded, soft point. | Romantic and elegant; elongates fingers significantly. |
| Stiletto | Tapered to a sharp, pointed tip. | Bold and dramatic; requires longer natural nails or extensions. |
| Coffin/Ballerina | Tapered with a flat, squared-off tip. | Modern and chic; often used with extensions. |
Consider visiting a professional nail technician to discuss which shape would best suit your hand shape and nail health. For official guidance on nail care and health, the Mayo Clinic provides excellent general information on nail health.
DIY Wedding Nail Design: Easy Steps For Beginners
Want to try a simple DIY bridal nail design? The ‘Half Moon’ or ‘Dot’ manicure is perfect for beginners!
The Simple Half Moon/Dot Manicure
This design uses tape or stickers to create a clean line or distinct dots, offering a chic look with minimal effort.
What You’ll Need:
Base Coat
Your chosen wedding nail polish color (e.g., sheer nude, milky white)
A contrasting polish for the moon or dots (e.g., subtle gold, silver, or classic white)
Nail tape or circular nail stickers/guides
Top Coat
Tweezers (optional, for placing stickers)
Acetone-based nail polish remover (for clean-up)
Cotton pads or balls
Step-by-Step Guide:
1.
Prep Your Nails: Ensure your nails are clean, dry, and free of old polish. Push back your cuticles gently. Apply a thin layer of base coat and let it dry completely.
2. Apply Base Color: Paint 2-3 thin coats of your main wedding polish (e.g., the nude or milky white). Allow each coat to dry thoroughly between applications. A fully dried coat is crucial for clean lines.
3. Create the Moon/Dots:
For Half Moon: Carefully apply your nail tape or a circular sticker just above your cuticle, following the natural curve of your nail. Press down firmly to ensure a good seal.
For Dots: Place small circular stickers where you want your dots to be (e.g., at the base of the nail, or a pattern).
4. Apply Contrast Color: Paint the area above the tape/sticker with your contrasting color (e.g., gold for the moon, or small dots). If doing a full moon, paint the entire exposed nail section. Apply 1-2 thin coats, letting it dry completely.
5. Remove Tape/Stickers: While the contrasting color is still slightly tacky (but not wet), carefully peel away the nail tape or stickers. Do this slowly and at an angle to get the cleanest line possible. If the polish is too dry, it might peel away with the tape. If it’s too wet, it will smudge.
6. Touch-Ups (if needed): Use a small, fine-tipped brush dipped in nail polish remover to clean up any stray marks for precision.
7. Seal the Deal: Apply a generous layer of top coat over your entire nail, including the design. This will protect your work and add a beautiful shine. Allow it to dry completely.
This simple technique can yield stunning results that look professionally done!
Tips for Long-Lasting Bridal Nails
You’ll want your wedding nails to look flawless from your “I do” moment through your last dance. Here are some tips for longevity:
Professional Application: For intricate designs or embellishments, a professional nail technician is your best bet for a flawless and durable finish.
Quality Products: Invest in good quality base coats, polishes, and top coats. They make a significant difference in wear time and finish.
Top Coat is Key: A high-quality, chip-resistant top coat applied every few days can extend the life of your manicure. Look for formulas with UV protection to prevent yellowing.
Avoid Water Exposure: Try to minimize prolonged exposure to hot water, as it can soften the nail polish and lead to chipping. Wear gloves when doing chores like washing dishes.
Moisturize: Keep your cuticles and hands moisturized. Dry cuticles can lift polish. Use cuticle oil daily.
The “Test Run”: If you opt for a complex design or a new nail shape, try it out a few weeks before the wedding. This ensures you love the look and can identify any potential issues with longevity or comfort.
Wedding Nail Care Essentials
Healthy nails are the foundation of any beautiful manicure. A little pre-wedding nail care goes a long way.
Hydration: Drink plenty of water and use hand cream regularly.
Cuticle Care: Gently push back cuticles (never cut them!) and apply cuticle oil daily to keep them soft and healthy.
Nail Strengthening for Weak Nails: If your nails are prone to breaking or peeling, consider using a nail strengthening treatment a few weeks before your wedding. Look for formulas with biotin or calcium.
Gentle Filing: File your nails in one direction to prevent weakness and splitting. Use a fine-grit file.
* Avoid Harsh Chemicals:** Wear gloves when cleaning or using harsh cleaning products.
Frequently Asked Questions About Wedding Nail Designs
1. When should I get my wedding nails done?
| :————– | :———————————————– | :————————————————————– |
|
Your chosen wedding nail polish color (e.g., sheer nude, milky white)
A contrasting polish for the moon or dots (e.g., subtle gold, silver, or classic white)
Nail tape or circular nail stickers/guides
Top Coat
Tweezers (optional, for placing stickers)
Acetone-based nail polish remover (for clean-up)
Cotton pads or balls
It’s generally best to get your manicure 1-2 days before your wedding. This allows the polish to fully cure and reduces the risk of smudging or chipping before the big day.
2. Can I use gel or dip powder for my wedding nails?
Yes! Gel and dip powder manicures are excellent choices for weddings as they offer superior durability and chip resistance compared to traditional polish. They typically last much longer.
3. How do I choose a nail design that matches my wedding dress?
Consider the style of your dress. A classic ballgown might suit a timeless French mani or soft nude, while a modern sheath dress could pair well with minimalist metallic accents or a chic chrome finish. Ultimately, choose a design you love that feels like you!
4. What if I have short nails? Can I still have a beautiful wedding manicure?
Absolutely! Shorter nails can look incredibly elegant with the right design. Think clean French manicures (even a “baby French” with a tiny tip), minimalist dots, sheer nudes, or a single accent nail with subtle sparkle. Properly shaped short nails can be very chic.
5. What’s a “baby boomer” nail design?
The “baby boomer” nail design is a softer, more blended version of the French manicure. It features a seamless gradient transition from a pink or nude base to a white tip, creating a very natural and romantic look.
6. Should my nail polish color match my dress or bouquet?
Not necessarily! While it can be a beautiful coordination if it works, your nail color should complement your overall bridal aesthetic. Many brides opt for classic neutrals or soft shades that enhance their look without directly matching specific elements. It’s about what makes you feel confident and beautiful.
7. How can I make sure my wedding nails last through the honeymoon?
If you’re heading straight on your honeymoon, opting for a gel or dip powder manicure is highly recommended for its longevity. Continue to wear gloves for chores


