Wedding chrome nails are a stunning, modern bridal choice for a chic, reflective finish that catches the light beautifully. This guide breaks down how to achieve this glamorous look at home, covering essential tools, step-by-step application, and tips for making them last down the aisle. Get ready for dazzling, mirror-like nails perfect for your special day!
Planning a wedding is such an exciting time, filled with dreamy details! Among all the gorgeous choices, your nails play a starring role, complementing your dress and rings. If you’re looking for a manicure that’s a little bit glamorous, totally modern, and oh-so-sparkly, then wedding chrome nails might be calling your name! They offer this incredible, almost futuristic metallic sheen that’s surprisingly versatile. Don’t worry if you’ve never tried chrome nails before; this guide is designed for beginners. We’ll walk through everything you need to know, making it super easy to achieve those stunning, reflective nails yourself. Get ready to discover how simple and fun it can be!
What Are Wedding Chrome Nails?
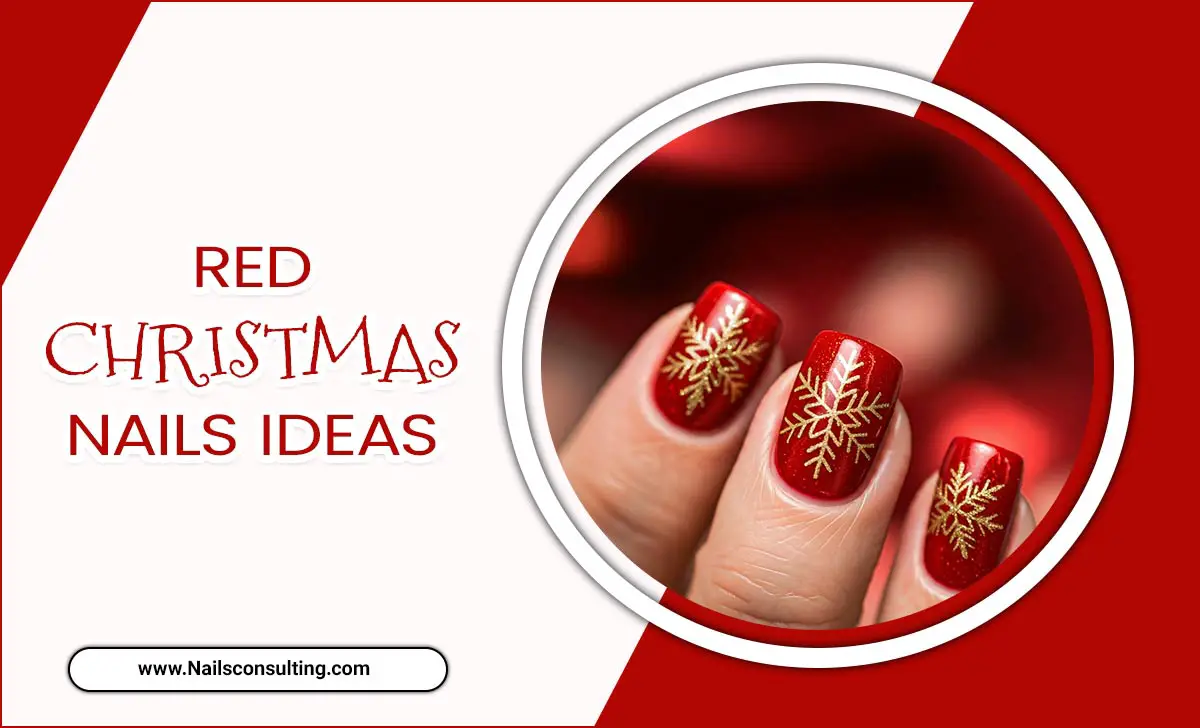
Wedding chrome nails, also known as mirror nails or holographic nails, are a nail art technique that creates a high-shine, metallic, reflective surface. Unlike traditional nail polish, chrome powder is applied over a specific base coat to achieve this unique, mirror-like effect. For weddings, this trend is embraced for its modern elegance, ability to catch the light beautifully in photos, and its surprisingly wide range of color possibilities, from classic silver and gold to softer pastels or even iridescent finishes.
Why Choose Chrome Nails for Your Wedding?
Chrome nails are a fantastic choice for brides seeking a contemporary and sophisticated look. They offer a unique finish that stands out, adding a touch of unexpected glamour. Here’s why they’re becoming a bridal favorite:
- Modern Glamour: They provide a sleek, futuristic, and incredibly polished look that’s a departure from traditional matte or glossy finishes.
- Photogenic Appeal: The reflective surface catches light beautifully, making your hands look stunning in wedding photos. Your rings will pop even more!
- Versatile Designs: While the chrome finish is the star, it can be applied over various base colors (nude, white, pastels, metallics) to create different effects. You can also combine it with other nail art elements like glitter or delicate designs.
- Long-Lasting: When applied correctly with gel polish, chrome nails can last for weeks, meaning you can get them done well in advance of your wedding without worrying about chips.
- Customizable Colors: While silver is classic, you can achieve almost any color of chrome, from rose gold and champagne to pearly white or even soft blues and pinks.
Essential Tools and Materials for Wedding Chrome Nails
To achieve that perfect wedding chrome effect, you’ll need a few specific items. Don’t be intimidated by the list; many of these are staples for gel manicures, and the chrome powder itself is quite simple to use. Here’s what you’ll need:
The Must-Haves:
- Nail File and Buffer: For shaping and creating a smooth nail surface.
- Cuticle Pusher/Remover: To gently prep the nail bed.
- Non-Wipe Gel Top Coat: This is CRUCIAL! A “non-wipe” or “no cleanse” top coat is essential because it leaves a tacky layer that the chrome powder adheres to. Regular top coats with a cleansing wipe will remove this tackiness. You can find excellent options from brands like essie or professional salon brands.
- Chrome Powder: Available in various shades – silver, holographic, pearl white, rose gold, or colored chrome. Look for fine-milled powders for the smoothest finish.
- Silicone Applicator or Sponge: This is what you’ll use to pick up and buff the chrome powder onto your nail.
- Gel Base Coat: The foundation for your gel polish.
- Colored Gel Polish (Optional but Recommended): Applying a colored gel polish before the chrome can create layered effects. White, nude, or pale pinks work beautifully as a base for classic bridal chrome.
- UV/LED Nail Lamp: Essential for curing all gel products.
- Rubbing Alcohol or Nail Cleanser: To clean the nail surface before applying product.
- Lint-Free Wipes: For cleaning during the prep stages.
Optional but Helpful:
- Base Polish Remover: If you’re removing old polish.
- Nail Prep Dehydrator/Primer: For extra adhesion, especially if you have oily nails.
Step-by-Step Guide to Achieving Wedding Chrome Nails
Applying chrome powder might seem tricky, but it’s quite straightforward once you get the hang of it. Follow these steps for a flawless, bridal-ready finish. We’ll primarily focus on the gel method, as it offers the best durability and shine for a wedding.
Step 1: Prepare Your Nails
Start with clean, dry nails. Gently push back your cuticles using a cuticle pusher. Shape your nails to your desired length and style using a nail file. Lightly buff the surface of your nails with a fine-grit buffer to remove any shine and create a smooth surface for the gel polish to adhere to. Cleanse your nails with rubbing alcohol and a lint-free wipe to remove any dust or oils.
Step 2: Apply Gel Base Coat and Cure
Apply a thin, even layer of gel base coat to each nail. Be careful not to let it flood your cuticles. Place your nails under your UV/LED lamp to cure according to the lamp’s or polish’s instructions (usually 30-60 seconds for LED, 2 minutes for UV). A proper cure is vital for the longevity of your manicure.
Step 3: Apply Colored Gel Polish (Optional but Recommended for Bridal Tones)
If you’re using a colored gel polish as a base (e.g., white, nude, pale pink), apply a thin, even coat now. Cure this layer under the lamp.
For the most classic bridal chrome effect, a pure white or off-white base works wonders to make the chrome pop vibrantly. A sheer nude or pale pink can create a softer, more pearlescent look.
Apply a second thin coat of your colored gel polish for full opacity and cure it again.
Step 4: Apply the Non-Wipe Gel Top Coat and Cure (Partially!)
Apply a thin, even layer of your non-wipe gel top coat over the cured colored gel polish. This is the crucial layer that the chrome powder will adhere to.
Now, here’s a key tip for the best chrome application: do NOT fully cure this layer in the lamp. Cure it for about HALF the recommended time. This will leave the surface tacky enough for the powder to stick but not so wet that it runs or smudges. For example, if your lamp cures gel in 60 seconds, cure this non-wipe top coat for only 30 seconds.
Step 5: Apply the Chrome Powder
Dip your silicone applicator or sponge into the chrome powder. Gently tap off any excess.
Begin to gently rub and buff the powder onto the tacky surface of your nail. Use small, circular motions. You should see the chrome effect start to appear almost instantly. Keep buffing until the entire nail surface is covered and has a uniform, mirror-like shine. Don’t press too hard; let the powder do the work!
If you find some powder on your skin, a stiff brush can help sweep it away carefully before the next step.
Step 6: Seal the Chrome Finish
Once you have your desired chrome effect, it’s time to seal it. Gently brush off any loose powder with a soft brush.
Apply a final layer of a high-quality non-wipe gel top coat. This layer needs to be cured completely. Ensure you cap the free edge of your nail to prevent lifting and chipping. Cure this top coat fully under your UV/LED lamp according to the manufacturer’s instructions. This step is critical for locking in the chrome and ensuring your manicure lasts.
Step 7: Final Touches
After the final cure, your chrome nails are complete! There’s no need to wipe off any sticky residue because you used a non-wipe top coat. You can apply cuticle oil to rehydrate the skin around your nails.
Popular Wedding Chrome Nail Shades & Effects
While classic silver chrome is undeniably chic, wedding chrome nails offer a spectrum of possibilities. The base color and the specific chrome powder you choose can dramatically alter the final look. Here are some popular choices:
Classic Bridal Chrome:**
Shade: Pearl white or a very soft, almost clear iridescent chrome powder.
Base: Often applied over a sheer white, milky white, or pale nude gel polish for a subtle glow.
Effect: This gives a soft, luminous, ethereal finish that’s timeless and elegant. It looks like a natural, perfected nail with an angelic sheen.
Silver Mirror Chrome:
Shade: A true silver chrome powder.
Base: Can be used directly over a black gel polish for an intense, liquid-metal silver look, or over white/nude for a brighter, more refined silver.
Effect: A bold, high-impact metallic finish that’s very eye-catching and modern. It’s perfect for brides who want a statement nail.
Rose Gold Chrome:
Shade: A rose gold chrome powder.
Base: Typically applied over a pale pink, nude, or even a sheer white gel polish.
Effect: Offers a warm, romantic, and sophisticated metallic shimmer. It’s a beautiful alternative to traditional silver or gold and pairs wonderfully with blush or rose-themed weddings.
Champagne Chrome:
Shade: A soft, golden-toned chrome powder.
Base: Works well over nude, beige, or a soft ivory gel polish.
Effect: This shade is understated and luxurious, providing a gentle metallic warmth that’s incredibly elegant and versatile with many wedding color palettes.
Holographic Chrome:
Shade: Holographic chrome powder, which contains fine glitter particles that refract light into a rainbow spectrum.
Base: Often looks stunning over a black base for a vibrant rainbow effect, but can also be beautiful over white or pastels for a more subtle, shimmering rainbow shift.
Effect: A playful yet glamorous option, perfect for the bride who loves a bit of sparkle and magic. It adds dimension and movement to the nails.
Colored Chrome Accents:
Shade: Any colored chrome powder (e.g., soft blue, lavender, pastel pink).
Base: Usually applied over a white or complementary pastel base.
Effect: This offers a way to incorporate a color theme subtly. You might opt for all-over colored chrome on accent nails or just a chrome French tip or swirl design.
Tips for Long-Lasting Wedding Chrome Nails
Your wedding day is a marathon, not a sprint! You want your nails to look flawless from the “I do’s” to the last dance. Here are tips to maximize the longevity of your wedding chrome nails:
- Prep Properly: The key to any long-lasting manicure is thorough preparation. Ensure your nails are clean, dry, and free of oils.
- Use Quality Products: Invest in a good quality gel base coat, non-wipe top coat, and a reliable UV/LED lamp. Over time, cheaper products can lead to premature lifting or dulling. For information on gel curing and lamp safety, the FDA provides guidelines on UV radiation safety, which is relevant for lamp use.
- Avoid the Cuticle and Sidewalls: Ensure no gel polish or chrome powder touches your skin or cuticle area. This is a major cause of lifting.
- Cap the Edge: Always “cap” the free edge of your nail with each gel layer, especially the top coat. This seals the polish and prevents chipping.
- Two Thin Coats are Better Than One Thick Coat: This applies to both the colored gel and the top coat. Thicker coats are more prone to improper curing and can lift more easily.
- Gentle Curing: Make sure to cure each layer for the manufacturer’s recommended time. Under-curing is a common cause of product failure.
- Be Gentle After Application: For at least 24-48 hours after your manicure, try to avoid prolonged exposure to hot water, harsh soaps, or chemicals, as this can affect the curing process and polish adhesion.
- Wear Gloves: When doing household chores (like washing dishes!) after your wedding, wear gloves. This protects your nails from chemicals and excessive moisture.
- Avoid Using Nails as Tools: Try not to use your nails to pry open things or scrape surfaces, as this can cause chips or breaks.
Wedding Chrome Nail Designs to Inspire You
Beyond the basic full-coverage chrome, there are many creative ways to incorporate this beautiful finish into your bridal nail look. Think about combining chrome with other elements for a personalized touch!
Chrome French Tips</h3
A modern twist on a classic! Instead of white tips, opt for a gleaming silver, rose gold, or pearly chrome tip on a nude or sheer base. This is subtle yet sophisticated.
Chrome Half-Moons
Apply a chrome finish to the lunula (the half-moon shape) at the base of your nail, while the rest of the nail is a solid color or even a different chrome shade. This creates a sophisticated color-block or metallic accent.
Chrome Accents
Have one or two accent nails fully covered in chrome, while the rest are a complementary solid color (like a soft white, pink, or nude). This is a great way to wear the trend without it being overwhelming.
Chrome Ombre
Blend a chrome shade into a solid color for a subtle, shimmering gradient. A white-to-silver or nude-to-rose gold ombre can be absolutely breathtaking.
Chrome with Minimalist Art
Combine a full chrome nail with simple line art, tiny dots, or a small floral detail in gel polish. The chrome provides a stunning canvas.
Two-Tone Chrome
Use different chrome colors on adjacent nails or create a design where sections of the nail are different chrome shades.
Comparing Chrome Application Methods
While the gel method is the most popular and durable for a special occasion like a wedding, it’s good to know there are other ways to achieve a chrome effect. Here’s a quick comparison:
| Method | Pros | Cons |
|---|---|---|
| Gel-Based Chrome (Recommended for Weddings) | Superior shine and durability; lasts 2-3 weeks; no chipping when done correctly; wide variety of colors available. | Requires UV/LED lamp and gel products; more steps involved. |
| Regular Nail Polish + Chrome Powder | Uses standard polish colors; no lamp needed. | Much less durable (can chip in 1-2 days); chrome may not adhere as smoothly or intensely; more prone to smudging. |
| Press-On Nails with Chrome Finish | Quick and easy to apply; can be very professional-looking; good for trying trends without commitment. | Fit might not be perfect; can pop off if not applied perfectly; reuse is limited; may not have the same depth of shine as gel. |
For a wedding, the gel-based method is highly recommended due to its longevity and professional finish. It ensures your nails will look stunning throughout your celebrations.
Frequently Asked Questions About Wedding Chrome Nails
Q1: How do I prevent my wedding chrome nails from looking “chunky”?
A1: Use

