Quick Summary:
Mastering viral nail designs is easier than you think! This guide breaks down the hottest trends with simple, proven steps and essential tools. Get ready to recreate those stunning looks and boost your nail game with confidence, no matter your skill level.
Ever scrolled through social media and seen nails that stop you in your tracks? Those gorgeous, intricate, or just plain fun designs that seem to be everywhere? We call those viral nail designs, and they can feel a little intimidating to try yourself. But guess what? They don’t have to be! With the right approach and a few key tips, anyone can learn to rock these popular looks. This guide is here to show you exactly how, making nail art accessible and exciting for everyone. Let’s dive in and unleash your inner nail artist!
Why Are Certain Nail Designs “Viral”?
It’s a question many of us wonder! What makes a particular nail design explode across platforms like TikTok, Instagram, and Pinterest? Several factors contribute to a nail look becoming a viral sensation:
- Visual Appeal: The design must be striking and catch the eye immediately. Bold colors, unique patterns, and eye-catching textures often do the trick.
- Relatability or Aspiration: Viral designs are often either something many people can imagine doing themselves (relatable) or a glamorous, aspirational look that people dream of having.
- Simplicity (or Perceived Simplicity): Even complex-looking designs might go viral if they can be broken down into achievable steps. If people think, “I could do that!”, they’re more likely to try and share it.
- Nostalgia or Trends: Designs that tap into popular culture, throwback eras (like Y2K aesthetics), or current fashion trends tend to gain traction.
- Creator Influence: When popular beauty influencers or nail artists share a design, it naturally gets a huge boost in visibility.
- “Wow” Factor: Something unexpected, innovative, or just remarkably beautiful will always grab attention.
Understanding these elements helps us appreciate why certain looks take off. But more importantly, it shows us what to look for when we want to try and recreate them ourselves!
Essential Tools for Viral Nail Designs
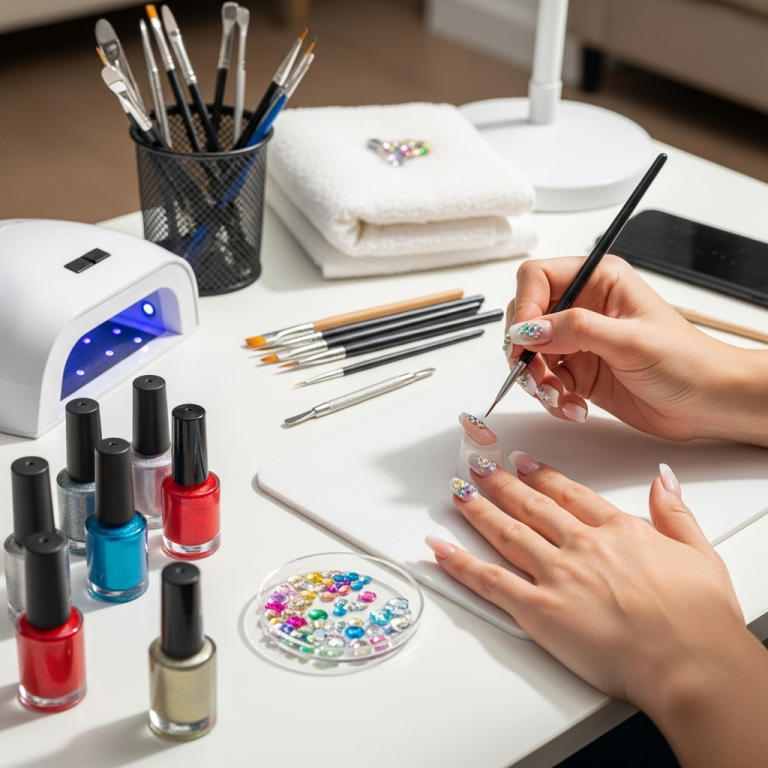
Before we jump into specific designs, let’s talk tools. You don’t need a professional salon’s worth of supplies to start. Here are some basics that will get you far:
| Tool | Why You Need It | Beginner Tip |
|---|---|---|
| Nail File & Buffer | To shape your nails and create a smooth surface for polish. | Start with a medium-grit file (around 180-240 grit) for shaping and a gentle buffer for smoothing. |
| Nail Polish Remover & Cotton Pads | To clean off old polish and prep nails. | Opt for acetone-free removers if your nails tend to be dry. |
| Base Coat & Top Coat | Base coat protects your nails and helps polish adhere. Top coat seals the design and adds shine. | A good quality base and top coat can make your manicure last much longer! |
| Nail Polish in Various Colors | The building blocks of any design! | Start with a few versatile shades like white, black, a nude, and a few trending colors. |
| Thin Nail Art Brush or Dotting Tool | For drawing lines, dots, and small details. | A dotting tool with different tip sizes is super versatile for dots and simple swirls. |
| Tweezers | For picking up small embellishments like rhinestones or glitter. | Fine-tip tweezers offer the most precision. |
| Cuticle Oil | To keep your cuticles hydrated and healthy-looking. | Apply after your manicure is completely dry. |
As you get more adventurous, you might consider adding things like striping tape, stencils, or even a UV/LED lamp if you plan to use gel polish. But for now, this list is your solid foundation.
Viral Nail Design Trend 1: The “Clean Girl” Aesthetic
This trend is all about understated elegance and healthy-looking nails. It’s minimalist, chic, and incredibly easy to achieve. Think “your nails but better.”
Steps to Achieve the “Clean Girl” Look:
- Prep Your Nails: Start with a clean slate. File your nails into a neat shape (squoval or soft almond often works best) and gently push back your cuticles. Apply a nail strengthener if you have one.
- Base Coat: Apply a thin layer of a clear or milky-pink sheer polish. This evens out the nail color and adds a subtle healthy glow.
- Sheer Color (Optional): If you want a bit more coverage, add one thin coat of a sheer nude, pale pink, or milky white polish. The key is “sheer” – you should still see a hint of your natural nail.
- Top Coat: Seal everything with a high-shine, quick-drying top coat. This gives that polished, put-together finish.
- Cuticle Care: Finish by massaging a bit of cuticle oil into your cuticles. This step is crucial for that perfectly groomed appearance.
Keywords: minimalist nails, natural nails, nude nails, sheer nails, everyday nails
Viral Nail Design Trend 2: Chrome/Mirror Nails
This high-shine, futuristic look has been dominating feeds! It reflects light like a mirror and comes in a rainbow of metallic shades.
Achieving the Perfect Chrome Finish:
- Base Polish: Apply a black or dark-colored gel polish (or regular polish if you’re not using chrome powder) and cure it under a lamp if it’s gel. A dark base makes the chrome color pop. Regular polish needs to be completely dry but still slightly tacky.
- Apply Chrome Powder: This is the magic ingredient! Using a silicone applicator or your fingertip (gloves recommended to avoid staining), pick up a small amount of chrome powder.
- Rub It In: Gently rub the powder over the nail surface. You’ll see it transform the polish into a metallic sheen. Keep rubbing until the entire nail is covered with a smooth, even shine.
- Clean Up Edges: Use a small brush dipped in nail polish remover to clean any powder that got onto your skin or cuticles.
- Seal It: Apply a generous layer of a no-wipe gel top coat (for gel polish) or a durable regular top coat. This is essential to lock in the shine and prevent chipping.
Tip: Chrome powder can be messy! Work in a well-ventilated area and consider wearing a mask if you’re sensitive to dust.
For those using traditional nail polish, you can achieve a similar, though less intense, effect with metallic polishes. Look for polishes specifically labeled “chrome” or “mirror finish.” Apply two thin coats for best results.
Keywords: chrome nails, mirror nails, metallic nails, holographic nails, futuristic nails
Viral Nail Design Trend 3: French Tips with a Twist
The classic French manicure gets a modern update! Think colorful tips, abstract shapes, or even glittery accents.
DIY Funky French Tips:
- Base Color: Apply your chosen base color – this could be a clear, nude, or even a milky white. Let it dry completely.
- Create the Tip: This is where the fun begins!
- Colored Tips: Use a thin nail art brush to paint a line of your desired color (e.g., pastel green, baby blue, hot pink) along the free edge of your nail. You can keep it clean and crisp or make it a bit wavy.
- Glitter Tips: Apply a thin layer of glitter polish or a clear polish mixed with loose glitter to the tips of your nails.
- Abstract Shapes: Instead of a straight line, paint a small dot, a half-moon, or a tiny V-shape on the tip.
- Optional Embellishments: Add a tiny rhinestone at the base of the colored tip or a subtle shimmer line just above it.
- Top Coat: Finish with a good top coat to seal your design.
External Resource: For more on nail shaping and the classic French tip, the National Institutes of Health (NIH) has resources on nail health and common conditions, underscoring the importance of proper nail care as a foundation for any design.
Keywords: French manicure, colored French tips, glitter French tips, modern French nails, abstract nail art
Viral Nail Design Trend 4: Aura Nails
These ethereal, gradient-like designs mimic the look of an aura. They typically feature soft color blends and a dreamy finish.
Creating Your Own Aura Nails:
- Base Layer: Apply a sheer white or milky-pink base coat and let it dry. This creates a nice, clean canvas.
- Create the Circles: Using a small makeup sponge or a soft brush, gently dab two different colors onto the middle of the nail, blending them slightly where they meet. Think soft pastels like peach and pink, or lavender and baby blue. The goal is a soft, diffused circle effect, not harsh lines.
- Blend, Blend, Blend: Use a clean sponge or brush to gently blend the edges of the colors together. You want a seamless transition.
- Add Dimension (Optional): For a more intense aura, you can add a slightly darker shade in the center where the two colors meet, then blend again.
- Top Coat: Apply a thin layer of top coat to seal the design. You can use a matte top coat for an even softer look or a glossy one for more shine.
Pro-Tip: Practice the blending on a piece of paper first to get a feel for the sponge or brush. Less pressure is more!
Keywords: aura nails, gradient nails, soft nails, pastel nails, dreamy nails
Viral Nail Design Trend 5: 3D Accents & Charms
Taking nail art to the next dimension, literally! Think tiny bows, flowers, or charms attached to your nails.
Adding 3D Elements Safely:
- Secure Base: Start with a well-applied base and color coat. Ensure your polish or gel is completely dry/cured before adding accents.
- Choose Your Charm: Select your 3D element. These can be found online or in craft stores. Common choices include small acrylic flowers, bows, or metal charms.
- Adhesive: This is the trickiest part. For regular polish, a thicker top coat can work for very lightweight charms, but they may not last long. For better longevity, use a specialized nail art glue or a strong nail adhesive. If you’re using gel polish, apply a small bead of gel and place the charm directly into the wet gel before curing.
- Placement: Carefully place the charm onto the nail using tweezers. Press gently to ensure it adheres well without smudging your polish.
- Seal Around (Not Over): If using regular polish and adhesive, try to apply top coat around the charm, not directly over it, to avoid dislodging it. For gel, curing it in the gel will secure it.
Important Note: Be mindful of the size and placement of charms, especially for everyday wear. Oversized or awkwardly placed charms can snag on clothing or hair. You can learn more about proper nail preparation and potential risks from resources like the CDC’s guidelines on hand hygiene, which indirectly highlight the importance of well-maintained and safely adorned nails.
Keywords: 3D nails, nail charms, acrylic nails, embellishments, statement nails
Maintaining Your Viral Designs
You’ve created a masterpiece! Now, how do you keep it looking fresh?
- Be Gentle: Avoid using your nails as tools. Don’t scrape, pry, or pick at things.
- Wear Gloves: Protect your nails from harsh chemicals when cleaning or doing dishes.
- Oil Up: Regularly apply cuticle oil to keep your nails and the polish flexible, reducing the risk of chips.
- Touch-Ups: For regular polish, a quick layer of top coat every couple of days can revive the shine and help prevent wear.
- Watch Out for Water: Prolonged soaking can weaken polish. Towel dry your hands thoroughly after washing.
Common Beginner Mistakes & How to Avoid Them
We all start somewhere! Here are a few common hiccups and how to navigate them:
| Mistake | How to Fix/Avoid |
|---|---|
| Applying Polish Too Thickly | Always use thin coats. It’s better to do two or three thin coats than one thick, gloopy one that will take forever to dry and likely smudge. |
| Forgetting Base or Top Coat | Base coat prevents staining and helps polish adhere. Top coat seals and protects. Don’t skip these essential steps! |
| Painting Over Wet Polish | Patience is key! Let each coat dry sufficiently before applying the next. This is especially important with intricate nail art. |
| Messy Cuticles & Edges | Use a small brush dipped in nail polish remover to clean up any mistakes around the cuticle line after the polish has set a little. Don’t try to paint perfectly right up to the edge if you’re struggling – clean-up is your friend! |
| Not Shaking Polish Properly | Don’t shake polish bottles up and down, as this creates air bubbles. Instead, roll the bottle gently between your palms. |
Frequently Asked Questions (FAQ)
Q1: How do I make nail designs last longer?
A: Always start with clean, prepped nails. Use a good base coat and a durable top coat. Reapply top coat every 2-3 days. Be gentle with your hands and wear gloves for chores!
Q2: What’s the easiest viral nail design for beginners?
A: The “Clean Girl” aesthetic or simple colored French tips are great starting points. They require minimal tools and practice.
Q3: Do I need special tools for chrome nails?
A: Yes, you’ll need chrome powder and a silicone applicator or soft brush. If you’re using gel polish, a UV/LED lamp is also necessary. Regular polish can achieve a different kind of metallic look but not the true mirror effect.
Q4: My nail art brush is clumpy. What should I do?
A: Clean your brush thoroughly with nail polish remover after each use. Store it flat or upright with the bristles up to prevent damage. If it’s still clumpy, it might be time for a new brush.
Q5: How can I prevent nail polish from chipping quickly?
A: Ensure your nails are completely dry and oil-free before painting. Apply thin coats of polish, capping the free edge (painting a tiny bit along the tip of the nail) with your color and top coat. A good quality top coat is also crucial.
Q6: Can I do viral nail designs on short nails?
A: Absolutely! Many viral designs, like clean girl nails, aura nails, or minimalist French tips, look fantastic on short or medium-length nails. Just adjust the scale of the design to fit your nail size.
Conclusion
There you have it – your beginner-friendly guide to conquering the world of viral nail designs! We’ve explored some of the hottest trends, from the effortlessly chic “Clean Girl” aesthetic to the dazzling chrome finish and the playful twists on the classic French manicure. Remember, the key to mastering these looks is patience, practice, and having the right tools (which, as you’ve seen, don’t have to be complicated!). Don’t be afraid to experiment, mix and match elements, and most importantly, have fun expressing your unique style through your nails. Your nails are a canvas, and these viral designs are just the inspiration you need to create something beautiful and unique to you. So grab your polishes, get creative, and get ready to rock some seriously stunning nails!


