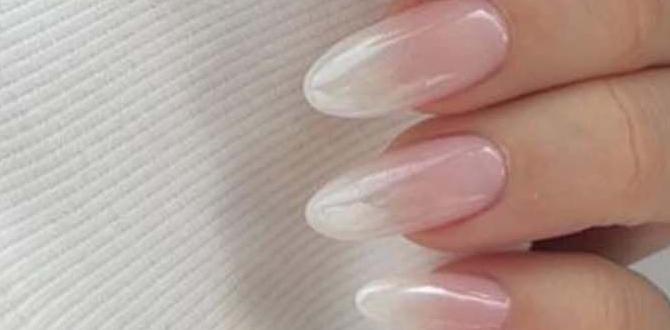
Violet nail designs offer a versatile and chic way to express your style, from soft lavender to deep amethyst. These stunning looks are surprisingly easy to achieve, even for beginners, and can elevate any outfit. Get ready to explore beautiful violet manicures that are both on-trend and timeless.
Hello nail lovers! Lisa Drew here from Nailerguy, ready to dive into the gorgeous world of violet nail designs. Have you ever looked at a beautiful shade of purple and wished you could wear it on your nails? Maybe you’ve tried a few purple polishes but felt unsure how to make them truly pop. You’re not alone! Many of us love the idea of a vibrant or elegant purple manicure but aren’t sure where to start. The good news is that violet nails are incredibly versatile and surprisingly easy to master. Whether you’re a total beginner or looking to spice up your usual routine, I’ve got you covered. We’ll explore everything from the basic polish application to fun, simple designs that will make your nails the talk of any room. Get ready to add some beautiful bolds and soft pastels to your nail repertoire!
Why Violet Nails Are a Must-Have
Violet, in all its magnificent shades, has a unique appeal. It’s a color that blends the calm stability of blue with the fiery passion of red, creating a hue that is both regal and playful. This duality makes violet incredibly adaptable for any occasion and personal style.
- Versatility: From pale lilac for a soft, romantic look to deep plum for a sophisticated evening vibe, violet offers a spectrum of possibilities.
- Universally Flattering: Violet shades often complement a wide range of skin tones, making them a great choice for almost everyone.
- Trend-Forward: Purple has consistently been a popular color in fashion and beauty, ensuring your violet nails will always feel current and stylish.
- Mood Booster: Colors like purple are often associated with creativity, luxury, and a touch of mystery, which can add a fun and confident flair to your day.
Essential Tools for Violet Nail Designs
Before we get our hands dirty with design, let’s make sure you have the right tools. Don’t worry, you don’t need a professional salon to create stunning violet nail art. Most of these items are readily available and quite budget-friendly.
For Basic Violet Manicures:
- Nail File and Buffer: To shape your nails and smooth the surface for a perfect polish application.
- Cuticle Pusher/Orange Stick: To gently push back your cuticles for a clean canvas.
- Base Coat: Essential for preventing staining (especially with darker purples!) and helping polish adhere better.
- Violet Nail Polish: Your star player! Choose your favorite shade(s).
- Top Coat: To seal your design, add shine, and prolong wear.
- Nail Polish Remover and Cotton Pads: For inevitable oopsies and cleanup.
For Adding Simple Designs:
- Dotting Tools: These have small round balls on the end, perfect for creating dots and simple patterns.
- Thin Nail Art Brush: For drawing lines, swirls, or delicate details.
- Striping Tape: For creating crisp, clean geometric lines.
- Stencils: Pre-cut designs you can use to easily apply patterns.
- Glitter or Metallic Polishes: To add sparkle and contrast.
Beginner-Friendly Violet Nail Design Ideas
Ready to get creative? These designs are perfect for beginners and can be achieved with minimal practice. They’re all about fun and showing off that beautiful violet shade!
1. The Classic Violet Chic
This is your go-to for an effortlessly elegant look.
What You’ll Need:
- Base Coat
- Your favorite violet nail polish
- High-shine Top Coat
Steps:
- Prep: Start with clean, dry nails. File them to your desired shape and gently push back your cuticles.
- Base Coat: Apply one thin layer of base coat and let it dry completely. This protects your nails.
- Color Application: Paint two thin, even coats of your violet nail polish. Allow each coat to dry for a minute or two before applying the next. Thin coats dry faster and look smoother.
- Top Coat: Once the second color coat is dry to the touch, apply a generous layer of top coat. This seals the color, adds shine, and helps prevent chips.
- Cleanup: Use a small brush dipped in nail polish remover to clean up any polish that got onto your skin.
2. Simple Violet Floral Accent
Add a touch of delicate artistry to a single nail.
What You’ll Need:
- Base Coat
- Light violet nail polish
- White or pale pink nail polish
- Dotting tool (small size) or even a toothpick
- Top Coat
Steps:
- Prep: Prepare your nails as usual. Apply base coat.
- Violets Base: Apply two coats of your light violet nail polish on all nails, or just your accent nail if you prefer. Let dry.
- The Flower: On your accent nail (usually the ring finger), use the dotting tool dipped in white or pale pink polish to create a small circle in the center. Then, create slightly larger dots around it to form petals. You can make a simple five or six-petal flower.
- Center Detail (Optional): Add a tiny dot of a darker violet or even yellow polish in the very center of the flower.
- Seal: Once the flower is completely dry, apply a top coat over all nails.
3. Geometric Violet with Striping Tape
Achieve crisp lines for a modern, edgy look.
What You’ll Need:
- Base Coat
- Violet nail polish
- A contrasting color polish (like gold, silver, black, or white)
- Striping tape
- Nail art brush or tweezers (for applying tape)
- Top Coat
Steps:
- Prep: Nails prepped, base coat applied.
- Full Color: Paint your nails with your violet polish and let it dry COMPLETELY. This is crucial for the tape to peel off cleanly.
- Apply Tape: Carefully place strips of nail striping tape onto your dried violet polish to create the design you want. Think geometric shapes, diagonal lines, or color blocking.
- Contrast Color: Paint over the tape with your contrasting polish. Make sure to get full coverage over the tape.
- Remove Tape: While the contrasting polish is still WET, carefully use tweezers or your nail art brush to lift and remove the striping tape. If you wait for it to dry, the tape might peel off the underlying polish.
- Finish: Once everything is completely dry, apply a smooth layer of top coat.
4. Subtle Ombre Violet
A beautiful gradient is easier than you think!
What You’ll Need:
- Base Coat
- Two shades of violet polish (e.g., a lighter and a darker shade)
- Cosmetic sponge or makeup wedge
- Top Coat
Steps:
- Prep: Nails prepped, base coat applied.
- First Color: Apply one coat of the lighter violet polish to all nails. Let it dry.
- Sponge Prep: Cut a makeup sponge into a small wedge. You can lightly dampen it with water (then squeeze out excess) to make it more porous, or use it dry.
- Gradient Application: Apply a stripe of the lighter violet polish and a stripe of the darker violet polish side-by-side onto the sponge.
- Dab Away: Gently dab the sponge onto your nail, starting from the cuticle and moving towards the tip. You may need to reapply polish to the sponge and dab several times to build up the gradient effect. Think of it as “stamping” the color on.
- Repeat: Repeat for all nails. Don’t worry about perfection; a slightly messy edge is fixable!
- Clean Up: Use a brush dipped in remover to clean up any polish that landed on your skin.
- Seal: Apply a top coat to smooth out the gradient and give it a beautiful finish.
5. Dazzling Violet Glitter Accent
For a pop of sparkle that’s simple yet effective.
What You’ll Need:
- Base Coat
- A neutral or light violet polish
- A vibrant violet glitter polish
- Top Coat
Steps:
- Prep: Nails prepped, base coat applied.
- Base Color: Apply one or two coats of your neutral or light violet polish to all nails. Let dry.
- Glitter Focus: On your accent nail, apply one or two coats of the violet glitter polish. You can sweep it from the cuticle to the tip, or concentrate it more towards the tip for a “” effect.
- Optional: If you want more glitter intensity, apply a second layer of the glitter polish.
- Top Coat: Apply top coat over all nails, ensuring the glitter layer is fully covered to smooth the surface.
Tips for Achieving Salon-Quality Violet Nails at Home
Even with simple designs, a few pro tips can make a big difference in how polished your violet nails look.
Preparation is Key
- Cleanliness: Always start with clean, dry nails. Wash your hands and remove any old polish.
- Cuticle Care: Gently push back your cuticles after showering or soaking your nails. This will make them softer and easier to manage. Some people prefer to use a cuticle remover product. You can learn more about proper cuticle care from resources like the American Academy of Dermatology Association, who emphasize gentle handling.
- Buffing: A light buffing of the nail surface creates a smooth canvas and helps polish adhere better. Don’t over-buff, though!
Application Techniques
- Thin Coats are Best: It’s better to apply two or three thin coats of polish than one thick, gloopy one. They dry faster and look much smoother.
- The Three-Stroke Method: For each coat of color, use three strokes: one down the center, then one on each side. This ensures even coverage without overloading the brush.
- Cap the Edge: When applying your color coats and top coat, run the brush along the free edge (the tip) of your nail lightly. This helps prevent chipping.
- Drying Time: Be patient! Allow adequate drying time between coats. A quick-dry top coat can be a lifesaver.
Troubleshooting Common Issues
- Streaks: If your polish looks streaky, you likely need another thin coat or your polish is becoming quite thick. Add a drop of nail polish thinner to revive old polish.
- Bubbles: Bubbles usually occur when polish is applied too thickly or when nails are too hot. Ensure thin coats and avoid rushing.
- Chipping: Ensure you’ve capped the edge and used a good top coat. Reapply top coat every couple of days to extend the life of your manicure.
Choosing the Right Violet Shades
Violet isn’t just one color; it’s a whole mood board! Here’s a quick guide to help you pick the perfect shade for your violet nail designs.
| Shade Name | Vibe/Look | Best For | Tips |
|---|---|---|---|
| Lavender/Lilac | Soft, dreamy, romantic, gentle | Everyday wear, spring/summer, bridal manicures | Try with white floral accents or subtle silver glitter. |
| Amethyst | Bright, vibrant, energetic, playful | Making a statement, fun outings, concerts | Pairs well with gold or contrasting neon details. |
| Grape/Medium Purple | Balanced, sophisticated, chic | Work, evenings out, all seasons | Great base for intricate designs or metallic stripes. |
| Plum/Deep Purple | Luxurious, dramatic, mysterious, elegant | Fall/winter, formal events, sophisticated looks | Looks stunning with matte top coat or fine gold foil. |
| Periwinkle | Cool, serene, subtle, ethereal | Unique everyday style, calming look | Add a touch of white for a milky effect or holographic glitter. |
Violet Nail Designs for Different Occasions
Need inspiration for your next event? Violet nails can be dressed up or down!
Casual Day Out
- Lavender with White Dots: A sweet and simple look.
- Amethyst with a single glitter accent nail: Adds just enough sparkle without being overpowering.
- Ombre lilac/periwinkle: Soft and trendy.
Workplace Appropriate
- Classic Plum or Grape polish: Polished and professional.
- Nude with a thin violet French tip: A subtle twist on a classic.
- Sheer Lavender with a hint of shimmer: Elegant and understated.
Date Night or Evening Events
- Deep Plum with gold foil accents: Luxurious and glamorous.
- Amethyst with black accents (stripes or floral details): Dramatic and chic.
- Glittery Violet gradient: Eye-catching and festive.
Seasonal Styles
- Spring: Light lavenders, lilac and floral designs.
- Summer: Bright amethyst, periwinkle with fruit motifs.
- Fall: Deep plums, grape, rich jewel tones with leafy or abstract patterns.
- Winter: Icy violets, deep purples with snowflake or starry night designs.
Frequently Asked Questions About Violet Nail Designs
Q1: How do I prevent dark purple polish from staining my nails?
The best way to prevent staining is by using a good quality base coat. Apply two coats if you’re worried, especially with very dark or vibrant purples. A good base coat creates a barrier between the pigment and your natural nail. Another tip is to avoid leaving dark polish on for more than a week if possible; refreshing your manicure every few days can help.
Q2: What colors go well with violet nail designs?
Violet is surprisingly versatile! For a classic look, try white, black, silver, or gold for contrast. For something softer, pale pinks, creams, and nudes work beautifully. If you want to be bold, try complementary colors like yellow or orange accents, or even greens for a striking contrast. Jewel tones like emerald or sapphire can also create a rich, layered look.
Q3: How do I make my nail polish dry faster?
Several tricks can help! Apply polish in thin coats, as thick coats take much longer to dry. You can use a quick-dry top coat, which contains fast-drying agents. Some people swear by dunking their nails in cold water once the top coat is applied (though be very careful not to smudge!). Avoid using heat, as warmer temperatures actually slow down drying.
Q4: Can I use regular makeup sponges for ombre designs?
Yes, absolutely! Standard cosmetic sponges or makeup wedges work perfectly for creating ombre effects. Just make sure to cut them into a manageable size. The porous nature of the sponge helps to blend the colors beautifully as you dab. Remember to replace the sponge if it gets too saturated or clogs up.

