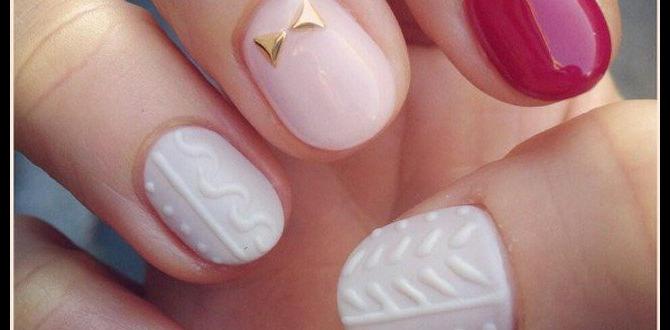
Velvet nails design offers an effortlessly chic, plush texture that’s surprisingly easy to achieve at home. Get ready to elevate your manicure with this simple, step-by-step guide to creating luxurious velvet nails that look and feel amazing, perfect for any occasion.
Have you ever seen those gorgeous, soft-looking manicures and wondered how they get that amazing texture? We’re talking about velvet nails, a trend that brings a touch of luxury and chic sophistication right to your fingertips. It might look super high-end, but believe it or not, creating this plush, velvety effect is totally doable for beginners! Forget complicated techniques; we’re diving into how you can get that dreamy velvet finish with just a few key items. Get ready to transform your nails into a stylish statement piece. Let’s get started!
What Exactly Are Velvet Nails?
Velvet nails are a manicure style that mimics the soft, plush texture of velvet fabric. They achieve this unique look not with actual velvet, but with special nail polish formulations that create a multidimensional, light-reflective surface. When the light hits them, they shimmer and shift, giving the illusion of deep, cozy velvet. It’s a subtle yet impactful way to add a touch of elegance and a unique finish to any nail color. Think of it as a sophisticated upgrade from a standard glossy manicure.
Why You’ll Love Velvet Nail Designs
The appeal of velvet nails is undeniable, and for good reason! They’re more than just a pretty design; they offer a whole host of benefits that make them a fantastic choice for anyone looking to elevate their nail game.
- Effortless Elegance: Velvet nails instantly feel luxurious and sophisticated. They’re perfect for adding a touch of polish to any outfit, whether you’re dressing up or keeping it casual.
- Unique Texture: Unlike traditional manicures, velvet nails offer a distinctive tactile and visual experience. The soft, shimmering appearance is sure to catch the eye.
- Beginner-Friendly: The most popular velvet nail techniques are surprisingly simple, making them ideal for those new to nail art. You don’t need a steady hand or extensive experience!
- Versatile: This design works beautifully with a wide range of colors, from deep jewel tones to soft pastels and even neutrals.
- Long-Lasting: When applied correctly, velvet nails can last as long as a regular gel or gel-polish manicure, offering enduring beauty.
- Customizable: While the core technique is simple, you can play with different colors, finishes (like matte vs. glossy accents), and even subtle nail art elements to make them your own.
The Magic Behind the Velvet Finish: What You Need
Creating velvet nails at home is simpler than you might think, and the secret lies in a few key products. You don’t need a whole nail art studio; just a few specialized items will do the trick.
Essential Tools and Materials:
- A Magnet Tool (Cat Eye Wand): This is your most important tool! These magnets have different shaped tips that create the swirling, velvety effect by manipulating the metallic particles in the polish. You can find various designs online or at beauty supply stores.
- “Cat Eye” Gel Polish: This is the special polish that makes it all happen. These polishes contain fine metallic particles that react to the magnet. They are usually referred to as “cat eye” polishes.
- A Base Coat: Just like with any gel manicure, a good quality base coat is essential for polish adhesion and protecting your natural nails.
- A Top Coat: A standard gel top coat will seal your design and add shine. For a true velvet look, you’ll want to use a no-wipe top coat. This means it doesn’t leave a sticky residue after curing, which is crucial for preserving the velvet effect.
- A UV/LED Nail Lamp: Since cat eye polishes are typically gel polishes, you’ll need a lamp to cure each layer, just like a regular gel manicure.
- Alcohol Wipes or Gel Cleanser: For prepping your nails and cleaning up any mistakes.
- Nail Files and Buffer: To shape and smooth your nails for a flawless canvas.
A Note on Polish Types
While “cat eye” polishes are the most common way to achieve the velvet nail look, some brands might offer polishes specifically branded as “velvet effect” or “magnetic.” The principle remains the same: finely milled magnetic particles that react to a magnet. Ensure you’re purchasing a polish that indicates it has these magnetic properties.
Step-by-Step: Crafting Your Chic Velvet Nails
Ready to bring this plush texture to your fingertips? Follow these easy steps for a salon-worthy velvet manicure right at home.
Step 1: Prepare Your Nails
Like any great manicure, the key to a long-lasting velvet design starts with proper nail preparation.
- Gently push back your cuticles.
- Shape your nails using a nail file.
- Lightly buff the surface of your nails with a buffer. This helps the polish adhere better.
- Wipe each nail with an alcohol wipe or gel cleanser to remove any dust or oils.
Step 2: Apply the Base Coat
Apply a thin, even layer of your gel base coat to each nail. Be sure to cap the free edge of your nail (painting the very tip) to prevent chipping. Cure the base coat under your UV/LED lamp according to the manufacturer’s instructions.
Step 3: Apply the First Layer of Cat Eye Polish
Now for the magic! Apply your chosen “cat eye” gel polish in a thin, even layer. Don’t cure this layer yet.
Step 4: Create the Velvet Effect
This is the fun part! While the polish is still wet, bring your magnet tool close to the nail. Hold it about 1-2 mm away from the surface. You’ll see the metallic particles move and swirl. Experiment with moving the magnet in different directions (horizontal, vertical, diagonal, circular) and holding it in place for a few seconds over different parts of the nail to achieve the desired gradient or pattern. Watch this demonstration video to get a feel for magnetic movement!
Step 5: Cure the Polish
Once you’re happy with the velvet effect, carefully cure the polish under your UV/LED lamp as directed by the polish brand.
Step 6: Apply a Second Layer (Optional but Recommended)
For a deeper color, more intense velvet effect, and better coverage, apply a second thin layer of the cat eye polish. Again, do not cure immediately.
Step 7: Recreate the Velvet Effect
Repeat Step 4. Bring your magnet tool close to the nail and create your desired pattern. Remember, the effect will be most pronounced on this wet layer.
Step 8: Cure Again
Cure this second layer under your UV/LED lamp.
Step 9: Apply the No-Wipe Top Coat
Apply a thin, even layer of your no-wipe gel top coat. Make sure to cap the free edge again. This step seals in the design and provides a protective, glossy finish without disturbing the magnetic particles.
Step 10: Final Cure
Cure the top coat under your UV/LED lamp, following the manufacturer’s recommended time.
Step 11: Clean Up
Once cured, the manicure is complete! There’s no sticky residue to wipe off since you’re using a no-wipe top coat. Admire your gorgeous, chic velvet nails!
Pro Tips for Flawless Velvet Nails
Want to take your velvet nail game to the next level? Nailerguy has a few insider tips to make your DIY manicures even more stunning and long-lasting.
- Work Quickly: The magnetic particles in cat eye polish start to settle as soon as you apply it. Have your magnet ready and work one nail at a time for the best control over the design.
- Don’t Let the Magnet Touch the Polish: Holding the magnet just a millimeter or two above the wet polish allows the particles to move freely and create the best effect. Touching the polish can smudge the design.
- Experiment with Magnet Placement: Try holding the magnet in different spots on the nail (center, corners) and moving it slowly to create unique swirls and gradients. For a gradient, hold the magnet towards the tip of the nail. For a more blended look, gently move it across the whole nail.
- Thin Coats are Key: Applying thick layers of polish can lead to uneven curing, smudging, or a less defined velvet effect. Stick to thin, even coats for best results.
- No-Wipe Top Coat is Non-Negotiable: For the classic plush velvet look, a no-wipe top coat is essential. A regular top coat with a sticky inhibition layer will dull the magnetic effect.
- Layering for Depth: If you want an even more dramatic velvet effect, you can apply a black or dark base color first, cure it, then apply the cat eye polish and the magnet. This provides a deeper base for the magnetic particles to work with.
- Consider Matte Top Coat for a Twist: While gloss is classic, try a matte no-wipe top coat over your cured velvet design for a totally different, sophisticated matte velvet look.
Velvet Nail Color Inspiration
The beauty of velvet nails is their versatility. They look stunning in almost any shade! Here are some popular color families and ideas to get your creativity flowing:
Dark & Moody
These shades are perfect for adding a mysterious, sophisticated vibe.
- Deep Emerald Green: Rich, luxurious, and oh-so-chic.
- Sapphire Blue: A royal hue that always makes a statement.
- Amethyst Purple: Mysterious and captivating.
- Blackest Black: The ultimate in dark glamour.
- Burgundy/Wine Red: Classic elegance with a hint of drama.
Bright & Bold
Don’t shy away from vibrant colors! Velvet can make them pop even more.
- Electric Blue: Futuristic and eye-catching.
- Hot Pink: Fun, flirty, and fabulous.
- Fiery Orange: Bold and attention-grabbing.
- Vibrant Teal: A tropical, energetic choice.
Soft & Subtle
For a more understated, everyday elegance, soft shades are perfect.
- Milky White/Cream: A soft, ethereal look.
- Blush Pink: Feminine and delicate.
- Soft Lavender: Dreamy and calming.
- Pale Grey: Modern and minimalist.
- Nude/Beige: Effortlessly chic and natural-looking.
Metallic Accents
Play with colors that have a strong metallic base for even more dramatic effects.
- Rose Gold: Romantic and trendy.
- Silver: Cool, crisp, and modern.
- Gold: Timeless glamour.
Troubleshooting Common Velvet Nail Issues
Even with the simplest techniques, sometimes things don’t go exactly as planned. Don’t worry, these common hiccups are usually easy to fix!
Issue: The velvet effect isn’t strong enough.
Possible Causes & Solutions:
- Polish not thick enough: Apply a slightly thicker (but still manageable) second coat of cat eye polish.
- Magnet too far away: Hold the magnet closer to the wet polish (1-2mm).
- Magnet not strong enough: Ensure you’re using a quality magnet tool designed for cat eye polish.
- Not enough magnetic particles: Some brands have more particles than others. Consider trying a different brand or using a dark base color underneath for more contrast.
Issue: The effect is smudged or uneven.
Possible Causes & Solutions:
- Magnet touched the polish: Always keep the magnet slightly above the nail surface. If smudged, gently try to reapply the magnet or carefully smooth it out before curing.
- Polish cured too soon: Ensure the polish with the magnet effect is fully cured without interruption.
- Uneven polish application: Apply thinner, more even coats.
Issue: The velvet finish is dull after top coat.
Possible Causes & Solutions:
- Used the wrong top coat: You MUST use a no-wipe gel top coat. Regular gel top coats leave a sticky residue that dulls the metallic finish.
- Top coat applied too thickly: A thick layer of top coat can sometimes mute the effect. Apply thinly and evenly.
- Incorrect curing time: Ensure you cure the top coat for the full recommended time under the lamp.
Issue: Polish is wrinkling or not curing properly.
Possible Causes & Solutions:
- Polish applied too thickly: Always apply thin coats. Thick polish blocks UV light from fully curing the layers beneath.
- Lamp not strong enough or old: Ensure your UV/LED lamp is functioning correctly and has sufficient wattage (typically 36W or higher for gel). Lamps can lose power over time.
- Curing time too short: Always follow the manufacturer’s instructions for both the polish and the lamp. Gel polish requires adequate curing time to harden fully.
Comparing Velvet Nails to Other Popular Finishes
Velvet nails offer a unique experience compared to other nail finishes. Understanding these differences can help you choose the perfect look for any occasion.
| Finish Type | Description | Key Characteristic | DIY Difficulty | Special Tools Required |
|---|---|---|---|---|
| Velvet (Cat Eye) | Creates a plush, soft-looking manicure with a shimmering, multidimensional effect that mimics velvet fabric. | Magnetic particle movement creating a gradient/swirling light reflection. | Beginner-Intermediate | Magnet tool, Cat Eye/Magnetic polish. |
| Glossy/High Shine | The standard, polished finish with a mirror-like reflection and bright sheen. | Smooth, light-reflecting surface. | Beginner | Standard base, color, and top coat. |
| Matte | Absorbs light, giving a flat, sophisticated, non-reflective finish. | Soft, velvety texture without shine. | Beginner | Matte top coat. |
| Chrome/Mirror | Achieves a hyper-reflective, metallic finish that looks like a perfect mirror. | Intense, uniform metallic sheen. | Intermediate-Advanced | Chrome powder, special base/top coats, often a brush. |
| Glitter | Nails covered in small, reflective particles of glitter, from subtle shimmer to chunky. | Sparkle and depth from embedded glitter. | Beginner | Glitter polish or loose glitter. |
As you can see, velvet nails stand out with their specialized magnetic technique that creates a distinct, plush visual. While glossy and matte are fundamental finishes, and chrome requires specific powders, velvet offers a unique mid-ground of textured elegance that’s surprisingly accessible.
The History and Evolution of Magnetic Polishes
Magnetic nail polish, the technology behind velvet nails, isn’t entirely new but has seen significant evolution in its formulation and application. The concept originated from traditional magnetic paints used in automotive and industrial applications, where magnetic powders create textured finishes. Nail polish manufacturers adapted this principle by incorporating fine metallic or ferrous particles into polish formulas.
Early iterations of magnetic polishes in the early 2000s were often rudimentary, producing a less refined effect. However, advancements in pigment technology and the widespread adoption of gel polish formulas have greatly improved the quality and aesthetic appeal. Today’s magnetic or “cat eye” polishes offer richer colors, finer particles for smoother effects, and a wider variety of magnet wand designs to create intricate patterns. The “velvet nail” trend is essentially a sophisticated evolution of the classic “cat eye” effect, focusing on the smooth, plush illusion that magnetic particles can create when artfully manipulated.
Beyond the Basic Swirl: Advanced Velvet Nail Techniques
Once you’ve mastered the basic velvet effect, there are fun ways to enhance your design or create even more intricate looks.
- Ombre Velvet: Create a gradient of color using two magnetic polishes or by placing the magnet strategically. For a smoother transition, you can use a fan brush or a clean sponge to gently blend the edges before curing.
- French Tip Velvet: Apply a classic French tip design using a non-magnetic polish. Once the tip is cured and top-coated (or if you’re using a matte base), apply a magnetic polish to the rest of the nail and create your velvet effect.
- Accent Nail Velvet: Make one or two nails velvet while keeping the others a solid glossy or matte color for a chic, minimalist look.
- Geometric Patterns: Use striping tape or stencils to create geometric shapes. Apply your magnetic polish, use the magnet to create the velvet effect in the open

