Absolutely! Velvet cat eye nails offer a stunning, multi-dimensional shimmer that’s surprisingly fun to achieve at home. Our guide breaks down everything you need, from magnets to polish, making this trendy look totally doable for beginners. Get ready to dazzle!
Dreaming of nails that catch the light with a mesmerizing, plush shimmer? Velvet cat eye nails are the latest obsession, and they look way more complicated than they are! This unique finish mimics the soft depths of velvet and the captivating gaze of a cat’s eye, creating a truly eye-catching manicure. If you’ve ever admired this look and thought, “There’s no way I can do that,” think again! At Nailerguy, we believe everyone can rock amazing nails. This guide is designed to be super simple, so even if you’re new to nail art, you’ll be creating gorgeous velvet cat eye effects in no time. Let’s dive in and uncover the secrets behind this popular trend!
What Exactly ARE Velvet Cat Eye Nails?
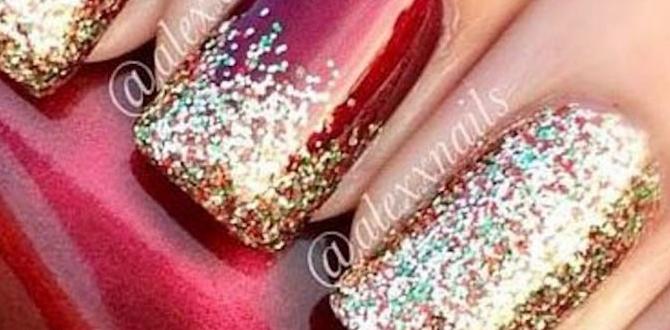
Velvet cat eye nails are a type of nail art that uses a special magnetic polish to create a soft, plush-looking effect on the nails. Unlike traditional cat eye polishes which often have a sharp, defined line, velvet cat eye polishes have a more diffused, dreamy shimmer. Imagine the luxurious feel and look of velvet fabric combined with the enchanting, shifting glow of a cat’s eye. It’s a beautiful illusion created by tiny magnetic particles within the polish and the magic of a special magnet tool. This trend brings depth and dimension, making your nails look incredibly sophisticated and chic.
Why You’ll Love Velvet Cat Eye Nails
This trend isn’t just about looking good; it’s about the whole experience and the gorgeous results. Here’s why velvet cat eye nails are a must-try:
- Unique & Eye-Catching: They stand out from the crowd with their depth and shimmer.
- Luxurious Finish: The “velvet” effect gives a plush, high-end feel to your manicure.
- Easy to Achieve: With the right tools and technique, it’s simpler than you might think!
- Versatile: Works beautifully with gel polish for long-lasting wear or even regular polish for practice.
- Endless Color Options: Available in a vast spectrum of colors to match any mood or outfit.
Your Essential Velvet Cat Eye Nail Toolkit
Don’t worry, you don’t need a professional salon setup for this! Here’s what you’ll need to create your own velvet cat eye masterpiece:
For Gel Polish Application:
- Velvet Cat Eye Gel Polish: This is the star! It contains special magnetic particles.
- Strong UV/LED Nail Lamp: Essential for curing gel polish.
- Gel Base Coat: Helps the color adhere and protects your natural nail.
- Gel Top Coat: Seals the polish and provides shine.
- Gel Cleanser/Alcohol Swabs: For wiping off the sticky inhibition layer after curing.
- Lint-Free Wipes: To avoid leaving fuzzy bits on your nails.
- Nail Prep Items: (Optional but recommended for longevity) Nail file, buffer, cuticle pusher.
For Regular Polish Application (for practice or a quick effect):
- Velvet Cat Eye Polish: Look for polishes specifically designed for this effect, often labeled “magnetic” or “cat eye.” You’ll still need a magnet.
- Magnet Wand or Tool: This is crucial! It usually has a strong magnet on the end that pulls the metallic particles into the cat eye effect.
- Base Coat: For longevity.
- Quick-Dry Top Coat: To seal and add shine.
The Magic Wand: Understanding the Magnet
The magnet is what brings the velvet cat eye to life! Most kits come with a simple wand that has a strong magnet at the tip. Some even have shaped ends or multiple magnets for unique patterns. The key is to bring the magnet close to the wet polish without touching it. The metal particles in the polish are attracted to the magnet, creating that signature diffused, shimmering line.
Tip: The closer the magnet is to the polish (without touching!), the more defined the effect will be. Experiment with distance and angles to see different looks.
Step-by-Step Guide to Creating Velvet Cat Eye Nails
Ready to create some magic? Follow these steps for stunning velvet cat eye nails. We’ll cover the gel polish method first, as it’s the most popular for this effect, followed by a quick primer for regular polish.
Gel Polish Method (Recommended for Longevity & Effect)
This method ensures a durable, high-shine finish that truly showcases the velvet cat eye effect. Make sure you’re in a well-lit area!
- Prep Your Nails: Start by cleaning your nails. Gently push back your cuticles using a cuticle pusher. If you want your gel to last longer, you can lightly buff the surface of your natural nails with a fine-grit buffer and clean them with a nail cleanser or alcohol to remove any oils. For a smoother canvas, shape your nails with a file.
- Apply Base Coat: Apply a thin, even layer of gel base coat to each nail. Cure this under your UV/LED lamp according to the lamp’s and the base coat’s instructions (usually 30-60 seconds). Don’t wipe off the sticky layer!
- Apply First Coat of Velvet Cat Eye Polish: Apply a moderately thick layer of your chosen velvet cat eye gel polish. This polish needs to be wet enough for the magnets to work their magic.
- The Magnetic Magic: Immediately after applying the polish to one nail, grab your magnet wand. Hold the magnet about 1-2 mm above the wet polish surface. You’ll see the metallic particles start to move and form the “cat eye” effect. Hold it for about 5-10 seconds. Experiment with the angle of the magnet to create the desired line or swirl. For a softer velvet effect, hold the magnet slightly further away. For a more defined line, bring it closer.
- Cure: Once you’re happy with the magnetic effect on that nail, quickly cure it under your UV/LED lamp according to the polish and lamp instructions. It’s crucial to cure promptly after magnetizing before the polish dries too much if you were using a regular polish, but with gel, the magnet stage happens before curing.
- Repeat for Other Nails: Work on one nail at a time, applying the polish, magnetizing, and then curing. This ensures the best effect for each nail.
- Apply Second Coat (Optional but Recommended): For deeper color and a more pronounced cat eye effect, apply a second coat of the velvet cat eye polish. Repeat steps 3-5 for each nail, ensuring you magnetize the polish before curing.
- Apply Top Coat: Once all nails are polished and cured, apply a layer of gel top coat. Make sure to cap the free edge (the tip of your nail) to prevent chipping. Cure the top coat according to the instructions.
- Wipe Off Inhibition Layer: After curing the top coat, there will be a sticky, uncured layer (the inhibition layer). Use a lint-free wipe soaked in gel cleanser or isopropyl alcohol to gently wipe away this layer from each nail. This reveals the beautiful, glossy finish!
- Admire Your Work: You’ve just created gorgeous velvet cat eye nails!
Regular Polish Method (Quick Guide for Practice)
While gel offers better results for this effect, you can get a feel for it with regular polish. Keep in mind the wear time and depth of color might be less intense.
- Prep and Base Coat: Apply a base coat and let it dry completely.
- Apply Color: Apply one or two coats of your velvet cat eye polish, letting each coat dry slightly but not completely.
- Magnetize: Before the polish dries, hold your magnet tool close to the wet polish (do not touch!) for 5-10 seconds to create the effect.
- Repeat & Dry: Repeat for all nails. Allow the polish to dry completely. This can take a while with regular polish!
- Top Coat: Apply a quick-dry top coat.
Troubleshooting Common Velvet Cat Eye Nail Issues
Even with the best intentions, sometimes things don’t go perfectly the first time. Here are some common hiccups and how to fix them:
| Problem | Possible Cause | Solution |
|---|---|---|
| The cat eye effect is weak or not visible. |
|
|
| The line is too sharp and not “velvety.” |
|
|
| Uneven color or patches. |
|
|
| Gel polish isn’t curing properly. |
|
|
| Chipping or peeling of polish. |
|
|
Choosing Your Perfect Velvet Cat Eye Color
The beauty of velvet cat eye nails is the sheer variety of colors available! From deep, mysterious hues to bright, playful shades, there’s a color to suit everyone. Here’s a guide to help you pick:
- Deep & Mysterious: Think deep purples, midnight blues, emerald greens, and rich burgundies. These colors showcase the depth of the velvet effect beautifully and are perfect for evening wear or adding a touch of drama.
- Earthy & Natural: Shades like warm browns, terracotta, olive greens, and muted greys offer a sophisticated, understated look. These are fantastic for everyday wear and look amazing with fall and winter outfits.
- Jewel Tones: Vibrant sapphires, rubies, amethysts – these shades pop with shimmer and add a luxurious, glamorous feel. Great for special occasions or when you want your nails to be the star!
- Pastels & Neons: Don’t shy away from lighter shades! Pastel pinks, blues, and lavenders can have a delicate, ethereal velvet glow. Bright neons can be surprisingly chic with this effect, offering a high-fashion, fun vibe.
Pro Tip: Consider your skin tone when choosing colors. Deeper, richer tones often complement warmer skin tones, while cooler, brighter tones can enhance cooler skin tones. However, the best color is always the one that makes YOU feel fabulous!
Making Your Velvet Cat Eye Nails Last
To keep your gorgeous velvet cat eye manicure looking pristine for as long as possible, especially with gel, here are some tips:
- Proper Prep is Key: As mentioned, ensuring your nails are clean, dry, and free of oils before applying gel is crucial for adhesion.
- Cure Thoroughly: Always follow the recommended curing times for your lamp and polish. Under-curing is a common cause of lifting and chipping.
- Seal the Deal: Make sure your top coat covers the entire nail, including the free edge. This seals in the color and protects it from wear and tear.
- Avoid Harsh Chemicals: Prolonged exposure to water, cleaning products, and harsh chemicals can break down the gel and reduce its lifespan. Wear gloves when doing household chores!
- Gentle Removal: When it’s time to remove the gel polish, use the proper methods (soaking with acetone or using an electric file carefully) rather than picking or peeling, which can damage your natural nails. For more on safe gel removal, check out resources from organizations like the U.S. Food & Drug Administration (FDA) regarding cosmetic product safety.
Frequently Asked Questions About Velvet Cat Eye Nails
Q: Do I need a special light for velvet cat eye gel polish?
A: Yes, if you are using velvet cat eye gel polish, you absolutely need a UV or LED nail lamp to cure (harden) the polish. Regular velvet cat eye polishes do not require a lamp and will air dry, but the gel versions provide a much longer-lasting and more intense effect.
Q: Can I use a regular nail magnet with gel polish?
A: Yes, you can use a magnet wand designed for regular cat eye polishes with velvet cat eye gel polishes. The effectiveness depends on the strength of the magnet and the quality of the gel polish itself.
Q: How long do velvet cat eye nails last?
A: When applied correctly using gel polish and a proper curing lamp, velvet cat eye gel nails can last anywhere from 2 to 3 weeks, sometimes even longer! Regular polishes will last only a few days to about a week.
Q: Is applying velvet cat eye polish difficult?
A: It’s easier than it looks! The most crucial step is using the magnet correctly on wet polish. A little practice, and you’ll master the technique. Following the steps precisely will make it very manageable, even for beginners.
Q: What is the difference between regular cat eye and velvet cat eye?
A: Regular cat eye polish typically creates a sharp, defined line of shimmer. Velvet cat eye polish, on the other hand, produces a softer, more diffused, and plush-looking shimmer effect, much like

