Vegan nail art is all about stunning designs using cruelty-free polish and tools. From simple dots to intricate patterns, you can achieve chic, ethical manicures at home. This guide breaks down essential designs and tips for gorgeous, guilt-free nails.
Dreaming of beautiful nails but worried about the ingredients? You’re not alone! Many of us want to express ourselves with fun nail art, but finding products that align with our values can feel like a puzzle. The good news is that vegan nail art is booming, making it easier than ever to get those Pinterest-worthy looks without compromising on ethics. Whether you’re a total beginner or looking to refresh your style, this guide is here to help. We’ll walk you through some genius, essential vegan nail art designs that are totally achievable. Get ready to unleash your inner nail artist!
What is Vegan Nail Art?
Vegan nail art simply means creating nail designs using products that are free from animal-derived ingredients and have not been tested on animals. In today’s beauty world, “cruelty-free” and “vegan” are terms that are becoming increasingly important to consumers. When we talk about vegan nail art, we’re focusing on polishes, topcoats, basecoats, nail art pens, brushes, and even nail stickers that meet these ethical standards.
This means checking labels carefully. Many brands are now proudly displaying vegan and cruelty-free certifications on their packaging, making it easier to shop consciously. The vast majority of nail polish formulas are already vegan, but it’s always good practice to double-check, especially for specialty polishes or treatments.
Why Choose Vegan Nail Products?
Choosing vegan nail products aligns with a compassionate lifestyle. It’s about making informed decisions that reduce harm to animals and support brands committed to ethical practices. Beyond the ethical reasons, many vegan formulas are also formulated without harsh chemicals sometimes found in traditional polishes, which can be better for your nail health.
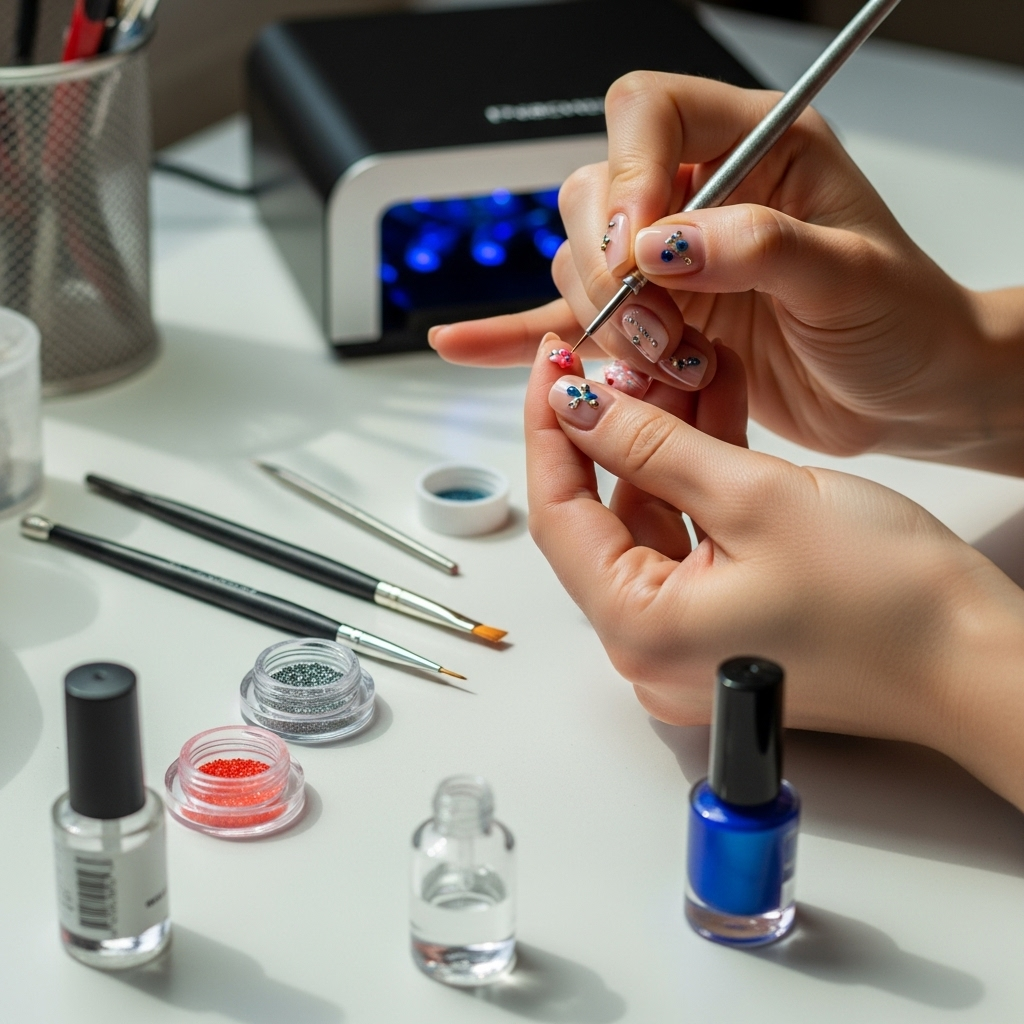
Essential Vegan Nail Art Tools for Beginners
Getting started with vegan nail art doesn’t require a pro kit! A few essential tools can help you create a variety of designs. Focusing on quality, cruelty-free options will ensure your nail art journey is both ethical and enjoyable.
Must-Have Vegan Nail Art Tools:
- Vegan Nail Polish: Obviously essential! Look for brands that explicitly state they are vegan and cruelty-free.
- Base Coat: Protects your natural nails and helps polish adhere better. Vegan formulas are readily available.
- Top Coat: Seals your design, adds shine, and extends wear. Cruelty-free top coats are key.
- Dotting Tools: These have small metal balls at the end of handles, perfect for creating dots, flowers, and swirls. They come in various sizes.
- Thin Nail Art Brushes: Finer brushes are great for drawing lines, details, and creating intricate patterns. Look for brushes with synthetic bristles.
- Nail Art Stickers/Decals: A super easy way to add instant detail without freehand skills. Ensure the adhesive is also vegan-friendly if specified by the brand.
- Cuticle Pusher/Orange Stick: For cleaning up edges and pushing back cuticles before you start. While not a “nail art” tool, a clean canvas is crucial!
- Nail Polish Remover: Opt for an acetone-free, vegan formula to remove polish without drying out your nails too much after your art session.
| Tool | Best For | Vegan Tip |
| :————— | :——————————————- | :———————————————— |
| Dotting Tools | Dots, flowers, patterns, simple designs | Most are metal and plastic, inherently vegan. |
| Thin Brushes | Fine lines, details, intricate patterns | Ensure synthetic bristles, not animal hair. |
| Vegan Polishes | Base color, art details, accent nails | Crucial for ethical manicures. Look for labels. |
| Nail Art Stickers| Quick, precise designs, accents | Check brand ethics and ingredient lists. |
Where to Find Vegan Nail Products:
Many mainstream beauty retailers now carry vegan nail polish brands. Online stores are also fantastic resources! Websites like Ulta, Sephora, and even Amazon have filters or sections dedicated to vegan and cruelty-free beauty products. Always check the brand’s official website if you’re unsure. For example, Pacifica Beauty and Ella+Mila are well-known brands offering a wide range of vegan nail polishes.
Genius Vegan Nail Art Designs for Beginners
Ready to get creative? These designs are perfect for anyone just starting their vegan nail art journey. They are simple, stylish, and use the basic tools we just discussed.
1. The Classic Polka Dot
Polka dots are a timeless design that’s surprisingly easy to master. They add a playful touch to any manicure.
How to Create Vegan Polka Dots:
- Prep your nails: Apply a vegan base coat and let it dry completely. Then, apply your chosen base color (another vegan polish!) and let it dry thoroughly.
- Load your dotting tool: Dip the smallest ball of your dotting tool into a contrasting vegan polish color. You don’t need a lot of polish on the tip.
- Start dotting: Gently press the loaded dotting tool onto your nail to create a dot. Start with one nail and practice until you get the hang of it.
- Vary the size and spacing: Use different sized dotting tools for varied dot sizes. Play with the spacing between dots – tight and uniform for a classic look, or more random for a whimsical feel.
- Add more colors (optional): Once you’re comfortable, try using multiple colors on different nails or even mixing colors on one nail!
- Seal the deal: Once all your polish is completely dry, apply a vegan top coat to seal your design and add shine.
Pro Tip: If you don’t have dotting tools, you can carefully use the tip of a toothpick or the end of a bobby pin! Just be sure to wipe them clean between dots.
2. Simple Striped Accent Nail
Lines add a sophisticated touch, and an accent nail is a great way to try it without committing your whole hand to a more complex design.
How to Create Vegan Stripes:
- Base and dry: Apply your vegan base coat, then your base color polish. Let it dry completely.
- Choose your stripe color: Select a contrasting vegan polish for your stripes.
- Load your brush: Dip a thin nail art brush into the stripe color. Wipe off excess polish on the edge of the bottle to avoid globs.
- Draw the lines: Gently draw a straight line across your accent nail. You can go vertically, horizontally, or diagonally.
- Add more lines: Continue adding lines, leaving a small gap between them. You can make them uniform or vary the spacing.
- Clean up and seal: If you make a mistake, you can carefully clean it up with a small brush dipped in nail polish remover. Once everything is dry, apply a vegan top coat.
External Resource: For tips on achieving clean lines and even application, the National Nail Technicians Association often shares helpful techniques, which can be adapted for DIY use.
Variations: Try French tips with thin stripes, or create a “racing stripe” effect!
3. Minimalist Half-Moon Mani
This chic and modern design is incredibly simple yet makes a statement. It’s a great way to use two complementary vegan polish colors.
How to Create Vegan Half-Moons:
- Prep and base: Apply vegan base coat and your first color polish to all nails. Let dry.
- Apply concealer or tape: For a clean edge, you can use a small brush dipped in concealer or liquid latex around the cuticle area. Alternatively, use nail guide stickers cut in half-circles. This is optional but helps with precision.
- Paint the moon: Using a small, thin brush, carefully paint a half-moon shape along your cuticle line with your second vegan polish color.
- Clean and layer: Clean up any wobbly edges with your cleanup brush. Let the first color dry. Then, you can apply a second coat of the moon color for opacity if needed.
- Seal it: Once completely dry, apply a nourishing vegan top coat.
4. Glitter Gradient (Ombre)
This is an easy way to add sparkle without full-on glitter polish, which can sometimes be tricky to remove. It’s also very forgiving!
How to Create a Vegan Glitter Gradient:
- Base color: Apply your vegan base coat and one or two coats of your desired base color polish. Let it dry completely.
- Load up the glitter: Get a vegan polish with fine or chunky glitter.
- Apply to the tip: Using the brush from the glitter polish, start applying it to the tip of your nail.
- Build the color: Gently dab and blend the glitter down towards the middle of your nail. You want the most glitter at the tip and less as you move down, creating a gradient effect.
- Second coat (optional): For a more intense glitter look, apply a second coat, focusing on the tips and blending slightly less downwards.
- Seal and protect: Once the glitter is completely dry, carefully apply a vegan top coat. You might need two layers of top coat to smooth out the glitter texture.
Quick Tip: A clean makeup sponge can also be used to dab the glitter onto the nail for a softer blend.
5. The “Abstract Splash”
This design is all about imperfection and artistic flair. It’s perfect for those who love a more organic, freeform look.
How to Create an Abstract Splash:
- Foundation: Apply your vegan base coat and let it. Then, apply your desired background color (can be nude, white, black, or even a subtle pastel) and let it dry thoroughly.
- Choose your splash colors: Select 2-3 contrasting vegan polish colors that you love together.
- Load your brush: Take a thin nail art brush or even a simple toothpick. Dip it into one of your “splash” colors.
- Create splashes: Make small, irregular dabs, splatters, or short, broken lines across a portion of your nail. Don’t overthink it – the messier, the better for this style!
- Repeat with other colors: Layer your other colors over or around the first set of splashes.
- Final touch: Once everything is dry, add a vegan top coat.
6. Sticker Sophistication
Nail stickers (also called nail wraps or decals) are a beginner’s best friend. They offer instant, professional-looking designs with minimal effort.
How to Use Vegan Nail Stickers:
- Prep your nails: Apply vegan base coat and your base color. Ensure nails are completely dry before applying stickers.
- Select your sticker: Choose a sticker and carefully peel it off its backing.
- Position and press: Place the sticker onto your nail. Smooth it down firmly from the center outwards, ensuring there are no air bubbles.
- Trim to fit: Gently file any excess sticker material over the edge of your nail. You can also carefully trim with small scissors.
- Seal: Apply a generous layer of vegan top coat to seal the sticker and protect your design.
Brand Spotlight: Many brands like Born Pretty offer a huge variety of nail stickers, and they often have vegan and cruelty-free options. Always check the product description!
Taking Your Vegan Nail Art Further
Once you’ve mastered the basics, you might be wondering how to elevate your vegan nail art game. Here are a few more advanced techniques and design ideas that still keep cruelty-free principles in mind.
1. Vegan French Tips with a Twist
The classic French manicure gets an upgrade! Instead of stark white, try colorful tips with vegan polishes.
How to Create Fun Vegan French Tips:
- Base and guide: Apply your vegan base and base color. Once dry, use nail guide stickers to create a sharp line where your tips will begin.
- Color the tips: Use a thin brush and a vibrant vegan polish color to paint over the guide.
- Remove guide and seal: Carefully remove the guide sticker while the polish is still slightly wet for the cleanest line. Let dry completely, then apply a vegan top coat.
2. Geometric Patterns
Using tape or fine brushes, you can create sharp, modern geometric shapes on your nails.
Achieving Geometric Designs:
- Base: Apply your vegan base and base color. Let it dry completely.
- Apply tape: For clean lines, use specialized nail art tape. Apply strips of tape across your nail in the shapes you want.
- Paint over tape: Paint over the taped sections with a contrasting vegan color.
- Remove tape: While the new polish is still slightly wet, carefully peel off the tape.
- Detailing: Use a thin brush for any connecting lines or small details.
- Seal: Apply a vegan top coat once everything is dry.
3. Negative Space Designs
This trendy style incorporates the bare nail into the design, creating a sophisticated and modern look.
Creating Negative Space Art:
- Base coat only: For some designs, you might just need a vegan base coat and then proceed with drawing or placing elements.
- Partial coverage: Apply a vegan polish just to certain sections of the nail, leaving other parts bare.
- Use tape: Similar to geometric designs, tape can create clean lines between polished and unpolished areas.
- Combine with other elements: Add small dots, lines, or even a few subtle stickers over the negative space or the painted areas.
- Seal: A vegan top coat will protect the design and add shine.
4. Embossed or 3D Effects (with vegan materials)
While some “3D” applications might use animal-derived glues or materials, many newer “nail charms” and embellishments are vegan! Look for acrylic rhinestones, metal charms, and glitters explicitly labeled as vegan.
Applying Vegan 3D Embellishments:
- Base and design: Apply your vegan base color polish and let it dry.
- Placement: Use a dotting tool or a fine brush dipped in a thick vegan top coat or a specialized nail art glue to pick up and place your vegan embellishments.
- Secure: Gently press down on the embellishment to ensure it adheres well.
- Seal carefully: Apply a vegan top coat around the embellishments, being careful not to cover them entirely if they are meant to stand out.
Important Note: Always check the ingredient list and brand ethics for any nail art embellishments you plan to use, as not all decorative items are automatically vegan or cruelty-free.
Caring for Your Vegan Manicure
Keeping your beautiful vegan nail art looking its best involves a little extra care. These tips will help your designs last longer and your nails stay healthy.
Nail Pre-Treatment:
- Start with clean nails.
- Always use a vegan base coat—it protects your nails from staining and helps polish grip.
- Ensure your base color polish is completely dry before adding any art. This prevents smudging.
During Application:
- Work in thin coats for both base color and art. Thicker coats take longer to dry and are more prone to damage.
- Let each layer dry sufficiently before adding the next. Patience is key!
- Apply your vegan top coat generously once your art is bone dry. This seals everything in and adds high shine.
Maintenance:
- Avoid using your nails as tools (e.g., to scrape or pry).
- Wear gloves when doing chores, especially washing dishes, to protect your polish from harsh chemicals and water.
- Reapply a layer of vegan top coat every 2-3 days to refresh the shine and help prevent chipping.
Removal:
- Use a high-quality, acetone-free vegan nail polish remover.
- Soak cotton pads, place them on your nails, and wrap with foil for a few minutes to loosen the polish.
- Gently wipe away the polish. Avoid harsh scrubbing.
- Follow up with a nourishing vegan cuticle oil and hand cream to keep your nails and skin hydrated after removal.
Maintaining your nails with vegan-friendly products ensures your beautiful art not only looks good but also supports overall nail health and your ethical choices.