Vampire nail designs are your perfect spooky accessory! From deep reds and blacks to gothic accents, these looks are surprisingly easy to achieve, letting you embrace a bit of darkness with confidence and killer style.
Ready to dive into the captivating world of vampire nails? It’s that time of year (or any time, really!) when a touch of gothic glamour is totally in vogue. But if you’ve scrolled through endless images and thought, “That looks too complicated!” – take a breath! You absolutely can rock these spooky-chic looks yourself. We’re going to demystify vampire nail designs, making them fun and totally achievable, even if you’re just starting out with nail art.
Forget those intimidating, overly complex tutorials. We’re talking about stylish, striking nails that tell a story. Think deep, mysterious colors, elegant accents, and that undeniable allure of the night. Whether you’re prepping for Halloween or just love a bit of dark romance on your fingertips, there’s a vampire nail design waiting for you. Let’s explore how to unleash your inner creature of the night with some essential inspiration and simple tips!
Frequently Asked Questions About Vampire Nail Designs
What exactly are “vampire nail designs”?
Vampire nail designs are manicures that evoke the mysterious, gothic, and often glamorous aesthetic associated with vampires. This typically involves dark color palettes like deep reds, blacks, purples, and grays, often combined with elements like sharp shapes, metallic accents, glitter, or thematic symbols like bats or fangs.
Are vampire nail designs difficult to do for beginners?
Not at all! While some advanced designs can be intricate, many vampire nail looks are surprisingly beginner-friendly. Simple color blocking, adding a touch of glitter, or using nail stickers can achieve a fantastic vampire vibe without requiring advanced artistic skills. We’ll cover some easy methods!
What are the most common colors used in vampire nail designs?
The most popular colors are rich, deep shades. Think blood-red, midnight black, dark plum, deep burgundy, charcoal gray, and even shadowy emerald green or sapphire blue. Metallics like silver, gold, or even a gunmetal shade also work beautifully as accents.
Do I need special nail art tools for vampire nail designs?
For basic designs, standard nail polish, a top coat, and maybe a dotting tool or a fine-tipped brush are sufficient. For more detailed elements like intricate lines or stencils, specialized nail art brushes, dotting tools, or stamping plates can be helpful, but they aren’t strictly necessary to start.
How can I make my vampire nail designs last longer?
Proper nail preparation is key! Ensure your nails are clean, dry, and free of oils before applying polish. Use a good quality base coat, apply thin, even layers of color, and always finish with a durable, chip-resistant top coat. Reapplying top coat every couple of days can also extend the life of your manicure.
Can I incorporate glitter into vampire nail designs?
Absolutely! Glitter is a fantastic way to add sparkle and dimension to vampire nails. You can use a full glitter polish, apply glitter only on accent nails, create a glitter gradient, or even embed chunky glitter for a dramatic effect. Dark or metallic glitters often work best.
Where can I find inspiration for vampire nail art?
Inspiration is everywhere! Pinterest, Instagram (search #vampirenails, #gothicnails, #darknails), beauty blogs, and even movie costumes can offer amazing ideas. Look for color combinations, textures, and shapes that speak to you.
Unleash Your Inner Darkness: A Beginner’s Guide to Vampire Nail Designs
As the leaves turn and the air gets a little crisp, our thoughts often drift towards the allure of the spooky season. But who says you have to wait for a specific holiday to embrace a bit of gothic charm? Vampire nail designs are timeless, offering a sophisticated edge that can elevate any look. Whether you’re attending a Halloween party, a themed event, or just feel like adding a touch of mystery to your everyday style, these designs are your secret weapon. Think deep, luxurious colors, sharp lines, and a hint of undeniable drama. Ready to transform your nails into works of art worthy of a night owl? Let’s get started!
The Essence of Vampire Chic: Colors, Textures, and Motifs
What truly defines a “vampire nail design”? It’s all about capturing that captivating blend of dark elegance, mystery, and a hint of danger. This aesthetic isn’t confined to just one look; it’s a mood, a vibe, and a color story. Mastering this style often comes down to a few key elements:
- The Color Palette: The foundation of any great vampire nail design is its color scheme. Think rich, deep, and often brooding tones.
- The Shape and Lines: Sharpness and structure are often key. Think pointed tips or clean, defined lines.
- The Embellishments: Subtle or dramatic, these additions elevate the design from simple polish to a statement piece.
- The Finish: Matte, glossy, or velvety – the finish plays a crucial role in the overall mood.
The Unholy Trinity: Red, Black, and Beyond
When you think of vampires, certain colors immediately spring to mind. These are the absolute staples for any vampire-inspired manicure:
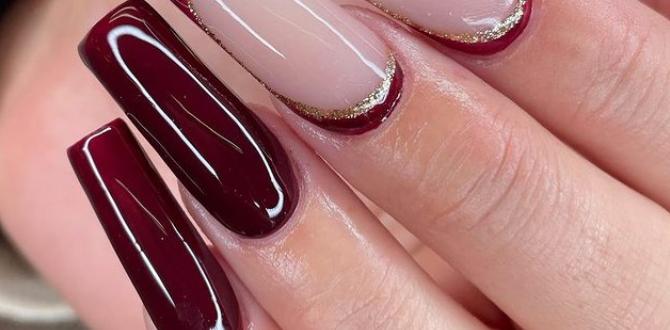
- Blood Red: From deep crimson to rich burgundy and dark cherry, this is the quintessential vampire hue. It speaks of passion, danger, and ancient allure.
- Midnight Black: The ultimate symbol of mystery and the night, black polish forms the dramatic backdrop for many gothic designs. It’s sleek, powerful, and always chic.
- Deep Purples and Plums: Think of the twilight sky or the velvety darkness of a mysterious cloak. These shades add a touch of regal mystery.
- Charcoal Gray and Slate: For a subtler, more sophisticated gothic feel, these muted tones offer a chic alternative to pure black.
- Shadowy Emeralds and Sapphires: Occasionally, deep jewel tones can be incorporated to represent the glint of expensive jewels or the dark depths of a haunted forest.
Sharpen Your Look: The Power of Shape
Vampire designs often play with sharp, defined shapes to echo the iconic imagery associated with these creatures. Consider these popular choices:
- Stiletto/Almond Shape: Longer nails filed into a sharp point (stiletto) or a softer, rounded point (almond) are inherently dramatic and elegant, perfectly framing darker colors.
- Sharp French Tips: Instead of a soft white curve, opt for sharp, geometric French tips in contrasting colors (like black on red, or silver on black).
- Geometric Accents: Use fine lines, triangles, or sharp angles as design elements on a solid base color.
The Devil is in the Details: Accents and Embellishments
These finishing touches can transform a simple manicure into a masterpiece:
- Metallic Sheens: Silver, gold, gunmetal, or even deep bronze accents—think fine glitter lines, metallic polish accents, or small stud charms—add a touch of gothic opulence.
- Glitter and Shimmer: From subtle holographic glitters that mimic moonlight to chunky, dark glitters, adding sparkle can enhance the mystery.
- Matte Finishes: A matte top coat can give your dark colors a velvety, sophisticated depth that is incredibly chic.
- Themed Motifs: Small, subtle details like tiny bat decals, delicate web patterns, or even a single faux fang shape on an accent nail can cement the vampire theme.
Effortless Elegance: Vampire Nail Designs for Beginners
Don’t let intricate designs intimidate you! You can achieve a stunning vampire-inspired look with minimal effort and basic tools. The key is to focus on strong color combinations and simple, impactful elements. Here are some foolproof ideas:
1. The Classic Blood-Red Manicure
Sometimes, simplicity is the ultimate statement. A perfectly applied, opaque blood-red polish is inherently vampiric and utterly chic.
- Prep: Ensure nails are clean, filed to your desired shape (almond or squoval work well), and buffed smooth. Apply a good quality base coat.
- Color: Apply two thin coats of a rich, deep red nail polish. Allow each coat to dry slightly before applying the next.
- Seal: Finish with a high-shine top coat for a glossy, luxurious finish. For a moodier vibe, opt for a matte top coat.
Why it works: This look is sophisticated, powerful, and requires no artistic skill beyond careful application.
2. The Midnight Black French Manicure (with a Twist!)
This is a refined take on a classic. Instead of white tips, we’re going dark and mysterious.
- Prep: Apply a base coat. Paint all nails with a sophisticated charcoal gray or deep plum polish. Let dry completely.
- The “Frenches”: Using a fine-tipped brush or a nail art pen, carefully paint sharp, clean lines of black polish across the tips of your nails. Aim for a crisp edge.
- Optional Accent: On one accent nail (like your ring finger), add a tiny silver or dark red stud at the base of the nail where the colors meet.
- Seal: Apply a clear top coat, being careful not to smudge your black tips.
Why it works: It’s a modern, darker take on a familiar style that looks incredibly put-together.
3. The Two-Tone Gothic Gradient
A smooth gradient can look incredibly high-end, and when done in dark colors, it’s pure vampire allure.
- Prep: Apply a base coat. Paint all nails with your lightest dark color – perhaps a deep purple or dark gray. Let dry.
- Create Gradient: Apply a makeup sponge (a small piece will do) with alternating stripes of your first dark color and a darker shade (e.g., purple and black, or gray and black).
- Dab and Blend: Gently dab the sponge onto the nail, starting from the tip and working down. You might need a few layers to build intensity. Use a clean brush dipped in nail polish remover to clean up any mess around the cuticles.
- Seal: Apply a shimmering or high-gloss top coat to meld the colors and add depth.
Why it works: The blend of colors creates a smoky, mysterious effect that’s visually striking.
4. The Minimalist Dark Accent Nail
This is perfect if you love a subtle nod to the gothic. It’s chic, modern, and incredibly easy.
- Prep: Apply a base coat. Paint all your nails with a beautiful, deep red or rich plum polish.
- The Accent: Once the base color is dry, choose one nail (typically the ring finger). Using a fine nail art brush and black polish, paint a simple, sharp V-shape or a thin line across the tip or the base of the nail.
- Optional Sparkle: Add a tiny dot of black glitter polish right where the lines meet.
- Seal: Apply a clear top coat to all nails.
Why it works: It’s understated elegance with just a hint of dark drama.
5. Velvet Matte Mystery
Matte finishes have a unique, velvety depth that is perfect for dark, moody shades. Embracing a full matte manicure is incredibly chic and sophisticated.
- Prep: Apply a base coat. Paint your nails with your chosen dark color(s) – black, deep burgundy, or midnight blue are excellent choices. Ensure they are completely dry.
- Matte Magic: Apply a matte top coat evenly over each nail. Be careful not to over-brush, as this can sometimes reactivate the polish and cause streaks.
- Add Texture (Optional): For an extra touch, you could add a small, glossy accent (like a single tiny dot or a fine line) in the same color or a contrasting metallic over the matte finish.
Why it works: The lack of shine creates a sophisticated, luxurious, and subtly eerie effect.
Tools of the Trade: Essential Supplies for Your Vampire Manicure Toolkit
You don’t need a professional salon in your bathroom to create fabulous vampire nail designs! Most of these looks rely on standard nail care items, with just a few optional extras for added flair. Here’s a rundown of what you might need, from basic to slightly more advanced:
| Tool/Product | Purpose | Beginner Friendly? |
|---|---|---|
| Nail File & Buffer | Shaping nails and smoothing the surface for polish adhesion. | Essential |
| Base Coat | Protects natural nails and helps polish adhere better. | Essential |
| Top Coat (Glossy & Matte) | Seals polish, adds shine (glossy) or a velvety finish (matte), and prevents chipping. | Essential |
| Dark Nail Polishes | Your core color palette: reds, blacks, purples, grays. | Essential |
| Fine-Tipped Nail Art Brush | For drawing thin lines, small details, or creating sharp French tips. | Helpful for more detailed designs |
| Dotting Tool | Creating dots of various sizes, small circles, or even flower petals. | Helpful for simple accents |
| Makeup Sponge (mini) | For creating smooth color gradients (ombre effect). | Helpful for gradients |
| Nail Polish Remover & Cotton Swabs/Pads | Essential for cleaning up mistakes around cuticles and between color changes. | Essential |
| Liquid Latex or Peel-Off Base Coat | Optional, but excellent for protecting cuticles when doing intricate designs or glitter application. | Nice-to-have for less mess |
| Nail Stickers/Decals (optional) | Pre-made designs like bats, cobwebs, or stars for quick, easy embellishments. | Great for beginners wanting instant detail |
| Small Gems or Studs (optional) | For adding 3D accents and texture. | Optional for advanced flair |
Step-by-Step Guide: Crafting a More Detailed Vampire Nail Design
Ready to try something a little more intricate? Let’s walk through creating a popular vampire-inspired look: the Deep Red with Black Geometric Accents.
Materials You’ll Need:
- Base Coat
- Deep Red Nail Polish
- Black Nail Polish
- Fine-Tipped Nail Art Brush (or a nail art pen)
- Top Coat (Glossy recommended for this look)
- Nail Polish Remover & Cotton Swabs
- Optional: Small silver or black studs
The Process:
- Nail Prep: Start with clean, dry nails. File them to your preferred shape – almond or stiletto will enhance the dramatic effect. Gently buff the surface to remove any shine, which helps polish adhere better. Apply a thin, even layer of your chosen base coat and let it dry completely. This step is crucial for stain prevention, especially with dark polishes.
- Base Color Application: Apply your first coat of deep red


