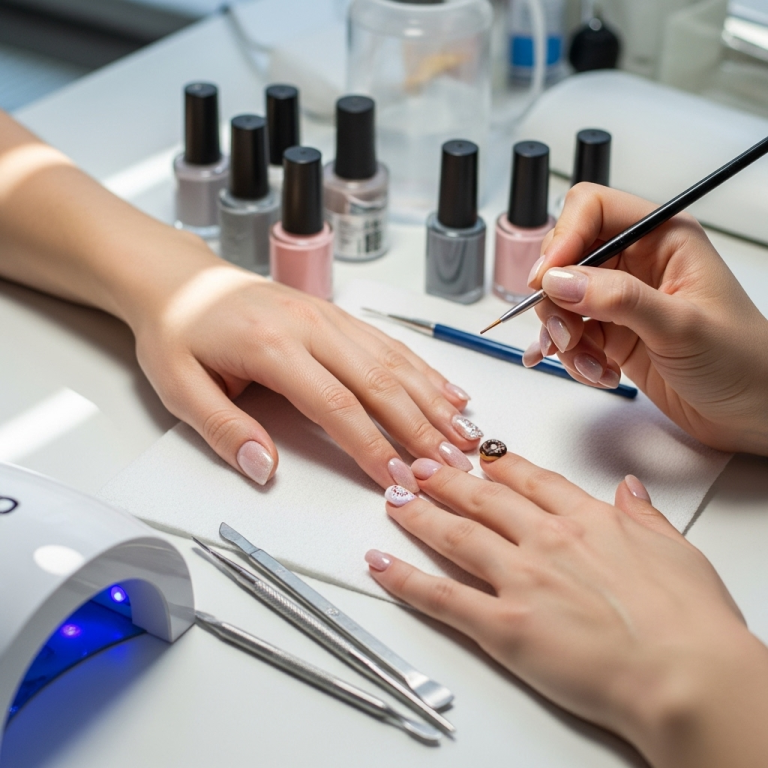
Valentine’s Negative Space Nails: Stunning & Essential Manicure Looks for Everyone! Learn how to create chic, modern Valentine’s Day nail art using the sophisticated negative space technique. Perfect for beginners, these designs are easy, stylish, and effortlessly romantic.
Love is in the air, and so are beautiful nails! Valentine’s Day is the perfect excuse to show off your creative side, but sometimes intricate nail art can feel daunting. You might look at stunning designs and think, “There’s no way I can do that!” But what if we told you there’s a super stylish, easier way to achieve a romantic vibe? Negative space nails are a gorgeous trend that leaves parts of your natural nail visible, making designs pop and feel incredibly chic. They’re surprisingly simple to create and are perfect for a subtle nod to the holiday. Get ready to fall in love with your nails all over again, with designs that are as easy to achieve as they are beautiful. We’re going to break down everything you need to know to create your own stunning Valentine’s look!
Why Negative Space is Perfect for Valentine’s Nails
Valentine’s Day is a time for hearts, pinks, reds, and all things love. But this year, let’s add a touch of modern elegance with negative space nails! This trend is fantastic because it’s not overly complicated, yet it looks incredibly sophisticated. Think of seeing glimpses of your natural nail through the design – that’s negative space! It adds depth and makes the colors you do apply stand out even more. It’s also super versatile. You can go bold with deep reds, keep it sweet with soft pinks, or even use metallics like gold or rose gold. Because it’s less about covering the entire nail, you often need fewer coats of polish, and touch-ups are a breeze. Plus, it feels so fresh and contemporary, moving away from the typical all-over glitter or opaque designs. Ready to give your nails a romantic yet minimalist makeover?
What is Negative Space Nail Art?
Negative space nail art means leaving intentional bare areas on your nails where the natural nail or a sheer base coat is visible. Instead of filling the entire nail with color, you use polish to create shapes, lines, or patterns that contrast with the exposed parts of your nail. Think of it like a sketch where the white of the paper is part of the drawing itself. This technique creates visual interest and a modern, airy feel.
Benefits of Negative Space for Valentine’s Day
Chic & Modern: It’s a sophisticated take on traditional Valentine’s nail art.
Easy to Achieve: Requires less precision than fully opaque designs, making it beginner-friendly.
Versatile: Works with various colors, from classic reds and pinks to metallics and even black.
Low Maintenance: Often requires fewer coats and can look good even as it grows out slightly.
Subtle Romance: Perfect for those who want a festive touch without being too over-the-top.
Essential Tools for Your Negative Space Manicure
Gathering the right tools makes all the difference in creating a salon-worthy look at home. Don’t worry, you probably have many of these already! For negative space nails, we want precision and neatness.
Here’s what you’ll need:
Nail File & Buffer: To shape your nails and create a smooth surface.
Cuticle Pusher & Oil: For neat cuticles, which really make designs pop.
Base Coat: Essential for protecting your natural nail and helping polish adhere.
Top Coat: To seal your design and add shine.
Nail Polish Colors: Choose your Valentine’s shades! Think reds, pinks, white, black, gold, or rose gold.
Thin Nail Art Brush or Detailer Brush: This is your best friend for drawing lines and small shapes. You can find these at most beauty supply stores.
Dotting Tool (Optional): Great for perfect little dots or creating small heart shapes.
Rubbing Alcohol or Nail Polish Remover: For cleaning brushes and fixing mistakes.
Cotton Pads/Balls: For cleaning and removing polish.
Paper Towel or Palette: To wipe excess polish off your brush.
Let’s look at some of these tools more closely. A good quality thin nail art brush allows for delicate lines and intricate details that are key to negative space designs. For instance, when creating fine lines for hearts or geometric patterns, a brush with fine synthetic bristles will give you the control you need. The Ulta Beauty Tools Nail Art Brushes offer a range to experiment with for various designs.
Simple Steps to Stunning Valentine’s Negative Space Nails
Creating these looks is easier than you think! We’ll walk through the basic process, and then look at some specific design ideas. The beauty of negative space is its forgiving nature.
The Basic Technique
1. Prep Your Nails: Start by filing your nails into your desired shape. Gently push back your cuticles and apply a dab of cuticle oil. Buff your nails lightly to create a smooth canvas.
2. Apply Base Coat: Apply one thin coat of your favorite clear base coat. Let it dry completely. This protects your nails and gives polish something to stick to.
3. Apply Color (Strategically): This is where negative space comes in. You won’t always be painting the whole nail!
Option A (Partial Color): Apply color only to a section of your nail (e.g., a crescent moon at the tip, a stripe, or a geometric shape).
Option B (Outline): Use a thin brush and polish to outline your nail shape, leave a French tip, or draw a design, leaving the rest bare.
Option C (Cut-Outs): Paint a section of the nail, then use a very fine brush and a contrasting color (or just a clean brush with remover) to “carve out” shapes from the wet polish. This is slightly more advanced but yields amazing results.
4. Build Your Design: Add more elements as desired. This could be dots, lines, small hearts, or contrasting colors. Remember to let each layer dry slightly to prevent smudging. For very fine lines, a steady hand and a paper towel to wipe excess polish off your brush are key.
5. Let It Dry: Ensure your designs are completely dry before moving to the next step. This is super important to avoid smearing!
6. Apply Top Coat: Once everything is dry, apply a generous layer of clear top coat. This seals your artwork and gives it a beautiful shine that lasts.
Design Ideas to Spark Your Creativity
Now for the fun part! Let’s translate these techniques into gorgeous Valentine’s looks.
1. The Classic Half-Moon
This is a super easy and chic design.
How-To:
1. Apply your base coat.
2. Using your chosen Valentine’s polish (e.g., a classic red or a soft pink), paint a perfect half-moon shape at the base of your nail, along the cuticle line. You can use a fine brush or even a small dotting tool dipped in polish for this.
3. Let it dry.
4. Apply your top coat.
Tip: For an even cleaner line, use a nail guide sticker or tape! Place it where you want the color to stop, paint above it, and then carefully remove the sticker when the polish is semi-dry.
2. The Sweet Heart Outline
A delicate heart is always romantic!
How-To:
1. Prep and base coat.
2. Using a fine nail art brush and a red or pink polish, carefully paint a small outline of a heart on each nail. Aim for the center of the nail or near the tip.
3. Alternatively, paint two small dots close together, then carefully draw two small lines from each dot to meet at a point at the bottom and curve up to form the top halves of the heart.
4. Let dry, then top coat.
Tip: Practice drawing hearts on a piece of paper first to get the shape right.
3. The Modern French Tip with a Twist
Elevate the classic French manicure.
How-To:
1. Prep and base coat.
2. Instead of a full white tip, use a fine brush and red or pink polish to paint just an outline of the tip. Or, create a thin, angled line across the tip.
3. Another version: Paint a thin horizontal line in the middle of the nail, leaving the top and bottom sections bare.
4. Dry and top coat.
4. Geometric Love
Lines and shapes are super trendy and work wonderfully with negative space.
How-To:
1. Prep and base coat.
2. Use a fine brush and your chosen polish to paint simple geometric shapes or lines on your nails. Think a single diagonal line, a triangle, or even a simple “X” across the nail.
3. You can also create “cut-out” effects by painting a portion of the nail and then using a thin brush dipped in nail polish remover to “draw” a shape within the wet polish.
4. Dry and top coat.
5. The Peek-a-Boo Accent
This is a great way to add a pop of color or shimmer.
How-To:
1. Start with a sheer nude or pink base coat. Let it dry.
2. On one or two accent nails, use a fine brush to paint a small shape (like a heart or a simple swirl) in a contrasting color (e.g., bright red, rose gold glitter) on top of the sheer base.
3. The rest of the nail remains see-through.
4. Dry and top coat.
Table: Negative Space Valentine’s Design Ideas at a Glance
Here’s a quick reference for some of our favorite Valentine’s negative space looks:
| Design Idea | Description | Ease (1-5) | Key Colors/Elements |
| :——————- | :————————————————————- | :——— | :—————————————- |
| Half-Moon | Color applied only at the cuticle base in a crescent shape. | 2 | Red, Pink, Nude, White |
| Heart Outline | Delicate outline of a heart on the nail. | 3 | Red, Pink, Rose Gold, White |
| Modern French Tip | An outline or thin line accentuating the nail tip. | 3 | Red, Pink, Burgundy, Black, Gold |
| Geometric Shapes | Simple lines, angles, or shapes on the nail. | 4 | Any Valentine’s colors, metallics |
| Peek-a-Boo Accent | Small pop of color/glitter on a sheer or nude base. | 3 | Glitter, Red, Pink, Gold, Sheer Base |
| Color Block Sections | Two or three distinct color blocks with visible bare nail. | 4 | Contrasting Valentine’s colors |
Remember, practice makes perfect! Don’t get discouraged if your first attempt isn’t flawless. The beauty of negative space is that each nail can be unique and still look cohesive and stylish.
Pro Tips for Flawless Negative Space Nails
Want to elevate your game? Here are a few tips from the pros to make your negative space creations truly shine.
Thin Coats are Key: When applying any polish, especially for detailed work, use thin coats. This prevents bulkiness and makes it easier to control your lines and shapes. You can always add another thin coat if needed.
Clean Your Brush Regularly: For intricate lines with your art brush, dip it in rubbing alcohol or nail polish remover frequently to clean off excess polish. This ensures you always have a fine, precise tip to work with.
Steady Your Hand: When drawing lines or intricate shapes, rest your pinky finger on a stable surface (like your table or even your knee). This provides an anchor for your hand and helps prevent shaky lines.
Don’t Be Afraid of Mistakes: We all make them! Keep a fine-tipped brush or an orange stick dipped in nail polish remover handy for quick clean-ups. You can gently “erase” small mistakes before they dry.
Consider a Gel Polish System for Longevity: If you love having your nails look perfect for longer, consider using gel polishes with a UV/LED lamp. Gel polish is more durable and less prone to chipping, which is great for detailed designs. For more information on the safety and proper use of UV/LED lamps for gel manicures, resources from the U.S. Food and Drug Administration (FDA) can be very helpful.
Play with Texture: Combine matte and glossy finishes for an extra dimension. You can apply a matte top coat over a glossy design, or vice versa, on different sections.
Embrace Imperfection: Sometimes, a slightly wobbly line or a tiny dot can add to the charm and handmade feel of your nails. It shows they were made with love!
Choosing Your Valentine’s Colors
The color palette for Valentine’s Day is traditionally red and pink, but negative space allows for so much more!
Classic Valentine’s Palette
Reds: From deep crimson to bright cherry red, these are timeless.
Pinks: Soft blush, hot pink, bubblegum, fuchsia – all beautiful.
White: Perfect for creating clean lines, dots, or contrasting elements. It makes other colors pop.
Burgundy/Wine: A more sophisticated, moody take on the romantic theme.
Modern & Trendy Choices
Metallics: Gold, rose gold, and silver can add a touch of glamour and elegance. They look stunning as outlines or small accent shapes.
Black: For a chic, edgy vibe, black can be used for sharp lines or contrasting details against a bare nail.
Nudes & Sheers: These form the “negative space” itself, providing a sophisticated backdrop. A sheer pink or milky white can be a beautiful base even before adding color.
Pastels: Soft corals, lavenders, or mint greens can offer a unique, less traditional Valentine’s feel.
Mixing and Matching
Don’t be afraid to combine colors! A red heart outline on a sheer nude nail is sweet. A metallic gold line separating a pink and white section on the nail is chic. A matte black geometric shape on a glossy bare nail is ultra-modern. The beauty of negative space is how well different finishes and colors can play together.
Frequently Asked Questions about Valentine’s Negative Space Nails
Q1: Are negative space nails difficult for beginners?
Not at all! Negative space designs are actually very beginner-friendly because they often involve creating smaller shapes or lines, and the visible natural nail area is forgiving. You can start with very simple designs.
Q2: How do I get clean lines for my designs?
Use a good quality, thin nail art brush. Always wipe off excess polish from your brush on a paper towel before applying it to your nail. Resting your hand on a stable surface can also help steady your lines.
Q3: Can I do negative space nails if my nails aren’t perfect?
Absolutely! The beauty of negative space is that it can draw attention to the design elements rather than any perceived imperfections. It’s very adaptable. Just make sure your nails are clean and filed.
Q4: How long do negative space manicures typically last?
With a good base coat and top coat, they can last as long as regular manicures, typically 5-7 days, depending on your nail care habits. If using gel polish, they can last 2-3 weeks.
Q5: Can I use regular nail polish or do I need special polishes for negative space?
You can use regular nail polish! You’ll just need a thin nail art brush for detailed work. If you opt for gel polish, you’ll need a UV/LED lamp and gel top/base coats.
Q6: What’s the best way to clean up mistakes?
Keep a fine-tipped brush or an orangewood stick dipped in nail polish remover nearby. You can use it to carefully “erase” smudges or wobbly lines before the polish dries completely.
Q7: Do I need to apply polish to the entire nail first and then remove it?
You can do this for some “cut-out” effects, but many negative space designs are created by applying polish only where you want it. You can also use nail guides or tape to create clean edges for your colored areas.
Conclusion: Your Most Romantic Nails Yet!
There you have it – your guide to mastering stunning Valentine’s negative space nails! We’ve explored why this technique is a perfect fit for the season, gathered the essential tools, and walked through simple steps and inspiring design ideas. Remember, the key to negative space is embracing the elegance of what you don’t paint, making your chosen colors and shapes stand out beautifully.
Whether you’re a nail art novice or looking for a fresh, romantic design, negative space offers a sophisticated and achievable way to celebrate Valentine’s Day. Don’t be afraid to experiment with colors, shapes, and finishes. Pick up that thin brush, choose your favorite Valentine’s hues, and have fun creating a look that truly expresses your personal style. Your nails are a canvas for self-expression, and these negative space designs are sure to make them shine with love and confidence. Happy

