Love your nails this Valentine’s Day with simple, chic designs. Minimalist Valentine’s nails are easy to create, beautiful to look at, and perfect for any occasion. Get ready to embrace effortless beauty with these quick and stylish ideas.
Valentine’s Day is just around the corner, and you’re probably thinking about romantic gestures, sweet treats, and maybe even a special outfit. But what about your nails? Sometimes, elaborate nail art can feel a bit much, especially if you’re new to the scene or simply prefer a more understated look. If you want your nails to feel festive without being over-the-top, you’ve come to the right place! We’re diving into the wonderful world of minimalist Valentine’s nails. These designs are incredibly chic, surprisingly simple, and totally achievable right at home. Get ready to fall in love with easy-to-create, elegant nail looks that will have you feeling your best.
Why Minimalist Nails for Valentine’s Day?
Minimalist nail art is having a major moment, and for good reason! It’s all about subtle elegance and strategic touches of detail. For Valentine’s Day, this translates into beautiful designs that whisper “love” rather than shout it. Think delicate lines, tiny hearts, subtle color accents, or classic shades with a romantic twist.
Here’s why minimalist nails are the perfect choice for this romantic holiday:
Effortless Chic: They exude sophistication without trying too hard.
Versatile: Minimalist designs complement any outfit, from casual to formal.
Easy to DIY: Most can be done with basic nail polish and a few simple tools.
Timeless Appeal: These styles never go out of fashion.
Budget-Friendly: You don’t need complex art supplies to achieve these looks.
Getting Started: Essential Tools for Minimalist Nail Art
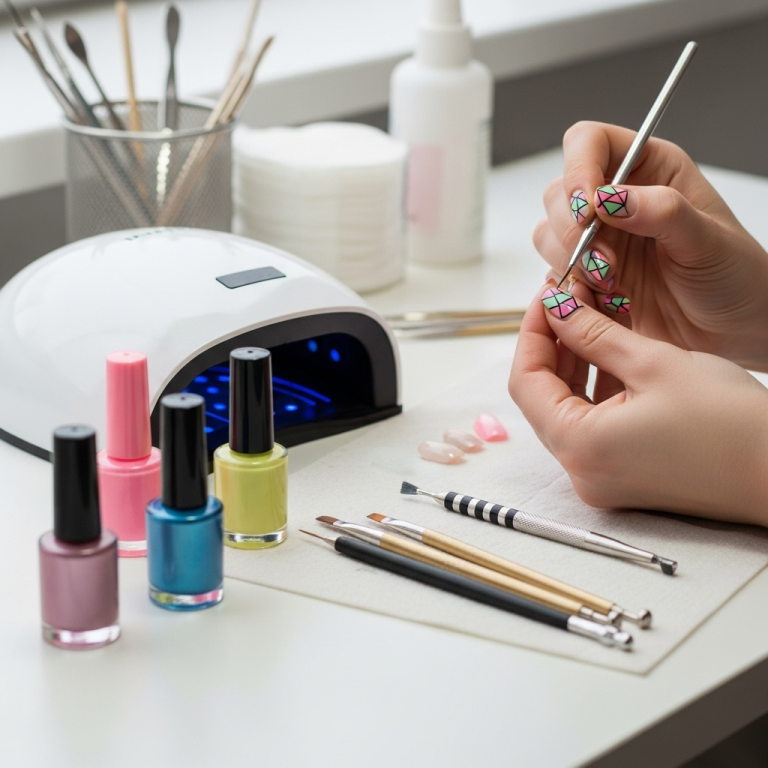
Before we jump into the designs, let’s gather your essential tools. You might already have most of these handy!
Base Coat: Protects your natural nails and helps polish adhere better.
Top Coat: Seals your design, adds shine, and prevents chipping.
Nail Polish Colors: Choose your preferred romantic shades (reds, pinks, nudes, whites, black, metallics).
Thin Nail Art Brush/Dotting Tool: For creating fine lines, tiny dots, and small shapes. You can find these easily online or at beauty supply stores.
Tweezers: Helpful for placing tiny embellishments like glitter or small studs.
Nail Polish Remover & Cotton Pads: For quick clean-ups and corrections.
Cuticle Oil: To keep your nails and cuticles looking healthy and hydrated.
A good quality cuticle oil can make a noticeable difference in the overall appearance of your manicure. Brands like CND SolarOil are highly recommended by professionals for their nourishing properties.
Effortless Minimalist Valentine’s Nail Ideas
Now for the fun part! Here are some easy-to-follow ideas for your minimalist Valentine’s Day manicure.
1. The Classic Red with a Twist
This is a timeless choice that’s always in style. A perfect application of a beautiful red polish is all you need for elegance.
How to achieve it:
1. Apply a good base coat.
2. Apply two thin coats of a classic red nail polish. Allow each coat to dry slightly before applying the next.
3. Once dry, apply a glossy top coat for extra shine and protection.
Minimalist Elevation:
Single Accent Nail: Paint one or two nails in a contrasting neutral shade (like nude or white) and the rest in red.
Tiny Heart Detail: On one accent nail, use a fine brush and black or white polish to paint a tiny heart in the corner or on the cuticle line.
Half-Moon Mani: Leave the half-moon at the base of your nail unpainted or use a contrasting color.
2. Delicate Pink and Nude Combinations
Soft pinks and elegant nudes offer a subtle yet romantic vibe, perfect for a sophisticated look.
How to achieve it:
1. Start with a clear or nude-toned base coat.
2. Apply one or two coats of your chosen soft pink or nude polish. Nude shades are fantastic for making nails look polished and elongating fingers.
3. Finish with a clear top coat.
Minimalist Elevation:
Color Blocking: Alternate between a nude and a soft pink polish on different nails.
Subtle Stripe: On one accent nail, use a fine brush and a contrasting pink or white polish to paint a thin vertical or horizontal stripe.
Tiny Dot: Use a dotting tool to place a single, tiny dot in a contrasting color (like white or metallic gold) near the cuticle of one or two nails.
3. The “XOXO” Touch
Spell out your love with simple, iconic symbols. This design is playful and sweet.
How to achieve it:
1. Paint all nails with your base color (nude, pink, or white are great options).
2. On one or two accent nails, use a thin nail art brush and contrasting polish (black, red, or metallic) to paint tiny “X” and “O” shapes. You don’t need to create a full word; just a few scattered symbols are enough.
Tips for drawing X’s and O’s:
X: Draw two diagonal lines that intersect in the center.
O: Draw a small circle.
4. Subtle Hearts: Less is More
A tiny heart can be the perfect romantic touch without being overwhelming.
How to achieve it:
1. Choose your base polish – a soft muted tone, classic red, or even a deep berry works well.
2. Once the base color is dry, take a fine nail art brush with a contrasting color (white, black, pink, or even metallic gold).
3. On one accent nail, create a tiny heart shape. You can do this by painting two small dots side-by-side, then gently connecting them with a small curve underneath.
4. Alternatively, paint a tiny upside-down “U” shape, then add a small inverted “V” or curved line at the bottom to form the point.
Placement is Key: Place the heart strategically – near the cuticle, in the center of the nail, or in a corner.
5. The French Manicure Reimagined
The classic French manicure is elegant, but you can give it a Valentine’s Day spin.
How to achieve it:
1. Apply a sheer pink or nude base coat.
2. Instead of a white tip, use a delicate pink, red, or even a metallic polish to create the French tip. You can use a very fine brush for precise lines.
Valentine’s Variations:
Heart-Shaped Tip: For a creative twist, shape the tip into a subtle heart.
Colored Tip: Use a bold red or a soft pink for the tips.
Double French: Add a second thin line of contrasting color above the first tip.
6. Minimalist Glitter Accents
A touch of sparkle can add a festive feel without turning your nails into a disco ball.
How to achieve it:
1. Apply your base color (nude, pink, or a subtle shimmer).
2. Option 1 (Glitter Top Coat): Apply a sheer glitter top coat over your base color on one or two accent nails.
3. Option 2 (Glitter Gradient): On the tips or the base of one or two nails, gently dab a fine glitter polish, fading it into the base color.
4. Option 3 (Small Glitter Detail): Use tweezers to place a few tiny pieces of glitter artfully on one accent nail.
7. Simple Lines and Geometric Shapes
Clean lines and simple geometric patterns are the epitome of minimalist chic.
How to achieve it:
1. Paint your nails in your desired base color.
2. With a fine nail art brush and a contrasting color, add a single thin line. This line can be vertical, horizontal, or diagonal.
3. Simple Shapes: Create tiny squares, triangles, or dots near the cuticle or on one side of the nail.
Table: Minimalist Nail Design Quick Guide
| Design Idea | Base Color Suggestions | Accent Color/Embellishment | Difficulty | Best For |
| :————————— | :————————— | :————————- | :——— | :————————————— |
| Classic Red with Twist | Nude, White, Muted Pink | Red, Black, White | Easy | Everyday elegance, subtle festivity |
| Pink & Nude Combos | Nude, Sheer Pink, Beige | White, Gold, Silver, Pink | Easy | Sophisticated, understated romance |
| “XOXO” Touch | Nude, White, Soft Pink | Black, Red, Pink, Metallic | Easy | Playful, cute, and personal |
| Subtle Hearts | Muted tones, Red, Berry | White, Black, Pink, Gold | Medium | Romantic gestures, delicate details |
| French Manicure Reimagined | Sheer Pink, Nude, Clear | Red, Pink, Metallic | Medium | Classic with a festive twist |
| Minimalist Glitter Accents | Nude, Pink, White, Sheer | Silver, Gold, Rose Gold | Easy | Touch of glamour, festive sparkle |
| Simple Lines/Geometric Shapes | Any base color | Black, White, Gold, Silver | Easy | Modern, clean, and chic |
Understanding nail shapes can also enhance your minimalist designs. Whether you prefer a classic oval, a chic square, or a trendy almond shape, each can beautifully showcase these simple yet impactful nail art styles. For more on nail shapes, you can explore resources common in cosmetology education, like those discussing nail anatomy and shaping techniques.
Step-by-Step: Creating the Perfect “Tiny Heart” Accent Nail
Let’s walk through the steps for one of the most popular minimalist Valentine’s designs: the tiny heart accent nail.
Materials Needed:
Base Coat
Your chosen base polish (e.g., nude, light pink)
A fine-tipped nail art brush
Contrasting polish for the heart (e.g., red, white, black)
Top Coat
Step-by-Step Instructions:
1. Prep Your Nails: Ensure your nails are clean, dry, and free of any old polish. Push back your cuticles gently.
2. Apply Base Coat: Apply one thin layer of base coat to all nails and let it dry completely. This step is crucial for preventing staining and ensuring a smooth canvas.
3. Apply Base Color: Apply one or two thin coats of your chosen base polish to all nails. Let it dry fully between coats. A nude or soft pink is perfect for a subtle look.
4. Prepare Your Accent Nail: Decide which nail(s) will be your accent nail(s) – usually the ring finger.
5. Load Your Brush: Dip the tip of your fine nail art brush into your contrasting polish. Wipe off any excess on the edge of the bottle or a piece of paper to avoid having too much polish, which can lead to thick, messy lines.
6. Paint the Heart:
Method 1 (Two Dots): On your accent nail, paint two small, close-together dots where you want the top curves of your heart to be. Then, with the tip of your brush, gently pull the polish downwards from the center of these dots to create the point of the heart.
Method 2 (Outline): For a more defined heart, paint a tiny inverted “U” shape. Then, add a small inverted “V” shape to create the point at the bottom.
7. Refine the Shape: Use a clean, dry brush to gently smooth out any imperfections or adjust the shape of the heart if needed. Be quick, as nail polish dries fast!
8. Let it Dry: Allow the tiny heart design to dry completely before moving to the next step. This is very important to prevent smudging.
9. Apply Top Coat: Once the design is fully dry, apply a layer of your clear, glossy top coat over all your nails. This will seal in your design, add shine, and help your manicure last longer.
10. Clean Up: Use a small brush dipped in nail polish remover to clean up any stray polish around your cuticles or sidewalls for a super-professional finish.
11. Hydrate: Finish by applying cuticle oil to keep your nail beds moisturized.
Frequently Asked Questions (FAQs)
Q1: Are minimalist nails suitable for beginners?
A1: Absolutely! Minimalist nails are perfect for beginners because they rely on simple techniques and subtle designs that are easy to master. You don’t need advanced skills to create elegant looks.
Q2: How long do minimalist nail designs typically last?
A2: With a good base coat, careful application, and a quality top coat, minimalist manicures can last anywhere from 5 to 10 days, depending on your daily activities and how well you care for them.
Q3: What are the best colors for minimalist Valentine’s nails if I don’t like red or pink?
A3: You have plenty of beautiful options! Think chic neutrals like nudes, beige, ivory, or classic black. Metallics like gold, silver, or rose gold also make stunning minimalist accents. Even a deep navy or a subtle grey can be incredibly elegant.
Q4: Can I achieve minimalist nail art without special nail art brushes?
A4: Yes! While nail art brushes make it easier, you can improvise. A toothpick can be used for dots, and the edge of a thin eyeliner brush (that you only use for nails) can create fine lines. Even the tip of a bobby pin can make a decent dot.
Q5: How do I avoid smudging my tiny designs?
A5: The key is patience! Let each layer of polish, especially the design itself, dry thoroughly before applying the next step or the top coat. Applying thin coats of polish also helps them dry faster.
Q6: What’s the difference between a minimalist design and a plain manicure?
A6: A plain manicure is typically just a solid color. A minimalist design takes that plain base and adds a subtle, intentional detail – like a single dot, a fine line, or a tiny heart – making it more artistic and specially curated.
Q7: Can I add real glitter to my minimalist design?
A7: Yes, but sparingly. For a truly minimalist look, use fine cosmetic-grade glitter sparingly as an accent. You can pick up individual flecks with a damp brush or tweezers and place them strategically on a dry nail polish before the top coat.
Maintaining Your Minimalist Manicure
To keep your beautiful minimalist nails looking their best, follow these simple maintenance tips:
Reapply Top Coat: Add a fresh layer of top coat every 2-3 days to refresh the shine and protect against chipping.
Avoid Harsh Chemicals: Wear gloves when doing household chores, especially when using cleaning products.
Moisturize: Keep your hands and cuticles hydrated daily with hand cream and cuticle oil. Healthy cuticles make your entire manicure look more polished.
Be Gentle: Avoid using your nails as tools to open packages or scrape surfaces. This is a sure way to cause chips and breaks.
* Touch-Ups: If you notice a small chip or wear on an accent nail, you can often touch it up with a tiny bit of polish and Seal it with top coat.
Conclusion: Effortless Beauty for Your Valentine’s Day
Valentine’s Day is about celebrating love, and that includes self-love! Embracing minimalist nail art is a wonderful way to add a touch of personal style and festive charm to your look without a lot of fuss. These designs prove that you don’t need to be a nail art expert to achieve beautiful, sophisticated results. Whether you opt for a classic red with a single tiny heart, a soft pink with a delicate stripe, or a chic nude with a metallic dot, your nails will be a subtle yet stunning expression of your Valentine’s spirit.
Remember, the most important thing is to have fun with it and let your creativity shine. Choose colors and designs that make you feel happy and confident. With these easy techniques and simple tools, you can achieve effortless beauty that’s perfect for celebrating love, in all its forms, this Valentine’s Day and beyond. Happy polishing!


