Get ready for your summer getaway with chic vacation nail designs! This guide offers easy-to-follow, trendy styles perfect for any trip, from beach holidays to city breaks. Discover simple DIY options that will make your nails vacation-ready and express your personal style with confidence. Let’s dive into the most essential summer looks!
Hello, nail lovers! As the sun shines brighter and vacation plans fill our calendars, it’s time to think about our nails. Do you ever feel a little stuck on what to do with your manicure before a trip? Maybe you want something fun and festive, but you’re not sure where to start, or perhaps you worry it will be too complicated to do yourself. Don’t sweat it! Getting stylish vacation nail designs is easier than you might think. We’re going to explore some super fun and achievable looks perfect for any sunny escape. Get ready to give your nails a vacation glow-up!
Your Essential Vacation Nail Designs Toolkit
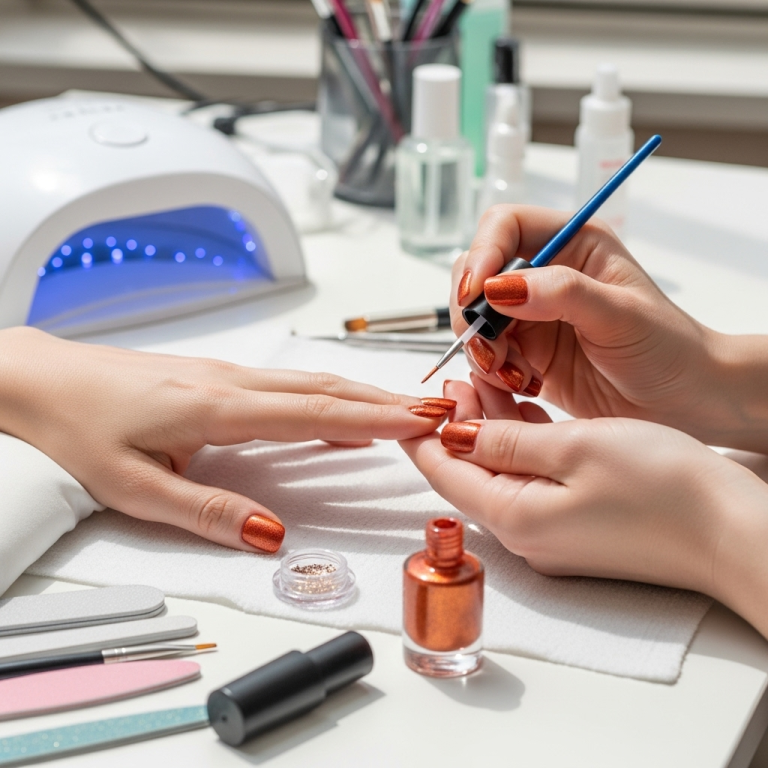
Before we jump into the fun designs, let’s make sure you have the basics covered. Having the right tools will make your DIY manicure experience so much smoother and more enjoyable. Think of this as your starter pack for creating salon-worthy nails at home.
Must-Have Nail Tools for Beginners:
Nail File and Buffer: Essential for shaping your nails and smoothing out any ridges.
Cuticle Pusher/Orange Stick: Gently push back cuticles for a clean nail base.
Base Coat: Protects your natural nails and helps polish adhere better.
Top Coat: Seals your design, adds shine, and prevents chipping.
Nail Polish Remover & Cotton Pads: For fixing mistakes and cleaning up.
Assorted Nail Polishes: Choose your favorite summer shades!
Dotting Tool or Toothpick: Perfect for creating dots and simple patterns.
Thin Nail Art Brush: For drawing lines and delicate details.
Having these on hand means you’re ready to tackle any of the designs we’re about to explore. It’s all about making it easy and fun for you!
The Hottest Vacation Nail Designs for Summer 2024
Summer is the season for bright colors, fun patterns, and expressing your personality. When it comes to vacation nail designs, think about where you’re going and what vibes you want to channel. Are you heading to a tropical beach, exploring a vibrant city, or relaxing by a pool? We’ve got a style for every occasion!
1. Tropical Paradise: Bright & Bold Florals
Imagine sipping a cool drink with hibiscus flowers on your nails – pure bliss! Tropical floral designs are a classic for a reason. They’re cheerful, colorful, and instantly transport you to an island state of mind.
How to Achieve the Look:
1. Base Color: Start with a vibrant base like sunny yellow, ocean blue, or lush green.
2. Floral Elements: Using a dotting tool or a fine brush, create simple flower shapes.
Petals: For easy flowers, use your dotting tool to make a small circle in the center with one color, then add dots or small petal shapes around it with a contrasting color.
Leaves: Add small green leaf shapes next to your flowers.
3. Top Coat: Seal everything with a glossy top coat.
Pro-Tip: Don’t aim for perfection! Slightly imperfect, hand-painted flowers add to their charm and make them unique.
2. Beach Babe: Ocean Waves & Sandy Shores
Channel the mesmerizing beauty of the ocean with wave-inspired nail art. This design is calming, chic, and perfect for any beach or seaside vacation.
How to Achieve the Look:
1. Base Color: A soft, sandy beige or nude is a great starting point.
2. Wave Effect:
Option A (Simple): Use a fine brush and a vibrant blue or turquoise polish. Freehand gentle, curved lines across your nail to mimic waves. You can add a lighter shade of blue for depth.
Option B (Gradient): Paint your nails in a gradient of blues, from light sky blue at the cuticle to a deep ocean blue at the tip.
3. White Accents: Add tiny white dots for seafoam or a thin white line separating color blocks.
4. Top Coat: A shiny top coat will make the blues pop!
3. Citrus Zing: Fruity Fun
Brighten up your nails with juicy citrus fruit designs! Lemons, oranges, and watermelon slices are incredibly cute and scream summer fun. These are surprisingly easy to do yourself!
How to Achieve the Look:
1. Base Color: A clean white or pale yellow works well as a blank canvas.
2. Fruit Slices:
Lemons/Oranges: Paint a simple yellow or orange circle. Then, using a black or dark brown fine brush, draw thin lines radiating from the center to create a slice effect. Add a tiny green leaf.
Watermelon: Paint the nail a vibrant green. Once dry, paint a curved slice of pink or red on top. Outline the pink/red with a thin black line, and add tiny black dots for seeds.
3. Top Coat: A clear top coat will seal and protect your fruity masterpieces.
4. Sunset Gradient: Golden Hour Hues
Capture the magic of a summer sunset on your fingertips. This design uses a blend of warm colors like orange, pink, yellow, and even a touch of purple, mimicking the sky as the sun dips below the horizon.
How to Achieve the Look:
1. Color Palette: Gather polishes in sunset shades: yellow, orange, pink, and maybe a soft purple.
2. Gradient Technique:
Sponge Method: Apply your chosen colors side-by-side onto a makeup sponge. Gently dab the sponge onto your nail, blending the colors. Repeat for a more intense effect. You’ll need to clean up the polish around your skin afterwards with a brush dipped in nail polish remover.
Layering: Apply a base color (like yellow). Then, using a thin brush, carefully blend in streaks of orange and pink.
3. Top Coat: A glossy top coat will enhance the blend and make your nails truly glow.
5. Minimalist Chic: Clean Lines & Geometric Shapes
For those who prefer a more understated yet stylish look, minimalist designs are perfect. Think clean lines, subtle dots, or abstract geometric shapes in chic color combinations.
How to Achieve the Look:
1. Base Color: Opt for nudes, whites, pastels, or even a soft black.
2. Design Elements:
Thin Lines: Use a striping tape or a very fine brush to create thin horizontal, vertical, or diagonal lines. A popular look is a single thin gold or silver line near the cuticle.
Dots: Use a dotting tool to place a few strategically placed dots. These can be all the same color or a mix of complementary shades.
Half-Moon: Paint a semi-circle at the base of your nail in a contrasting color.
3. Top Coat: A matte top coat can give minimalist designs a sophisticated edge, or go for glossy for a classic look.
6. Glitter Glam: Sparkle and Shine
No summer vacation is complete without a little sparkle! Glitter nails are fun, eye-catching, and surprisingly easy to achieve. They’re perfect for adding a festive touch to any outfit.
How to Achieve the Look:
1. Base Color: Choose a base color that complements your glitter shade – nudes, blacks, or even clear can work well.
2. Glitter Application:
Full Glitter: Apply a coat of glitter polish directly. For more intense coverage, apply a second coat or dab chunky glitter with a sponge.
Glitter Fade: Apply glitter polish only to the tips of your nails, fading it down towards the cuticle.
Glitter Accent Nail: Paint one or two nails entirely with glitter, keeping the others a solid color.
3. Top Coat: A good quality top coat is essential to smooth out the texture of glitter and prevent it from catching.
7. Tropical Leaves: Sophisticated Greenery
For a touch of the exotic without being overtly bright, consider sophisticated palm or monstera leaf designs. These look elegant on a nude or sheer base and bring a natural, serene vibe.
How to Achieve the Look:
1. Base Color: A sheer nude, milky white, or a pale blush pink works beautifully.
2. Leaf Stencils or Freehand:
Stencils: You can buy leaf-shaped stencils for a crisp, clean look. Apply the stencil, then paint over it with green polish, peel off carefully.
Freehand: Use a fine nail art brush and a deep green polish. Practice drawing simple leaf shapes with a central vein. Start with a teardrop shape and add a line down the middle. You can vary sizes and positions.
3. Top Coat: A glossy top coat seals the design and adds a polished finish.
8. Coral Crush: The Ultimate Summer Color
Coral is the definitive summer color. It’s vibrant, flattering on most skin tones, and brings an instant vacation feel. Whether you go for a solid shade or use it in a design, it’s a winner.
How to Achieve the Look:
1. Solid Coral: Simply apply two coats of your favorite coral polish. Ensure a clean cuticle line and smooth application.
2. Coral Accents: Use coral as a highlight color. Try coral French tips, or pair it with white for a fresh, summery look.
Coral French Tips: Paint your nail beige or white, then use a fine brush to create a coral tip.
Coral & White Abstract: Paint some nails solid coral, others solid white, and then use a thin brush to connect them with diagonal or curved white lines over the coral, or vice versa.
3. Top Coat: A high-shine top coat makes coral look extra juicy and vibrant.
Easy Nail Care Tips for Your Vacation Nails
To make sure your gorgeous vacation nail designs last and look their best, a little bit of care goes a long way. These simple tips will help keep your nails healthy and your manicure flawless throughout your trip.
Moisturize Daily: Dry air, sun, and salt water can dehydrate your nails and cuticles. Apply cuticle oil or hand cream regularly. Think of it like sunscreen for your nails!
Protect Your Nails: While out and about, avoid using your nails as tools. This can lead to chips, breaks, or lifting of polish.
Reapply Top Coat: If you notice your top coat is losing shine or showing minor wear, apply an extra layer. This can significantly extend the life of your manicure. Check out resources from organizations like the Nail Manufacturers Council for more on nail health.
Be Gentle with Water: Constant exposure to water can soften nails and weaken polish adhesion. Wear gloves when doing dishes or other water-intensive tasks, even on vacation!
Pack a Mini-Kit: Bring a mini nail file and a small bottle of your top coat for on-the-go touch-ups.
Hydrate from Within: Drink plenty of water! Good hydration reflects in the health of your skin, hair, and nails.
Quick Comparison: Simple vs. Intricate Vacation Nail Designs
Sometimes, you have a bit more time for nail art, and other times, you need something super quick. Here’s a handy table to help you decide what’s best for your schedule and skill level.
| Design Category | Effort Level | Time Commitment | Best For |
|---|---|---|---|
| Solid Color (e.g., Coral Crush) | Beginner | 5-15 minutes per coat (2 coats + top coat) | All skill levels, busy travelers, minimalist style. |
| Glitter Accent Nail | Beginner | 10-20 minutes | Adding sparkle with minimal effort, parties, evenings out. |
| Simple Dots/Lines (Minimalist Chic) | Beginner-Intermediate | 15-30 minutes | Chic and modern look, creative expression. |
| Tropical Florals (Simple) | Intermediate | 20-40 minutes | Fun and festive vibes, beach vacations, expressing joy. |
| Ocean Waves / Sunset Gradient | Intermediate-Advanced | 30-60 minutes | Artistic expression, unique looks, visually stunning results. |
| Fruity Designs (e.g., Watermelon) | Intermediate | 25-45 minutes | Playful and cute look, great for family trips or festivals. |
| Tropical Leaves | Intermediate | 25-45 minutes | Elegant and sophisticated, nature-inspired, good for diverse settings. |
This table should give you a good idea of what to expect. Remember, practice makes perfect, and there are always shortcuts like nail stickers or water decals if you’re short on time!
Frequently Asked Questions About Vacation Nail Designs
Q1: How can I make my DIY vacation nail designs last longer?
A: Always start with a clean, dry nail. Apply a good base coat, followed by thin layers of your colored polish, letting each dry slightly before applying the next. Crucially, finish with a high-quality, quick-drying top coat and reapply it every few days for extra protection and shine.
Q2: I’m a complete beginner. What’s the easiest vacation nail design to try?
A: A solid vibrant color like a coral, turquoise, or sunny yellow is fantastic and requires no special skills. Alternatively, a simple glitter accent nail or a single thin metallic line near the cuticle are very easy and look super chic.
Q3: Can I achieve intricate designs without professional tools?
A: Absolutely! For dots, a toothpick works wonders. For lines and small details, a regular fine eyeliner brush (that you’ll dedicate solely to nail art!) or even the edge of a business card can be used with nail polish. Many beauty supply stores also have affordable nail art brushes.
Q4: My nail polish always chips quickly on vacation. What’s the secret?
A: Technique is key! Ensure you cap the free edge of your nail with both your color polish and your top coat. This means running the brush horizontally along the very tip of your nail. It acts like a seal and prevents lifting and chipping. Also, avoid excessive soaking in water.
Q5: How do I clean up messy polish edges without ruining my design?
A: The best tool is a small, flat brush (like an old, clean eyeliner brush or a dedicated clean-up brush) dipped in nail polish remover. Gently trace around your cuticle and sidewalls to remove any excess polish. Doing this while the polish is still wet makes it easier.
Q6: Are there any specific colors that are “more summery” than others for vacation nails?
A: Think bright and vibrant! Corals, turquoises, sunny yellows, hot pinks, and ocean blues are classic summer shades. Pastels also work well for a softer look, and metallics like gold and silver add a touch of glam. Don’t be afraid to mix and match!
Q7: What if I don’t have time for elaborate nail art before my trip?
A: Don’t stress! A perfectly applied solid color in a fun summer shade looks stunning. You can also use press-on nails in trendy designs or apply nail stickers (like small flowers, fruits, or geometric shapes) over a base color for a quick, professional-looking result.
Bringing It All Together: Your Perfect Summer Manicure
There you have it! From dazzling tropical florals to chic minimalist lines and everything in between, there are so many fantastic vacation nail designs perfect for your summer adventures. Remember, the most important thing is to have fun with it and choose styles that make you feel confident and excited. These designs are not just about looking good; they’re about expressing your summer mood and adding a little extra sparkle to your vacation memories.
Whether you spend 15 minutes on a solid bright color or an hour crafting a complex gradient, your nails will be vacation-ready. So, grab your favorite polishes, perhaps a new summer shade, and get creative. Your perfect summer manicure awaits! Enjoy your trip, and let your nails do a little celebrating too!


