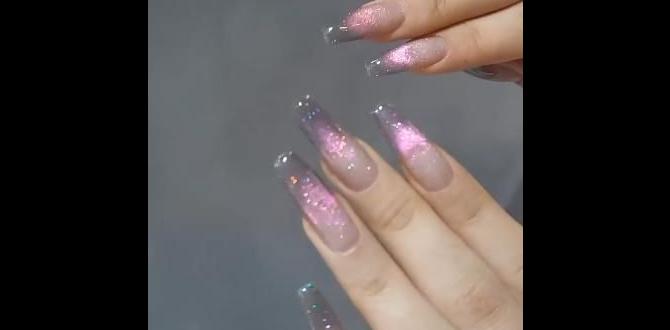
USA Flag Nail Designs: Your Ultimate Summer Manicure Guide! Get ready to flaunt patriotic, stylish, and easy-to-create red, white, and blue nail art this summer. Perfect for any skill level, these looks are sure to turn heads and add a festive flair to your fingertips.
Summer is the season for sunshine, celebrations, and showing off your fabulous style! And what better way to embrace the spirit of the season and patriotic holidays than with dazzling USA flag nail designs? Gone are the days of complicated nail art being out of reach. Today, we’re diving into the wonderful world of red, white, and blue manicures, making it super simple for anyone to achieve stunning results. Whether you’re a seasoned nail art pro or just starting out, this guide is packed with easy-to-follow steps, essential tools, and inspiring ideas to get your nails summer-ready. Let’s get those nails looking as vibrant and festive as a summer evening!
Why USA Flag Nail Designs Rock This Summer
There’s something undeniably fun and festive about USA flag nail designs, especially when the summer months roll around. Think backyard BBQs, fireworks, and sunny days – it’s the perfect time to let your patriotic spirit shine! But it’s not just about holidays; a touch of red, white, and blue can add a vibrant pop to your everyday look, making your nails a conversation starter. Plus, these designs are surprisingly versatile, from minimalist chic to full-on fabulous.
The best part? You don’t need to be a professional nail technician to create these looks. With a few simple tools and some creativity, you can transform your nails into mini works of art. We’re here to break down everything you need to know, so get ready to feel inspired and confident as we explore some amazing USA flag nail designs perfect for your summer adventures.
Essential Tools for Your USA Flag Nail Art Journey
Before we dive into the dazzling designs, let’s get our toolkit ready! Having the right tools makes all the difference, turning a potentially tricky task into a seamless and enjoyable creative process. Don’t worry if you don’t have everything listed – many items are optional, and you can adapt with what you have!
Must-Have Polishes
- Classic Red: A vibrant, true red is essential for those iconic stripes and stars.
- Crisp White: A bright, opaque white serves as a perfect base or for accent details.
- Deep Navy Blue: This creates the starry field, adding depth and contrast.
Helpful Application Tools
- Fine-Tip Nail Art Brush: This is your best friend for drawing crisp lines and tiny stars.
- Dotting Tool: Perfect for creating uniform dots, stars, or even small accents. If you don’t have one, the tip of a bobby pin or even a toothpick can work in a pinch!
- Striping Tape or Stencils: For achieving perfectly straight lines and clean shapes, especially if freehand is tricky. You can find these at most beauty supply stores.
- Nail Polish Remover: For quick clean-ups and correcting any little oopsies.
- Cotton Swabs (Q-tips): Excellent for precise clean-ups around the cuticle and edges.
- Base Coat: Crucial for protecting your natural nails and helping polish adhere better.
- Top Coat: This seals your design, adds shine, and helps your masterpiece last longer. A quick-dry top coat is a lifesaver for busy bees!
Easy USA Flag Nail Designs for Beginners
Ready to get creative? These designs are perfect for beginners and can be customized to your liking. Let’s start with some simple yet stunning looks!
Design 1: The Classic French Tip with a Patriotic Twist
This design is elegant and subtle, perfect for those who love a touch of festivity without being overt.
Step-by-Step Guide:
- Prep Your Nails: Start with clean, dry nails. Apply a base coat and let it dry completely.
- Apply Base Color: Paint all your nails with a sheer white or nude polish. This provides a clean canvas.
- Create the “Flag” Tips: On your ring finger (or accent nail), carefully paint a French tip using red polish.
- Add the “Stars”: Using a dotting tool or a fine-tip brush, carefully add small white dots within the red tip to mimic stars.
- Continue to Other Nails: For a more cohesive look, you can alternate the accent nail or add a single white dot to the tips of other nails.
- Seal the Deal: Once completely dry, apply a generous layer of top coat to protect your artwork and add shine.
Design 2: The Bold Stripe Statement
This design embraces the iconic stripes of the flag in a fun, modern way.
Step-by-Step Guide:
- Base Coat: Apply a clear base coat.
- White Base: Paint most of your nails with a solid white polish. Let it dry thoroughly.
- Red Stripes: Using a striping brush or a fine-tip art pen, carefully paint thin horizontal red stripes across your nails. Focus on two or three stripes per nail.
- Blue Accent Nail: On one finger (like your ring or pinky), paint the nail a solid navy blue.
- Add Stars to Blue Nail: While the blue polish is still slightly wet, use a small dotting tool to add white dots, creating a starry effect on the blue nail.
- Clean Up and Seal: Clean any smudges with a cotton swab dipped in remover. Apply a top coat to all nails.
Design 3: The Subtle Star Accent
Sometimes, less is more! This design features a simple yet impactful starry accent.
Step-by-Step Guide:
- Base Coat: Apply your trusty base coat.
- Color Choice: Paint all your nails in a solid color – think a vibrant red, a clean white, or even a soft blue.
- The Star-Studded Nail: On your accent nail, generously apply a coat of navy blue polish.
- Dotting for Stars: While the blue polish is wet, use a small dotting tool to place white dots across the nail. Vary the size slightly for a more natural look. You can also use a fine brush to draw tiny stars.
- Clean and Shine: Clean up any stray polish. Apply a top coat to all nails to seal the design.
Intermediate USA Flag Nail Designs: Level Up Your Art
Feeling a bit more confident? These designs incorporate a few more techniques but are still totally achievable for a motivated beginner!
Design 4: The Full-Flag Feature Nail
This is for when you want your nails to make a bold statement! We’ll create a mini flag on one or two accent nails.
Step-by-Step Guide:
- Prep: Base coat all nails.
- Base Colors: Paint your accent nails with white polish and the rest with your chosen solid color (red, blue, or white). Let them dry fully.
- The Star Field (Accent Nail): On one accent nail, paint a square in the upper left corner with navy blue polish. While still wet, use a white polish and a fine brush or dotting tool to create stars within the blue square. You can aim for 3-5 stars.
- The Stripes (Accent Nail): Use red polish and a striping brush or tape to carefully create thin horizontal red stripes on the rest of the accent nail, extending from the blue square.
- Red & White Nails: On your other nails, you can add simple red or white stripes, or a single red stripe across a white nail for continuity.
- Final Touches: Clean up edges and apply a protective top coat to all nails.
Design 5: The Color Block with Stars
A modern, artistic take on the flag, using color blocking and scattered stars.
Step-by-Step Guide:
- Base Coat: Apply your clear base coat.
- Block Sections: Divide your nails into sections using tape or freehand. For example, one nail might have a blue base, with a red block on one side and white on the other. Another might be mostly white with a red stripe.
- Paint the Blocks: Carefully paint within your taped sections using red, white, and blue polishes.
- Add Scattered Stars: Once the blocks are dry, use a dotting tool to add small white stars randomly across the blue and red sections, or on the white sections for contrast.
- Seal and Admire: Remove tape carefully while polish is slightly wet to avoid peeling. Apply a top coat.
Design 6: The Glitter Gradient Flag
A touch of sparkle always elevates a design! This combines a gradient effect with flag colors.
Step-by-Step Guide:
- Base Coat: Start with a base coat.
- Red Gradient: Apply red polish to about two-thirds of your nail, fading towards the tip. Use a makeup sponge or a clean brush to blend the color.
- White Fade: On the tip area, gently blend in white polish so it connects with the red, creating a soft gradient.
- Blue Glitter Accent: On one or two nails, apply a navy blue base. Then, use a blue glitter polish to create a gradient effect over the blue, mimicking the starry night sky, or simply apply it to the tips.
- Add Stars: Add a few white dots on the blue glitter nails for a starry effect.
- Top Coat: Seal everything with a glossy top coat.
Pro Tips for Flawless USA Flag Nail Designs
Achieving salon-worthy results at home is all about technique and patience! Here are some insider tips to help you nail your USA flag designs.
Cleanliness is Key
- Always start with clean, dry nails. Remove any old polish and push back your cuticles gently.
- Keep your tools clean between uses, especially your brushes and dotting tools. Wipe them with nail polish remover.
The Art of the Line
- Steady Hand: Rest your hands on a stable surface. Brace your pinkies together for extra stability when painting lines.
- Thin Coats: Apply thin layers of polish rather than thick ones. They dry faster and are less likely to smudge.
- Less is More (with Polish): Don’t overload your brush. For lines, use just enough polish to create a smooth stroke.
Mastering the Stars
- Dotting Tool Sizes: Use a smaller dotting tool for tiny, precise stars.
- Practice Dots: Practice making dots on a piece of paper or a nail file first until you get the hang of the pressure and amount of polish needed.
- DIY Stars: If you’re feeling artistic, you can use a very fine brush to paint simple star shapes.
Prevention and Correction
- Protect Your Skin: Apply a thin layer of petroleum jelly or white liquid latex around your cuticles before you start intricate designs. This creates a barrier, making clean-up a breeze!
- Instant Fixes: Keep cotton swabs and nail polish remover handy for immediate clean-up of any mistakes. Dip the swab in remover, wipe away excess polish, and reapply if necessary.
The All-Important Finish
- Don’t Skip the Top Coat: A good quality top coat is essential for shine, longevity, and preventing chips.
- Quick-Dry Options: If you’re short on time, consider a quick-dry top coat.
USA Flag Nail Designs: Tool Comparison
Choosing the right tools can make a big difference. Here’s a quick comparison to help you decide what might work best for you.
| Tool | Pros | Cons | Best For |
|---|---|---|---|
| Fine-Tip Nail Art Brush | Precision, control for lines and small details. Versatile for different designs. | Requires a steady hand. Can get clogged if not cleaned properly. | Drawing thin stripes, tiny stars, intricate patterns. |
| Dotting Tool | Easy to use for uniform dots and small circles. Comes in various sizes. | Less control for precise lines. Can sometimes leave a slightly raised dot. | Creating stars, polka dots, small accents. |
| Striping Tape | Creates perfectly straight, crisp lines. Easy to apply and remove. | Can be tricky to place perfectly on curved nails. Needs careful removal to avoid lifting polish. | Achieving flawless stripes on accent nails or across multiple nails. |
| Toothpick/Bobby Pin | Readily available, inexpensive alternative. | Less precise than professional tools. Can break easily or be too thick for fine details. | Basic dotting for stars or simple accents when other tools aren’t available. |
Understanding Nail Polish Ingredients and Safety
It’s great that you’re interested in nail art! While we use nail polish for fun designs, it’s also good to be aware of what’s in it and how to use it safely. Most nail polishes contain solvents, plasticizers, and colorants. Some brands offer “5-free,” “7-free,” or “10-free” formulas, meaning they are made without certain potentially harmful chemicals like formaldehyde, toluene, and DBP.
Always use nail polish in a well-ventilated area to avoid inhaling fumes. Keep polishes away from children and use them as directed. For more information on cosmetic ingredient safety, you can refer to resources from the U.S. Food and Drug Administration (FDA).
FAQ: Your USA Flag Nail Design Questions Answered
Q1: How do I make my nail polish dry faster?
A1: Apply polish in thin coats, use a quick-dry top coat, or try a nail drying spray or drops. Keeping your nails cool can also help them harden faster.
Q2: My nail polish always smudges when I try to draw lines. What can I do?
A2: Ensure each layer of polish is completely dry before adding the next. Using striping tape or stencils can help create cleaner lines. If painting freehand, use a very fine brush with minimal polish and steady your hands.
Q3: Can I use regular nail polish for nail art, or do I need special polishes?
A3: You can absolutely use regular nail polish! For intricate details like tiny stars or thin stripes, polishes with a thinner consistency or specialized nail art pens/brushes are helpful, but not strictly necessary.
Q4: How long do DIY nail designs typically last?
A4: With a good base coat and a solid top coat, most DIY nail designs can last anywhere from 3-7 days, depending on your daily activities and how well you care for your nails.
Q5: I’m terrible at painting straight lines. Are there any easy ways to get them right?
A5: Yes! Striping tape is your best friend. Apply it after your base color is dry, paint over it, and then carefully peel off the tape while the polish is still slightly wet. This gives you a super crisp line!
Q6: What’s the best way to clean up mistakes without ruining the whole nail?
A6: Keep a small brush (like an old eyeliner brush or a fine art brush) and some nail polish remover nearby. Dip the brush in remover and gently wipe away any excess polish around the edges or on your skin. A tapered cotton swab also works wonders.
Q7: How can I make my DIY USA flag nails look more professional?
A7: Focus on clean application, ensuring your base coat and white polish are opaque. Sharp lines, evenly spaced stars, and a high-shine top coat make a huge difference. Patience and neatness are key!
Conclusion: Shine Bright with Your Festive Fingertips!
And there you have it! Creating stunning USA flag nail designs for summer is absolutely achievable, fun, and a fantastic way to express your personality and festive spirit. We’ve explored everything from the essential tools and beginner-friendly creations to more intricate designs and pro tips that will elevate your nail game. Remember, nail art is all about creativity and enjoying the process. Don’t be afraid to experiment, mix and match these ideas, and most importantly, have fun with it!
Whether you’re heading to a holiday barbecue, a beach day, or just want to add a pop of patriotic flair to your week, these red, white, and blue designs are sure to make your nails the star of the show. So grab your polishes, unleash your inner artist, and let your fabulous USA flag nails shine all summer long. You’ve got this!

