Need unique nail designs for special events? Think elegant accents, subtle shimmer, and personalized touches tailored to your occasion. From classic French tips with a twist to minimalist metallic lines and subtle glitter fades, these ideas are simple enough for beginners to try, helping you express your style and feel fabulous for weddings, parties, or any celebration!
Getting ready for a special event is always exciting! You’ve picked out your outfit, planned your hair, and now it’s time to think about your nails. But what if you’re stuck on what design to go for? You want something that wows, but maybe you’re not a pro at nail art. Don’t worry! It’s totally understandable to feel a little overwhelmed by all the options. We’re here to make it super easy and fun. Get ready to discover gorgeous, unique nail designs perfect for any celebration, all simple enough for anyone to create!
We’ll walk you through some fantastic ideas that will make your nails the perfect finishing touch to your special occasion look. Let’s dive into creating nail art that’s as special as you are!
Frequently Asked Questions
What’s the easiest unique nail design for beginners?
A simple glitter accent nail is super easy and effective! Paint all your nails your desired color, then on one nail, apply a glitter polish over a top coat or nail glue. It adds sparkle without complicated art.
How can I make a basic manicure look more special for an event?
You can elevate a basic manicure with a subtle detail. Think adding a tiny rhinestone at the base of one nail, a thin metallic stripe across your nail, or a delicate dot at the cuticle. These small touches make a big difference!
What nail colors are always a good choice for special events?
Classic colors like deep reds, elegant nudes, sophisticated blacks, and rich jewel tones (like emerald green or sapphire blue) are always safe and stylish bets for formal events. Metallics like gold, silver, or rose gold also add a touch of glamour.
Can I do intricate nail art without professional tools?
Yes! With a steady hand, you can use toothpicks for dots, thin nail art brushes for lines, and even household items like bobby pins for textured effects. Patience is key, and watching a few online tutorials can help immensely!
How long do special event nail designs usually last?
With proper application, good quality polish, and a strong top coat, most carefully done nail designs can last anywhere from 5-10 days. Using cuticle oil and avoiding harsh cleaning chemicals can help extend their life. Gel polish manicures, with proper application and curing, can last 2-3 weeks.
What’s the difference between regular polish and gel polish for event nails?
Regular polish is easy to apply and remove at home but can chip faster. Gel polish requires a UV/LED lamp to cure, offers a super glossy finish, and is much more durable, resisting chips and smudges for longer, making it ideal for events.
Elevate Your Look: Unique Nail Designs for Special Events
Getting ready for a special occasion is half the fun! You’ve got your outfit gleaming, your hair styled to perfection, and now it’s time for the crowning glory: your nails. But sometimes, deciding on that perfect, unique nail design for an event can feel like a challenge. You want something that sparkles, something that feels totally “you,” but you’re not sure where to start, especially if you’re new to nail art. It’s a common puzzle, but don’t let it stress you out! We’re here to make it simple, creative, and fun.
This guide is packed with inspiration and easy-to-follow ideas that will help you craft stunning nail looks for any celebration, from weddings and birthdays to parties and date nights. We’ll cover how to choose colors, add subtle details, and even simple techniques that even beginners can master. Ready to transform your tips into stunning statements?
The Power of the Perfect Polish: Why Your Nails Matter
Think about it – your hands are often visible when you’re talking, gesturing, or holding a drink. Your nails are a beautiful canvas that can truly complete your entire look. They’re a small detail that makes a big statement, showing off your personality and adding an extra touch of polish to your ensemble. For a special event, you want them to reflect the mood of the occasion – whether that’s pure glamour, understated elegance, or a pop of festive fun.
A well-chosen nail design can:
- Amplify your outfit: A matching or complementary nail design can tie your whole look together seamlessly.
- Express your style: Nails are a fantastic way to showcase your personal taste and creativity.
- Boost your confidence: Having beautifully manicured nails can make you feel polished and ready to conquer any event.
- Be a conversation starter: Unique designs often catch the eye and can lead to compliments and chats.
Setting the Stage: Planning Your Event Manicure
Before we dive into specific designs, let’s talk about how to plan. A little bit of thought upfront can make the whole process smoother and ensure your nails look amazing.
Consider the Occasion
Is it a formal wedding, a casual birthday bash, a romantic dinner, or a festive holiday party? The vibe of the event should be your first guide.
- Formal Events (Weddings, Galas): Think elegant, classic, and sophisticated. Metallics, subtle glitters, deep colors, and minimalist designs work best.
- Casual Gatherings (Birthdays, Brunches): You can be a bit more playful! Think brighter colors, fun accent nails, or simple patterns.
- Themed Parties: Get creative and match your nails to the theme!
Color Palette Perfection
Your outfit is a great starting point for choosing colors. You can:
- Match your outfit: For a seamless look.
- Complement your outfit: Choose colors from your outfit that aren’t the main shade for a harmonious effect.
- Choose a contrasting pop: Select a bold color that stands out against your outfit for a fun statement.
- Go classic: Timeless shades like nudes, reds, deep blues, and blacks are always elegant.
Prep Your Canvas: Essential Nail Care Steps
No matter how intricate or simple your design, a well-prepped nail is the foundation for a long-lasting, beautiful manicure. Here’s what you need to do:
- Cleanse: Remove all old polish with a non-acetone remover, which is gentler on your nails.
- Shape: File your nails into your desired shape (square, round, oval, almond). Always file in one direction to prevent splitting.
- Cuticle Care: Gently push back your cuticles with an orange stick or pusher. If needed, trim any hangnails carefully. Avoid cutting your cuticles entirely as they protect your nail bed. For more on best practices in cuticle care, you can check out NHS guidance on treating minor cuts, which also touches on gentle wound care should you nick yourself.
- Buff: Lightly buff the surface of your nails to smooth out ridges and create an even finish. This also helps polish adhere better.
- Base Coat: Always apply a good base coat. This protects your natural nails from staining and helps your polish last longer.
Tools of the Trade (You Don’t Need a Salon!)
You’d be surprised by how much you can achieve with just a few basic items:
- Nail Polish: Your chosen colors, a good top coat, and a base coat.
- Dotting Tools: These come in various sizes and are perfect for creating dots, swirls, and small patterns. A toothpick or the blunt end of a pen can also work in a pinch!
- Thin Nail Art Brush: For drawing fine lines, details, and delicate shapes.
- Tweezers: For picking up small embellishments like rhinestones or glitter.
- Cleanup Brush/Cotton Swabs: For tidying up any polish mistakes around the cuticle.
- Nail Polish Remover: For quick fixes and cleanup.
Unique Nail Designs to Sparkle For Your Events
Now for the fun part! Here are some gorgeous, beginner-friendly nail design ideas perfect for making any special occasion even more memorable.
1. The Elegant Chrome Accent
Chrome nails are incredibly chic and offer a modern twist on classic elegance. For a special event, instead of doing all-over chrome, consider a subtle accent!
- Design: Paint all nails in a deep, solid color like navy, burgundy, forest green, or a classic nude. On one or two nails per hand, apply a thin line of chrome powder or a chrome effect polish just along the edge of your nail (like a reverse French tip) or as a single vertical line down the center.
- Why it works: It’s understated and sophisticated, adding just a hint of futuristic shimmer without being overwhelming.
- How to achieve: Use a fine nail art brush dipped in chrome powder (applied to a sticky top coat or special base) for the effect, or opt for a sheer chrome-toned polish.
2. The Subtle Glitter Fade (Ombré)
A glitter fade, or ombré, is like a party on your fingertips but in a refined way. It’s stunning for evening events or weddings.
- Design: Paint your nails in your chosen base color. Then, take a fine glitter polish (silver, gold, rose gold, or a color that complements your base) and dab it onto the tip of your nail, gradually blending it down towards the cuticle with a sponge or a dabbing brush. Build up the intensity at the tip and let it softly fade out.
- Why it works: It adds sparkle and dimension without full-on glitter overload. The fade effect is soft and romantic.
- Tip: A stipple or makeup sponge can help you create a beautiful gradient effect. Apply the glitter polish to the sponge and gently dab it onto the nail, starting from the tip and working down.
3. Minimalist Lines and Dots
Sometimes, less is more. Simple geometric details can elevate a plain manicure into something special.
- Design: Apply a solid color polish (think shades of grey, blush pink, deep teal, or even a sheer nude). Once dry, use a fine nail art brush or a dotting tool to add delicate details. This could be a single thin gold or silver line across the nail, a few tiny dots at the cuticle, or a small geometric shape in the corner.
- Why it works: It’s modern, chic, and incredibly versatile. It adds a touch of artistry without being too busy.
- Beginner-friendly tip: Use a striping tape for perfectly straight lines. Apply it to the dry polish, paint over it with your accent color, and peel it off carefully while the painted layer is still slightly wet.
4. The Modern French Tip
The classic French manicure gets a contemporary update. Forget the stark white!
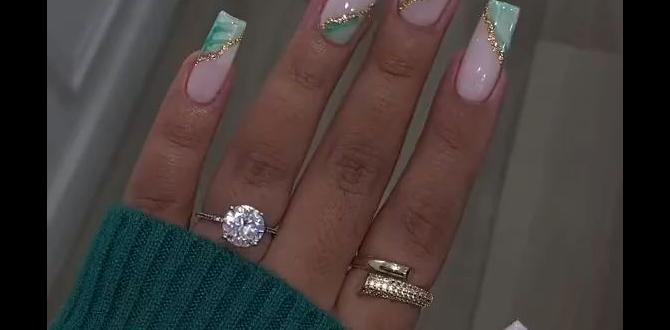
- Design: Start with a sheer nude, pink, or milky white base. Instead of a white tip, use a contrasting color, a metallic shade, or even a subtle glitter polish to create the tip. You can also play with the shape – try a deep ‘V’ shape, a rounded almond tip, or a super-thin micro-tip.
- Why it works: It’s a sophisticated nod to a timeless style but feels fresh and exciting for a special event.
- Get precise: For clean lines, you can use a fine brush or even a stencil.
5. The Single Rhinestone Statement
A tiny touch of bling can make a huge impact!
- Design: Paint your nails a solid color of your choice. On one accent nail per hand (usually the ring finger), apply a tiny dab of strong nail glue or a dot of top coat where you want the stone. Use tweezers to carefully place a small rhinestone or even a micro-pearl.
- Why it works: It’s glamorous and adds a focal point without being over the top. It’s incredibly easy to do.
- Secure it: Make sure to seal the rhinestone carefully with a little top coat around its base (avoid painting directly over the stone if it’s foiled on the back, as it can dull its shine).
6. Jewel-Toned Sophistication
Rich, deep colors are inherently luxurious and perfect for elegant events.
- Design: Opt for shades like emerald green, sapphire blue, amethyst purple, or ruby red. You can wear these as solid colors for a chic, understated look, or pair them with a touch of gold or silver chrome/foil at the cuticle or as a thin line.
- Why it works: These colors exude richness and drama, making your nails a statement piece without needing complex art.
- Expert tip: A high-shine top coat is crucial to bring out the depth and luminosity of jewel tones.
7. The Subtle Shimmer Overlay
This is a fantastic way to add a hint of magic to any color.
- Design: Paint your nails in your favorite solid color or even a French tip. Once dry, apply a sheer, iridescent top coat or a delicate holographic polish over the entire nail. This adds a subtle, captivating shimmer that catches the light beautifully.
- Why it works: It’s super simple to apply but adds a dreamy, ethereal quality that is perfect for special occasions.
8. Metallic & Holographic Details
Metals and holographics bring instant glamour, and you don’t need to go all out.
- Design: Paint your nails a solid color. Use metallic gold, silver, rose gold, or holographic polish to paint a thin line just above the free edge of your nail, or create a small metallic accent shape on one nail.
- Why it works: This adds a striking modern element that provides a beautiful contrast and catches the light.
- Application tip: For very clean lines, consider using nail tape or guides to achieve a crisp finish.
Tips for a Long-Lasting Event Manicure
You’ve put in the effort to create a stunning design, so let’s make sure it lasts through the entire event!
- Quality Top Coat: This is your best friend! A good quality, quick-drying, and chip-resistant top coat will seal in your design and add an extra layer of protection and shine. Reapply a thin layer every 2-3 days if needed.
- Avoid Water & Harsh Chemicals: For the first 12-24 hours, try to avoid prolonged exposure to hot water and harsh cleaning products, as these can soften and degrade polish.
- Cuticle Oil: Keeping your cuticles hydrated with cuticle oil will help prevent the cuticle area from drying out and lifting, which can sometimes lead to polish chipping at the base.
- Be Gentle: Try not to use your nails as tools to open things or scrape surfaces. Treat them with care!
- Top Up & Repair: If you notice a tiny chip or wear on an edge, a quick touch-up with your top coat can often save the day and extend its life.
Your Nails, Your Masterpiece: Embrace Creativity!
We’ve explored how to plan, prep, and create some truly unique nail designs for your


