Don’t let long nails intimidate you! From elegant ombrés to whimsical art, discover the most stunning and achievable unique nail designs for long nails with these expert tips and simple steps. We’ll guide you through creating show-stopping manicures that highlight your nail length beautifully.
Having long nails opens up a whole world of creative possibilities for nail art! But sometimes, it can feel a little overwhelming knowing where to start. The good news is, you don’t need to be a pro to create gorgeous designs. Whether you’re flaunting your natural length or showcasing extensions, there are tons of fun and unique ways to make your long nails pop. We’re going to dive into some genius tips and simple techniques that will help you achieve breathtaking manicures right at home. Get ready to unlock your inner nail artist and express your style!
This guide will cover everything from choosing the right designs for your nail shape to mastering simple application techniques.
Why Long Nails Are a Canvas for Creativity
Long nails are often seen as a statement in themselves, but they also offer a much grander canvas for nail artists and enthusiasts alike. Unlike shorter nails, longer lengths provide more surface area to play with, allowing for intricate details, bolder patterns, and more complex designs. This extra space means you can incorporate finer lines, more colors, gradients that blend beautifully, and even tiny embellishments without making your nail look cluttered. It’s like comparing a postage stamp to a full-size painting – the latter allows for much more artistic freedom and visual depth. For anyone looking to express their personality through their manicure, long nails are a dream come true!
The shape of your long nails also plays a significant role in how designs appear. Almond, stiletto, coffin, and oval shapes all have different lines and curves that can complement or enhance specific nail art. For instance, a pointed stiletto is perfect for sharp, geometric designs, while a softer oval might be ideal for delicate floral patterns or soft ombré effects. Understanding how your nail shape interacts with your chosen design is a key step in creating a polished and harmonious look.
Choosing the Right Unique Nail Designs for Long Nails
When it comes to unique nail designs for long nails, the possibilities are almost endless. The trick is to choose designs that are not only beautiful but also practical for your lifestyle and complementary to your nail shape. Here are some ideas and considerations:
Designs That Flatter Long Nails
- Ombré and Gradients: These are fantastic for long nails because the gradual transition of colors has more space to show off its beauty. A classic pink-to-white baby boomer or a vibrant rainbow gradient looks stunning.
- Geometric Patterns: Bold lines, chevrons, and abstract shapes can be incredibly striking on longer nails. You have the room to create sharp angles and intricate, interlocking patterns. Think about accent nails with a complex geometric design while keeping others simple.
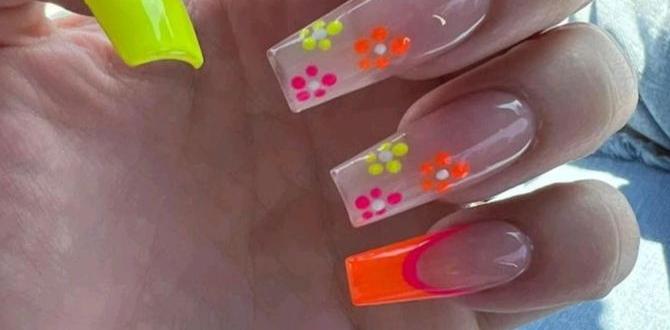
- Floral and Botanical Art: Delicate flowers, trailing vines, or even bold tropical leaves can bloom beautifully on a longer nail canvas. You can opt for minimalist line art or detailed, painted blooms.
- Marble Effects: The swirling patterns of marble look sophisticated and artistic on long nails. You can achieve this with polishes and water marbling techniques or by using nail foils.
- French Manicure Variations: Move beyond the basic white tip! Try colored tips, glitter French tips, or even a double French line for a modern twist that elongates the nail even further.
- Galaxy and Cosmic Designs: The depth and sparkle of a galaxy print are perfectly showcased on longer nails, allowing for layers of dark blues, purples, and shimmering stars.
- Animal Prints: Classic leopard, chic snakeskin, or bold zebra stripes can look very stylish and make a statement on longer nails.
- Minimalist Accents: Sometimes, less is more. A single dot, a thin metallic line, or a small constellation drawing on one or two nails can be incredibly elegant.
Considering Nail Shape and Length
The shape of your long nails significantly influences how a design will look. Here’s a quick guide:
| Nail Shape | Best For | Design Ideas |
|---|---|---|
| Almond | Elongation, elegant designs | Delicate florals, fine lines, ombré, abstract swirls |
| Stiletto / Coffin | Bold statements, intricate details | Sharp geometric patterns, bold 3D art, crystal accents, strong color blocking |
| Oval | Graceful, classic looks | Soft ombré, simple French tips, subtle gradients, minimalist dots |
| Square / Squoval | Modern, clean designs | Geometric shapes, solid colors, bold French tips, graphic art |
When your nails are very long, intricate details can sometimes become the focus. Consider if you want your design to be the star or complement the length and shape. For beginners, starting with simpler designs on one or two accent nails is a great way to get comfortable.
Essential Tools for Long Nail Art
You don’t need a fully stocked professional kit to create unique nail designs for long nails! A few key tools can make a big difference:
- Fine-Tip Brushes: Essential for drawing lines, dots, and small details. Look for synthetic bristles that hold their shape well.
- Dotting Tools: These come with different-sized balls on the end, perfect for creating polka dots, swirls, and even small flowers.
- Striping Tape: Adhesive tape that comes in thin lines, ideal for creating clean geometric shapes and French tips.
- Stencils: Pre-cut designs you can use with polish or stamping plates to create intricate patterns quickly.
- Nail Art Polish: Smaller bottles with precision tips make it easier to control the application of color for detailed work.
- Top Coat: A good quality top coat is crucial for sealing your design, adding shine, and ensuring longevity.
- Tweezers: Useful for picking up small rhinestones, glitter, and other embellishments.
- Clean-up Brush: A small, flat brush (like a small concealer brush) dipped in nail polish remover is perfect for cleaning up any stray polish around your cuticles and nail edges.
For any serious nail art enthusiast, investing in a set of good quality brushes is a game-changer. You can find affordable starter kits online or at beauty supply stores.
Genius Tip #1: Master the Art of the Gradient (Ombré)
Ombré is a timeless trend that looks especially elegant on long nails. It’s easier than you think!
How to Achieve a Perfect Ombré:
- Prep Your Nails: Start with clean, shaped nails. Apply a base coat and let it dry completely. Apply one or two coats of your base color (e.g., white, nude, or a light pastel) and let it dry thoroughly. This will make your ombré colors pop.
- The Sponge Technique: Grab a makeup sponge (a clean kitchen sponge cut into small pieces works too!). Apply your two chosen colors side-by-side onto the sponge, or dab them on one after another. Work quickly!
- Dab and Blend: Gently dab the sponge onto your nail, pressing down slightly. You might need to dab a few times to transfer the color.
- Add More Layers: Your first dab might be patchy. Reapply the colors to the sponge and dab again on the same nail. You can also use a piece of the sponge saturated with just one color to blend the edges.
- Clean Up: Use your clean-up brush dipped in nail polish remover to carefully tidy up any polish that got on your skin.
- Seal the Deal: Once the ombré is dry, apply a thick, generous coat of top coat. This is key to smoothing out the texture from the sponge and making the gradient seamless.
Pro Tip: For a smoother finish, wait a minute or two after applying the first layer of top coat, and then apply a second layer. This helps minimize any sponge texture.
You can find great tutorials online demonstrating the sponge technique, often using brands like BeautyBigBang or Born Pretty for specialized tools and polishes.
Genius Tip #2: Geometric Brilliance with Striping Tape
Striping tape allows for incredibly sharp and clean lines, making complex geometric patterns achievable for everyone.
Creating Geometric Designs:
- Start with a Base: Apply your base polish color and let it dry completely. If you’re creating a design with multiple colors and tape, ensure each layer is fully dry before applying tape.
- Apply the Tape: Carefully place strips of adhesive nail striping tape onto your nail. You can create simple lines, triangles, or more complex patterns by layering strips. Press down firmly to ensure a good seal.
- Paint Over the Tape: Apply your accent color(s) over the taped areas. You can use a brush, a sponge, or even a stamper to apply the polish.
- Peel Off the Tape: While the polish is still wet (or slightly tacky, depending on the polish), carefully peel off the striping tape using tweezers or your fingers. Pull slowly and steadily to avoid lifting the underlying polish.
- Seal Your Art: Once the polish is dry, apply a generous layer of top coat to seal your design.
Variations: Try alternating colors on different sections, using metallic tapes for a futuristic look, or combining tape with other techniques like stamping.
For more advanced geometric patterns, consider tools like the MoYou London stamping plates which offer a wide variety of etched designs perfect for transfer onto nails.
Genius Tip #3: Effortless Elegance with Nail Foils
Nail foils are a fantastic way to add metallic, holographic, or intricate patterns to your long nails with minimal effort.
Using Nail Foils:
- Apply Foil Glue: Paint a thin, even layer of specialized nail foil glue onto your nail where you want the foil design to adhere. Let it dry until it becomes clear and tacky (usually a minute or two).
- Place the Foil: Cut a piece of foil slightly larger than your nail. Place the foil design-side down onto the tacky glue.
- Press and Rub: Gently but firmly rub over the foil with your fingertip or a small silicone tool. Ensure good contact all over the design.
- Peel Away: Carefully peel off the backing paper of the foil. The metallic or colored design should transfer beautifully onto your nail.
- Seal It: Apply a clear top coat over the entire nail to protect the foil and add shine.
Tip: Practicing on a fake nail tip first can help you get the hang of the pressure and timing needed.
You can find a wide variety of nail foils online from brands like Marmalade and Apipila.
Genius Tip #4: Delicate Details with Dotting Tools and Fine Brushes
For intricate designs like tiny flowers, polka dots, or fine lines, dotting tools and fine-tip brushes are your best friends.
Creating Detailed Art:
- Polka Dots: Dip your dotting tool into polish and gently press it onto the nail. For uniform dots, wipe the tool clean between each application. Varying the size of the dotting tool can create different-sized dots for a pleasing pattern.
- Flower Power: Use a larger dotting tool to place dots in a circular pattern. Then, use a fine-tip brush to connect them with thin lines or add a smaller dot in the center for a simple floral effect.
- Fine Lines: A fine-tip brush is perfect for drawing thin, elegant lines. Load the brush with a small amount of polish for control. Draw lines steadily across the nail, or create delicate swirl patterns.
- Water Droplets/Bubbles: Use a medium-sized dotting tool with a clear polish to create “dew drops” or “bubbles” on your nails for a subtle, chic effect.
Maintenance: Always clean your dotting tools and brushes thoroughly after each use with nail polish remover to keep them in good condition.
These tools are invaluable for recreating trends seen on sites like NailPro Magazine, which often feature detailed nail art.
Genius Tip #5: Embellish Wisely with Gems and Glitter
Long nails provide ample space for adding 3D elements like rhinestones, gems, and glitter to truly make your manicure stand out.
Adding Sparkle and Shine:
- Strategic Placement: Don’t overdo it! A few well-placed rhinestones can elevate a design. Consider placing a small cluster at the base of the nail, along the cuticle, or as the center of a flower design.
- Use the Right Adhesive: While top coat can work for lightweight embellishments, for heavier gems or stones, a stronger nail glue or a thick layer of builder gel (if you’re comfortable with UV/LED lamps) will provide better hold.
- Glitter Gradient: Apply a layer of glitter polish over a base color, concentrating the glitter at the tip or cuticle and fading it down the nail.
- Encapsulated Glitter: For a super smooth finish, apply loose glitter and then cover it with a clear top coat or acrylic/gel. This seals the glitter in and prevents it from snagging.
- Mix and Match Textures: Combine different types of glitter (fine, chunky, iridescent) or mix glitter with small stud gems for a complex, textured design.
Tip: Use tweezers to precisely pick up and place small embellishments on your nails.
Genius Tip #6: The Power of Negative Space
Negative space in nail art refers to the areas of the nail that are left bare or painted with a sheer polish. This trend looks incredibly chic and sophisticated on long nails.
Incorporating Negative Space:
- Minimalist Lines: Use striping tape or a fine brush to add thin lines (gold, silver, or black) to a bare nail. The contrast between the bare nail and the line creates a modern look.
- Geometric Cut-Outs: Paint geometric shapes onto your nail, leaving strategic areas bare.
- Half-Moon Designs: Paint a shape at the tip or base of your nail, leaving the rest of the nail’s natural color or a sheer nude.
- Peek-a-Boo Designs: This involves creating a design on the underside of the nail tip that can be glimpsed from the front, especially effective on longer nails where the tip is more pronounced.
Why it works: Negative space designs can make long nails appear less heavy and more delicate, offering a sophisticated alternative to full-coverage art.
Maintaining Your Long Nail Masterpieces
Once you’ve created your unique nail designs for long nails, keeping them looking fresh is key!
- Regular Top Coat Touch-Ups: Apply a fresh layer of top coat every 2-3 days to keep the shine and protect your design.
- Moisturize: Keep your cuticles and the skin around your nails hydrated with cuticle oil. Dry skin can detract from even the most perfect manicure. Look for products containing jojoba oil or vitamin E.
- Be Mindful: Long nails can be prone to breaking. Be cautious when opening cans, typing aggressively, or doing tasks that could catch your nails.
- Clean Under the Tips: Long nails can trap dirt. Gently clean the undersides of your nails regularly with a soft brush and soap.
- Patch Test New Products: If you’re trying a new polish or tool, always do a small patch test to ensure you don’t have any adverse reactions. The U.S. Food & Drug Administration (FDA) provides helpful information on cosmetic safety.
Frequently Asked Questions (FAQ)
Q1: How do I prevent my long nails from breaking while doing nail art?
A: Start with strong, healthy nails. Using a nail strengthener can help. When doing nail art, be patient and gentle. Avoid rough movements, and consider reinforcing very long nails with a thin layer of builder gel or acrylic for added durability, especially for detailed or 3D designs.
Q2: Can beginners really do these unique nail designs for long nails?
A: Absolutely! We’ve focused on techniques that are beginner-friendly. Start with simpler designs like dotted patterns or om


