Get enchanting unicorn nails with pastel colors! This guide makes it super easy for beginners to create a magical, dreamy manicure using simple steps and common nail polish shades. You’ll learn the best colors, essential tools, and how to blend them perfectly for a whimsical look that’s totally achievable at home.
Dreaming of nails that shimmer with ethereal magic? Unicorn nail designs with pastel colors are incredibly popular for a reason – they’re whimsical, enchanting, and oh-so-pretty! If you’ve ever looked at gorgeous pastel unicorn manicures and thought, “I could never do that!” – think again! This guide is here to show you just how simple and fun it can be to create this magical look right at home. No fancy equipment or years of art school needed. We’ll walk you through everything, from picking the perfect soft shades to blending them like a pro. Get ready to transform your nails into a dreamy, pastel unicorn wonderland that’s uniquely yours. Let’s dive into this magical journey!
Frequently Asked Questions About Pastel Unicorn Nails
What are the most popular pastel colors for unicorn nails?
The most popular pastel colors include soft pinks, baby blues, lavender purples, mint greens, and pale yellows. Think of colors that evoke a dreamy, sunrise-sky feel. These shades blend beautifully together to create that signature unicorn magic.
Do I need special tools to create unicorn nail designs?
While specialized tools can help, you don’t absolutely need them for a beginner-friendly unicorn nail design. A clean makeup sponge (like a cosmetic wedge), a nail file, base coat, top coat, and your pastel polishes are the essentials. A dotting tool can be helpful for accents, but isn’t strictly necessary to start.
How do I get the pastel colors to blend smoothly?
The key to smooth blending is working quickly while the polish is still wet. Apply your chosen pastel colors side-by-side on a clean surface the sponge will touch, then gently dab the sponge onto your nail. Overlap your dabbing strokes to encourage the colors to meld. A clean section of the sponge can be used to blend edges further.
Can I add glitter or other elements to my pastel unicorn nails?
Absolutely! Glitter adds extra sparkle and enhances the magical unicorn vibe. You can use fine iridescent glitter, chunky holographic glitter, or even glitter polish. Other popular additions include small rhinestones, tiny star embellishments, or even hand-painted small unicorn horns or subtle rainbow stripes.
How long do homemade unicorn nail designs usually last?
With proper application – a good base coat, careful polish application, and a strong top coat – your pastel unicorn nails can last anywhere from 5 to 10 days. Avoid harsh chemicals or activities that can chip your nails to help them stay looking perfect for longer.
What if I mess up a color blend? Can I fix it?
Don’t worry if your first attempt isn’t perfect! The beauty of nail art is that you can often fix mistakes. You can gently use the edge of your sponge or a small brush dipped in nail polish remover to clean up edges. If a blend is really off, you can let it dry and then apply another sheer layer of a complementary color or a white polish to start again, or simply use a glitter top coat to cover it up!
Your Pastel Unicorn Nail Art Toolkit
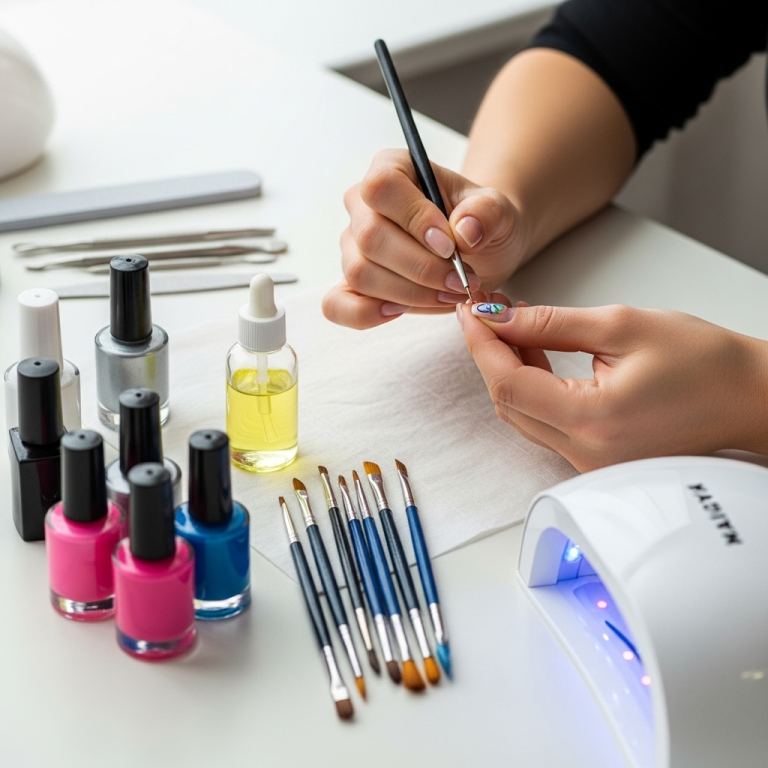
Creating enchanting unicorn nails with pastel colors doesn’t require a professional salon setup. With a few key items, you can achieve a truly magical look at home. Think of these as your magic wand and palette for a dreamy manicure!
Essential Polish Colors:
The foundation of any great pastel unicorn design is the right color palette. Opt for shades that evoke softness and fantasy. Here are some must-haves:
- Soft Pink: A gentle blush or rose shade.
- Baby Blue: A light, airy sky blue.
- Lavender/Lilac: A delicate purple hue.
- Mint Green: A refreshing, pale green.
- Pale Yellow: A soft, buttery yellow.
- White: Essential for creating a base that makes pastels pop and for blending!
Essential Tools:
These are the workhorses that will help you bring your design to life:
- Base Coat: This protects your natural nails and helps polish adhere better.
- Top Coat: Seals your design, adds shine, and extends the life of your manicure.
- Nail Polish Remover: For cleaning up mistakes and prepping nails.
- Cotton Pads/Balls: For applying nail polish remover.
- Makeup Sponges: Cosmetic wedges are perfect for creating the gradient effect.
- Small Brush or Toothpick: Useful for precise clean-up around the cuticle.
- Optional: Top Coat with Glitter/Holographic Finish: To add that extra sparkle!
- Optional: Nail Art Brushes or Dotting Tools: For adding small details like stars or horns.
Step 1: Prepare Your Canvas—Nail Prep is Key!
Before we dive into the magical colors and blending, let’s get your nails ready for their transformation. A little prep work goes a long way in making your unicorn design look polished and last longer. This isn’t the fun part, but it’s super important for a flawless finish!
- Clean Nails: Start with clean, dry nails. Remove any old polish using nail polish remover and cotton pads.
- Shape Them Up: Use a nail file to gently shape your nails. Whether you prefer square, round, or almond, keeping them uniformly shaped makes the final design look neat. File in one direction to prevent snagging.
- Cuticle Care: Gently push back your cuticles using an orange stick or a cuticle pusher. This creates a cleaner nail surface for polish application and makes your nail bed look longer.
- Buffing (Optional): Lightly buff the surface of your nails with a fine-grit buffer. This smooths out ridges and helps polish adhere better. Be gentle!
- Apply Base Coat: This is crucial! Apply one thin layer of your base coat. It protects your natural nail from staining and provides a sticky surface for your polish to grip. Let it dry completely.
A well-prepped nail is like a perfectly primed canvas for an artist. It ensures your colors show up vibrantly and your beautiful unicorn design sticks around!
Step 2: Crafting That Dreamy Pastel Gradient
This is where the magic really begins! Creating the blended pastel effect is the heart of the unicorn nail design. It’s easier than you think, especially with a makeup sponge.
Choosing Your Colors:
For a classic pastel unicorn look, select 3-4 pastel shades that you love. Think about how they’ll look next to each other. For example, a pink, purple, and blue combination is always a winner!
The Sponge Technique:
Here’s how to get that smooth, ethereal blend:
- Prepare Your Sponge: Cut a makeup sponge wedge into a manageable size. You can also slightly dampen it with water and then squeeze out all the excess moisture – this can help create a smoother blend by preventing the polish from soaking in too much.
- Apply Polish to Sponge: On a flat, clean surface (like a plastic lid or a piece of foil), paint stripes of your chosen pastel polishes directly onto the sponge. Place them right next to each other. For example, you might put pink on one edge, then lavender, then blue. Don’t load it too heavily with polish, but ensure there’s enough to transfer.
- Dab, Dab, Dab! Immediately after applying the polish, gently press the sponge onto your nail. Start from the cuticle end and roll or dab upwards. You want to transfer the colors onto your nail.
- Repeat and Blend: You might need to re-apply polish to your sponge and dab again to build up opacity and blend the colors. For a more seamless blend, you can use a clean section of the sponge to gently dab over the lines where the colors meet.
- Work Quickly: The key is to work while the polish is still wet. If it starts to dry on the sponge, your blend won’t be as smooth.
- Clean Up Edges: As messy as it might look at this stage, don’t worry! Use a small brush (an old, clean makeup brush or a fine-tip art brush) dipped in nail polish remover to carefully clean up any polish that got on your skin or cuticles. This step makes a HUGE difference.
If you’re aiming for a more subtle pastel unicorn look, using white as your base coat can help the colors appear lighter and more diffused. Simply apply a thin coat of white polish before starting the sponge technique. This also helps create a brighter canvas, making your pastels really sing!
Step 3: Adding Magical Unicorn Sparkle
Now for the fun part that truly elevates your pastel unicorn nails: adding that signature sparkle and finishing touches! This is where the ethereal, magical quality comes to life.
Option 1: Iridescent Top Coat
This is the easiest way to add unicorn magic. An iridescent or holographic top coat has a sheer, shimmery base that catches the light and creates duochrome shifts. Simply apply one or two layers over your dried pastel gradient. It’s like a magic spell in a bottle!
Option 2: Glitter Application
If you want more intense sparkle, fine iridescent glitter or holographic glitter polish is your best friend. You can:
- Full Glitter Coverage: Apply a layer of glitter polish over the entire nail for maximum shimmer.
- Glitter Gradient: Apply glitter polish only to the tips or the cuticle area and blend it down into the pastel colors.
- Loose Glitter: For even more control, apply a layer of glitter top coat (or a clear top coat) and while it’s still wet, carefully sprinkle fine iridescent or holographic glitter onto the nail. Gently press it down. You can also use a small brush to pick up glitter and place it strategically.
Option 3: Unicorn Horn or Details (Optional)
For those who want to go the extra mile, you can add subtle unicorn-themed details:
- White Unicorn Horn: Using a fine nail art brush and white polish, paint a small, simple cone shape on one or two nails to represent a unicorn horn. You can add a subtle shimmer to it with a separate clear polish with fine glitter.
- Small Stars or Moons: Use a dotting tool or a fine brush to add tiny white or silver stars or crescent moons for an extra dreamy touch.
- Subtle Rainbow Swirl: With a very fine brush and tiny amounts of light pastel colors (pink, yellow, blue), create a tiny, almost ethereal swirl or a hint of a rainbow arc on one nail.
Remember, the goal with these extra details is to be subtle and whimsical, not overpowering. They should complement the pastel gradient, not steal the show.
Step 4: The Final Seal: Top Coat Power
You’ve blended your colors beautifully, added sparkle, and maybe even a little detail. Now it’s time to lock it all in with a fantastic top coat. This is the “set it and forget it” step that ensures your gorgeous unicorn nails stay gorgeous!
Why a Top Coat is Essential:
- Protection: It shields your nail art from chipping, peeling, and everyday wear and tear.
- Shine: A good top coat gives your manicure that professional, glossy finish that makes colors pop.
- Smoothness: It evens out any slight texture from glitter or the ombre effect, making your nails feel perfectly smooth.
- Longevity: It’s the secret weapon for making your beautiful design last as long as possible.
How to Apply:
- Wait for Drying: Ensure all your polish and any glitter or details are completely dry to the touch. Rushing this step can cause smudging!
- Apply Generously (but not too much): Apply a smooth, even layer of your top coat. Make sure to cap the free edge of your nail by running your brush lightly along the very tip of your nail. This extra step significantly helps prevent chipping.
- Avoid Overworking: Try to get one smooth, even coat on without going over it too many times, which can sometimes drag the colors or glitter around.
- Let it Cure: Allow your top coat to dry completely. This can take a few minutes for quick-dry formulas or a bit longer for traditional ones. Avoid touching anything until you’re sure it’s dry.
A high-shine, quick-dry top coat is a nail art beginner’s best friend. It gives you that salon-perfect look and keeps your pastel unicorn creations looking magical for days!
More Tips for Lasting Pastel Unicorn Magic
You’ve created a beautiful pastel unicorn nail design, and you want it to last! Here are some extra tips and tricks to keep your manicure looking enchanting for as long as possible. It’s all about gentle care and smart habits.
Seal the Deal with Regular Top Coating:
Even after your initial top coat dries, consider applying a thin layer of top coat every 2-3 days. This reinforces the protective layer and can revive shine, especially if you notice any dullness.
Moisturize, Moisturize, Moisturize:
Dry cuticles and dry hands can lead to compromised nails. Keep a cuticle oil or a good hand cream handy and apply it regularly, especially after washing your hands. Gently massaging it into your cuticles and nails helps keep everything healthy and flexible, reducing the risk of snagging or chipping.
Protect Your Hands:
This is a big one for longevity! Whenever you’re doing chores that involve water, detergents, or harsh chemicals (like washing dishes, cleaning the bathroom, or gardening), wear gloves. Water and chemicals are the arch-nemesis of any manicure, whether it’s a simple color or an intricate design like your unicorn nails.
Be Gentle When Filing:
If you notice a slight snag or edge on your nail, resist the urge to bite or pick at it. Instead, use a fine-gritiger nail file to gently smooth it down. Again, file in one direction.
Avoid Using Nails as Tools:
It might be tempting, but try not to use your nails as tools to open cans, scrape off stickers, or type aggressively. This puts a lot of direct pressure on the nail tip and can easily cause chips or breaks.
Consider Your Activities:
Be mindful of activities that might put prolonged stress on your nails. For example, intense sports or heavy manual labor might not be ideal for showcasing your delicate unicorn manicure. If you know you’ll be engaging in such activities, you might consider a more resilient nail design or opting for press-on nails for that period.
By following these simple care tips, you can significantly extend the life of your beautiful pastel unicorn nails and keep them looking magical!
The Magic Behind Pastel Unicorn Nails
Unicorn nail designs with pastel colors have captured hearts for a reason. Let’s break down why this trend is so enduringly popular and why it’s a fantastic choice for anyone.
Inherent Whimsy and Fantasy
Unicorns are mythical creatures associated with magic, purity, and dreams. Pastel colors, with their soft, muted tones, evoke a sense of gentleness, serenity, and ethereal beauty. When these two elements combine, they create a manicure that feels inherently magical, whimsical, and uplifting. It’s an escape into a fantasy world right at your fingertips!
Soothing Aesthetic
Pastel colors are known for their calming and soothing properties. They are gentle on the eyes and contribute to a feeling of peace and tranquility. This makes pastel unicorn nails not just a fashion statement but also a mood enhancer, bringing a touch of serenity to your day.
Versatility of the Gradient/Ombre Effect
The signature blended technique used in unicorn nails (often a gradient or ombre effect) is incredibly versatile. It allows for a beautiful flow of colors, creating depth and visual interest. This technique is forgiving for beginners, as the blending itself masks minor imperfections, making it a perfect DIY. The gradient can also be adapted to feature any color combination, making it adaptable to personal style.
Adaptability to Different Styles
While the core of the design is pastel and dreamy, it can be adapted to suit various personal aesthetics.
- Subtle Elegance: A softer blend with minimal glitter for a chic, understated look.
- Bold Fantasy: Brighter pastels, more prominent glitter, and even small details like horns or stars for those who want to fully embrace the magical theme.


