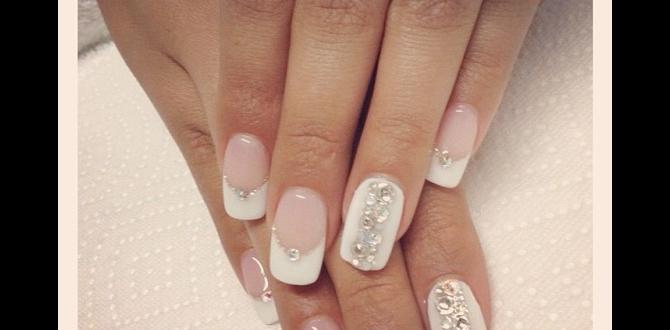
Underrated nail designs are essential styles that offer a unique twist on classic looks, allowing for personal expression beyond the most popular trends. Discover simple yet chic options that add flair without complexity, perfect for beginners and busy beauty lovers seeking stylish, achievable manicures.
Nail art can sometimes feel overwhelming, with trends buzzing by faster than you can say “French tip.” You might scroll through endless, intricate designs on social media and think, “That’s beautiful, but I could never do that!” It’s easy to feel like you’re missing out on the fun if you’re not a nail art whiz. But guess what? You don’t need to be a pro to have stunning nails! There are so many wonderful, yet often overlooked, nail designs that are surprisingly easy to create and look incredibly chic. These are the styles that add that special something to your look without demanding hours of your time or advanced skills. Let’s dive into some seriously underrated nail designs that are totally achievable and will have you feeling fabulous!
Mastering the Basics: Your Underrated Nail Design Toolkit
Before we jump into the designs, let’s make sure you have the confidence and the right tools to bring them to life. Think of this as your friendly guide to the essential items that will make your DIY nail journey a breeze. You don’t need a professional salon in your bathroom, just a few key players!
Essential Tools for Easy Nail Art
Having the right tools makes all the difference, turning a potential mess into a masterpiece. Don’t worry, these are simple and readily available!
- Nail File & Buffer: For shaping your nails to perfection and creating a smooth canvas.
- Cuticle Pusher/Orange Stick: To gently care for your cuticles, making the nail bed look clean and neat.
- Base Coat: This is crucial! It protects your natural nails from staining and helps your polish last longer.
- Top Coat: Your secret weapon for shine and durability. It seals in your design and prevents chipping.
- Nail Polish Remover & Cotton Pads: For those inevitable little oopsies and for cleaning up edges.
- Thin Nail Art Brush or Toothpick: For drawing lines, dots, or small details. No need for fancy tools here!
- Dotting Tool (Optional but Fun!): Perfect for creating evenly sized dots, a staple in many underrated designs.
Nail Prep is Key!
A little preparation goes a long way. Clean, well-shaped nails are the best foundation for any design.
- Clean Your Nails: Remove any old polish.
- Shape Them: File your nails into your desired shape. A gentle back-and-forth motion is best for natural nails.
- Push Back Cuticles: Gently push them back for a polished look. Avoid cutting them!
- Apply Base Coat: Always start with a good base coat. Let it dry completely.
Underrated Nail Designs You NEED to Try!
Now for the fun part! These designs are simple, stylish, and have that “wow” factor without being complicated. They’re perfect for anyone looking to step up their nail game.
1. The Reverse French Manicure
You know the classic French mani with the white tip? The reverse French flips it! Instead of the tip, you paint a contrasting color at the base of your nail, near the cuticle. It’s sophisticated and adds an unexpected visual element.
How to Create a Reverse French Manicure:
- Apply your base coat and let it dry.
- Paint your entire nail with your main polish color. Let it dry fully.
- The Trick: Use a thin brush or a fine-tipped polish to carefully paint a crescent shape along your cuticle line. You can also use a small French tip guide sticker if you’re worried about freehanding it.
- Clean up any stray marks with a small brush dipped in nail polish remover.
- Finish with a top coat once everything is dry.
Why it’s Underrated:
- It’s a subtle yet impactful change from the traditional French.
- It elongates the appearance of the nail bed.
- It’s surprisingly easy to do with a steady hand or guide stickers.
2. The Modern Half-Moon
Similar to the reverse French, this design uses the lunula (the half-moon shape at the base of your nail) as a focal point. Instead of a full crescent, you might leave a small, naked half-moon at the base, or paint it a different color than the rest of the nail.
How to Create a Modern Half-Moon:
- Apply base coat and let dry.
- Paint your nail with your chosen color. Let it dry completely.
- Option A (Naked Moon): Once the main color is dry, use a small brush or even a stencil (like a circular sticker) placed at the base of your nail to neatly paint the desired color around the moon.
- Option B (Colored Moon): Paint the whole nail with Color A. Once dry, use a guide sticker or carefully freehand Color B in a half-moon shape at the base.
- Clean up edges and apply a top coat.
Why it’s Underrated:
- It’s a chic, geometric design that feels very contemporary.
- The negative space (leaving part of the nail bare) is very on-trend and minimalist.
- It’s forgiving if your lines aren’t perfectly straight!
3. The Subtle Gradient or Ombré
Ombré nails, where colors blend seamlessly, sometimes seem complicated. But a subtle, tone-on-tone gradient or a simple two-color blend is totally doable and incredibly elegant! Think of soft pinks blending into a nude, or a deep blue fading into a lighter shade.
How to Create a Subtle Gradient:
- Method 1 (Sponge – for a softer look):
- Apply base coat and Color A (the lighter shade) to your entire nail. Let dry.
- On a makeup sponge or piece of foil, dab Color A and Color B (the darker shade) side-by-side.
- Gently dab the sponge onto your nail, starting near the cuticle and blending upwards. You might need a few passes.
- Clean up edges and apply a top coat.
- Method 2 (Brush – for a sharper blend):
- Paint your nail with Color A. Let dry.
- Using a thin brush dipped in Color B, carefully paint a line where you want the blend to start (e.g., halfway up the nail).
- Use a clean, slightly damp brush to gently blend the two colors together.
- Repeat for opacity and apply top coat.
Why it’s Underrated:
- It can be as simple or as complex as you like.
- The blended effect is always soft and flattering.
- It looks far more professional than it is to create!
For more inspiration on color theory and what shades blend well, check out Color Matters’ basic guide to color theory.
4. Geometric Accents
Forget intricate patterns; we’re talking about clean lines and simple shapes. A single stripe down the middle, a corner accent, or a bold diagonal line can transform a plain nail into a modern masterpiece.
How to Create Geometric Accents:
- Apply base coat and your main polish color. Let dry completely.
- Use Guide Tape: For sharp lines, use nail art tape or even regular Scotch tape (cut into thin strips). Place it firmly on your dry polish.
- Paint over the tape with your accent color.
- Carefully peel off the tape while the polish is still wet to reveal a clean line. If you wait for it to dry, you risk peeling the base color.
- Freehand Option: Use a thin nail art brush or a toothpick to draw simple shapes like lines, triangles, or squares in a corner or across the nail.
- Let everything dry and seal with a top coat.
Why it’s Underrated:
- It’s minimalist yet striking.
- Clean geometric lines look very sophisticated.
- They are incredibly versatile – try thin lines, thick blocks, or just a small dot!
5. The Subtle Glitter Fade
Glitter doesn’t have to mean a full-on disco ball! A delicate fade or a hint of sparkle at the tip or cuticle can add just the right amount of glam.
How to Create a Glitter Fade:
- Apply base coat and your main polish color. Let dry.
- Option A (Tip Fade): Apply a glitter polish to the tips of your nails, and then use a dry brush to lightly feather it down the nail.
- Option B (Cuticle Fade): Apply a glitter polish near your cuticle and use a sponge or dry brush to blend it upwards towards the tip.
- Option C (Accent Glitter): Simply apply a subtle glitter polish to the accent nail only.
- Let dry and seal with a top coat. A thicker top coat might be needed for very textured glitters.
Why it’s Underrated:
- It’s glamorous without being over the top.
- The fade effect adds dimension and interest.
- It’s a fantastic way to use up those beautiful but perhaps “too much” glitter polishes.
6. The One-Nail Accent
Sometimes, less is truly more. Painting one nail on each hand a different color or with a simple design is a chic way to add personality without committing to a full manicure.
How to Create a One-Nail Accent:
- Paint all nails except one with your main color.
- On the accent nail, apply a contrasting color, a simple design (like a dot or stripe), or a glitter polish.
- Ensure all layers are dry before applying your top coat to all nails.
Why it’s Underrated:
- It’s unbelievably easy and quick.
- It offers a hint of flair and trendiness.
- It’s perfect for when you’re short on time but still want stylish nails.
7. Minimalist Floral Dots
Who says floral has to be complicated? Tiny dots placed strategically can mimic flower petals or simple buds. This is more about implied beauty than detailed drawing.
How to Create Minimalist Floral Dots:
- Apply base coat and a soft, solid color (like a sheer pink, nude, or white) to your nails. Let dry.
- Using a dotting tool or the tip of a toothpick, place small dots of a contrasting color onto your nail. You can group them to suggest a flower, or place them randomly.
- Let dry and add a top coat.
Why it’s Underrated:
- It’s playful and feminine but still very subtle.
- It’s much easier than drawing delicate petals.
- It’s a charming touch for spring or any time you want a hint of sweetness.
8. The Textured Matte Finish
Matte top coats were incredibly popular, but they’ve somewhat faded from the mainstream spotlight. Using a matte top coat over a glossy color (or even a metallic) creates a sophisticated, velvety finish that is incredibly chic and feels very luxurious.
How to Create a Textured Matte Finish:
- Apply base coat and your colored polish. Let this dry completely.
- Apply a matte top coat instead of a glossy one. Be sure to cap the free edge (paint along the tip of the nail) to seal it.
- Let it dry thoroughly. Some matte top coats dry faster than others!
Why it’s Underrated:
- It instantly elevates any color, making it look more expensive.
- It’s a simple swap of one product for a completely different feel.
- It has a modern, understated elegance.
According to the National Institute for Occupational Safety and Health (NIOSH), proper nail preparation and care ensure the best results and longevity for any manicure, including those with special finishes. Always ensure your polishes are fully dry before applying top coats.
Combining Styles for Unique Looks
The beauty of these underrated designs is how well they can be combined! Don’t be afraid to mix and match elements to create something that’s uniquely yours.
Example Combinations:
- Reverse French + Glitter Fade: Apply a metallic glitter polish as your “reverse French” accent at the cuticle, and then fade it slightly up the nail.
- Geometric Accent + Matte Finish: Paint your nails with a solid color, apply a matte top coat, and then add a single glossy geometric line over the matte finish for a cool contrast.
- One-Nail Accent + Minimalist Dots: Have one accent nail with a contrasting color and add a few minimalist dots to the other nails in the same accent color.
Choosing Your Perfect Underrated Design
With so many simple yet stylish options, how do you pick? Consider your lifestyle, your personal style, and the occasion.
For everyday wear, subtle options like the reverse French or geometric accents in neutral tones are fantastic. If you have a special event, you might try a subtle glitter fade or a modern half-moon in a bolder color.
Here’s a quick look at how some of these designs fit different styles:
| Design Style | Best For | Ease of Creation | Overall Vibe |
|---|---|---|---|
| Reverse French | Sophistication, subtle change | Easy to Medium | Chic, Elegant |
| Modern Half-Moon | Modern, minimalist | Easy | Sleek, Stylish |
| Subtle Gradient | Softness, depth | Medium | Dreamy, Artistic |
| Geometric Accents | Boldness, clean lines | Easy to Medium | Modern, Edgy |
| Subtle Glitter Fade | Glamour, sparkle | Easy | Festive, Fun |
| One-Nail Accent | Simplicity, quick style | Very Easy | Playful, Trendy |
| Minimalist Floral Dots | Femininity, sweetness | Easy | Charming, Delicate |
| Textured Matte Finish | Luxury, understated | Very Easy | Sophisticated, Modern |
FAQ: Your Beginner Nail Design Questions Answered
Q1: How can I make my nail polish last longer with these designs?
A1: The key is proper prep and a good top coat! Make sure your nails are clean and dry before applying base coat. Always use a high-quality base coat and a glossy or matte top coat. Reapply your top coat every 2-3 days. Avoid using your nails as tools (like opening cans!).
<h3 id="q2-what-if-my-lines-arent-perfectly

