Tween nail designs are a fantastic way for younger individuals to express their creativity and personal style. This guide offers fun, easy-to-follow ideas and tips for gorgeous, on-trend manicures perfect for tweens, all achievable at home!
Getting your nails looking their best can be a lot of fun! If you’re a tween looking for cool nail art ideas, you’ve come to the right place. Sometimes finding inspiration that’s just right can feel tricky, but don’t worry! We’re here to share some amazing and super fun tween nail designs that are easy to create and totally stylish. Get ready to explore a world of color, patterns, and sparkle that will make your nails shine. Let’s dive into some creative DIY manicures!
Frequently Asked Questions About Tween Nail Designs
Q1: What are the best nail polish colors for tweens?
Bright and pastel colors are super popular! Think vibrant pinks, electric blues, sunny yellows, and soft lavenders. Metallics and shimmers also add a fun, glamorous touch. Neutrals like soft beige or light grey can also be a chic option for a more subtle look.
Q2: How can I make nail designs last longer?
Start with clean, dry nails. Apply a base coat to protect your nails and help polish adhere. Apply two thin coats of your chosen polish color, allowing each to dry completely. Always finish with a good quality top coat to seal in the design and add shine. Avoid activities that can chip polish, like harsh cleaning, right after your manicure.
Q3: Are there any easy nail design ideas for beginners?
Absolutely! Simple dots using a dotting tool or the end of a toothpick, wavy lines, or a single accent nail with glitter or a different color are perfect for beginners. Ombre effects (blending two colors) and simple striped patterns are also quite achievable.
Q4: What tools do I need for DIY nail designs?
You don’t need many fancy tools to start! A good set of nail polishes, a strong top coat, and maybe a toothpick or a simple nail art brush are great. For more detailed designs, consider a dotting tool set, stripping tape, or stencils. Clean-up brushes are also super helpful for tidying edges.
Q5: Should tweens get their nails done professionally or do them at home?
Both are great options! Doing your nails at home is a fun, creative, and cost-effective way to experiment with designs. Professional manicures can be a special treat and allow for more complex designs and techniques. The choice depends on your preference, budget, and what you enjoy most!
Q6: What’s the difference between regular nail polish and gel polish for tweens?
Regular nail polish air dries and is easy to remove with standard nail polish remover. Gel polish needs to be cured under a special UV/LED lamp and is much more durable, often lasting two weeks or more without chipping. For tweens, regular polish is usually recommended due to its ease of use, removal, and the fact that gel polish requires specific equipment and removal processes.
Q7: How can I prepare my nails for a manicure?
Start by removing any old polish. Gently push back your cuticles using an orange stick or cuticle pusher. If your nails need shaping, use a fine-gritFile to shape them. Wash your hands to remove any dust or oils, and make sure they are completely dry before applying any polish.
Tween Nail Designs: Explore Stunning & Fun Ideas for Creative Manicures
Tween years are a magical time filled with self-discovery and expressing who you are. Your nails are like a mini canvas, and decorating them is a fantastic way to show off your unique style! We’re talking about designs that are vibrant, playful, and totally cool, perfect for school days, parties, or just hanging out with friends. Forget boring manicures; we’re about to dive into a world of color, sparkle, and creativity that’s easy to do right at home. Get ready to transform your nails into works of art!
Why Nail Art is a Tween’s Best Friend
Nail art is more than just pretty colors; it’s a form of self-expression that’s totally accessible. For tweens, it’s a low-commitment way to try out different looks. Love rainbow colors? You can do that! Into cute animals? Yep, there are designs for that too! It’s a creative outlet that boosts confidence and allows you to experiment with trends. Plus, mastering a cool nail design can be a super fun skill to have.
Getting Started: Essential Tools for Your Tween Nail Art Journey
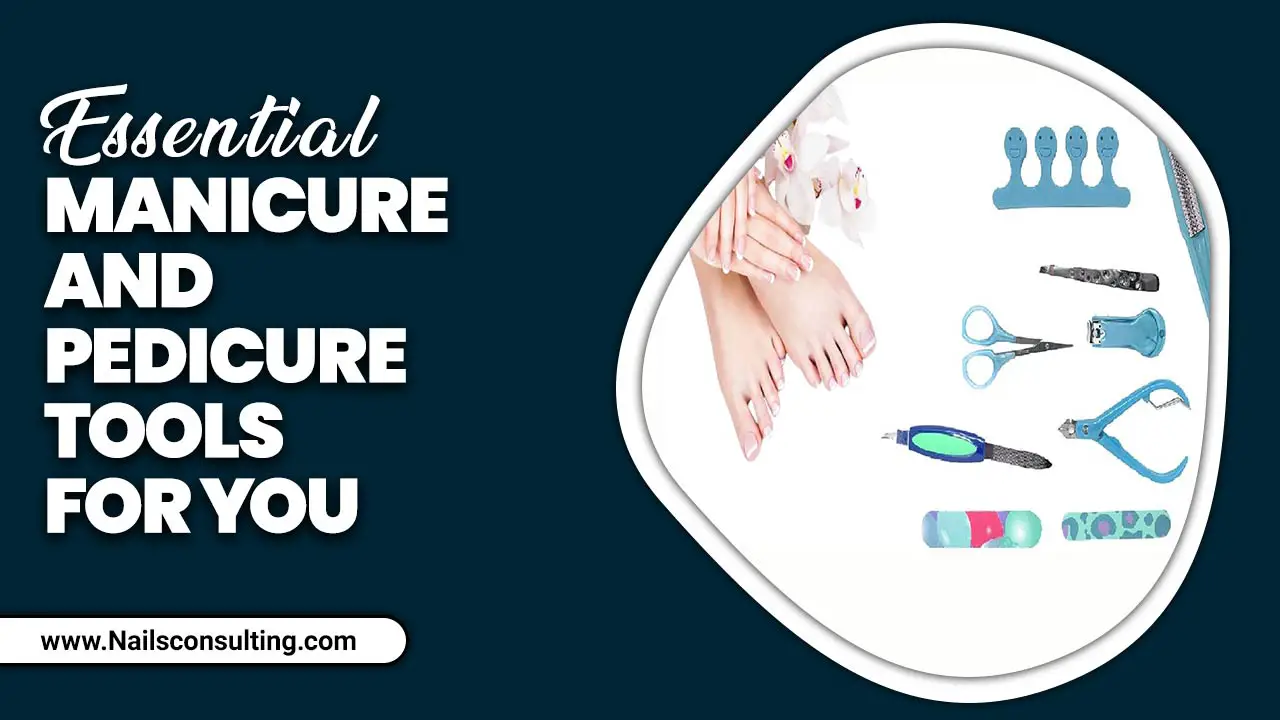
Before we jump into the amazing designs, let’s gather what you’ll need. The good news is, you probably have some of these at home already!
Your Basic Nail Art Kit:
- Nail Polish: A rainbow of colors! Don’t forget a good base coat and a super shiny top coat.
- Toothpicks or Dotting Tools: Perfect for creating dots, swirls, and tiny designs. Dotting tools come in various sizes for different dot effects.
- Fine-Tip Nail Art Brush: Great for drawing thin lines, shapes, and details.
- Nail Polish Remover: For those oops moments or when you want to try a new design.
- Cotton Balls or Pads: To go with your nail polish remover.
- Orange Stick or Cuticle Pusher: To gently tidy up cuticles for a clean canvas.
- Optional: Glitter Polish, Nail Stickers, or Washi Tape: For extra sparkle and easy graphic elements.
Easy & Awesome DIY Tween Nail Designs
Let’s get creative! Here are some stunning and fun tween nail designs that are perfect for beginners and can be customized in tons of ways.
1. The Classic Glitter Accent Nail
This is the ultimate beginner design and always looks fabulous.
How to do it:
- Apply a base coat to all your nails.
- Paint your accent nail (usually the ring finger) with a fun glitter polish. Let it dry completely.
- Paint your other nails with a solid color that complements the glitter.
- Once dry, apply a top coat to all nails for protection and shine.
Tip: Mix and match glitter colors with different base colors for endless combinations!
2. Polka Dot Fun
Dots are easy, cheerful, and look great in any color combination.
How to do it:
- Apply your base coat and your chosen base polish color on all nails. Let it dry thoroughly.
- Dip the tip of a toothpick or a dotting tool into a contrasting polish color.
- Gently dot the polish onto your nails. You can make a pattern (like random dots, rows, or a cluster in one corner) or cover the whole nail.
- Let the dots dry, then apply a top coat.
Pro Tip: Use different-sized dotting tools or toothpicks to create polka dots of varying sizes!
3. Wavy Lines & Ombre
This creates a cool, flowing look that’s surprisingly simple.
How to do it (Wavy Lines):
- Paint your nails with your base color and let them dry completely.
- Using a fine-tip brush or a toothpick dabbed in a contrasting color, paint a wavy line across each nail. You can place it in the middle, near the tip, or at the base.
- Let it dry and then add a sparkly top coat.
How to do it (Simple Ombre/Gradient):
- Apply a base coat and a light color polish (like white or nude) as your base. Let it dry.
- Slightly dab a makeup sponge with two or three coordinating polish colors, blending them slightly where they meet.
- Gently dab the sponge onto your nail, starting from the tip and moving up. This will transfer the blended colors.
- Repeat dabbing until you get the desired color intensity.
- Clean up any smudges around your nails with nail polish remover and a brush.
- Apply a top coat once fully dry.
4. Stripy Styles
From thin, delicate lines to bold stripes, this design adds a touch of sophistication.
How to do it (with Striping Tape):
- Apply your base polish and let it dry completely.
- Carefully place strips of nail art striping tape onto your nail to create your desired pattern (horizontal, vertical, diagonal). Press down the edges firmly.
- Paint over the tape with a contrasting polish color.
- While the new polish is still wet, carefully peel off the striping tape. This leaves a clean, crisp stripe.
- Let it dry and apply a top coat.
How to do it (Freehand):
- Apply your base polished nails and let them dry.
- Dip a fine-tip nail art brush into a contrasting polish.
- Carefully paint thin, straight lines across your nails. Practice on paper first if you’re nervous!
- Let dry and seal with a top coat.
5. Cute Character & Emoji Nails
Bring your favorite characters or emojis to life on your fingertips!
How to do it:
- Paint your nail the base color of your character or emoji (e.g., yellow for a Minion, pink for a heart emoji).
- Use your fine-tip brush or toothpick to add details: black for eyes and outlines, white for highlights, and other colors for features.
- For simple emojis like hearts, dots, or stars, use the dotting tool or brush to create them directly.
- Seal with a top coat.
Inspiration: Think about cartoon characters, favorite animals, popular game icons, or even just fun mood emojis!
6. Rainbow Brights
Celebrate every color of the rainbow!
How to do it:
- Apply a white or light-colored base coat to all nails. This helps the rainbow colors pop. Let it dry.
- On each nail, paint a stripe of a different rainbow color (red, orange, yellow, green, blue, purple). You can do this side-by-side, or one color per nail.
- For a blended rainbow look: Paint multiple colors onto a sponge and dab onto the nail.
- Let dry and apply a top coat.
7. Geometric Glam
Shapes like triangles, squares, and chevrons add a modern twist.
How to do it:
- Start with a solid base color. Let it dry.
- Use striping tape or a fine brush to create geometric shapes. For example, mask off a triangle shape at the tip of the nail and paint it a different color.
- You can also use polish to paint simple shapes like dots, squares, or lines in a pattern.
- Let designs dry and apply a top coat.
8. Two-Tone Tips
A stylish twist on the classic French manicure.
How to do it:
- Apply a base coat and your main polish color to each nail. Let it dry.
- Use striping tape to create a straight line across the tip of your nail.
- Paint the tip with a contrasting color.
- Carefully remove the tape while the polish is wet.
- Let dry and apply a top coat.
Nail Care Tips for Happy, Healthy Nails
Keeping your nails healthy is just as important as making them look pretty! Clean, strong nails are the perfect base for any design. Here’s how to keep them in top shape:
Tween Nail Care Essentials:
- Moisturize: Apply hand lotion daily, especially after washing your hands. This keeps your skin and cuticles soft.
- Protect: When doing chores that involve water or harsh cleaners, wear gloves. This protects your nails from damage and polish from chipping.
- File Safely: File your nails in one direction to prevent them from splitting or breaking. Avoid sawing back and forth. Check out the National Library of Medicine for more on nail health.
- Cuticle Care: Gently push back cuticles after a shower when they are soft, but avoid cutting them, as this can lead to infection.
- Give Nails a Break: If you wear polish constantly, give your nails a few days plain and bare every so often to let them breathe and recover.
Table: Nail Design Ideas at a Glance
To help you pick your next masterpiece, here’s a quick look at some popular tween nail designs:
| Design Idea | Best For Beginners? | Tools Needed (Basic) | Key Element |
|---|---|---|---|
| Glitter Accent Nail | Yes | Glitter polish, base/top coat | Sparkle on one nail |
| Polka Dots | Yes | Toothpick/dotting tool, contrasting polish | Fun, simple dots |
| Wavy Lines | Yes | Fine brush/toothpick, contrasting polish | Flowing, artistic lines |
| Simple Stripes | Yes (with tape) / Intermediate (freehand) | Striping tape or fine brush, contrasting polish | Crisp, geometric lines |
| Rainbow Colors | Yes | Multiple polishes, white base (optional) | Vibrant color play |
| Geometric Shapes | Intermediate | Striping tape, fine brush, multiple polishes | Modern, sharp angles |
| Two-Tone Tips | Intermediate | Striping tape, contrasting polish | Modern French tip |
Popular Polish Finishes and Effects
Beyond colors, different finishes can dramatically change your nail design!
- Matte Finish: Gives a smooth, velvety look instead of shine. Apply over dry polish.
- Chrome/Mirror Effect: Achieved with special powders or polishes that give a super shiny, metallic look.
- Holographic Glitter: Catches light to show a rainbow of colors within the glitter.
- Pearlescent: Creates a subtle, shimmery sheen, like a pearl.
- Neon/Fluorescent: Glows under blacklight – perfect for parties!
Creative Inspiration & Trends
Wondering what’s hot in the nail art world? Tweens can totally rock these trends:
- Galaxy Nails: Swirls of dark blues, purples, and blacks with speckles of white for stars.
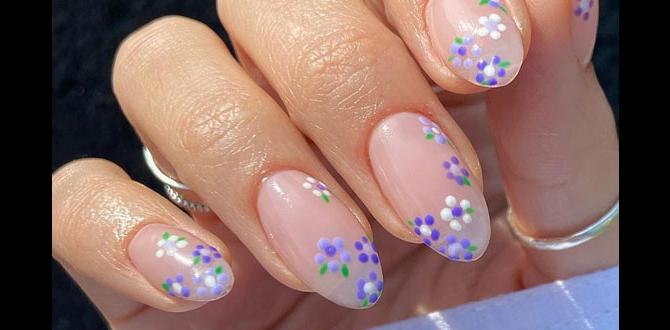
- Floral Accents: Tiny painted flowers or leaves on a solid background.
- Marble Effect: Swirling up to three colors together to mimic natural stone.
- Fruit Themes: Cute painted strawberries, watermelons, or pineapples.
- Checkerboard Patterns: For a sportier or bolder look.
Remember, the best trend is what makes you feel amazing!
Tips for Longevity and Clean Application
No one wants their gorgeous nail art to chip right away! Here are some tricks to make your designs last and look super neat:
- Clean Nails are Key: Always start with nail polish remover to get rid of any natural oils or old polish.
- Base Coat Power: A good base coat helps polish adhere better and prevents staining.
- Thin Coats Rule: Applying polish in thin layers is much better than one thick glob. It dries faster and is less likely to bubble or smudge.
- Patience is a Virtue: Let each layer of polish dry completely before adding the next. This is the #1 rule for avoiding smudges! Use a fast-drying spray if you’re impatient.
- Seal the Deal: A high-quality top coat is your best friend. It adds shine, protects your design, and extends the life of your manicure.
- Clean Up Crew: Dip a small brush (or a toothpick) in nail polish remover to clean up any stray polish around your cuticles or sidewalls. This makes a HUGE difference in how professional your nails look!
Mastering the Art of Perfectly Shaped Nails
Before you even pick up a polish


