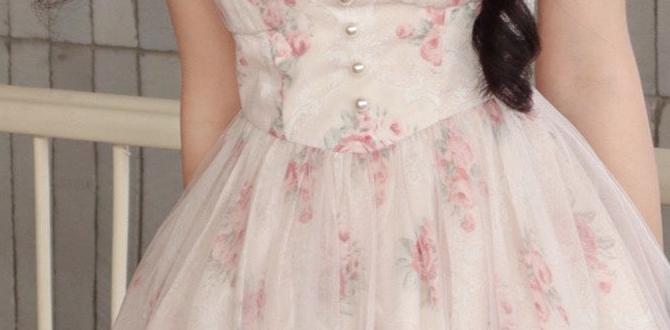
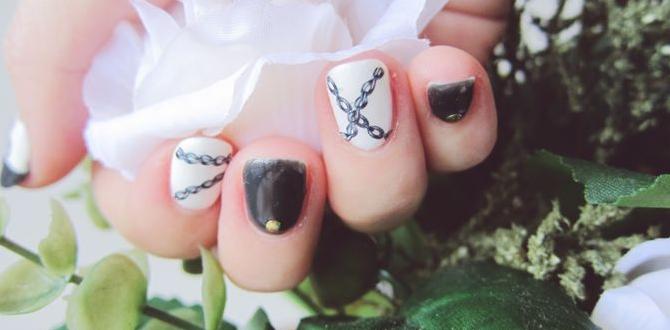
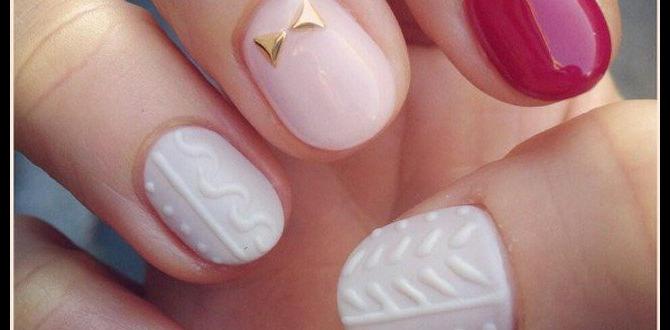
Tweed nail designs are a chic and sophisticated way to add a touch of classic elegance to your manicure. These designs mimic the iconic woven fabric, offering a textured, stylish look that’s surprisingly easy to achieve for beginners.
Hey nail lovers! Ever scroll through Pinterest and see those amazing manicures that look like they’re woven right into your nails? That’s the magic of tweed nail designs! They’re super stylish, a bit vintage, and totally make a statement. But if you’re new to nail art, you might think they’re too complicated to try. Don’t worry! I’m here to show you how simple and fun creating your own tweed-inspired nails can be. We’ll break it all down, step-by-step, so you can rock this sophisticated look with confidence. Ready to elevate your nail game? Let’s get started!
What Exactly Are Tweed Nail Designs?
Tweed nail designs are art that replicates the look and texture of the famous tweed fabric on your nails. This fabric, originally from Scotland, is known for its distinctive woven pattern, often featuring a flecked or speckled appearance with intersecting threads. On nails, this translates to intricate lines, crosshatch patterns, and sometimes subtle color variations that mimic the visual texture of the material.
The appeal of tweed nails lies in their timeless elegance and versatility. They can evoke a sense of classic fashion, academia, or even a cozy, autumnal vibe, depending on the color palette you choose. It’s like wearing a designer scarf on your fingertips!
Why Are Tweed Nails So Popular?
Tweed prints have been a fashion staple for decades, and their transition to nail art was a natural progression. Here’s why they continue to be a hit:
Timeless Chic: Tweed is a classic pattern that never goes out of style. It adds a touch of sophistication and polish to any outfit.
Versatility: Whether you prefer bold, vibrant colors or subtle, neutral tones, tweed designs can be adapted to suit your personal style and the season.
Textural Illusion: These designs create a visual depth that makes your nails look more interesting and intricate, even if the application is straightforward.
Celebrity and Influencer Approved: You’ll often see this elegant pattern on the nails of celebrities and fashion influencers, further boosting its trend status.
DIY Friendly: While they look complex, tweed nail designs are surprisingly achievable for beginners with the right tools and techniques.
Essential Tools for Your Tweed Nail Design Journey
Before we dive into the fun part, let’s gather your toolkit. Having the right supplies makes the whole process smoother and the results much prettier!
| Tool | Description | Why You Need It |
|---|---|---|
| Base Coat | A clear polish applied before your color. | Protects your natural nails from staining and helps polish adhere better. |
| Nail Polish Colors | Your chosen base color and accent colors for the tweed pattern (e.g., black, white, grey, beige, and accent flecks like blue, pink, or gold). | These are the building blocks of your tweed masterpiece! |
| Fine-Tip Polish Brush or Striper Brush | A brush with very thin bristles. | Essential for drawing the fine lines that create the woven effect. Look for brushes designed for nail art. |
| Dotting Tool | A tool with a small metal ball at the end. | Perfect for adding those subtle flecks and dots that give tweed its signature look. |
| Tweezers | Small, precise tweezers. | Helpful for picking up tiny glitter pieces or small embellishments if you choose to add them. |
| Top Coat | A clear, protective polish applied last. | Seals your design, adds shine, and helps your manicure last longer. |
| Nail Polish Remover and Cotton Swabs/Pads | For cleaning up mistakes. | Mistakes happen! These are your best friends for a clean finish. |
| Ruler or Straight Edge (Optional) | A small, flexible ruler or a piece of tape. | Can help you achieve straighter lines if freehanding is tricky. |
Genius Essential Tweed Nail Looks for Beginners
Let’s get creative! Here are a few go-to tweed nail designs that are perfect for starting out. We’ll focus on simplicity and impact.
Look 1: Classic Neutral Tweed
This is the quintessential tweed nail. It’s sophisticated, understated, and incredibly chic.
Colors needed: Beige or light grey (base), black, white, and a subtle accent color like a soft brown or navy.
Step-by-Step Guide:
- Prep: Start with clean, dry nails. Apply a base coat and let it dry completely.
- Base Color: Apply two thin coats of your neutral base color (beige or light grey). Let each coat dry thoroughly. A good base sets the stage for a flawless finish!
- The Weave:
- Using your fine-tip brush and black polish, carefully paint a few thin, horizontal lines across your nail. Don’t worry if they’re not perfectly straight; tweed has a natural, woven texture.
- Next, using white polish, paint a few thin, vertical lines that intersect the black ones. Again, imperfect lines add to the authentic look.
- Adding Dimension: Now, take your accent color (soft brown or navy). Use your dotting tool or the very tip of your brush to add tiny dots or short, broken lines in between the black and white lines. This mimics the flecks in real tweed.
- Refine (Optional): If you want to clean up any wobbly lines, dip a cotton swab in nail polish remover and very carefully neaten the edges.
- Seal It: Apply a generous layer of top coat. This will smooth out any texture and make your design pop. Let it dry completely.
Pro Tip: For an even cleaner look, try using striping tape! Once your base color is dry, place strips of tape horizontally and vertically where you want your contrasting lines, paint over them, remove the tape while the polish is still slightly wet, and then add your accent dots.
Look 2: Pop of Color Tweed
Want to add a bit more personality? This version injects a fun, vibrant color into the classic tweed pattern.
Colors needed: Nude or light pink (base), grey, black, and a bright accent color like cobalt blue, fuchsia, or emerald green.
Step-by-Step Guide:
- Prep: Base coat, always!
- Base Color: Apply two coats of your nude or light pink polish. Ensure it’s fully dry.
- The Grid:
- With your fine-tip brush and grey polish, paint a few scattered, thin horizontal lines.
- Using black polish, paint a few thin vertical lines that overlap the grey ones to create a subtle grid.
- The Accent: This is where the magic happens! Dip your dotting tool into your bright accent color. Add small, random dots and very short dashes scattered throughout the grey and black lines. You can also use the dotting tool to create tiny, irregular shapes.
- Clean Up: Use a remover-dipped cotton swab for any stray marks.
- Shine On: Finish with a good helping of top coat.
Why this works: The bright accent color stands out against the more muted grey and black, creating a modern twist on the traditional tweed. It’s a fantastic way to experiment with color without going overboard.
Look 3: Monochrome Tweed Statement
For the minimalist who loves a bit of edge, this all-black-and-white version is stunning. It’s bold, graphic, and undeniably chic.
Colors needed: Black and white. That’s it!
Step-by-Step Guide:
- Prep: Base coat is your best friend.
- Base Coat: Apply one coat of pure white or pure black polish. Let it dry.
- Contrast Lines:
- If your base is white, use black polish and your fine-tip brush to draw thin, slightly uneven horizontal lines.
- Then, using white polish (or even a pearly white for a subtle sheen), paint thin vertical lines over the black ones.
- If your base is black, simply reverse the colors! Use white for horizontal lines and black for vertical ones.
- Subtle Texture: For a bit more depth, use the tip of your brush to add very small, broken white dashes or dots within the black lines (or vice versa if your base is black). This adds that slightly imperfect, woven feel.
- Precision: Clean up edges with a nail polish remover-soaked cotton swab.
- The Finish: A high-shine top coat will make this graphic design pop.
A Note on Application: The key here is varying the thickness and spacing of your lines slightly. Real tweed isn’t perfectly uniform, and that’s what makes it look so good!
Look 4: Glitter Tweed Accent
Want to add a touch of sparkle? This design uses glitter strategically to enhance the tweed effect.
Colors needed: Cream or pale grey (base), black, white, and fine glitter polish (gold, silver, or iridescent).
Step-by-Step Guide:
- Prep: Base coat.
- Base Polish: Apply two coats of your cream or pale grey polish. Let it dry completely.
- The Foundation Lines:
- Using black polish and your fine brush, paint a few thin horizontal lines.
- With white polish, add thin vertical lines, crossing the black ones. Keep these lines relatively sparse to allow the glitter to shine.
- Glitter Infusion: Now, take your fine glitter polish.
- Using your dotting tool, lightly dab the glitter polish onto some of the intersection points of the black and white lines.
- Alternatively, use your fine-tip brush to carefully paint a few thin, glittery lines alongside or over the black and white lines.
- Detailing: You can also add a few tiny glitter dots using the dotting tool for extra sparkle.
- Seal & Shine: Apply a thick layer of top coat. You might need two coats of top coat to fully cover the glitter and make the surface smooth.
Where to find great glitter polishes: Many brands offer these. For instance, OPI, Essie, and Sally Hansen often have beautiful fine-glitter polishes that are perfect for adding subtle shimmer. For options available online, check out reputable beauty retailers like Ulta or Sephora.
Tips for Achieving the Perfect Tweed Look
Even with simple designs, a few tricks can elevate your results.
Patience is Key: Allow each layer of polish to dry completely before adding the next. This prevents smudging and makes clean-up much easier.
Thin Coats are Better: Multiple thin coats of polish are more durable and less prone to chipping than one thick coat.
Clean Your Brush: Wipe excess polish off your fine-tip brush on a paper towel before dipping into the polish bottle. This gives you more control. Clean your brush thoroughly between colors to avoid muddying your shades.
Embrace Imperfection: Remember, real tweed has a textured, slightly irregular look. Don’t stress too much about perfectly straight lines; subtle variations often enhance the design.
Practice Makes Progress: If freehanding is challenging, use striping tape or stencils. They’re great tools for beginners! You can find stencils at most beauty supply stores or online.
Use High-Quality Polish: Good quality polishes have better formulas that are easier to work with and provide better color payoff. For nail art, polishes with a good flow are ideal.
Consider Your Nail Shape: Tweed designs can look fantastic on various nail shapes, from square to almond. The key is adapting the line placement to flatter your specific nail. For instance, on longer nails, you might opt for longer, more defined lines.
Understanding the Science Behind Nail Polish and Durability
Ever wondered why some nail designs last longer than others? A few factors play a role, from the polish formula to how you apply it. Nail polish is essentially a mixture of pigments, solvents, and polymers. When you apply it, the solvents evaporate, leaving behind the pigments and polymers that form a hard, protective film.
Solvents: Commonly used solvents include ethyl acetate and butyl acetate. Their evaporation rate affects drying time.
Polymers: Nitrocellulose is a common polymer that provides the film-forming properties. Acrylates can also be used for added flexibility and toughness.
Plasticizers: Added to prevent the film from becoming too brittle and chipping.
National Institute of Standards and Technology (NIST) has explored adhesion and durability in coatings, which relates to how well polishes bond to the nail surface. Properly prepping your nails by ensuring they are clean and free of oils is crucial for optimal adhesion. Using a good base coat forms a crucial intermediary layer that helps the polish adhere better and prevents the nail from absorbing pigment.
Frequently Asked Questions About Tweed Nail Designs
Q1: Are tweed nail designs hard for beginners?
A1: Not at all! While they look intricate, the basic tweed pattern relies on simple lines and dots. With a steady hand and the right brushes, beginners can easily create stunning tweed looks. Patience and practice are key!
Q2: What colors work best for tweed nail designs?
A2: Classic tweed typically uses neutrals like beige, grey, cream, black, and white. However, you can be creative! Adding pops of bright colors, pastels, or even metallic shades can give your tweed design a modern twist. Think about the outfit you’re wearing or the season.
Q3: How do I make the lines for the tweed pattern straight?
A3: For straighter lines, you can use striping tape applied to your dried base coat. Paint over the tape, then carefully peel it away while the polish is still wet. Alternatively, a ruler or even a piece of paper can act as a guide for your brush. However, remember that slight imperfections add to the authentic tweed texture!
Q4: Can I achieve a textured look with tweed nail designs?
A4: Yes! While these designs often create a visual texture, you can add subtle physical texture by layering a bit more polish in the line intersections or by using fine glitter polishes. Make sure to use a good top coat to seal it and prevent snagging.
Q5: How long do tweed nail designs usually last?
A5: With a proper base coat, careful application, and a good quality top coat, tweed nail designs can last anywhere from 5 to 10 days, similar to any other well-applied nail polish manicure.
Q6: What’s the difference between drawing tweed lines and using a stamping plate?
A6: Drawing tweed lines gives you complete creative control over color, thickness, and placement. Stamping plates offer speed and consistency for intricate patterns but limit your color and design choices to what’s available on the plate. Both are great options depending on your preference and skill level!
Taking Your Tweed Game to the Next Level
Once you’ve mastered the basics, don’t be afraid to experiment!
Color Combinations: Try a bold tweed with a black base and vibrant, contrasting lines like neon pink and electric blue. Or go for a soft pastel tweed with mint green and lavender.
Finish Variations: Instead of a high-gloss top coat, try a matte top coat for a sophisticated, velvety finish that really mimics fabric.
Accent Nail Focus: Apply the full tweed design on just one or two accent nails and keep the rest of your nails a solid matching or complementary color.
Embellishments: Add tiny pearls or micro-beads at the intersection points of your tweed lines for a touch of 3D luxury.
* Ombre Tweed: Blend two colors softly on your base nails before adding the tweed pattern for an extra layer of dimension.
Conclusion
And there you have it! Tweed nail designs are a fantastic way to add a sophisticated, stylish touch to your nails, and as you’ve seen, they’re totally achievable even if you’re new to nail art. From classic neutrals to pops of vibrant color, these essential looks offer a versatile canvas for expressing your personal style. Remember to prep well, use your tools wisely, and most importantly, have fun with the process! Don’t be afraid to play with different color combinations and finishes. Before you know it, you’ll be creating tweed masterpieces that look like they walked right off the fashion runway onto your fingertips. Happy painting!

