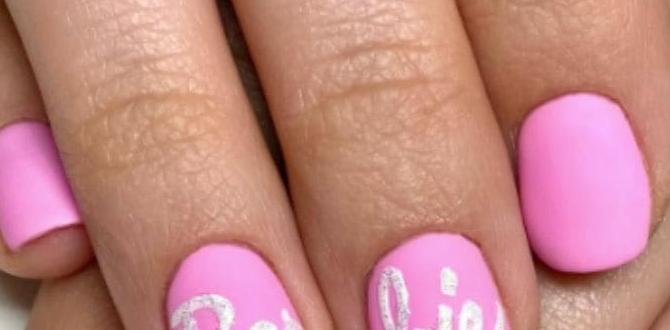
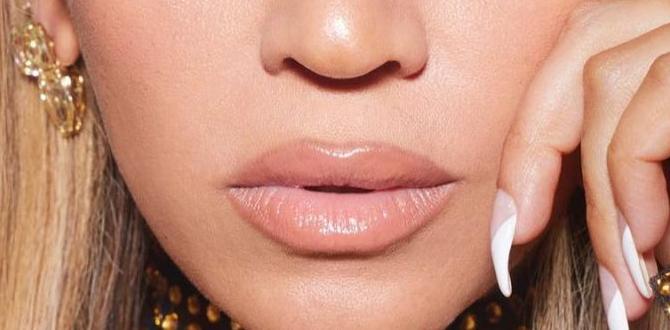
Tweed French nails offer a chic and sophisticated twist on the classic French manicure, combining the timeless elegance of a French tip with the cozy, textured look of tweed fabric. They’re a fantastic way for beginners and pros alike to add a touch of luxury and unique style to their fingertips.
French manicures have been a go-to for stylish nails for ages. But what if you want something a little more… wow? Enter tweed French nails! This trend takes the classic white-tipped look and infuses it with the rich, textured charm of tweed. Imagine your nails looking like they’re wearing a tailored tweed jacket – it’s that sophisticated! Don’t worry if “textured” sounds tricky. We’re going to break down exactly how to achieve this fabulous look, making it totally doable for anyone. Get ready to upgrade your mani game!
Why Tweed French Nails Are Taking Over
Tweed isn’t just for fashion anymore; it’s stormed the nail art world, and for good reason! These designs offer a unique blend of classic and contemporary.
- Sophistication: Tweed evokes a sense of luxury and refinement, making your nails look instantly polished and expensive. Think of it as wearing a classic Chanel-inspired accessory on your fingertips.
- Texture & Dimension: Unlike a flat color, tweed patterns add visual depth. This makes the manicure more interesting and eye-catching, even with subtle color palettes.
- Versatility: While often associated with autumnal or winter fashion, tweed designs can be adapted for any season with different color combinations and embellishments.
- Unexpected Elegance: It’s a twist on a classic that stands out. You get the familiar comfort of a French tip, elevated with a distinctive, stylish pattern.
- Inspiration: The pattern itself offers endless inspiration, from classic houndstooth and herringbone to more abstract interpretations.
Getting Started: What You’ll Need
Don’t let the “tweed” part fool you – creating this look is simpler than it sounds! You don’t need a degree in pattern design. Here’s a basic shopping list for your tweed French nail adventure:
Essential Tools & Products
- Base Coat: To protect your natural nails and help polish adhere better.
- Nude or Soft Pink Polish: This will be your nail bed color.
- White Polish: For the classic French tip base.
- Black or Dark Brown Polish: The primary color for creating the tweed lines.
- Accent Color Polish (Optional): Think grey, beige, navy, or even a subtle pastel to mimic classic tweed variations.
- Fine-Liner Nail Art Brush or Dotting Tool: This is your magic wand for drawing the tweed pattern. A thin brush works great for creating those thin lines.
- Top Coat: To seal your design and give it that glossy, long-lasting finish.
- Nail Polish Remover & Cotton Pads: For clean-ups and mistakes.
- Cuticle Oil: To keep your nails and surrounding skin looking healthy after the polish is done.
Optional, But Fun!
- Stamping Plates: Some plates have tweed or textured patterns that can simplify the process, especially for beginners.
- Nail Stickers/Decals: Pre-made tweed patterns can be a quick and easy alternative.
- Small Rhinestones or Pearls: To add a touch of sparkle or pearl accent.
The Classic Tweed French: A Step-by-Step Guide
This is the most popular and arguably the easiest way to achieve the tweed French nail look. It’s perfect for anyone new to nail art!
- Prepare Your Nails: Start with clean, dry nails. Push back your cuticles gently and shape your nails to your desired length and shape. Apply a thin layer of base coat and let it dry completely.
- Paint the Base Color: Apply two thin coats of your nude or soft pink polish. This creates a smooth canvas and mimics the look of a natural nail bed. Let each coat dry thoroughly.
- Create the French Tip:
- Option A (Freehand): Using your white polish and a fine brush (or the polish brush if you’re steady!), carefully paint a curved smile line across the tip of each nail. Don’t worry if it’s not perfect; a slightly wobbly line adds to the handmade charm.
- Option B (Using Guides): Apply French tip guide stickers to create a clean line and paint within the guides for a crisp white tip.
- Let the White Tip Dry: This is crucial! The white tip needs to be completely dry before you start drawing the tweed pattern.
- Draw the Tweed Lines: This is where the magic happens!
- Dip your fine-liner brush into your black or dark brown polish.
- On each white tip, carefully draw thin, intersecting lines. Think of drawing a loose grid or criss-cross pattern. It doesn’t need to be perfectly symmetrical. Vary the thickness slightly if you can.
- Add a few “fuzzier” or broken lines to mimic the texture of actual tweed. Imagine loose threads.
- If using an accent color (like grey), you can add a few of these lines in that color, slightly thinner and interspersed with the black/brown lines.
- Add the “Fuzz” (Optional): For extra texture, you can very lightly drag the tip of your brush to create tiny, almost invisible wisps of polish that stick out from your main lines. This mimics the stray fibers in tweed.
- Seal the Deal: Once all the tweed lines are completely dry, apply a generous coat of clear top coat. This smooths out the texture slightly, protects your design, and adds a beautiful shine.
- Finishing Touch: Once the top coat is dry to the touch, apply a few dots of cuticle oil to rehydrate your skin and give your nails a final healthy sheen.
Pro Tip for Beginners:
If drawing thin lines on the curved French tip feels daunting, try doing the tweed pattern on your accent nail (like your ring finger) first. Once you get the hang of it, transfer the technique to the French tips!
Genius Tweed French Nail Variations
The classic is great, but why stop there? Tweed French nails are a fantastic base for creativity. Here are some inspired variations to try:
1. The Subtle Tweed Accent
This is for those who love the idea of tweed but prefer a more understated look.
- Concept: Apply a nude or sheer pink polish to all nails. On your accent nail (usually the ring finger), paint a full nail tweed design using thin black and grey lines over a white base. Then, do a very thin, delicate white French tip on all other nails.
- Why it Works: It gives you the full tweed experience on one nail while keeping the rest of the manicure classic and clean.
2. Color-Blocked Tweed French
A modern take that plays with bold contrasts.
- Concept: Instead of white, use a bold colored polish (like cobalt blue, emerald green, or deep red) for the French tip. Then, create the tweed pattern on the colored tip using black and white or contrasting colors. For example, a navy tip with black and grey tweed lines.
- Why it Works: It’s an unexpected pop of color that still maintains sophistication. This style is great for making a statement.
3. Monochromatic Elegance
Playing with different shades of the same color for a chic, tonal effect.
- Concept: Use various shades of grey, beige, or even navy for your base color, French tip, and tweed lines. For instance, a light beige base, a medium beige tip, and thin dark brown/black lines for the tweed.
- Why it Works: It’s incredibly chic and sophisticated. The different tones create subtle depth and texture without being overpowering. It’s minimalist but impactful.
4. Tweed with a Twist: Add Sparkle!
Who says tweed can’t be glamorous?
- Concept: After creating your tweed French tip, add a few strategically placed rhinestones, pearls, or a strip of glitter polish along the smile line or at the base of the nail.
- Why it Works: The sparkle adds a festive and luxurious feel, perfect for evenings out or special occasions. It contrasts beautifully with the matte or textured tweed.
5. Houndstooth & Herringbone French
These are specific tweed patterns that translate beautifully to nail art.
- Concept: Instead of abstract lines, carefully draw the classic houndstooth (broken checks) or herringbone (V-shaped weave) pattern onto the French tip using fine-liner brushes.
- Why it Works: These defined patterns look incredibly intricate and high-fashion. They offer a slightly more structured and geometric take on tweed.
6. Double French Tweed
A dual-tone French tip with tweed.
- Concept: Create a slim French tip in one color (e.g., white), then overlay a second, even slimmer French tip in a contrasting color (e.g., black) right beside it. Then, draw thin tweed lines over both layers.
- Why it Works: It adds extra dimension and a modern edge to the French tip itself before the tweed is even added.
7. Matte Tweed French
Trade the shine for sophistication.
- Concept: Complete all steps as usual, but finish with a matte top coat instead of a glossy one.
- Why it Works: A matte finish enhances the textured, fabric-like appearance of tweed beautifully. It gives a very luxurious, almost velvety look.
Tweed French Nails: Choosing Your Colors
The beauty of tweed lies in its inherent color palette, but don’t be afraid to get creative!
Classic Tweed Palettes
These are inspired by traditional tweed fabrics found in clothing.
| Base Color | French Tip Base (Optional) | Tweed Lines | Accent Lines (Optional) |
|---|---|---|---|
| Nude/Soft Pink | White | Black, Charcoal Grey | Dark Brown, Beige |
| Light Beige | Cream | Dark Brown, Navy | Burgundy, Forest Green |
| Pale Grey | White | Black, Medium Grey | Light Blue, Taupe |
Modern & Bold Palettes
Experiment with vibrant hues for a contemporary twist.
| Base Color | French Tip Color | Tweed Lines | Accent Lines (Optional) |
|---|---|---|---|
| Sheer White | Cobalt Blue | Black, White | Silver |
| Pale Pink | Emerald Green | Black, Deep Purple | Gold |
| Nude | Deep Red | Black, Cream | Burgundy |
Achieving That “Textured” Look: Brush Techniques
The key to making your tweed French nails look authentic is in the way you draw the lines. It’s not about perfect, crisp lines.
- The “Wisp” Technique: Dip your fine-liner brush into the polish, then wipe off most of it on the side of the bottle. You want a very small amount of polish on the brush. Lightly “flick” or “dash” the brush to create tiny, short strokes that mimic loose threads.
- Scumbling: Use your brush to create very small, circular or back-and-forth motions with the polish. This creates a slightly fuzzy or blended line.
- Vary Line Thickness: Don’t make all your lines the same width. Some should be super fine, almost invisible, while others can be slightly bolder to create depth.
- Layering Colors: Using 2-3 colors for your tweed lines also adds a realistic layered effect, much like how different yarns are woven together in actual fabric.
- Think “Weave”: Imagine you’re drawing over and under threads. The lines don’t have to be perfectly straight; slight curves and overlaps enhance the woven look.
You can also explore professional nail art tools like dotting tools with fine tips or special effect brushes designed for intricate lines.
DIY vs. Salon: When to Get Your Tweed French On
Whether you’re a DIY enthusiast or prefer a pampered salon experience, tweed French nails are achievable either way.
DIY Advantages
- Cost-Effective: Buying a few polishes and a good brush is significantly cheaper than salon visits.
- Convenience: Do your nails anytime, anywhere, at your own pace.
- Customization: You have complete control over colors, patterns, and the level of detail.
- Skill Building: It’s a fun way to practice and improve your nail art skills.
Salon Advantages
- Professional Finish: Salons often have access to higher-quality polishes, gels, and tools for a flawless look.
- Time-Saving: If you’re short on time, a professional can likely execute the design faster.
- Expertise: Nail technicians are skilled artists who can create intricate designs you might struggle with.
- Gel Options: Gel polish offers incredible durability and shine, often preferred for complex nail art.
A good gel polish base is important for longevity, and brands like OPI and Gelish offer professional-grade options. For DIY enthusiasts looking for durability, consider investing in a good UV/LED lamp and gel polish kit. The US Food and Drug Administration (FDA) provides safety information regarding UV lamps, so always follow manufacturer guidelines for safe use.
Troubleshooting Common Tweed French Nail Issues
Even the best nail artists hit a snag sometimes! Here’s how to fix common tweed French nail problems.
Problem: Lines are too thick or blobby.
Solution: Use less polish on your brush! Wipe your brush on the edge of the bottle until only a tiny amount of polish remains. Practice drawing on a piece of paper first to get the right amount of product. If the lines are already on your nail, gently use the edge of a clean brush dipped in nail polish remover to refine the shape, or carefully file them down once dry (before top coat!).
Problem: The white tip smudged when drawing tweed lines.
Solution: This usually means the white polish wasn’t fully dry. Always wait until the white tip is completely dry to the touch before drawing your tweed lines. If it smudges, carefully try to correct it with your fine-liner brush. If it’s a mess, remove the polish from that nail and start over – patience is key!
Problem: My tweed doesn’t look textured enough.
Solution: Focus on the “wisp” technique mentioned above. Use very little polish and make short, flicking motions. Adding a few slightly more “broken” or feathery lines can also enhance the texture. A matte top coat can also make the texture appear more pronounced.
Problem: The design chipped after a day.
Solution: Ensure you used a good base coat, applied thin, even coats of polish, and finished with a thick, generous top coat that seals the entire nail, including the free edge. Make sure your top coat is completely dry before touching anything. For extra durability, consider using a gel top coat.
Frequently Asked Questions About Tweed French Nails
What is a tweed French nail?
A tweed French nail is a manicure style that combines the classic French tip with a pattern resembling tweed fabric. This is typically achieved by drawing fine, intersecting lines on the white tip to mimic the textured weave of tweed.
Are tweed French nails hard to do?
They can range from easy to moderately challenging depending on the complexity of the design. The basic tweed French tip is achievable for beginners with a fine-liner brush and a bit of patience. More intricate patterns might require practice.
What colors work best for tweed French nails?
Classic tweed colors include neutrals like beige, grey, brown, and black, often accented with cream or white. However, you can also use bold colors like navy, burgundy, or even pastels for a modern twist.
Do I need special tools for tweed French nails?
A fine-liner nail art brush or a dotting tool is highly recommended for drawing the thin tweed lines. Otherwise, standard nail polish, base coat, and top coat are all you need. Stamping plates with tweed patterns can also simplify the process.
How long do tweed French nails last?
With proper application, including a good base coat and top coat, regular nail polish tweed French nails can last 5-7 days. Using gel


