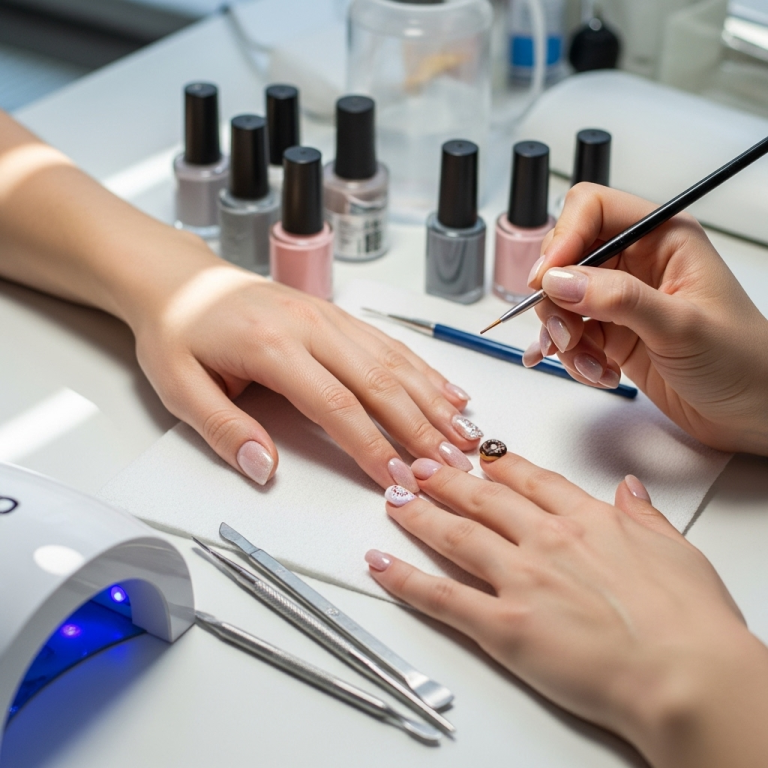
Turquoise nail designs are a vibrant and stylish choice, perfect for beginners and seasoned nail artists alike! This guide breaks down how to achieve stunning turquoise looks with essential tips on color pairing, design ideas, and simple application techniques, ensuring your nails will be conversation starters.
Turquoise nails can feel a little intimidating if you’re new to nail art, but they don’t have to be! That gorgeous blue-green hue is incredibly versatile, bringing a pop of color and a touch of luxury to any look. Whether you’re dreaming of a subtle shimmer or a bold statement, there’s a turquoise nail design waiting for you. Don’t worry if you’re just starting out; we’ll walk you through everything you need to know to create beautiful turquoise nails that you’ll love showing off. Get ready to dive into the world of turquoise and discover how easy it is to achieve fabulous results!
Why We Love Turquoise Nail Designs
Turquoise, a color inspired by the stunning gemstone, evokes feelings of peace, tranquility, and a connection to nature. It’s a color that flatters various skin tones and can be dressed up or down. From a soft, dreamy pastel to a deep, rich jewel tone, turquoise offers a spectrum of possibilities for your nails. It’s also a fantastic color for embracing different seasons – think beachy vibes in summer, or a cool, sophisticated touch in winter.
The appeal of turquoise nail designs lies in their:
- Versatility: Works with a wide range of outfits and occasions.
- Vibrancy: Adds a noticeable pop of color and personality.
- Uniqueness: Stands out from more conventional nail colors.
- Mood-Boosting Effect: The color itself is often associated with happiness and well-being.
Getting Started: Essential Tools for Turquoise Nails
Before you start painting, having the right tools makes all the difference. As a beginner, you don’t need a professional salon’s worth of equipment. Here’s a basic kit that will get you creating gorgeous turquoise nail designs with ease:
Must-Have Nail Polish Tools
- Base Coat: This is crucial! It protects your natural nails from staining, especially with vibrant colors like turquoise, and helps your polish adhere better.
- Top Coat: For that glossy finish and long-lasting wear. It seals your design and prevents chipping.
- Turquoise Nail Polish: Naturally! Choose a shade that speaks to you.
- Optional Accent Colors: Think white, gold, silver, black, or even a complementary shade like coral or navy.
- Nail File and Buffer: To shape your nails and smooth the surface for polish.
- Cuticle Pusher: To gently push back your cuticles for a clean canvas.
- Lint-Free Wipes: For cleaning nails before polishing and for correcting minor mistakes.
- Toothpicks or Dotting Tools: For simple designs like dots or small accents.
- Thin Nail Art Brush (Optional): If you want to try lines or more intricate details.
A good base and top coat are your best friends for healthy, long-lasting manicures. Brands like OPI and Essie offer tried-and-true formulations that professionals and DIYers swear by. For the creative part, you can find wonderful turquoise polishes from drugstore brands like Maybelline and Sally Hansen, all the way up to more premium lines.
Choosing Your Perfect Turquoise Shade
Turquoise isn’t just one color! It’s a spectrum that can range from a pale, icy aqua to a deep, oceanic teal. The shade you choose can dramatically change the feel of your nail design.
Popular Turquoise Hues
- Aqua/Pastel Turquoise: Soft, airy, and perfect for a delicate, subtle look. Great for spring and summer.
- Bright Turquoise: A vibrant, eye-catching shade that’s full of energy. Ideal for making a statement.
- Deep Teal/Jewel-Toned Turquoise: Rich, sophisticated, and luxurious. Excellent for evening wear or a more mature aesthetic.
- Metallic/Shimmer Turquoise: Adds glamour and sparkle, perfect for holidays or when you want extra flair.
Consider your skin tone too! Generally, warmer undertones (more green) can complement warmer skin tones, while cooler undertones (more blue) can enhance cooler skin tones. However, the best shade is always the one that makes you feel fabulous! Don’t be afraid to experiment.
Beginner-Friendly Turquoise Nail Design Ideas
You don’t need to be a nail artist to create stunning turquoise designs. These ideas are simple, effective, and perfect for testing the waters.
1. The Classic Turquoise Mani
This is the simplest way to rock turquoise: a solid coat of your favorite shade. Ensure you prep your nails properly, apply a base coat, two thin coats of turquoise polish, and finish with a good top coat. It’s chic, timeless, and always works.
2. Turquoise with a Metallic Accent
Add a touch of sparkle by painting just one accent nail (usually the ring finger) in gold, silver, or rose gold. Alternatively, use a metallic polish to paint a thin line at the tip or the base of your turquoise nails.
Steps:
- Prep nails and apply base coat.
- Paint all nails except the accent nail with your turquoise polish. Apply two coats if needed.
- On the accent nail, apply the metallic polish.
- Once dry, apply a top coat to all nails.
3. Polka Dots Delight
This is a playful and easy design. Use a toothpick or a dotting tool dipped in a contrasting color (white, black, or metallic gold work beautifully) to create dots on your turquoise nails. You can cover the whole nail or just add a few scattered dots.
How to get perfect dots:
- Dip your toothpick or dotting tool into the polish.
- Gently press it onto your nail.
- Repeat, reloading the tool as needed.
- Try to keep the spacing and size of your dots consistent for a cleaner look.
4. Ombre/Gradient Effect
This might sound advanced, but a simple sponge ombre is surprisingly easy. You can use two shades of turquoise, or a turquoise and a complementary color like white or gold.
Simple Ombre Steps:
- Apply a base coat and let it dry.
- Paint two thin coats of your main turquoise color.
- On a makeup sponge (a small piece works well), paint two stripes of your chosen colors side-by-side.
- Quickly dab the sponge onto your nail, blending the colors. You may need to reapply polish to the sponge and dab again.
- Immediately clean up any polish that got on your skin.
- Once dry, apply a top coat.
For a more seamless transition where two colors meet, you can find great tutorials using makeup sponges on most beauty blogs. A quick search for “nail sponge ombre tutorial” will give you visual guides, which are super helpful!
5. French Tips with a Turquoise Twist
Elevate the classic French manicure by using turquoise for the tips instead of opaque white. You can also do a “reverse French” where the turquoise is at the base of the nail.
French Tip Variation:
- Apply base coat and a sheer nude or pale pink polish if desired.
- Use a fine-tipped brush or striping tape to carefully paint crisp turquoise tips.
- Alternatively, for easier application, use a silicone stamper to help create French tips.
- Finish with a clear top coat.
Color Pairing with Turquoise
Turquoise is a gem, but what can you pair it with? The right color combinations can make your turquoise nail designs truly shine.
Best Color Pairings for Turquoise
Here are some colors that play beautifully with turquoise:
- White: Crisp and clean, perfect for a fresh, summery vibe. Think white dots on turquoise or turquoise tips on a white base.
- Gold & Silver: Adds instant glamour and sophistication. Excellent for accents, glitter, or metallic stripes.
- Coral & Peach: Creates a fun, tropical, and energetic look.
- Navy & Deep Blue: For a richer, more oceanic feel.
- Black: Offers strong contrast and a modern, edgy look.
- Nude/Cream: A subtle pairing that lets the turquoise take center stage without being overwhelming.
| Turquoise Shade | Pairs Well With | Vibe Created |
|---|---|---|
| Pastel Turquoise | White, Rose Gold, Light Grey, Coral | Soft, Dreamy, Lighthearted |
| Bright Turquoise | White, Black, Gold, Yellow, Orange | Bold, Energetic, Fun, Tropical |
| Deep Teal | Gold, Silver, Burgundy, Cream, Forest Green | Sophisticated, Luxurious, Moody |
| Metallic Turquoise | Black, White, Silver, Navy | Glamorous, Festive, Modern |
When in doubt, metallics and white are almost always safe and stylish bets for turquoise. Experimenting with a color wheel can also give you ideas for complementary colors (opposite each other) or analogous colors (next to each other) that will look beautiful.
Advanced Turquoise Nail Designs (for when you’re ready!)
Once you’ve mastered the basics, why not try something a little more intricate? These designs still focus on “beginner-friendly” principles but offer a bit more flair.
1. Geometric Accents
Using striping tape or a thin brush, create geometric patterns. Think triangles, chevrons, or simple lines in contrasting colors (gold, white, or black) over your turquoise base. You can find excellent tutorials on using striping tape for perfect lines online. This technique is a game-changer for clean lines!
2. Marble Effect
This looks complex but can be achieved with a few simple steps. You can use two polishes (e.g., turquoise and white) and a toothpick to swirl them together on your nail. Or, for a cleaner result, try the “water marble” technique (though this is a bit trickier for absolute beginners). A common beginner marble involves dropping a few drops of white polish onto a wet turquoise base and swirling with a needle.
3. Glitter Gradient
Apply a turquoise base, then, starting from the tip of your nail, pat glitter polish in a gradient fading down the nail. This is super forgiving and adds instant sparkle and dimension.
4. Floral Touches
Use a dotting tool to create simple floral patterns. For example, make a few dots in white or a light pink, then add a tiny dot of yellow for the center. Or, use a fine brush and white polish to paint small leaf shapes around a central turquoise design.
Nail Care Tips for Vibrant Turquoise Nails
To keep your beautiful turquoise nail designs looking their best, a little bit of care goes a long way. Healthy nails are the perfect canvas!
Daily and Weekly Nail Care
- Moisturize: Apply cuticle oil and hand cream daily, especially after washing your hands. This keeps cuticles soft and prevents hangnails.
- Protect Your Nails: Wear gloves when doing household chores, especially washing dishes or using cleaning chemicals.
- Be Gentle: Avoid using your nails as tools to open anything or scrape surfaces.
- Touch-Ups: Keep your top coat handy for a quick refresh every few days to maintain shine and prevent chipping.
- Removal: When it’s time to change your polish, use a good quality nail polish remover. Non-acetone removers are gentler if your nails feel dry. Soak a cotton ball, press it onto the nail for about 30 seconds, then gently swipe.
Consider giving your nails a break between polish applications, especially when using dark or vibrant colors that might potentially stain. A few days with just clear polish or nail treatments can help them recover.
Addressing Common Turquoise Nail Design Challenges
Even with the best intentions, you might run into a few hiccups. Here’s how to tackle them:
Challenge 1: Streaky Application
Solution: This usually happens with polish that’s too thick or when you’re not using enough polish on the brush. Ensure your coats are thin and even. If a polish is consistently streaky, it might be time to add a drop of nail polish thinner (not remover!) to revitalize it. Also, try building up the color with two thin coats rather than one thick one.
Challenge 2: Polish Stains on Skin/Cuticles
Solution: Prevention is key! Apply a layer of Vaseline or cuticle oil around your nail bed before you start painting. Any polish that gets on the skin will stick to the barrier, not your skin. If you do get polish on your skin, use a fine-tipped brush (like an old eyeliner brush) dipped in nail polish remover to carefully clean it up. The U.S. National Library of Medicine notes that nail polish removers, when used sparingly and with care, can effectively clean minor spills.
Challenge 3: Chipping Too Soon
Solution: This is often due to not using a top coat, or not capping the free edge. When you apply your top coat, run the brush along the very edge of your nail. This seals the polish and helps prevent chips. Also, ensure your nails are completely dry before applying the top coat and avoid activities that could chip them immediately after polishing.
Challenge 4: Uneven Nail Surface
Solution: A good base coat can help smooth out minor imperfections. If your nails are naturally uneven, a nail filler base coat can provide a smoother canvas. Buffing your nails gently before applying polish also helps create an even surface.
| Problem | Cause | Solution |
|---|---|---|
| Streaky Polish | Polish consistency, too little polish on brush, thin coats | Thin, even coats; revitalize polish with thinner; ensure enough polish on brush |
| Skin Stains | Accidental polish drips/smudges | Apply barrier (Vaseline); clean up with detail brush and remover |
| Quick Chipping | No top coat, not capping edge, rough handling | Use quality top coat, cap free edge, protect nails |
| Uneven Surface | Natural nail texture, improper filing | Use base coat, buff gently, consider nail filler |
| Polish Not Drying | Thick coats, low temperature, impatient | Thin coats, warm environment, quick-dry drops/sprays, patience |
Frequently Asked Questions About Turquoise Nail Designs
Here are some common questions beginners have about rocking turquoise nails:
Q1: Can any skin tone wear turquoise nail polish?
A: Absolutely! While some shades might be more flattering than others, there’s truly a turquoise for everyone. Experiment with different undertones (more blue vs. more green) and finishes (matte, shimmer, cream) to see what you love best.
Q2: How do I choose the right turquoise for my outfit?
A: Consider the overall vibe. Brighter turquoises pair well with bold or summery outfits. Deeper teals can complement more formal or sophisticated attire. Neutral outfits are a great backdrop for any turquoise shade.
Q3: Will turquoise stain my nails?
A: Vibrant colors, including some shades of turquoise, can potentially stain natural nails if a base coat isn’t used. Always apply a good quality base coat before your colored polish to prevent staining and protect your nails.
Q4: How can I make my turquoise nail designs last longer?
A: Use a good base coat and top coat! Apply thin, even coats of polish, cap the free edge of your nails with your top coat, and avoid harsh activities. Reapplying top coat every 2-3 days can also help extend the manicure’s life.
Q5: Can I mix turquoise polish with other colors?
A: Yes! Turquoise is very versatile. It pairs wonderfully with metallics (gold, silver), neutrals (white, black, nude), and can also create beautiful combinations with warmer tones like coral or yellow.
Q6: What’s the easiest way to do turquoise nail art?


