Tropical palm tree nail designs offer a fun, stylish way to bring vacation vibes to your fingertips. They are essential for anyone wanting an easy, eye-catching manicure that expresses creativity and a love for sunny escapes, perfect for beginners and pros alike.
Dreaming of swaying palm trees and sandy beaches? You can carry that tropical paradise with you, right on your nails! Tropical palm tree nail designs are a fantastic way to add a touch of effortless chic and wanderlust to your look. Whether you’re heading on a vacation or just wish you were, these designs can instantly boost your mood and inject some fun into your everyday style. We know starting with nail art can feel a bit daunting, but don’t worry! We’re here to break down super simple, genius ways to create these gorgeous tropical looks, step-by-step. Get ready to transform your nails into miniature vacation scenes!
Why Tropical Palm Tree Nail Designs Are a Must-Try
Tropical palm tree nail designs are more than just pretty patterns; they’re a statement! They’re a universally loved trend because they evoke feelings of relaxation, fun, and escape. Think about it: a touch of green foliage against a sunset orange background, or delicate silhouettes of palm fronds on a serene blue canvas. These designs are incredibly versatile, fitting perfectly for a beach getaway, a summer party, or simply when you need a little bit of sunshine in your life.
As Lisa Drew from Nailerguy, I’m all about making nail art accessible and enjoyable for everyone. The “genius” part of these designs lies in their simplicity and the impact they create. They don’t require hours of intricate work or a professional salon visit. Many can be achieved with basic tools and techniques, making them perfect for beginners. Plus, they’re a fantastic way to express your personal style and creativity without saying a word!
The Appeal of Tropical & Palm Tree Motifs
- Instant Vacation Vibe: Palm trees are synonymous with tropical getaways.
- Versatile Colors: They pair beautifully with a wide array of colors, from vibrant neons to soft pastels and classic neutrals.
- Easy to Adapt: Whether you love minimalist designs or bold statements, palm trees can be incorporated in countless ways.
- Mood Booster: A glimpse of palm trees on your nails can instantly transport you to a happier, more relaxed state.
- Beginner-Friendly: Many palm tree designs are achievable with simple dotting tools or even toothpicks!
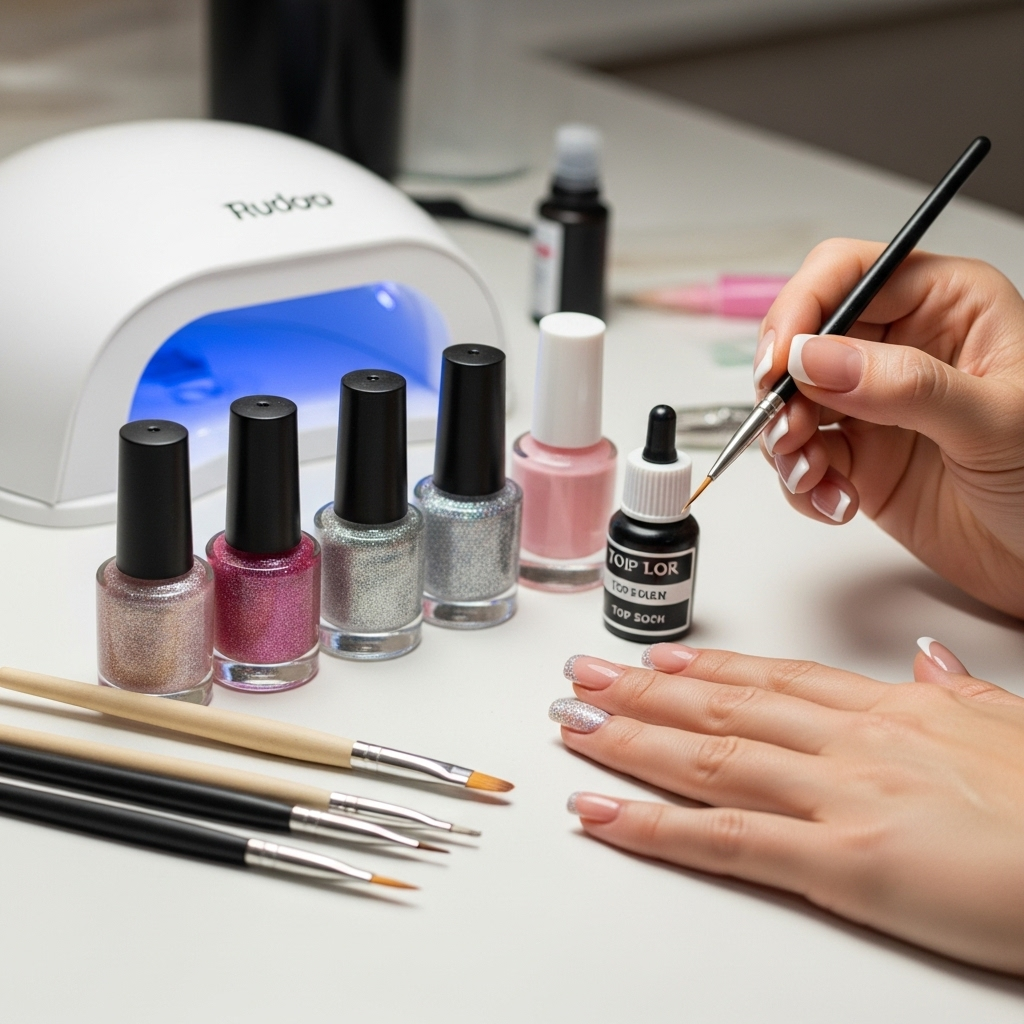
Essential Tools for Your Tropical Nail Art Toolkit
Before we dive into the fun designs, let’s gather your nail art essentials. You don’t need a professional kit to create stunning tropical palm tree nails. Most of these items are pretty common or easy to find at your local drugstore or online beauty supply store. Having the right tools makes the process smoother and the results even better!
Must-Have Tools & Supplies:
- Base Coat: Protects your natural nails and helps polish adhere better.
- Top Coat: Seals your design, adds shine, and makes your manicure last longer.
- Nail Polish Colors: Think beachy blues, sandy beiges, sunset oranges and pinks, vibrant greens for leaves, and black or dark brown for silhouettes.
- Fine-Tipped Detail Brush: Essential for drawing thin lines and details. Many affordable options are available.
- Dotting Tool: Perfect for creating dots, small leaves, or even simple palm fronds. They come in various tip sizes.
- Toothpick or Nail Art Pen: Great for beginners to draw simple shapes and lines.
- Nail Polish Remover & Cotton Swabs: For cleaning up any mistakes.
- Patience! This is the most important tool for any nail art beginner.
For those looking to invest a bit more, a good set of nail art brushes can offer more control and variety. Brands like professional nail art brush sets often include brushes of different sizes and shapes, which can be incredibly helpful for intricate designs.
Beginner-Friendly Tropical Palm Tree Nail Designs (Step-by-Step)
Ready to get creative? We’ve got three easy-to-follow designs that are perfect for anyone just starting out with nail art. These are genius because they look impressive without requiring advanced skills. Let’s get painting!
Design 1: Simple Palm Silhouette Accent Nail
This is the ultimate beginner design! It’s chic, subtle, and instantly recognizable as tropical.
What You’ll Need:
- A light, neutral polish (e.g., sandy beige, pale blue, or a soft white) for your main color.
- A dark polish (black or dark brown) for the palm tree silhouette.
- A fine-tipped detail brush or a toothpick.
- Base coat and top coat.
Steps:
- Prep Your Nails: Start with clean, dry nails. Apply a base coat and let it dry completely.
- Apply Main Color: Paint all your nails (except for one accent nail) with your chosen light, neutral polish. Apply two coats for full opacity and let them dry.
- Prepare Accent Nail: On your accent nail (usually the ring finger), apply one or two coats of the same neutral polish. Let it dry thoroughly.
- Draw the Trunk: Using your dark polish and fine-tipped brush (or toothpick), carefully draw a single vertical line down the middle of your accent nail. This is the palm tree trunk. Don’t worry if it’s not perfectly straight – nature isn’t perfect!
- Add the Fronds: From the top of the trunk line, start drawing short, curved lines extending outwards. Think of them as simple leaf shapes or fan strokes. You can make them slightly longer as they extend away from the trunk. Aim for 3-5 fronds on each side, creating a fanned-out effect.
- Refine (Optional): Once the lines are dry, you can go back with a tiny bit more dark polish to thicken the trunk slightly or add more definition to the fronds if needed.
- Seal the Deal: Once completely dry, apply a generous layer of top coat over all your nails to protect the design and add a beautiful shine.
Nailerguy Tip: For an even simpler version, you can use a dotting tool to make a few dots at the top of the trunk line and then gently drag them outwards to create the fronds. It’s incredibly forgiving!
Design 2: Sunset Ombre with Palm Silhouettes
This design brings the beautiful colors of a tropical sunset to your nails, with palm trees to complete the scene.
What You’ll Need:
- A makeup sponge (a regular kitchen sponge cut into small pieces works too!).
- Nail polishes in sunset colors: e.g., yellow, orange, pink, and maybe a hint of purple or red.
- Black or dark brown polish for the palm trees.
- Fine-tipped detail brush or toothpick.
- Base coat and top coat.
- Liquid latex or tape for easy cleanup (optional but recommended!).
Steps:
- Prep and Protect: Apply base coat. If you’re using liquid latex, apply it around your nails now. Otherwise, you can carefully apply tape around your nails.
- Create the Ombre: On your makeup sponge, paint stripes of your sunset colors next to each other (e.g., yellow, orange, pink).
- Sponge it On: Gently dab the sponge onto your nail, starting from the cuticle and moving upwards. You might need to reapply polish to the sponge and dab several times to build up the color intensity and blend the shades.
- Repeat for Other Nails: Clean your sponge and repeat the ombre process for your desired nails.
- Let it Dry: Allow the ombre colors to dry completely.
- Draw the Palm Trees: Once dry, use your fine-tipped brush or toothpick with black/dark brown polish to draw palm tree silhouettes along the edges or from the cuticles of your ombre nails. You can draw a full tree or just a few fronds reaching towards the ‘sun’ in your ombre.
- Cleanup: Carefully remove the liquid latex or tape. Use a cotton swab dipped in nail polish remover to clean up any stray polish on your skin.
- Seal the Look: Apply a clear top coat to seal the ombre and the palm tree designs.
Nailerguy Tip: For a softer ombre, you can also use a nail art brush to dab and blend the colors directly on the nail, like `this tutorial` showcases for general ombre techniques. Just be quick before the polish dries!
Design 3: Beachy Waves with Subtle Palm Fronds
This design is inspired by the gentle movement of ocean waves and the delicate nature of palm leaves.
What You’ll Need:
- A light blue or turquoise polish for the base.
- A slightly darker blue or green polish for the wave effect.
- White or a very light pastel polish for accents.
- A fine-tipped detail brush.
- Base coat and top coat.
Steps:
- Base Perfection: Apply your base coat and then one or two smooth coats of your light blue or turquoise polish. Let it dry completely.
- Create Gentle Waves: Using your darker blue or green polish and a fine-tipped brush, gently paint a few wavy lines across your nails. Imagine the gentle lapping of waves. You might want to curve them slightly towards the tips for a natural look. You can do this on all nails or just accent nails.
- Add Subtle Fronds: With white or a very light pastel polish and your fine brush, delicately draw a few small, wispy palm fronds extending from the top corners or edges of your nails. Think of them as soft, airy suggestions of palm leaves rather than bold silhouettes.
- Optional Highlights: You can add tiny white dots or very thin lines on top of some of the wave lines to mimic the sparkle of sunlight on water.
- Drying Time: Let all the polish dry thoroughly.
- Seal and Shine: Apply a good layer of top coat to seal your ocean-inspired masterpiece.
Nailerguy Tip: Don’t overdo the waves or fronds. The key here is subtlety and a light, airy feel. Less is often more with this design!
Pro Tips for Flawless Tropical Palm Tree Nails
Even with simple designs, a few pro tips can elevate your DIY nail art game. These little tricks make a big difference in achieving that polished, salon-quality look at home.
- Thin Coats are Key: Always apply polishes in thin, even layers. Thick coats take longer to dry and are more prone to smudging or bubbling.
- Shake, Don’t Stir: When mixing glitter polishes or if a polish seems a bit separated, roll the bottle between your palms instead of shaking vigorously. Shaking can create air bubbles in the polish.
- Clean Up as You Go: Keep a small brush or cotton swab dipped in nail polish remover handy. Clean up any mistakes or stray polish around your cuticles immediately. It’s much easier than trying to fix dried polish.
- Understand Polish Consistency: If your polish is too thick, use a nail polish thinner (never remover!) to bring it back to the right consistency. This is available from most nail supply stores.
- Practice on Nail Wheels or Paper: Before committing to your nails, try drawing the palm trees on an old nail wheel or even a piece of paper. This helps you get a feel for the brush strokes and polish flow.
- Invest in Quality Tools: While you can use basic items, investing in a few good quality nail art brushes or dotting tools can make a world of difference in precision and control.
- Let Each Layer Dry: This is crucial. Rushing to the next step before the previous layer is dry is the most common cause of smudged nail art. Be patient!
Tropical Palm Tree Nail Designs: A Quick Comparison
Choosing the right design depends on your skill level, the time you have, and the look you’re going for. Here’s a quick breakdown:
| Design Type | Beginner Friendliness | Time Involved | Visual Impact | Key Elements |
|---|---|---|---|---|
| Simple Palm Silhouette | Very High | 15-20 minutes | Subtle, Chic | Single dark silhouette on accent nail |
| Sunset Ombre with Palms | High (with sponge) | 30-45 minutes | Vibrant, Eye-catching | Color blending, palm tree accents |
| Beachy Waves with Fronds | High | 20-30 minutes | Elegant, Delicate | Wavy lines, light frond accents |
No matter which design you choose, the goal is to have fun and express yourself! These tropical palm tree nail designs are all about bringing a little bit of paradise to your fingertips. For more advanced techniques, you can explore water marbling for ocean effects or intricate line work for more detailed palm leaves. The Official U.S. Consumer Product Safety Commission also offers safety tips for cosmetic products, including nail polish, which is always good to keep in mind.
Frequently Asked Questions About Tropical Palm Tree Nail Designs
Q1: How do I make my nail art last longer?
A1: Properly prepping your nails (cleaning and applying a base coat), applying thin, even coats of polish, and finishing with a good quality top coat are key. Reapply top coat every 2-3 days for extra durability.
Q2: Can I do palm tree designs with regular nail polish, or do I need special gel polish?
A2: You can absolutely do these designs with regular nail polish! Gel polish offers more longevity and a harder finish, but regular polish is perfectly fine and often easier for beginners to work with for art.
Q3: My lines end up looking shaky. How can I get smoother lines for palm trees?
A3: Use a very fine-tipped detail brush and ensure your polish has the right consistency – not too thick, not too thin. Rest your wrist and pinky finger on a stable surface for support while you paint. Sometimes, using a nail art pen can also provide more control than a brush.
Q4: What are the best colors to use for tropical palm tree nails?
A4: Think of vacation! Blues (ocean, sky), greens (palm leaves), yellows, oranges, and pinks (sunsets) are classic. Sandy beiges, whites, and blacks/dark browns are great for accents and silhouettes.
Q5: How do I clean up mistakes without ruining my design?
A5: Dip a small, flat brush or a pointed cotton swab into nail polish remover. Carefully trace around your design or cuticle to clean up any excess polish. Doing this while the polish is still wet is easiest.
Q6: Can I combine palm tree designs with other tropical elements like flowers or beaches?
A6: Absolutely! That’s the beauty of nail art. You can easily add small tropical flowers, dots for sand, or wavy lines for water to enhance your palm tree theme. Get creative!
Conclusion: Your Tropical Nail Art Journey Begins!
So there you have it! Tropical palm tree nail designs are indeed genius in their simplicity and their ability to transport you to your happy place. We’ve explored why they’re so beloved, gathered your essential tools, and walked through several beginner-friendly tutorials designed to build your confidence and creativity. Remember, nail art is a journey, and every stroke is a step towards expressing your unique style.
Don’t be afraid to experiment with colors, add your own little touches, and most importantly, have fun with it! Whether you’re creating a full set of sunset-themed nails or just adding a single palm silhouette to your accent finger, you’re creating a little piece of art. Keep practicing, keep experimenting, and let your nails be your canvas for a little bit of everyday paradise. Happy painting from Nailerguy!