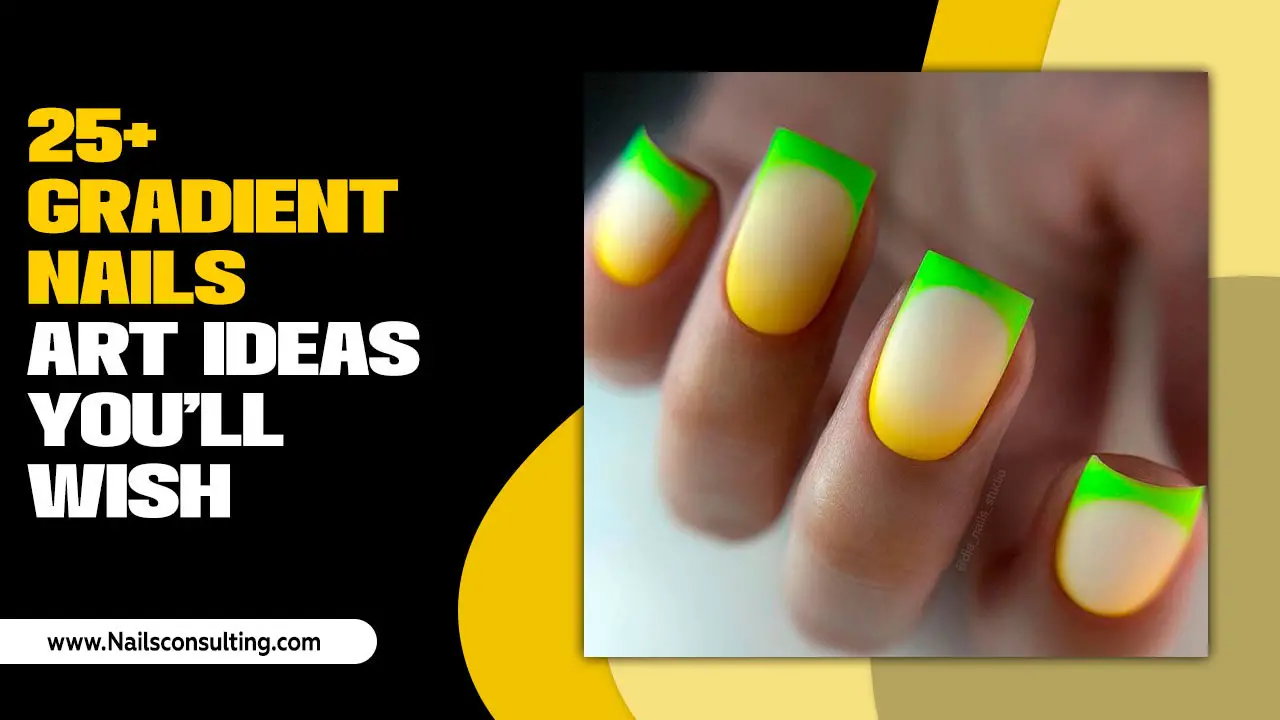
Get ready for stunning tropical nail art! This guide breaks down fun, easy designs with simple steps and smart tips, perfect for beginners. Learn how to create beautiful, vacation-ready nails that express your unique style.
Dreaming of a getaway but stuck at home? Bring the tropics to your fingertips with vibrant and fun nail art! You can create gorgeous, vacation-inspired manicures right on your nails, even if you’re just starting out. Forget complicated techniques; we’re diving into simple, genius designs that look amazing and are totally achievable. Let’s transform your nails into a mini paradise, adding a splash of color and fun to your everyday. Get ready to feel like you’re on a sunny beach, no travel required!
Your Tropical Nail Art Adventure Starts Here!
Tropical nail art isn’t just about palm trees and pineapples (though we love those!). It’s about capturing the feeling of sunshine, vibrant colors, and lush nature. Think bright blues of the ocean, fiery oranges of a sunset, and the lush greens of jungle leaves. This guide is your personal roadmap to creating these sunny vibes on your nails. We’ll cover everything from essential tools to step-by-step tutorials for designs that will make your friends say, “Wow, where did you get those done?” Spoiler alert: you did them yourself!
Gathering Your Tropical Toolkit
Before we dive into the fun designs, let’s make sure you have the right tools. Don’t worry, you don’t need a professional salon setup! Most of these items are likely already in your collection, or they’re super easy to find. Having the right supplies makes all the difference in creating smooth, polished looks.
Essential Nail Art Supplies:
- Base Coat: Protects your natural nails and helps polish adhere better.
- Top Coat: Seals your design, adds shine, and prevents chips.
- Nail Polish in Tropical Colors: Think bright pinks, sunny yellows, ocean blues, grassy greens, and sandy beige.
- Dotting Tools: These have small balls on the end, perfect for creating dots, flowers, and details. They come in various sizes!
- Thin Nail Art Brushes: For drawing lines, curves, and intricate patterns.
- Toothpicks or a Fine-Tipped Eyeliner Brush: Great for tiny details or cleaning up edges.
- Dotting Swirls or Nail Art Pens: Easy to use for beginners, they dispense polish in a fine tip.
- Nail Polish Remover & Cotton Swabs: For those inevitable little mistakes.
- Optional: Glitter Polish: Adds a touch of sparkle, like sunlight on water!
- Optional: Nail Art Stickers or Decals: For super quick and easy embellishments.
Check out this helpful guide from the Nail Care HQ for general tips on perfect polish application. Getting a smooth base is key!
Easy Tropical Nail Art Idea 1: The Sunset Gradient
Nothing says tropical like a breathtaking sunset. This gradient design mimics those stunning colors you see at the end of a perfect beach day. It looks complex, but trust me, it’s super achievable!
What You’ll Need:
- Base coat
- Yellow, orange, and pink nail polish
- A makeup sponge (the kind you use for foundation)
- Top coat
- Nail polish remover
Step-by-Step Guide:
- Prep Your Nails: Apply your base coat and let it dry completely.
- Apply Base Colors: On your makeup sponge, draw three horizontal lines next to each other: yellow, orange, then pink.
- Create the Gradient: Quickly dab the sponge onto your nail. You’ll see the colors blend! You might need to reapply polish to the sponge and dab again on your nail to get full color coverage.
- Repeat: Do this for all your nails.
- Clean Up: Dip a cotton swab or brush in nail polish remover to clean up any polish that got on your skin.
- Seal the Deal: Once totally dry, apply a generous layer of top coat to meld the colors and add shine.
This technique is fantastic for blending colors smoothly. Experiment with different color combinations for unique sunset looks!
Easy Tropical Nail Art Idea 2: The Pineapple Power
Pineapples are a classic tropical icon! This design is cheerful, cute, and surprisingly simple to create, bringing a burst of sunshine to your day.
What You’ll Need:
- Base coat
- Yellow nail polish
- Green nail polish
- A fine-tipped black or brown nail art brush or dotting tool
- A toothpick
- Top coat
Step-by-Step Guide:
- Base Coat & Yellow: Apply your base coat, let it dry, and then apply two coats of yellow nail polish. Let it dry completely.
- Create the Pineapple Body: Using your fine-tipped brush and the yellow polish (or a slightly darker yellow if you have it), paint a rough diamond or oval shape on your nail. This will be the main body of your pineapple.
- Add the Leafy Top: With the green polish and your brush, paint a few spiky leaves coming out of the top of your yellow shape. Think of long, thin triangles or jagged lines.
- The Pineapple Texture: Using the toothpick, gently draw horizontal lines across the yellow diamond shape. You can also use a fine-tipped brown or black brush to create a subtle criss-cross pattern for the pineapple’s “eyes” and texture. Don’t aim for perfection; natural textures are great!
- Clean Up & Seal: Clean up any stray polish and apply your top coat.
For an extra touch, you could add a tiny brown dot at the bottom of the yellow shape for the base of the pineapple!
Easy Tropical Nail Art Idea 3: Watermelon Slices
Juicy, refreshing, and oh-so-summery! Watermelon nail art is a playful choice that screams fun. This design uses simple shapes and colors to create edible-looking slices.
What You’ll Need:
- Base coat
- Pink or red nail polish
- Green nail polish (light and dark can be nice)
- Black nail polish
- A fine-tipped nail art brush or dotting tool
- Top coat
Step-by-Step Guide:
- Base Coat & Pink/Red: Apply base coat, then two coats of your pink or red polish. Let it dry.
- The Rind: With your fine brush and the lighter green polish, paint a curved line at the tip of your nail. Then, use the darker green polish to paint another curve just below the lighter green, creating a two-toned rind effect. You can make it a simple curve or slightly jagged.
- The Seeds: Using the black polish and your finest brush or a dotting tool, add a few small black dots or tiny curved lines on the pink/red section to represent seeds.
- Clean & Shine: Clean up any mistakes and apply your top coat.
You can also create full watermelon slices by painting a curved shape and adding the green rind at one end. This design is especially cute on accent nails!
Easy Tropical Nail Art Idea 4: The Tropical Flower Power
Floral designs are a staple in tropical aesthetics. Hibiscus, plumeria, and other exotic blooms can add a touch of elegance and vibrancy to your nails. We’ll explore a simple, yet effective floral pattern.
What You’ll Need:
- Base coat
- Polishes in your chosen flower colors (e.g., bright pink, coral, yellow)
- White or contrasting color for flower centers/details
- A dotting tool or a very fine brush
- Top coat
Step-by-Step Guide:
- Base Coat & Background: Apply base coat. You can either paint all your nails a solid tropical color (like teal or a sandy beige) or do a gradient like the sunset design. Let it dry fully.
- Create Petals: Using your lightest flower color and the dotting tool, create a ring of dots to form the outer edge of your flower. You can overlap them slightly. Alternatively, use a fine brush to paint simple petal shapes radiating from a center point.
- Add the Center: Use a contrasting color (like white, yellow, or a darker shade of your petal color) and a smaller dotting tool or your brush to create a dot in the middle of your flower.
- Detailing (Optional): With a fine brush, you can add subtle lines to the petals or a small highlight to the center for more dimension.
- Seal Your Bloom: Clean up edges and apply a top coat to protect your hard work.
Don’t be afraid to use different sizes of dotting tools for variety in your floral designs. A slightly larger dotting tool can make a whole flower in one go!
Easy Tropical Nail Art Idea 5: Ocean Waves & Sandy Shores
Capture the serenity of the beach with this simple yet effective design. It combines the calm blues of the water with the natural texture of sand.
What You’ll Need:
- Base coat
- A pale blue or turquoise polish
- A sandy beige or light brown polish
- White polish for wave accents (optional)
- A fine nail art brush or toothpick
- Top coat
Step-by-Step Guide:
- Base Coat & Blue: Apply base coat. Paint your nails with the blue or turquoise polish. Let it dry completely.
- Create Defined Lines: Using your fine brush and the sandy beige polish, paint a horizontal line across the bottom third of your nail, leaving the top two-thirds blue. This represents the sand.
- Add Wave Texture (Optional): For a more realistic wave effect, you can use white polish and your fine brush to paint small, foamy lines or dots along the edge where the blue meets the sand. You can also use the white to add a slight curl to the blue portion, mimicking a breaking wave.
- Clean and Seal: Clean up any rough edges and apply a generous top coat.
Vary the thickness of your “sand” line for different beach looks. You can also make the blue part more textured by using a sponge for a bubbly sea effect.
Making Your Tropical Nails Last
You’ve put in the effort to create beautiful tropical nail art, so let’s make sure it stays looking fabulous! Proper care will extend the life of your manicure and keep those designs looking fresh.
Tips for Longevity:
- Always Use a Top Coat: This is your magic shield against chips and smudges. Reapply every 2-3 days for extra protection.
- Wear Gloves: When doing chores, washing dishes, or anything that involves prolonged water exposure or harsh chemicals, wear rubber gloves. Water can weaken polish and lift edges.
- Avoid Using Nails as Tools: Resist the urge to scrape, pry, or open things with your nails. This is a recipe for chips and breaks.
- Moisturize: Keep your cuticles and hands hydrated with a good cuticle oil or hand cream. Healthy skin supports healthy nails.
- Buff Gently: If your top coat starts to lose its shine, a gentle buff with a fine-grit buffer can sometimes bring back the sparkle.
A good top coat can make a world of difference. Brands like Seche Vite or Sally Hansen Insta-Dri Top Coat are often recommended for quick drying and durability, though many brands offer excellent options. Remember to research products and find what works best for you!
Tropical Nail Art Maintenance Made Easy
Even with the best care, touch-ups might be needed. Here’s how to handle minor issues:
- Small Chips: For tiny chips on the edge, you can often carefully fill them in with a matching polish and then reapply top coat.
- Faded Shine: A fresh coat of top coat every few days can revive the shine.
- Lifting Edges: If an edge starts to lift, try to gently push it down with a tiny bit of top coat. If it’s too far gone, you might need to carefully trim the lifted bit with cuticle scissors and then reapply top coat.
For more in-depth nail care advice, resources from the American Academy of Dermatology Association can be very informative regarding nail health.
Frequently Asked Questions About Tropical Nail Art
Here are some common questions we get about creating tropical nail art:
Q1: I’m a total beginner. Which tropical nail art design is the easiest to start with?
A: The Sunset Gradient using a makeup sponge is incredibly forgiving! It’s hard to mess up the blending, and the results are always pretty. The Sandy Shores design is also very straightforward, just requiring a steady hand for a line.
Q2: What if I don’t have a lot of nail polish colors? Can I still do tropical designs?
A: Absolutely! Even with just white, black, and one or two bright colors (like pink or blue), you can create many tropical looks. Think simple dots, waves, or even minimalist flowers. The key is playing with shapes and contrast.
Q3: My nail polish smudges when I try to add details. What am I doing wrong?
A: This usually means your base color isn’t fully dry! Patience is key. Let each layer of polish dry completely before adding dots, lines, or other details. Using a quick-dry top coat can also help speed up the process.
Q4: How do I stop my nail art polish from getting thick and clumpy in the bottle?
A: Don’t shake your polish bottles vigorously; roll them between your hands instead. Also, make sure to wipe the brush clean on the neck of the bottle after dipping, and close the lid tightly immediately after use. Nail polish thinner can sometimes revive old polish, but use it sparingly.
Q5: Can I use regular craft paint for nail art? My friend suggested it.
A: While some people do use craft acrylics, it’s generally recommended to stick to nail polish for your designs. Nail polishes are formulated for use on nails and are non-toxic when applied correctly. Craft paints may contain different chemicals and can be harder to remove or seal properly on nails. Always prioritize products designed for nail use for safety and best results.
Q6: How can I make my intricate designs look cleaner?
A: The easiest way is cleanup! Keep acetone-based nail polish remover and a fine-tipped brush (or a clean-up brush) handy. Dip the brush in remover and gently trace around your nail bed and cuticle to remove any stray polish for a super crisp finish. This makes a huge difference!
Table: Tropical Nail Art Design Cheat Sheet
Here’s a quick reference for some popular tropical themes and the colors that bring them to life:
| Tropical Theme | Key Colors | Simple Elements | Advanced Elements |
|---|---|---|---|
| Sunset | Yellow, Orange, Pink, Purple, Red | Color blending (gradient), simple dots of color | Layered sunsets, glitter accents, starry night effect |
| Ocean/Beach | Blues (light to deep), turquoise, sandy beiges, white | Horizontal lines for sand/water, simple wave curves, small dots for bubbles | Complex wave patterns, foamy crests, gradual color shifts in water |
| Tropical Fruits | Yellow, pink, red, green, orange | Pineapple texture lines, watermelon slices (rind & seeds), simple shape of fruits | 3D fruit elements, detailed fruit patterns, subtle ombre within fruit shapes |
| Tropical Flowers | Vibrant pinks, reds, oranges, yellows, whites, greens | Simple dotted petals, single large flower, basic leaf shapes | Layered petals, intricate flower details, branching vines |
| Island Vibe | Bright pops of Teal, Coral, Gold, Hot Pink | Color blocking, simple geometric shapes, palm leaf silhouettes | Detailed leaf patterns, tribal-inspired accents, metallic finishes |
Conclusion: Your Nails Are Your Canvas
There you have it – a treasure trove of tropical nail art ideas explained! From the effortless cool of a sunset gradient to the playful charm of a watermelon slice, creating these designs is all about having fun and letting your creativity flow. Remember, nail art is a form of self-expression, and with these simple techniques and a little practice, you can achieve salon-worthy looks right at home. Don’t be afraid to mix and match elements, experiment with color palettes, and make these ideas your own. So

