Quick Summary:
Travel nail art made easy! Discover simple, stylish nail designs perfect for your next getaway with these beginner-friendly tips and tricks. Effortless beauty for on-the-go.
Planning a trip can be exciting, but sometimes getting your nails looking vacation-ready feels like a whole other task. You want cute nails, but you don’t want to spend hours on complicated designs or carry a massive nail kit. The good news is, you can absolutely achieve stunning travel-inspired nail art without the fuss! We’re diving into easy, breezy designs that pack a punch, require minimal effort, and require only a few key supplies.
Forget intricate tutorials that leave you frustrated. We’re focusing on clever techniques and simple ideas that look super chic, last through your adventures, and are totally doable, even if you’re a total beginner. Get ready to feel polished and put-together, no matter where your travels take you!
Why Choose Effortless Travel Nail Art?
Let’s face it, packing for a trip can be a juggling act. You’re trying to fit clothes, toiletries, and all those travel essentials into your suitcase. The last thing you need is to worry about a fancy manicure that chips after one day or a complicated art project that requires a dozen specialized tools. Effortless travel nail art solves this problem by focusing on:
- Simplicity: Designs that are quick to apply and require basic skills.
- Durability: Styles that hold up well to the bumps and activities of travel.
- Portability: Using a minimal set of tools and polishes you can easily pack.
- Versatility: Looks that complement various outfits and vacation vibes.
- Confidence Boost: Feeling put-together with minimal fuss, allowing you to focus on enjoying your trip.
This approach ensures your nails look fantastic without adding stress to your travel preparations. It’s all about smart choices and chic outcomes!
Your Essential Travel Nail Art Toolkit
You don’t need a professional salon on wheels to create beautiful travel nail art. A few key items will have you covered for a variety of easy designs. Think of this as your minimalist, go-to nail kit:
Must-Have Supplies:
- Nail File: For shaping your nails before you start. A good nail file is crucial for a smooth edge.
- Top Coat: This is your shine booster and chip protector. A quality top coat is non-negotiable for making your nail art last.
- Base Coat: Protects your natural nails and helps polish adhere better.
- Your Favorite Polish Colors: Choose a few versatile shades. Neutrals, a classic red, a pretty pastel, or even a shimmery shade are great options.
- Dotting Tools (or a Toothpick/Pen Tip): Perfect for creating dots and simple patterns.
- Striping Tape (Optional but Recommended): For creating crisp lines and geometric designs.
- Small Scissors or Tweezers: For precise placement of elements like glitter or tape.
- Nail Polish Remover and Cotton Pads: For clean-ups and mistakes.
This compact kit ensures you’re prepared for most simple and stylish nail art looks, no matter where your adventures take you.
Effortless Travel Nail Art Designs for Beginners
Ready to get creative? These designs are tried-and-true, requiring minimal effort for maximum impact. They’re perfect for beginners and busy travelers alike!
1. The Chic One-Color Wonder
Sometimes, less is more! A perfectly applied solid color can be incredibly sophisticated, especially when it’s a shade that makes you feel fantastic. The key here is flawless application.
How-To:
- Start with clean, shaped nails. Apply a base coat and let it dry completely.
- Apply the first thin coat of your chosen polish. Make sure to cap the free edge (paint a tiny bit on the tip of your nail) to prevent chipping.
- Let the first coat dry for a minute or two.
- Apply a second thin coat for full opacity. Again, cap the edge.
- Once the second coat is almost dry, apply a generous coat of your favorite vibrant top coat. This seals in the color and adds a beautiful shine.
Why it works for travel:
- Extremely durable.
- Requires only one polish color and basic tools you’ll already have.
- Never goes out of style.
2. The Minimalist Dot Parade
Dots are your best friend in the world of easy nail art. They add a playful touch without being overwhelming and are incredibly simple to create.
How-To:
- Apply a base coat and your chosen solid color (or leave it as a natural buff for a softer look). Let it dry thoroughly.
- Dip the tip of a dotting tool (or a toothpick/pen tip) into a contrasting polish color.
- Gently press the tip onto your nail to create a dot.
- Continue adding dots, either in a pattern all over the nail, as a border, or scattered for a random effect.
- Clean up any stray marks with a small brush dipped in nail polish remover.
- Finish with a generous layer of top coat.
Travel Tips:
- Use 2-3 coordinating colors for a cohesive look.
- Try different dot sizes for visual interest.
3. The Bold Stripe Statement
Crisp lines add a modern and sophisticated edge to any manicure. With a little help from striping tape, you can achieve professional-looking stripes with ease.
How-To:
- Apply your base coat and let it dry.
- Paint your nails with your primary color. Let this dry completely. It’s crucial that the base color is fully dry before applying the tape, otherwise, you risk peeling it off.
- Carefully apply striping tape to your nail. You can create a single line, a French tip effect, or a geometric pattern. Be sure to press the tape down firmly around the edges to prevent polish from seeping underneath.
- Paint over the taped areas with your secondary color. Apply thin coats.
- While the second color is still wet, carefully peel off the striping tape using tweezers or your fingernails.
- Let the polish dry completely and then apply a top coat.
Design Inspirations:
- Diagonal Lines: For a dynamic look.
- French Tip Upgrade: Use tape to create a sharp, angled French tip.
- Geometric Blocks: Tape off sections for a modern, almost abstract design.
4. The Glitter Accent Nail
Want a touch of sparkle without going full disco ball? A glitter accent nail is the perfect compromise. It adds a special touch that catches the light beautifully.
How-To:
- Apply your base coat and let it dry.
- Paint your accent nail (usually the ring finger) with a solid color of your choice.
- While the polish on the accent nail is still wet, carefully apply glitter. You can do this by dipping the nail directly into loose glitter, or by using a glitter polish.
- For a smoother finish with loose glitter, let the polish dry slightly, then gently tap off the excess glitter. Apply another layer of polish over the glitter to set it.
- Alternatively, use a glitter polish. Apply one or two coats to achieve your desired coverage.
- Apply top coat over all nails, including the accent nail, to seal everything in and add shine.
Travel Pro-Tip:
- Glitter can hide minor imperfections in nail polish application, making it super forgiving.
5. The Gradient Dream
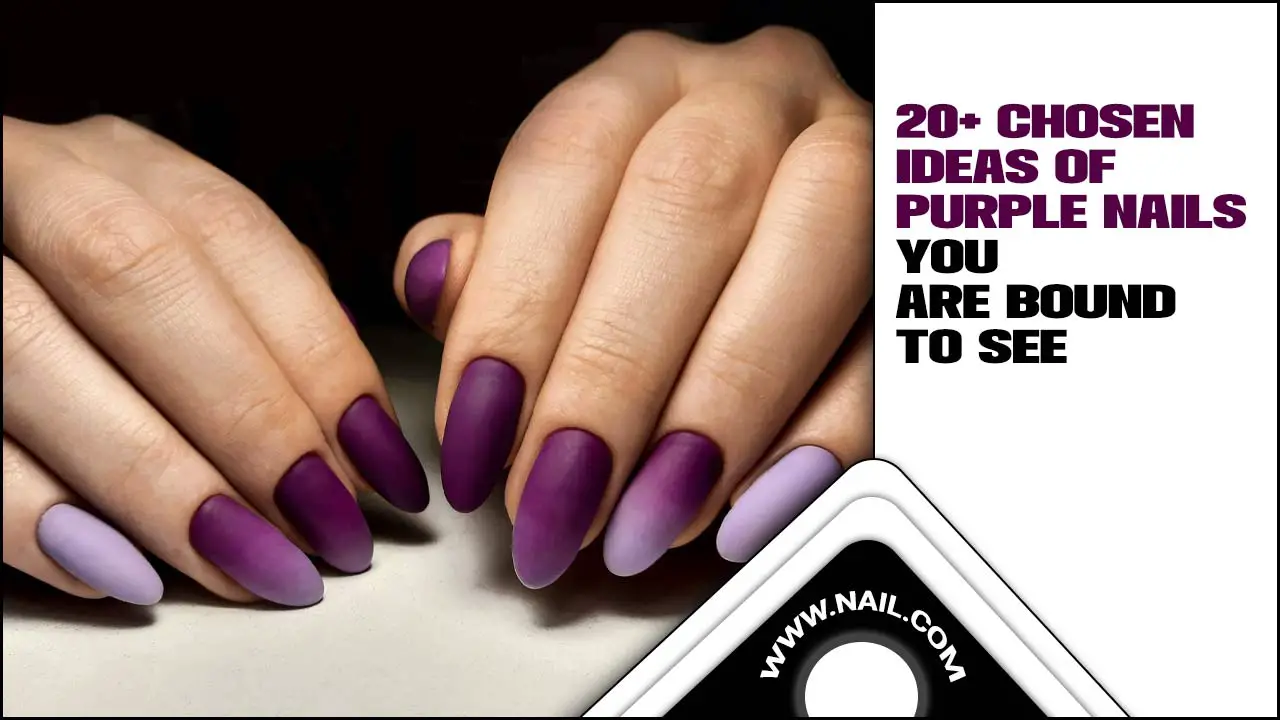
A gradient, or ombre, effect looks incredibly chic and multi-dimensional, but it’s surprisingly easy to achieve with a makeup sponge.
How-To:
- Apply a base coat and let it dry.
- Paint your nails with your lightest polish color. Let it dry.
- Cut a small piece of a clean makeup sponge.
- Apply two colors side-by-side onto the sponge, or layer one on top of the other.
- Gently dab the sponge onto your nail, starting from the tip and working your way down. You may need to dab a few times to build up the color blend.
- Repeat on other nails, or use a different color combination. Clean up any excess polish around the cuticles with a brush and remover.
- Finish with a generous layer of top coat to blend the colors and add shine.
Color Combinations to Try:
- Pink to purple
- Blue to teal
- Yellow to orange
- Neutral beige to a soft rose
6. Simple Stamping (With a Travel-Friendly Stamp)
Nail stamping can seem intimidating, but starter kits often come with clear instructions and simple plates. For travel, choose a plate with small, easy-to-place designs, like tiny flowers, dots, or simple lines.
How-To:
- Apply base coat and two coats of your chosen polish color. Let it dry completely.
- Apply a latex barrier around your cuticles if you have one, or be prepared for some cleanup.
- Scrape the polish over the design on your stamping plate.
- Immediately roll your stamper over the design to pick it up.
- Quickly and gently roll the stamper onto your nail.
- Clean up any stray polish and apply a top coat.
What to Look For:
When buying a starter stamping kit for travel, look for:
- Compact stamper and scraper: Smaller is better for packing.
- Simple design plates: One or two plates with universally flattering, easy-to-apply patterns are perfect.
- Good quality stamper: A clear, squishy stamper makes placement much easier.
For more detailed information on nail stamping, visit the Nail Stamping Beginners Guide.
Nail Care Tips for Travelers
Keeping your nails healthy and looking good while traveling is just as important as the art itself. Here are some essential tips:
Before You Go:
- Hydrate: Drink plenty of water to keep your nails and skin hydrated.
- Moisturize: Apply cuticle oil and hand cream religiously in the days leading up to your trip.
- Trim and File: Make sure your nails are at a comfortable length and neatly filed.
During Your Trip:
- Protect Your Nails: Wear gloves when doing household chores or handling rough materials.
- Avoid Using Nails as Tools: Don’t use your nails to open cans, scrape things, or pick at labels.
- Reapply Top Coat: If you notice your top coat is losing shine, a quick reapplication can refresh your manicure and add extra protection.
- Pack Essentials: Always have a small file and cuticle oil in your travel bag.
After Your Trip:
- Gentle Removal: Use a good quality nail polish remover to take off your polish.
- Deep Hydration: Give your nails and cuticles a good dose of oil and cream to restore moisture.
- Nail Break: If your nails feel weak, consider taking a break from polish or opt for a strengthening base coat.
Travel Nail Art Design Inspiration Table
Here’s a quick reference guide to pairing simple designs with common travel themes. This can help spark your creativity!
| Travel Theme | Effortless Nail Art Idea | Key Colors | Tools Needed (Minimal) |
|---|---|---|---|
| Beach Vacation | Ocean gradient (blue hues) or simple white dots on a sandy base. | Blues, whites, sandy beige, turquoise. | Sponge, dotting tool/toothpick, nail polish. |
| City Explorer | Black and white geometric lines or a classic bold color. | Black, white, silver, classic red, deep navy. | Striping tape, nail polish. |
| Nature Retreat | Leafy green accent nail with gold speckles or a soft, earthy tone. | Forest green, earthy browns, gold, cream. | Dotting tool/toothpick, glitter polish, nail polish. |
| Relaxing Spa Getaway | Soft pastel solid color or a minimalist French tip with a touch of shimmer. | Lavender, mint green, baby pink, pale yellow, sheer nude. | Nail file, top coat, desired polish. |
| Adventure Trip | Deep, matte color (like a forest green or burgundy) to withstand wear and tear. | Matte finishes in deep jewel tones or neutrals. | Matte top coat (optional), desired polish. |
Common Questions About Travel Nail Art
FAQ: Travel Nail Art Made Easy
Q1: How long do these simple nail art designs typically last?
A1: With proper application, including a good base and top coat, most of these simple designs can last anywhere from 5 to 10 days. The durability also depends on how hard you are on your hands during your travels.
Q2: Can I do these designs with only one or two nail polish colors?
A2: Absolutely! The one-color wonder and glitter accent nail designs require just one main color. Dotting designs can use one base color and one accent color. Many geometric designs can also be achieved with just two contrasting shades.
Q3: What’s the best way to pack nail polish for travel?
A3: Pack your polishes upright in a small bag, ideally in your checked luggage or securely in your carry-on to prevent spills. Consider miniature or travel-sized polishes if available. Wrap bottles in a plastic bag as an extra precaution.
Q4: My travel plans are short – how much time do I need?
A4: For most of these designs, you can be completely finished in under 30 minutes per manicure, especially if you have a little practice. Designs like the one-color wonder or glitter accent are particularly quick!
Q5: What if I make a mistake while doing my nails during my trip?
A5: That’s what your nail polish remover and cotton pads are for! Keep them handy for quick clean-ups. A small cleanup brush dipped in remover can help neaten edges. If it’s a major smudge, you might have to repaint that nail.
Q6: Are there any nail art tools that are travel-friendly?
A6: Yes! Look for compact dotting tools, a small set of striping brushes, or even just rely on a toothpick or the tip of a pen for dotting. A small, reliable stamper and scraper for nail stamping is also very portable.
Conclusion
There you have it – your guide to effortless travel nail art! You no longer need to stress about bringing a bulky kit or spending hours trying to recreate complicated designs. With these simple techniques, a few essential tools, and a dash of creativity, you can rock beautiful, vacation-ready nails that are both stylish and durable.
Remember, the goal is to enhance your travel experience, not add to your to-do list. Whether you opt for a chic solid color, a playful dot pattern, or a sharp stripe, your nails will be a subtle yet perfect accessory to your adventures. Pack smart, paint easy, and enjoy every moment of your trip feeling polished and confident!

