Quick Summary:
Create stunning travel-inspired nail designs easily with essential tips and step-by-step guides. Explore motifs from beaches to mountains to cityscapes for beautiful, portable art that reflects your wanderlust. Achieve vacation vibes on your fingertips!
Are you dreaming of your next getaway? You can bring a piece of your favorite destinations right to your fingertips with travel-inspired nail designs! It’s a fun way to express your love for adventure, even when you’re home. Don’t worry if you’re new to nail art; we’ll break down simple, beautiful designs that anyone can try. Get ready to paint your nails with memories and inspiration!
From sandy beaches to vibrant city lights, the world is full of beauty waiting to be translated onto your nails. Travel-inspired nail art is a fantastic way to keep your favorite vacation memories alive or to fuel your wanderlust for future trips. It’s a creative outlet that’s both personal and stylish. You don’t need to be a pro to create these looks; we’ve gathered easy-to-follow ideas and essential tips to make your nail art dreams a reality.
Discover Your Wanderlust: Easy Travel-Inspired Nail Designs
Travel is an incredible source of inspiration, and why should your nails miss out? Whether you’ve just returned from a serene beach vacation or are planning an exciting city break, translating those experiences onto your nails can be incredibly rewarding. We’ll explore how to capture the essence of different travel themes with simple, chic designs perfect for any skill level.
Think about the colors, textures, and iconic sights of your travels. A tropical beach might inspire blues, greens, and sandy beiges with shell accents. A European city could call for sophisticated grays, brick reds, and architectural lines. Even a simple picnic in the mountains can be represented by earthy tones and leaf patterns. The goal is to have fun and create something that makes you smile every time you look at your hands.
Beach Vibes: Sand, Sea, and Sun Nails
The beach is a classic travel destination that translates beautifully onto nails. It’s all about capturing that feeling of relaxation and the vibrant colors of the coast.
Essential Colors for Beach Nails:
- Ocean Blues (light to deep turquoise, navy)
- Sandy Beiges and Whites
- Coral Pinks and Oranges
- Seafoam Green
- Golden Yellow (for sunshine)
Simple Beach Nail Ideas:
- Ombre Sunset: Blend shades of orange, pink, and yellow on each nail to mimic a breathtaking sunset. Start with the darkest color at the tip and blend upwards.
- Sandy Texture: Paint your nails a light beige or sand color. While the polish is still wet, gently dip your nails into fine craft sand or a specialized nail glitter for a realistic sandy texture. Seal with a topcoat.
- Ocean Wave: Use a fine brush to paint fluid lines of white over a blue base to create a simple wave effect.
- Seashell Accents: Paint your nails in a solid color (like ocean blue or sandy beige). Use a dotting tool or a fine brush to add tiny white or pink shell shapes.
- Glittery Shimmer: A sheer polish with holographic or blue glitter can mimic the sparkle of the ocean water brilliantly.
Mountain Majesty: Peaks, Forests, and Earthy Tones
For those who love the crisp air and stunning vistas of mountain ranges, these designs bring the great outdoors to your fingertips.
Essential Colors for Mountain Nails:
- Deep Greens (forest green, olive)
- Earthy Browns and Beiges
- Grays and Silvers (for rocky peaks)
- Sky Blues
- Crisp Whites (for snow-capped mountains)
Simple Mountain Nail Ideas:
- Mountain Silhouette: Paint nails a dark blue or black. Use a fine brush and white or gray polish to paint simple triangular mountain peaks along the free edge or at the base of the nail.
- Forest Green Gradient: Create a gradient effect using different shades of green, from deep forest to lighter moss, to represent lush foliage.
- Rocky Texture: Experiment with sponging techniques using grays and blacks on a beige base to create a mottled, rocky appearance.
- Pine Tree Outline: On a simple blue or white background, use a dark green or black fine brush to draw a stylized outline of a pine tree.
- Snow-Capped Peaks: Paint your nails in a medium gray or blue. Use a fine brush and white polish to add a delicate “cap” of snow to the tips of your nails.
Cityscape Chic: Urban Adventures on Your Nails
Capture the energy and sophistication of city life with designs inspired by architectural lines, iconic landmarks, and urban textures.
Essential Colors for Cityscape Nails:
- Grays (from light to charcoal)
- Black and White
- Bold Reds and Yellows (for accents)
- Metallic Silvers and Golds
- Brick Red
Simple Cityscape Nail Ideas:
- Minimalist Skyline: Paint nails a solid color (like black or deep gray). Use a white or silver fine-tipped polish pen or brush to draw simple vertical lines representing skyscrapers.
- Geometric Patterns: Create abstract geometric shapes using tape and contrasting colors (e.g., black and white, gray and red) to mimic modern architecture.
- Brick Wall Effect: Use a small sponge or a fine brush to dab brick-red and brown polishes onto a gray base for a textured brick look.
- Traffic Lights: Paint nails black. Use a dotting tool to add small dots of red, yellow, and green polish to represent traffic lights.
- Pavement Texture: Use gray polishes and simple dotting or sponging to create a subtle, rough texture reminiscent of city sidewalks.
Tropical Paradise: Island Getaways on Your Nails
Embrace the vibrant colors and laid-back vibe of tropical destinations. These designs are perfect for evoking sunshine and exotic locales.
Essential Colors for Tropical Nails:
- Bright Pinks, Oranges, and Yellows
- Teal and Turquoise
- Leaf Greens
- White (for flowers and details)
- Coral
Simple Tropical Nail Ideas:
- Hibiscus Flowers: Paint your nails a bright base color (like teal or orange). Use a fine brush and white or red polish to paint simple, stylized hibiscus flowers.
- Palm Leaves: On a solid background (e.g., sunny yellow or light blue), use a fine brush and green polish to draw elegant, curved palm leaves.
- Pineapple Print: Paint nails yellow. Use a fine brush and black polish to draw simple diamond patterns for the pineapple skin and add a green stem.
- Sunset Gradient: Similar to beach sunsets, blend vibrant tropical colors like pink, orange, and yellow for a warm, island sunset feel.
- Exotic Bird Feathers: Create abstract strokes of vibrant colors (blue, green, yellow, red) to mimic the look of exotic bird feathers.
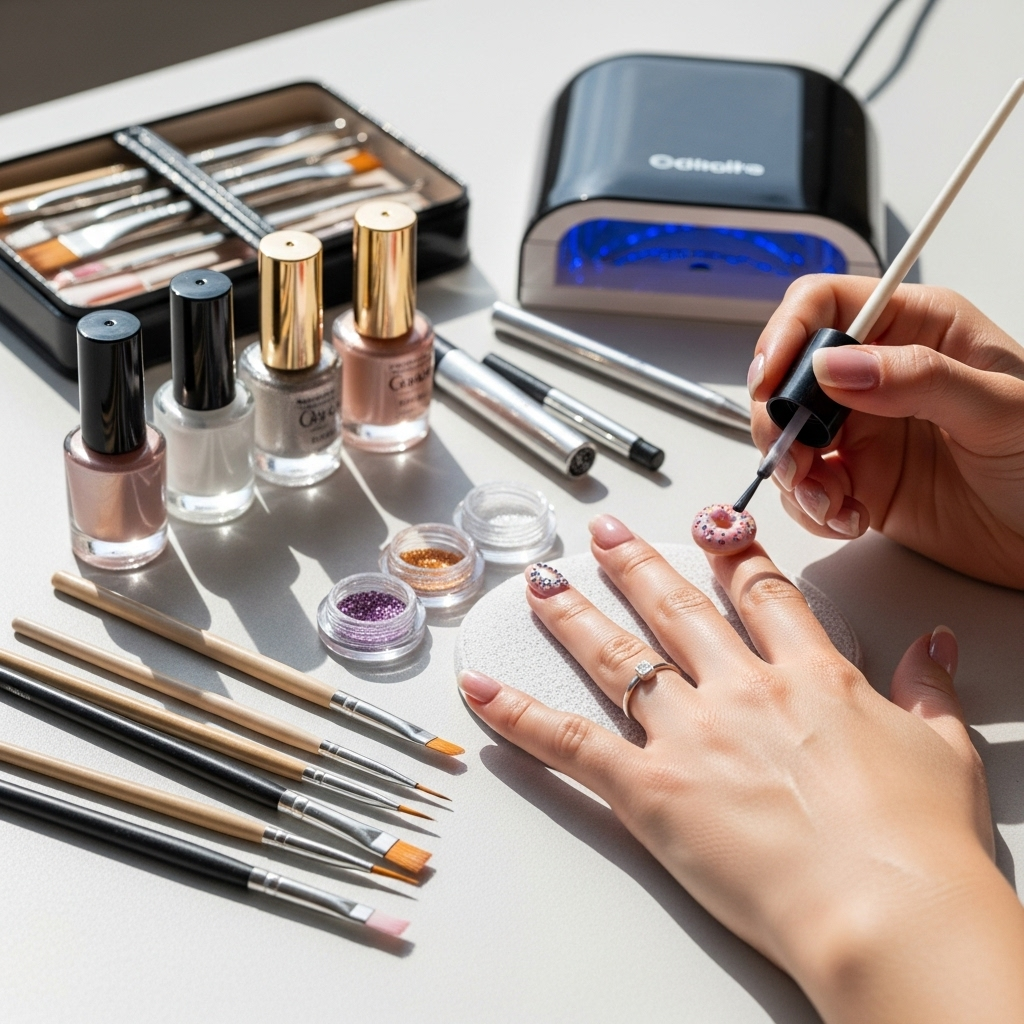
Essential Tools for Travel-Inspired Nail Art
You don’t need a professional salon setup to create amazing travel-inspired nail designs. A few key tools can make a big difference in achieving detailed and polished results.
Must-Have Nail Art Tools for Beginners
- Fine-Tipped Brushes: Essential for drawing lines, details, and small shapes. Look for a set that includes various thin brushes.
- Dotting Tools: These have small metal balls at the end and are perfect for creating dots, flowers, and other circular patterns. They come in various sizes.
- Nail Polish Pens: These are like markers for your nails and are fantastic for freehand drawing straight lines, dots, and simple outlines. They offer great control for beginners.
- Stencils or Nail Stickers: For ultimate ease, stencils or pre-made stickers in travel themes (like tiny flags, passport stamps, or maps) can be applied directly.
- Topcoat: Crucial for sealing your design, adding shine, and making your manicure last longer. A good quality, quick-dry topcoat is a savior!
- Base Coat: Protects your natural nails from staining and helps polish adhere better.
- Nail Polish Remover & Cotton Pads: For cleaning up mistakes and removing polish between designs.
Nail Shapes and Their Travel Vibe
The shape of your nails can subtly enhance your travel-inspired designs. Here’s a look at how different shapes can complement various themes:
| Nail Shape | Best For Travel Themes | Why It Works |
|---|---|---|
| Square/Squoval | Cityscapes, geometric patterns, graphic designs | Provides a clean, modern canvas for sharp lines and bold shapes. |
| Round | Floral designs, simple dots, soft gradients | A classic, natural shape that’s great for organic designs like flowers or waves. |
| Almond/Oval | Tropical prints, abstract art, elegant gradients | Elongates fingers and provides a smooth surface for blending colors and detailed artwork. |
| Stiletto/Coffin | Bold, dramatic travel themes, abstract architectural lines | Offers a modern and edgy platform for statement designs, think futuristic cityscapes or vibrant patterns. |
Step-by-Step: Creating a Simple Beach Wave Nail Design
Let’s walk through creating a beginner-friendly beach wave design. This look is easy to achieve and instantly transports you to the coast.
What You’ll Need:
- Base Coat
- Light Blue or Turquoise Nail Polish
- White Nail Polish
- Fine-tipped Nail Art Brush or Polish Pen
- Topcoat
Instructions:
- Prep Your Nails: Start by applying a layer of base coat to clean, dry nails. This protects your nails and helps the polish last longer.
- Apply Base Color: Paint 1-2 coats of your light blue or turquoise polish. Let it dry completely. This is your ocean background.
- Create the Waves: Dip your fine-tipped brush into the white polish. On a piece of paper or paper towel, wipe away excess polish so you have just a little on the brush.
- Paint the Wave Line: Starting from one side of the nail, gently draw a wavy line near the tip, mimicking a breaking wave. You can make it a single, smooth curve or a couple of smaller, overlapping curves. Don’t worry if it’s not perfect; natural waves aren’t uniform!
- Add Detail (Optional): If you want a bit more depth, you can add a very thin second white line beneath the first, slightly offset, or add tiny white dots for seafoam.
- Let it Dry: Allow the white polish to dry completely. This is important to prevent smudging.
- Seal the Design: Apply a generous layer of topcoat over your entire nail, including the design. This smooths out any texture and locks in your beautiful beach wave.
And there you have it! Simple, elegant beach waves that bring a touch of the ocean to your day.
Tips for Long-Lasting Travel-Inspired Nails
Creating beautiful nail art is one thing, but making it last during your travels (or your busy everyday life!) is key. Here are some tips and tricks:
Keeping Your Wanderlust Nails Looking Fresh
- Always Use a Base Coat: This prevents staining from darker colors and creates a smooth surface for polish adhesion.
- Apply Thin Coats of Polish: Thick coats take longer to dry and are more prone to smudging and chipping. Two thin coats are usually better than one thick one.
- Seal with a Quality Topcoat: This is non-negotiable! A good topcoat adds durability, shine, and protection against chips. Reapply every 2-3 days to boost longevity.
- Cap the Edges: When applying your base or topcoat, run your brush along the free edge (tip) of your nail. This seals the polish and prevents lifting.
- Avoid Harsh Chemicals: When cleaning or doing chores, wear gloves. Harsh chemicals can break down polish and damage your nails.
- Be Gentle: Try not to use your nails as tools to open things or scrape surfaces.
- Hydrate Your Cuticles: Dry cuticles can lead to hangnails and can make your manicure look less polished. Use cuticle oil daily. Find out more about essential cuticle care from the American Academy of Dermatology Association.
Incorporating Culture and Landmarks
Beyond colors and textures, you can draw inspiration from specific cultural elements or famous landmarks for truly unique travel nail art.
Ideas for Cultural & Landmark Designs
- National Flags: A simple stripe or star pattern can represent your favorite country.
- Famous Patterns: Think about iconic designs like the Moroccan geometric tiles, Japanese wave patterns (Seigaiha), or Scottish tartan.
- Architectural Silhouettes: Sketch the outline of a famous building like the Eiffel Tower or the Taj Mahal on an accent nail.
- Cultural Symbols: Small, stylized representations of cultural icons like a lotus flower for Asia, a dreamcatcher for Native American inspiration, or a flamenco dancer for Spain.
- Foodie Adventures: Don’t forget travel food! A tiny croissant, a slice of pizza, sushi rolls – these can make for incredibly cute and personal designs.
When attempting more intricate designs like landmarks, don’t try to recreate them perfectly. Stylized, simplified versions can be just as effective and are much easier to paint on a small nail canvas.
FAQ: Your Travel Nail Art Questions Answered
Here are some common questions beginners have about creating travel-inspired nail designs:
Q1: What’s the easiest travel-inspired nail design to start with?
A: A simple gradient using colors inspired by a destination (like beach blues or desert oranges) is very beginner-friendly. Alternatively, a solid color with a single nail accent, like a minimalist mountain silhouette or a tiny palm leaf, is also easy to achieve.
Q2: Do I really need special nail art brushes?
A: While you can get by with creativity on basic tools, fine-tipped nail art brushes make a huge difference for detail work. They offer much more control than a standard polish brush. Nail polish pens are also excellent and easy to use for beginners.
Q3: How can I make my detailed nail art last longer?
A: The key to longevity is a good base coat, thin layers of polish, avoiding touching harsh chemicals, and, most importantly, a strong, protective topcoat applied not just to the nail but also “capping” the free edge.
Q4: My polish always smudges when I try to add details. What am I doing wrong?
A: Ensure each layer of polish is completely dry before adding the next. For details, use a brush with minimal product and a light touch. Letting the base color dry thoroughly (at least 5-10 minutes, or use a quick-dry spray) is crucial.
Q5: Can I use regular craft glitter for nail art?
A: You can use fine craft glitter for texture, like for sandy beach nails, by applying it while the polish is wet and sealing generously with topcoat. However, for designs on the nail, it’s best to use cosmetic-grade glitter specifically made for nails, as craft glitter can be too coarse and may not adhere smoothly or safely.
Q6: What if I mess up my design?
A: Don’t worry! That’s what nail polish remover and cotton swabs (or a fine brush dipped in remover) are for. You can gently clean up small mistakes without ruining the whole manicure. For bigger errors, sometimes it’s easiest to remove the polish from that nail and start again – practice makes perfect!
Conclusion: Your Nails, Your Travel Story
Travel-inspired nail designs are a beautiful way to carry the spirit of your adventures with you, no matter where you are. From the calming blues of the ocean to the majestic peaks of mountains, or the vibrant energy of a bustling city, there’s a design waiting to capture your wanderlust. Remember, nail art is about self-expression and having fun.
Don’t be afraid to experiment with colors, try new techniques, and let your creativity flow. With a few essential tools and these simple ideas, you can transform your nails into miniature works of art that tell your personal travel story. So grab your polishes, gather your inspiration, and happy painting! Your next stunning