Translucent French nails offer a modern, chic twist on the classic French manicure. They create a clean, elegant look with a sheer, almost see-through base and a delicate white tip. This guide breaks down how to achieve this trendy style at home, making it easy for beginners to get salon-worthy results by understanding the tools, techniques, and variations.
Dreaming of that effortlessly chic, sophisticated nail look everyone’s talking about? Translucent French nails are your answer! They’re the perfect blend of classic elegance and modern minimalism, giving your nails a fresh, polished appearance without being too flashy. If you’ve ever found traditional French manicures a little too opaque or tricky to get just right, you’re in the right place. We’re going to break down exactly how to create this beautiful, subtle style yourself. Get ready to transform your nails into little works of art that look like they came straight from a high-end salon, but with a DIY approach that’s totally achievable!
What Exactly Are Translucent French Nails?
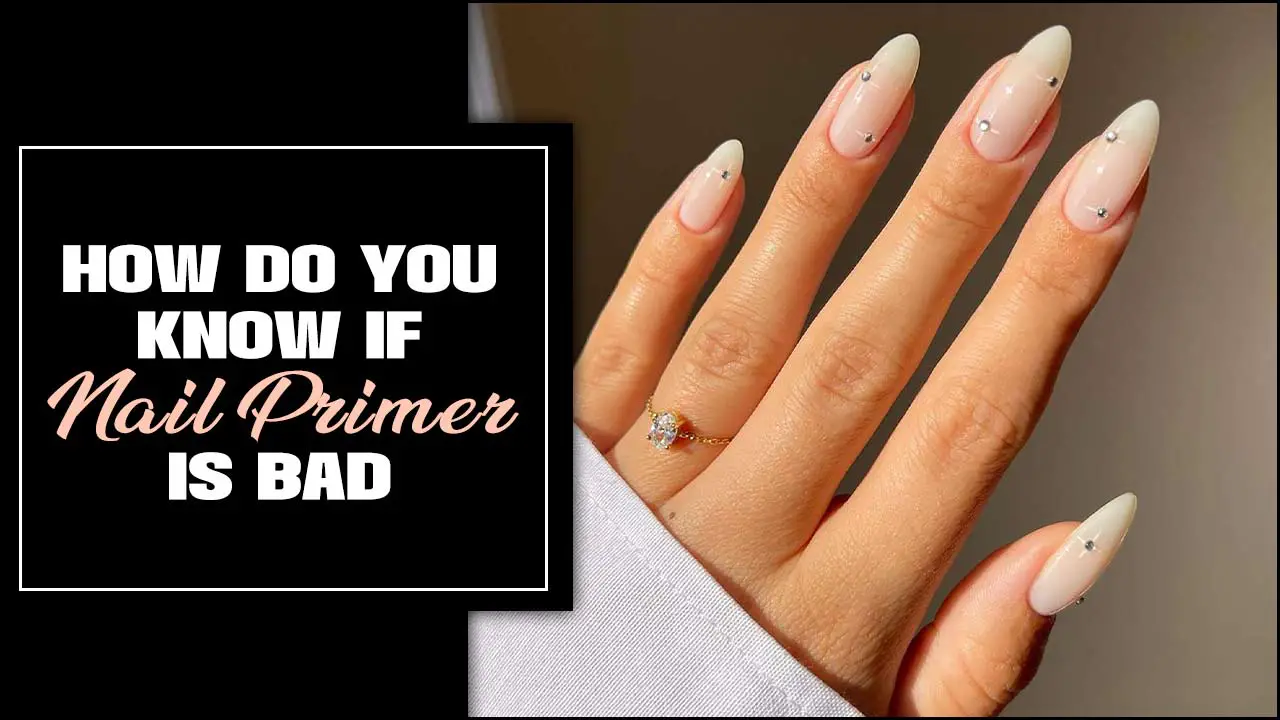
Translucent French nails are a stylish evolution of the traditional French manicure. Instead of an opaque, solid white tip and a full-coverage pink or nude base, these nails feature a sheer or milky base coat and a delicate, often softer white or off-white tip. The “translucent” aspect means you can subtly see the natural nail underneath, giving it a soft, ethereal quality. It’s about achieving a polished, “clean girl” aesthetic that’s incredibly versatile and always in style.
Why Choose Translucent French Nails?
This trend isn’t just about looking good; it’s about embracing a certain vibe. Here’s why they’re a favorite:
- Subtle Sophistication: They offer understated elegance that pairs perfectly with any outfit and occasion.
- Natural Enhancement: They enhance the natural beauty of your nails, making them look healthy and well-groomed.
- Modern Twist: It’s a fresh, updated take on a timeless classic, keeping your manicure on-trend.
- Versatility: From professional settings to casual outings, they fit seamlessly into any lifestyle.
- Beginner-Friendly: The sheer nature of the polish can be more forgiving for DIY application than opaque colors.
Essential Tools for Your Translucent French Manicure
To achieve salon-quality results at home, you’ll need a few key tools. Don’t worry, most of these are standard nail kit essentials!
The Must-Have Tools:
- Nail File: For shaping your nails.
- Cuticle Pusher/Orange Stick: To gently push back and tidy cuticles.
- Buffing Block: To smooth the nail surface.
- Base Coat: Essential for protecting your natural nail and helping polish adhere.
- Translucent Pink/Nude Polish: The sheer base color.
- White or Off-White Nail Polish: For the tips.
- Thin Nail Art Brush or French Manicure Guide Stickers: For creating clean tip lines.
- Top Coat: To seal and protect your manicure, adding shine.
- Nail Polish Remover & Cotton Pads: For clean-ups and mistakes.
- Cuticle Oil: To moisturize after finishing.
Step-by-Step Guide to Creating Translucent French Nails
Ready to DIY? Follow these simple steps for beautiful translucent French nails at home. We’ll cover both a brush-on and a sticker method for perfectly defined tips.
Step 1: Prep Your Nails
Clean nails are the foundation of any great manicure.
- Remove any old polish using nail polish remover and cotton pads.
- Gently push back your cuticles with an orange stick or cuticle pusher. Avoid cutting them, as this can lead to damage. Proper cuticle care is crucial for healthy, beautiful nails, and the NHS offers great advice on basic nail health.
- Shape your nails using a nail file. Aim for a uniform shape – almond, squoval, or rounded are popular choices for this style.
- Lightly buff the surface of your nails with a buffing block to create a smooth canvas and remove any natural oils.
Step 2: Apply Your Base Coat
A good base coat prevents staining and helps your polish last longer.
- Apply one thin layer of your preferred clear or slightly pink-tinted base coat.
- Let it dry completely.
Step 3: Apply the Translucent Base Color
This is where the “translucent” magic begins.
- Apply one or two thin coats of your sheer pink or nude nail polish. The goal is to even out your nail color and add a subtle flush, allowing your natural nail to still peek through.
- Allow each coat to dry thoroughly before applying the next. Patience here is key to avoiding streaks and bubbles!
Step 4: Create the French Tips
This can be done with a fine brush or guide stickers. We’ll explain both!
Method A: Using a Thin Nail Art Brush
This method offers the most control for a custom look.
- Dip your thin nail art brush into your white or off-white polish. Wipe off excess polish on the rim of the bottle to avoid flooding your nail.
- Start by drawing a thin, curved line along the free edge of your nail, creating the smile line.
- Connect the line to the sides of the nail.
- Fill in the tip area.
- For a softer look, you can use a milky white or even a very pale pearly shade.
- If needed, use a small brush dipped in nail polish remover to clean up any wobbly lines.
- Let the tips dry completely.
Method B: Using French Manicure Guide Stickers
Stickers are fantastic for beginners and ensure crisp, even lines.
- Once your translucent base color is dry, carefully apply a French manicure guide sticker along the smile line where you want your white tip to begin. Press it down firmly to prevent polish from seeping underneath.
- Apply your white or off-white polish over the tip of your nail, above the sticker.
- Apply a second thin coat if needed for opacity, ensuring it matches the other nails.
- While the polish is still wet, carefully peel off the sticker. Peeling when wet reduces the risk of tearing the polish.
- Let the tips dry completely.
Step 5: Apply Your Top Coat
This seals everything in and adds a beautiful shine.
- Apply one to two coats of a high-shine, quick-drying top coat over your entire nail, including the tips.
- Be sure to cap the free edge of your nails by running the brush along the tip to prevent chipping.
- Allow your nails to dry completely. This can take anywhere from 5 to 15 minutes for a dry-to-touch finish depending on the top coat, but it’s best to avoid banging them for at least 30 minutes.
Step 6: Final Touches
Add a little TLC to complete the look.
- Once your nails are fully dry, apply a nourishing cuticle oil to the skin around your nails. Massage it in gently.
- Admire your beautiful translucent French manicure!
Variations to Try
The beauty of translucent French nails lies in their adaptability. Here are a few ways to put your own spin on the trend:
Color Variations
- Milky White Tips: Instead of a stark white, use a polish with a milky, slightly creamy finish for an even softer look.
- Sheer Colors: Experiment with sheer pastels (like baby pink, peach, or lilac) for the tips instead of white.
- Subtle Shimmer: Add a touch of fine glitter to your white tips for a hint of sparkle.
- Two-Tone Translucency: Use two different sheer base colors, one slightly lighter than the other, for a subtle gradient effect.
Shape and Placement Variations
- Micro French: A very thin, delicate white line on the very edge of the nail.
- Color Block French: Two thin lines creating a “double” smile line or even small geometric shapes with sheer color bases.
- Deep French: The white tip line is placed further back on the nail for a more dramatic effect.
- V-Tip French: Instead of a curve, the white tip forms a “V” shape.
Translucent French Nails vs. Traditional French Nails
What’s the real difference? Understanding this helps you pick the perfect style for you.
| Feature | Translucent French Nails | Traditional French Nails |
|---|---|---|
| Base Color | Sheer, milky, or nude; allows natural nail to show through. | Opaque pink, nude, or beige; provides full coverage. |
| Tip Color | Often softer white, off-white, or pastels; can be sheerer. | Typically opaque, bright white for a stark contrast. |
| Overall Look | Soft, natural, modern, ethereal, subtle. | Classic, clean, bold contrast, polished. |
| Application Simplicity (DIY) | More forgiving due to sheer nature, easier to achieve natural look. | Can be challenging to get crisp, opaque lines without practice or guides. |
| Longevity Appearance | Growth can be less noticeable due to sheer base. | Growth at the cuticle line can be more apparent. |
Pro Tips for Flawless Translucent French Nails
Want to elevate your translucent French manicure game? Here are some insider tips:
- Thin Coats are Key: Avoid thick layers of polish, as they can look clumpy and take forever to dry, potentially leading to smudges.
- Quality Polish Matters: Invest in good quality sheer polishes and a reliable white polish. They’ll apply more smoothly and evenly.
- Practice Your Smile Line: If you’re using a brush, practice on paper first to get a feel for the pressure and angle needed to create a smooth curve.
- Don’t Rush Drying Time: This is the most common mistake! Let each layer dry adequately before moving to the next.
- Clean Up Carefully: A tiny brush dipped in nail polish remover is your best friend for fixing small mistakes around the cuticles and sidewalls.
- Consider Gel Polish: For a longer-lasting, chip-resistant finish, consider using gel polish and a UV/LED lamp. The process is similar, but the results are more durable. For information on safe UV/LED lamp usage, it’s good to refer to guidelines from reputable sources.
- Shape is Everything: The shape of your natural nail plays a big role in how the French tip looks. Ensure they are filed smoothly and consistently.
Frequently Asked Questions About Translucent French Nails
Got more questions? We’ve got answers!
Q1: How long do translucent French nails typically last?
A: With a good base and top coat, and careful application, you can expect translucent French nails to last anywhere from 5-10 days before significant chipping or wear begins. Using a gel polish will extend this significantly, often to 2-3 weeks.
Q2: Can I achieve this look with clear nail polish instead of a sheer pink/nude?
A: Yes! If you prefer a very natural look, you can absolutely use a clear base coat and then apply the white tips. Some may even opt for a clear coat for both the base and tip for a “glass nail” effect with a white line.
Q3: My white tips always look streaky. How can I fix this?
A: Ensure you’re using a good quality opaque white polish. Apply in two thin coats rather than one thick one. If using guide stickers, make sure they are sealed down firmly. For brush application, a steady hand and a bit of cleanup with a fine brush dipped in remover can work wonders.
Q4: Are translucent French nails good for short nails?
A: Absolutely! Translucent French nails can look especially chic on short nails. The subtle color and delicate tip can make short nails appear elegant and well-maintained without overwhelming them.
Q5: How do I clean up polish mistakes without ruining the whole nail?
A: The trick is a detailing brush (a small, fine-tipped synthetic brush) or an old lip brush. Dip it in nail polish remover, wipe off the excess on a paper towel, and carefully trace around the edge of your nail to remove any stray polish. This technique requires a gentle touch.
Q6: What’s the difference between a “sheer” polish and a “milky” polish?
A: “Sheer” polish is quite transparent, allowing a lot of your natural nail to show through. “Milky” polish is still translucent but has a higher opacity, giving more of a soft, opaque, milky hue, like tinted glass. Both work beautifully for translucent French nails but offer slightly different looks.
Conclusion
Translucent French nails are more than just a trend; they’re a testament to the power of subtle, sophisticated beauty. They offer a clean, polished look that’s incredibly versatile and surprisingly easy to achieve at home with the right tools and techniques. Whether you’re a seasoned nail art enthusiast or just dipping your toes into DIY manicures, this guide has equipped you with the knowledge to create your own stunning translucent French nails. Embrace the elegance, experiment with variations, and most importantly, have fun expressing your personal style. So go ahead, grab your polishes, and get ready to rock this chic, modern classic!


