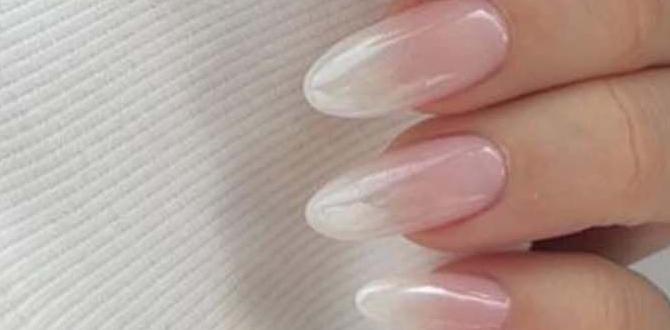
Translucent French nails offer a chic, modern take on a classic look, providing a soft, ethereal vibe perfect for any occasion. Get ready to learn how to achieve this stunning and versatile nail trend with our easy-to-follow guide!
Ever admired those French manicures that look impossibly chic, with a subtle hint of color and a perfectly blended line? You know, the ones that seem effortlessly elegant and make your hands look instantly polished? That’s often the magic of translucent French nails! They’re not just a trend; they’re a sophisticated staple that adds a touch of grace without being overpowering. If you’ve found yourself staring at your nails, wishing for that same polished look but feeling a bit intimidated by the technique, don’t worry! We’re here to break it all down. This guide will take you from confused beginner to confident creator of this beautiful nail style. Get ready to discover how simple and rewarding it can be to achieve translucent French nails that you’ll absolutely love!
What Exactly Are Translucent French Nails?
Think of traditional French manicures – the crisp white tip on a nude or pink base. Translucent French nails take that classic idea and soften it, making it feel more modern and ethereal. Instead of opaque white tips, you get sheer, buildable color that lets a bit of your natural nail show through. The “translucent” part is key! It means the color isn’t solid; it’s like colored glass, allowing light to pass through and revealing a subtle peek of what’s underneath. This creates a beautiful depth and a dreamy, natural-looking finish.
This style is incredibly versatile. It’s perfect for days when you want a polished look that’s not too bold. It complements any outfit and works for every occasion, from a casual coffee date to a formal event. Plus, the sheer nature of the color means any minor imperfections are less visible, making it incredibly forgiving for at-home manicures!
Why Are Translucent French Nails So Popular?
There are several reasons why translucent French nails have captured the hearts of nail art enthusiasts everywhere:
- Subtle Sophistication: They offer a polished look that’s understated and elegant. It’s the perfect way to elevate your nails without being flashy.
- Natural Aesthetic: The sheer color mimics the natural blushing tones of a healthy nail bed, making them look incredibly natural and chic.
- Versatile Appeal: They pair beautifully with virtually any outfit and are suitable for all settings – from the office to a wedding.
- Modern Twist: It’s a fresh, contemporary update to the classic French manicure that feels current and stylish.
- Longer-Looking Nails: When done correctly, the sheer color can create an illusion of longer, more graceful nail beds.
- Easy to Maintain: Because the color is sheer, regrowth is usually less noticeable than with opaque tips, meaning your manicure can look good for longer.
Are Translucent French Nails Difficult to Do?
The good news is, no! While achieving a perfect opaque French tip can be tricky, translucent French nails are actually quite beginner-friendly. The sheer nature of the color is more forgiving than opaque polishes. You don’t need incredibly steady hands to get a clean line, and minor mistakes can often be blended away. With a few tips and the right tools, you’ll be creating beautiful translucent French nails in no time!
Essential Tools for Your Translucent French Manicure
Before we dive into the steps, let’s gather our supplies. Having the right tools makes all the difference:
- Nail File and Buffer: To shape and smooth your nails.
- Cuticle Pusher or Orange Stick: To gently push back your cuticles.
- Base Coat: To protect your natural nails and help polish adhere.
- Sheer Polish (Color): This is your key ingredient! Look for polishes labeled “sheer,” “jelly,” or “milky.” Think pale pinks, peachy nudes, milky whites, or even soft lilacs.
- Translucent White or Milky Polish: For the tips. This should NOT be an opaque white. Look for shades that are slightly see-through.
- Thin Nail Art Brush or French Tip Guide Stencils: For creating the smile line.
- Top Coat: To seal your design and add shine.
- Lint-Free Wipes: For cleaning up any stray polish.
- Nail Polish Remover: For corrections.
Step-by-Step: Creating Beautiful Translucent French Nails
Ready to create your stunning nail look? Let’s get started!
Step 1: Prep Your Nails
Start with clean, dry nails. Gently push back your cuticles using a cuticle pusher or an orange stick. Be careful not to push too hard. Then, lightly buff the surface of your nails to remove any shine and create a smooth canvas for the polish. Finally, shape your nails to your desired length and shape using a nail file. Sweep the file in one direction to avoid weakening the nail edge.
Step 2: Apply Base Coat
Apply one thin layer of your favorite base coat. This is crucial for protecting your natural nails from staining and ensuring your manicure lasts longer. Let it dry completely.
Step 3: Apply the Sheer Base Color
Now, apply your chosen sheer polish to the entire nail. This will be your underlying color. Apply one thin coat and let it dry. Depending on the opacity of your sheer polish, you might want to apply a second coat for a slightly deeper, more uniform color. Remember, “sheer” means it will be buildable. Aim for a nice, even tone that lets a hint of your natural nail show through.
Step 4: Create the French Tip – Method 1: Freehand with a Brush
This is where the magic happens! You have a couple of options for creating that iconic French tip smile line.
Using a Sheer White/Milky Polish and a Thin Brush:
- Dip your thin nail art brush into your translucent white or milky polish. Wipe off any excess polish from the brush onto a lint-free wipe so you have a fine, controlled amount of product.
- Start in the center of your nail, just at the edge of your natural nail’s free edge (where the white part of a traditional French tip would begin). Gently press the brush down and pull it towards one side, creating half of the smile line.
- Repeat on the other side, starting from the center and pulling towards the other side to complete the curve.
- Connect the two lines with a slightly curved or straight line across the tip.
- Don’t worry if it’s not perfect! The sheer nature of the polish helps to camouflage minor wobbles. You can go back with a tiny bit more polish on your brush to smooth out any bumps or refine the curve.
- For a more opaque tip, you can layer multiple thin coats of the sheer tip color, allowing each to dry slightly in between.
Step 5: Create the French Tip – Method 2: Using Guide Stencils
If freehand isn’t your favorite, guide stencils are fantastic for beginners!
- Ensure your base sheer color is completely dry.
- Take a French tip guide sticker and carefully place it near the edge of your nail, where you want your smile line to be. Press down firmly to create a good seal.
- Using your thin brush and translucent white/milky polish, carefully paint over the edge of the stencil. Apply one or two thin coats, depending on the opacity you desire.
- Before the polish dries completely, carefully peel off the stencil. Peel slowly and steadily to avoid lifting the polish.
- Touch up any minor imperfections with your thin brush.
Here’s a quick tip from experience: Using guide stencils requires patience. Make sure your base color is bone dry before applying the stencil to prevent lifting.
Step 6: Refine and Build (Optional)
Once your tips are dry, assess your translucent color. If you want the tips to be a little more pronounced or the milky color to be slightly deeper, apply another thin coat of your sheer tip color. Remember to let each layer dry. This is the beauty of translucent polishes – you can build the color depth gradually to achieve your perfect look.
Step 7: Apply Top Coat
Once you are happy with your translucent French tips and they are thoroughly dry, it’s time for the top coat! Apply one or two layers of a good quality top coat. This will seal your design, add a beautiful glossy finish, and protect your manicure from chipping. Make sure to cap the free edge of your nails (paint a little bit over the very edge of your tips) to help prevent lifting.
Step 8: Final Touches and Clean-Up
Use a small brush dipped in nail polish remover to clean up any polish that may have gotten onto your skin or cuticles. This will give your manicure a super professional and neat finish. Let everything dry completely.
Achieving the Perfect “Smile Line”: Tips and Tricks
The smile line is the curved part of the French tip, and getting it just right can feel like an art form. Here are some tips to help you master it:
- Work in Thin Layers: It’s always better to build up color slowly with thin coats rather than applying one thick, gloopy layer. Thin layers are easier to control.
- Use the Right Brush: A fine-tipped nail art brush is your best friend for precise lines. If you don’t have one, you can often use the brush from another polish and thin out the bristles slightly by cutting a few off (do this carefully!).
- Steady Your Hand: Rest your wrists on a stable surface. You can even rest your pinky finger on the table for extra stability.
- Don’t Aim for Perfection on the First Go: The beauty of translucent polishes is their forgiving nature. You can often go back and gently buff out minor mistakes or blend them with another thin layer.
- Practice Makes Progress: The more you practice creating French tips, the better you’ll get. Try practicing on paper or a nail wheel first!
- Consider the Angle: Look at your nail from different angles as you paint to ensure the curve is even on both sides.
Choosing Your Translucent Colors
The sky’s the limit when it comes to color for translucent French nails! Here are some popular choices:
| Sheer Base Color Ideas | Translucent Tip Color Ideas | Overall Vibe |
|---|---|---|
| Milky Pink | Sheer White or Milky Beige | Classic, Soft, Natural |
| Soft Peach-Nude | Sheer Pink or Milky Peach | Warm, Delicate, Feminine |
| Sheer Beige | Sheer Milky White or Light Taupe | Elegant, Sophisticated, Earthy |
| Pale Lilac or Blue | Sheer White or a lighter, sheer version of the base color | Modern, Trendy, Unique |
| Clear or Pale Pink Jelly | Sheer White or a Milky Pink | Ethereal, Dreamy, Airy |
When selecting your polishes, look for terms like “jelly,” “sheer,” “milky,” or “sheer creme.” These are your keywords for achieving that beautiful translucent effect. You can find amazing options from brands like essie, OPI, and many indie brands that specialize in unique finishes.
Maintaining Your Translucent French Nails
To keep your beautiful translucent French nails looking fresh, follow these simple maintenance tips:
- Wear Gloves: When doing household chores, especially those involving water or harsh cleaning products, wear gloves. This protects your polish from damage and your natural nails from drying out.
- Reapply Top Coat: Every 2-3 days, apply a fresh layer of top coat. This will refresh the shine and add an extra layer of protection.
- Moisturize: Keep your cuticles and hands moisturized with a good quality cuticle oil and hand cream. Healthy cuticles make your manicure look even better.
- Avoid Using Nails as Tools: Resist the urge to open cans or scratch at things with your nails. This is a surefire way to chip or break your polish.
- Gentle Removal: When it’s time to change your polish, use a good quality nail polish remover. Avoid peeling or filing off the polish, as this can damage your natural nail.
Translucent French Nails vs. Other French Manicure Styles
It’s helpful to understand how translucent French nails differ from other French manicure variations:
| Feature | Classic French | Translucent French | Reverse French (or Half-Moon) |
|---|---|---|---|
| Tip Color Opacity | Opaque white | Sheer, buildable | Varies, often opaque |
| Base Color Feel | Opaque nude or pink | Sheer nude, pink, or milky | Varies; often a contrasting color |
| Overall Look | Crisp, defined, traditional | Soft, ethereal, modern | Bold, statement-making, artistic |
| Difficulty for Beginners | Moderate to High (for crisp lines) | Beginner-Friendly | Moderate |
| Vibe | Timeless, elegant | Dreamy, understated chic | Edgy, graphic |
The key difference lies in the “sheer” quality of the color. Where classic French uses solid white, translucent French uses a see-through color for a softer, more diffused effect. This makes it incredibly forgiving and allows for a beautiful gradation of color, a concept also explored in color theory for other applications, demonstrating how light and transparency can impact perception.
Troubleshooting Common Issues
Even with a beginner-friendly style, you might run into a snag. Here’s how to fix it:
- Uneven Smile Line: Don’t panic! If it’s slightly wet, you can sometimes gently nudge it with your clean brush. If it’s dry, apply another very thin layer of the sheer tip color over the whole tip. This can help blend and smooth out the line. For more significant fixes, carefully use a small brush dipped in nail polish remover to erase and redraw.
- Streaky Polish: Ensure you’re applying thin, even coats. If your polish is streaky, it might need a second (or even third) thin coat to even it out. Gel polishes are often less prone to streaking due to their self-leveling properties.
- Tips Too Opaque/Not Opaque Enough: This is easily fixed with translucent polishes! For more opacity, simply add another thin layer. For less opacity, you might have used too much product, or your base sheer color wasn’t sheer enough to show through. You can gently buff the tip after it dries to sheer it out, or start again with less product.
- Polish Chipping Quickly: Make sure your nails are completely clean and free of oils before applying polish. Always use a base coat and top coat, and don’t forget to cap the free edge of your nails.
Frequently Asked Questions (FAQ)
Q1: Can I use regular nail polish or does it have to be gel?
You can absolutely use regular nail polish! Many sheer polishes for this look are available in traditional formulas. Gel polish offers longer wear and a harder finish, but regular polish is perfectly fine for achieving the translucent French nail look at home.
Q2: How do I make the sheer white tip more opaque if I want a stronger contrast?
The beauty of sheer polishes is their buildability! Simply apply multiple thin coats of your sheer white or milky polish for the tip. Allow each coat to dry slightly before applying the next. This will gradually increase the opacity without looking chunky.
Q3: What’s the difference between a “jelly” polish and a “sheer” polish?
“Jelly” polishes are typically more saturated in color and have a distinct shiny, translucent appearance, like colored jelly. “Sheer” polishes are generally lighter and more subtle, allowing more of the natural nail to show through. Both can be used for translucent French nails, depending on the desired effect.


