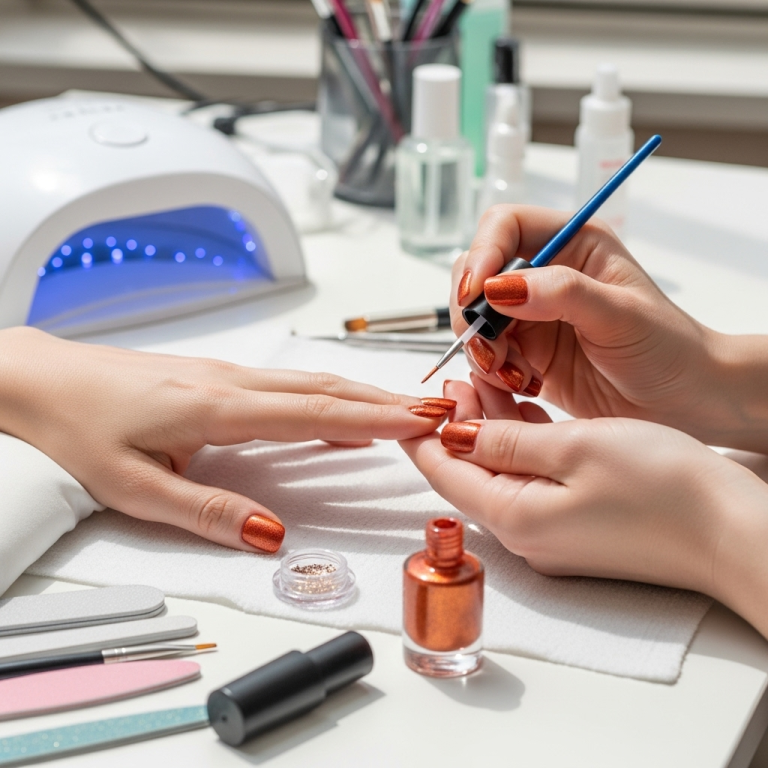
Toothpick nail art is a surprisingly versatile and budget-friendly way to create stunning, detailed designs on your nails. With just a toothpick and your favorite polishes, you can achieve salon-worthy looks at home, perfect for beginners and seasoned artists alike.
Ever look at intricate nail art and think, “There’s no way I can do that”? You’re not alone! Many of us admire beautiful manicures but feel intimidated by the tools and techniques. The good news is that you don’t need fancy brushes or expensive equipment to create gorgeous designs. Your trusty toothpick, a common household item, is actually a secret weapon for amazing nail art. Get ready to unlock your creative potential and transform your fingertips with simple, yet genius, toothpick nail art ideas that are perfect for everyone!
Why Toothpick Nail Art is a Game-Changer for Beginners
Let’s be honest, some nail art tools can feel a bit overwhelming when you’re just starting out. Specialized brushes, dotting tools, and stamping plates can seem like a lot to learn. That’s where the humble toothpick shines! It’s accessible, inexpensive, and surprisingly effective for a wide range of designs. You probably already have one in your kitchen or bathroom, making it the ultimate DIY nail art starter.
Think of it this way: a toothpick is essentially a tiny, precise brush or dotting tool. You can control the amount of polish it holds, making it perfect for detailed work like creating small dots, delicate lines, flowers, and even abstract patterns. It’s forgiving too! If you make a little mistake, it’s usually easy to wipe away and try again without ruining your entire manicure.
Using a toothpick for nail art is also incredibly budget-friendly. Instead of investing in a whole set of nail art brushes, you can achieve fantastic results with just what you have on hand. This means more money for more nail polish – always a win in my book!
Essential Tools for Toothpick Nail Art Success
Before we dive into the fun designs, let’s gather the essentials. You’ll be surprised how little you need to get started.
- Toothpicks: The star of the show! Opt for standard wooden toothpicks. You might want to have a few on hand, as you may need to switch to a fresh one for different colors or if the tip gets too saturated.
- Nail Polish: Your creativity canvas! Have a variety of colors ready. Base coats and top coats are also crucial for a lasting manicure.
- Base Coat: Protects your natural nails and provides a smooth surface for polish.
- Top Coat: Seals your design, adds shine, and helps your manicure last longer. A good quality top coat is key to preventing smudging.
- Paper Towel or Palette: A small piece of wax paper, a sticky note, or a bit of foil works perfectly to apply a small amount of polish that you’ll dip your toothpick into. This prevents you from contaminating your entire polish bottle.
- Nail Polish Remover & Cotton Swabs: For cleaning up any mistakes or stray marks. A fine-tipped cotton swab or even a clean, angled brush dipped in remover can be very precise.
- Optional: Tweezers: Useful for holding the toothpick steady if you have shaky hands, or for picking up tiny embellishments like glitter.
Getting Started: The Basic Toothpick Technique
Mastering the toothpick technique is simpler than you think. It all comes down to how you load your toothpick and how you apply the polish.
Loading the Toothpick:
- Pop open the nail polish color you want to use.
- Gently dab the tip of your toothpick into the polish. You only need a small amount – a tiny bead is perfect. Too much polish will lead to messy, blobby designs.
- If you have excess polish on the tip, you can gently wipe it on the rim of the bottle opening.
Applying the Polish:
- For Dots: Hold the toothpick parallel to your nail and gently press the tip down. Lift straight up. For larger dots, you can use a bit more pressure or dip your toothpick into a slightly larger amount of polish.
- For Lines: Gently drag the toothpick across your nail. You can create thin lines by using just the very tip, or slightly thicker lines by angling the toothpick.
- For Swirls: After placing a few dots, you can use the toothpick to gently swirl the colors together. Make sure to clean your toothpick between color swirls to avoid muddying the polish.
Tip: If your toothpick tip breaks or becomes too blunt, simply snap off the end or grab a new one. The beauty of toothpicks is their disposability!
Genius Toothpick Nail Art Ideas to Try Today
Now for the fun part! Here are some fantastic and easy-to-achieve nail art ideas using just a toothpick.
1. The Classic Polka Dot Manicure
Polka dots are a timeless favorite for a reason – they’re cheerful, versatile, and super easy to create. Toothpicks are practically made for this!
How to:
- Apply your base coat and let it dry completely.
- Paint your nails with your base color. Let it dry thoroughly until it’s not tacky.
- On a small piece of paper or foil, place a drop of your contrasting polish color.
- Dip the tip of your toothpick into the polish.
- Gently press the toothpick onto your nail to create a dot. Lift straight up.
- Repeat across your nail, spacing the dots as you like. Clean your toothpick periodically or switch to a fresh one.
- Let the dots dry, then apply a generous layer of top coat.
Variations: Try different sized dots by using different amounts of polish on your toothpick. Mix and match colors, or create ombre dots by fading from dark to light.
2. Delicate Flower Petals and Blooms
You can create surprisingly adorable floral designs with a toothpick. These are great for accent nails or a sweet, feminine look.
How to:
- Apply your base coat and color. Let dry.
- On your palette, place a small dab of your petal color.
- Load your toothpick with the petal polish.
- Gently press and slightly drag the toothpick in a petal shape onto your nail around a central point. You can make a tiny dot in the center for the flower’s center, or use a different color for it.
- Repeat to form your flower. For a fuller flower, make overlapping petals.
- Clean your toothpick thoroughly.
- Use a toothpick dipped in a contrasting color for the flower center or a tiny dot of green for a leaf.
- Seal with a top coat once dry.
Pro Tip: Start with a small dot of polish for the center of the flower. Then, press and slightly pull the toothpick away to create petal shapes radiating from the center. This is much easier than trying to draw a whole petal at once.
3. Abstract Swirls and Marbled Effects
Achieve that chic marbled look without the mess of water marbling. Toothpicks are perfect for swirling colors together.
How to:
- Apply base coat and let dry.
- Paint your nail with one or two base colors. Let the base colors dry until they are slightly tacky, but not fully dry. This is important for the colors to blend well.
- On your palette, place small drops of 1-2 contrasting polish colors next to each other.
- Dip your toothpick into one of the colors, then gently swirl it through the other color(s) on your palette.
- Carefully drag the toothpick across your nail, making swirls and abstract patterns. Don’t over-swirl, or the colors will become muddy.
- Clean your toothpick between each swirl and drag.
- Once you’re happy with the design, let it dry completely before applying a top coat.
External Resource: For an excellent overview of how polish interacts and blends, check out the principles of fluid dynamics on the NASA Glenn Research Center’s site. Understanding how liquids mix can indirectly help you grasp why colors blend in nail art.
4. Delicate Lines and Geometric Designs
Want those super fine lines or sharp geometric shapes? A toothpick can surprisingly help!
How to for Lines:
- Apply your base coat and color. Let dry completely.
- On your palette, place a very small drop of polish.
- Use just the very tip of the toothpick to pick up a tiny amount of polish.
- Gently draw thin lines across your nail. You might need to reload your toothpick frequently.
How to for Geometric Shapes:
- Paint your nails with a solid color and let them dry.
- Use your toothpick with contrasting colors to create dots along the edges of your nail or where you want the corners of your shapes to be.
- Connect the dots with more dots, or carefully draw thin lines with the toothpick to form squares, triangles, or simple patterns.
- Fill in the shapes with more dots if desired.
- Finish with a top coat.
5. Glitter Accent Nails
Elevate a simple mani with a touch of sparkle! Toothpicks are perfect for precise glitter application.
How to:
- Apply base coat and your main polish color. Let dry.
- Pour a small amount of loose glitter onto a piece of paper or a sticky note.
- Load your toothpick with a single piece of glitter or a small cluster.
- Gently place the glitter onto your nail where you want it.
- Repeat until you achieve your desired look. You can create patterns, fill the whole nail, or just add a few specks.
- Once the glitter is in place and dry, apply a thick, even layer of top coat to encapsulate the glitter and make it smooth. This might take two coats of top coat.
Tip: For a “full glitter” effect, you can dab a bit of top coat onto the nail first, then use your toothpick to pick up glitter and place it into the wet top coat. Work quickly before the top coat dries!
Toothpick Nail Art: Pros and Cons
While toothpicks are fantastic, it’s good to know what works best and what might be a little tricky. Here’s a quick breakdown:
| Pros | Cons |
|---|---|
| Extremely affordable and accessible. | Can be difficult to create very fine, consistent lines compared to specialized fine-liner brushes. |
| Great for beginners due to ease of use and forgiveness. | Wooden toothpicks can splinter or break, requiring frequent replacement. |
| Versatile for dots, simple flowers, swirls, and glitter placement. | May require multiple picks for different colors or complex designs to avoid color mixing. |
| Allows for precise placement of small details. | Achieving smooth, even coverage with larger areas can be challenging. |
| Can create unique, textured effects. | The dry, woody tip can sometimes absorb too much polish or make it difficult to get a smooth finish on very thick polishes. |
Comparing Toothpicks to Other Nail Art Tools
It’s helpful to see how toothpicks stack up against other common nail art tools. This can help you decide when to reach for a toothpick and when another tool might be better.
| Tool | Best For | Beginner Friendliness | Cost | Toothpick Comparison |
|---|---|---|---|---|
| Toothpick | Small dots, simple floral petals, abstract swirls, precise glitter placement. | Very High | Very Low (pennies) | Excellent for basic detailed work and affordability. Limited for precision lines and intricate shading. |
| Dotting Tools | Perfectly uniform dots of various sizes, creating simple patterns like flowers or confetti. | High | Low ($5-$15 for a set) | More consistent dots than toothpicks. Less versatile for lines. |
| Fine-liner Brushes | Thin, sharp lines, delicate details, lettering, intricate designs, filling smaller areas. | Medium (requires practice) | Medium ($10-$30 for a quality set) | Significantly better for fine lines and control. More expensive and harder to master initially. |
| Striping Tape | Creating clean, crisp geometric lines and patterns by masking areas. | High | Low ($2-$5 per roll) | Toothpicks create drawn lines; tape creates unpainted areas. Different techniques for linear designs. |
| Stamping Plates & Stamper | Reproducing complex, detailed images quickly and consistently. | Medium (requires specific technique) | Medium ($10-$40 for plates and stamper) | Toothpicks are freehand, allowing unique designs. Stamping is for exact replication of pre-made designs. |
Tips for Enhancing Your Toothpick Nail Art
Ready to level up your toothpick creations? Here are some pro tips:
- Work in Sections: Don’t try to do all your nails at once. Focus on one accent nail at a time, or even just a few dots or lines on one nail.
- Cleanliness is Key: Always clean your toothpick between color changes or if you’re switching between dots and lines. A damp paper towel or a quick wipe on a piece of tape works wonders.
- Patience with Drying Time: Allow each layer of polish and each design element to dry sufficiently before adding the next or applying your top coat. This will prevent smudging and muddy colors.
- Experiment with Polish Viscosity: Thinner polishes tend to work best for fine details, while slightly thicker polishes can create more pronounced dots. You can also add a drop of nail polish thinner to a thick polish if needed.
- Use a Gel Top Coat: If you use gel polish, a gel top coat will provide a super smooth finish over raised textures or glitter, making your toothpick art look even more professional.
- Don’t Fear the Full Coverage: While many toothpick designs are for accents, don’t shy away from using them to create a repeating pattern across your whole nail. Think of it as a subtle texture!
- Consider a “Dip” Method for Glitter: Instead of placing glitter with the toothpick, try dipping the toothpick into a clear polish or top coat, then into the glitter, and then applying it like this. It can give more control.
Common Toothpick Nail Art FAQs
Q1: Can I use the same toothpick for all colors?
A: It’s best to use a fresh toothpick for each new color, or at least clean it very thoroughly (using nail polish remover and a paper towel) if you want to use the same toothpick for different shades of the same color. This prevents your polishes from getting contaminated and your designs from becoming muddy.
Q2: How do I prevent my toothpick from breaking or splintering?
A: Gentle handling is key! Don’t press too hard when applying polish. If you notice the wood is getting rough or splintery, it’s time to snap off the end or grab a new toothpick.
Q3: My dots are uneven. How can I make them more consistent?
A: Consistency comes from applying the same amount of polish to the toothpick and using the same pressure and lifting technique each time. Try making a few practice dots on a piece of paper. Also, ensure your nail polish isn’t too thick or too thin – proper viscosity is important.
Q4: Can I create nail art on my toenails with a toothpick?
A: Absolutely! The technique is exactly the same. You might find it easier to manage the larger surface area of toenails, especially when starting out.
Q5: What kind of nail polish works best with toothpicks?
A: Most standard nail polishes work well. Creamy, opaque formulas are great for vibrant dots. For fine lines or intricate swirls, slightly thinner formulas can be

