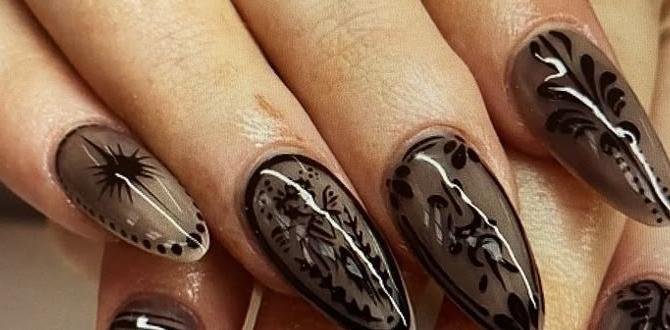
Photographing your amazing nail art designs is easy when you know a few simple tricks! Get stunning, clear photos that showcase your creativity by using the right lighting, angles, and background. This guide will help you capture every detail beautifully, so your gorgeous nails shine online and impress everyone!
Ever spent hours perfecting a stunning nail art design, only for your photos to look a little… meh? You spent so much time on those intricate details, the perfect polish color, and that glittery top coat, but the pictures just don’t capture the magic. It’s a common frustration for nail art enthusiasts, especially when you want to share your creations on social media or just admire them yourself! But don’t worry, capturing those perfect nail art photos is totally achievable, no matter your skill level or equipment. With a few smart tips, you can make your nail art designs pop and look as incredible in pictures as they do in real life. Ready to learn how to make your nails camera-ready?
Why Great Nail Art Photos Matter
In today’s visually driven world, a great photo is your nail art’s best friend. Whether you’re a budding nail artist looking to build a portfolio, a DIY enthusiast sharing your latest creation, or a professional seeking to attract clients, the quality of your photographs makes a huge difference. Stunning images grab attention, communicate the intricacy of your work, and ultimately, express your passion and skill. Poorly lit or blurry photos can hide even the most beautiful designs, making them seem less impressive than they are. Conversely, well-executed photos highlight the details, textures, and colors, making your followers double-tap and your clients book appointments.
Finding the Perfect Light for Nail Art Photos
Lighting is everything when it comes to capturing detailed nail art. It’s the single biggest factor that can make or break your photo. The goal is to have bright, even light that illuminates your design without harsh shadows or glare.
Natural Light: Your Best Friend
The most flattering and accessible light source is natural daylight. It’s soft, diffused, and renders colors accurately. Position yourself near a window, but avoid direct sunlight, which can cause harsh shadows and blown-out highlights.
- Timing is Key: Overcast days or the “golden hour” (shortly after sunrise and before sunset) offer beautifully diffused light.
- Indirect is Ideal: Sit facing a window, letting the light fall gently on your nails. If the light is too strong, use a sheer white curtain or a piece of white paper to diffuse it further.
- Avoid Overhead Lights: Indoor artificial lights often cast a yellow or greenish tint and create unflattering shadows directly above your nails.
Artificial Lighting Options
If natural light isn’t an option, you can still achieve great results with artificial sources. The trick is to mimic natural light as closely as possible.
- Ring Lights: A popular choice for beauty bloggers and photographers, ring lights provide a uniform, shadowless light source that’s perfect for close-up shots. They come in various sizes and often have adjustable brightness and color temperature.
- Softboxes: These lighting setups use diffusion material to soften harsh light from a bulb, creating a more even and flattering illumination. They are a bit more involved than ring lights but can yield professional results.
- Desk Lamps with Diffusers: Even a simple desk lamp can work if you position it correctly and use a diffuser (like a thin white cloth or paper) to soften the light. Experiment with placement until you eliminate harsh shadows.
- Color Temperature Matters: Opt for “daylight” or “cool white” bulbs (around 5000K-6500K) as they mimic natural light best. Warm lights can make your nail colors look dull or unnatural.
Dealing with Glare and Shadows
Glare can hide intricate details, especially in glitter or glossy finishes. Shadows can obscure parts of your design.
- Angle Your Nails: Experiment with tilting your hands and fingers slightly to catch the light at different angles, minimizing direct glare.
- Use Reflectors: A simple piece of white cardstock or a dedicated reflector placed opposite your light source can bounce light back onto your nails, filling in shadows and balancing the exposure. Even a sheet of white paper can make a difference!
- Multiple Light Sources: If using artificial lights, try using two light sources positioned on either side of your subject at a 45-degree angle to reduce shadows and create a more dimensional look.
Choosing the Right Background
Your background should enhance, not distract from, your nail art. It needs to complement your design and make your nails the undisputed star of the show.
Keep it Simple and Clean
A busy or distracting background will pull attention away from your exquisite nail art. The simpler, the better is often the rule here.
- Solid Colors: White, black, grey, or even soft pastels work beautifully as they don’t compete with your nail colors.
- Neutral Tones: Gentle textures like plain wood, marble, or fabric in neutral shades can add subtle interest without overpowering.
- Avoid Clutter: Make sure there’s nothing else in the frame that your viewer’s eye might get drawn to.
Adding Subtle Interest
While simplicity is key, you can add a touch of personality or context.
- Texture: A plain, textured surface like a soft blanket, a smoothed piece of wood, or even a clean, matte countertop can add depth.
- Props: If your nail art has a theme, you can incorporate minimalist props. For example, a tiny flower for floral nails, a coffee cup for a cozy vibe, or a makeup brush for a beauty-themed mani. Be judicious; less is more!
- Purposeful Backgrounds: If you’re photographing nails for a specific reason (e.g., travel-themed nails), a subtle background that hints at the theme can work, but ensure the nails remain the absolute focus.
DIY Background Ideas
You don’t need fancy equipment for great backgrounds.
- A piece of white or black cardstock from a craft store.
- A clean, smooth placemat.
- A neutral-colored scarf or fabric.
- A clean coffee table or desk surface.
- A small, flat piece of marble or wood from home improvement stores (often available as samples or small tiles).
Nail Art Photography Angles and Composition
How you frame your shot and the angle you choose can dramatically change how your nail art is perceived. Think about what you want to highlight.
The Classic Close-Up
This is the go-to for showcasing intricate details. It focuses tightly on the nails, allowing viewers to see every brushstroke, embellishment, and color blend.
- Straight On: A head-on shot of your fingers.
- Slight Angle: Tilting the camera slightly can reveal more of the nail shape and the depth of the design.
- Detail Shots: Focus on a single nail or a specific element of the design to highlight its complexity.
Showcasing the Entire Hand/Manicure
Sometimes, the beauty is in the complete set of nails and how they flow together.
- Overhead Shot: A bird’s-eye view of your hands resting on your chosen background. This is great for showing a full manicure.
- Side Profile: A shot from the side can highlight the length and shape of the nails and how they look when extended.
- Action Shots: Gently holding an object (like a flower, a piece of fruit, or a makeup brush) or typing on a keyboard can add a dynamic, lifestyle feel.
Composition Tips
Consider principles of photography composition to make your images more appealing.
- Rule of Thirds: Imagine your frame is divided into nine equal parts by two horizontal and two vertical lines. Placing your subject (your nails) along these lines or at their intersections can create a more balanced and engaging photo.
- Leading Lines: Use natural lines in your background or pose to draw the viewer’s eye towards your nail art.
- Negative Space: Don’t feel the need to fill the entire frame. Ample empty space around your nails can help them stand out and give the image a clean, professional look.
Camera Settings and Equipment
You don’t need a professional DSLR to take great nail art photos, but a few tips can help you get the most out of whatever camera you’re using.
Smartphone Photography
Most modern smartphones have incredible cameras that are more than capable of capturing stunning nail art.
- Clean Your Lens: This is the simplest yet most overlooked step! A smudged lens will create hazy photos.
- Focus Manually: Most smartphone camera apps allow you to tap on the screen to focus. Tap directly on your nail art to ensure it’s sharp.
- Avoid Digital Zoom: Digital zoom degrades image quality. If you need to get closer, physically move your phone closer to your nails.
- High Resolution: Ensure your camera is set to take photos at the highest resolution and quality possible.
DSLR/Mirrorless Camera Settings (for the enthusiast!)
If you have a dedicated camera, these settings can elevate your nail art photography.
| Setting | Recommendation | Why |
|---|---|---|
| Aperture (f-stop) | f/2.8 – f/5.6 | Creates a shallow depth of field, blurring the background and making your nails pop. |
| ISO | 100-400 | Keeps image noise to a minimum, ensuring sharp details. |
| Shutter Speed | Varies (adjust for proper exposure) | Needs to be fast enough to avoid camera shake, especially with macro shots. Use a tripod for slower speeds. |
| White Balance | Daylight or custom | Ensures accurate color representation of your nail polish. |
Essential Tools (Beyond Your Camera)
These items can significantly improve your nail art photos:
- Tripod: Crucial for stability, especially in lower light or when using slower shutter speeds. It prevents blur from hand movement and allows for consistent framing. Even a small, flexible desktop tripod for your phone can be a game-changer.
- Macro Lens/Attachment: If your phone doesn’t have a good macro mode, a clip-on macro lens can help you get incredibly close to capture fine details without distortion.
- Reflector: As mentioned, a small white board or dedicated reflector can bounce light into shadows.
- White Cardstock/Poster Board: Doubles as a simple, clean background and a reflector.
Posing Your Hands for the Perfect Shot
Your hands are the canvas, so how you present them matters! Posing can make a world of difference in how your nail art is perceived. Think about elegance, naturality, and showcasing the design.
Natural Poses
Avoid stiff, unnatural hand positions. The most appealing shots often feel effortless.
- Relaxed Fingers: Let your fingers be gently curved, not rigidly straight or tightly clenched.
- Slightly Curved Palm: A subtle curve in the palm can add a pleasing shape to your hand.
- Resting Naturally: Place your hands on a surface or in your lap as you would naturally.
Showcasing the Design
Consider what part of the nail art you want to emphasize.
- Thumb Focus: The thumb is often large and prominent. Ensure it’s positioned well if it features key elements of your design.
- Finger Separation: Gently separate your fingers to give each nail adequate space and prevent them from appearing mashed together.
- Rotating Fingers: Slightly rotating your fingers can reveal the curves of the nail and the way the design wraps around it.
Creative Poses and Props
Adding a touch of life and context can make your photos more engaging.
- Holding Small Objects: Gently hold a flower, a makeup brush, a smooth stone, or a piece of fruit. Ensure the object complements, not competes with, your nail art.
- Interlocking Fingers: A soft interlocking of fingers can create an interesting shape and highlight the artwork on multiple nails.
- Leaning on a Surface: Resting your fingertips or the back of your hand on a textured surface can add visual interest and depth.
Editing Your Nail Art Photos
Even the best photos can be polished further with a little editing. The goal is to enhance, not to create something that isn’t there. Apps and software can help you correct minor flaws and make your colors pop.
Basic Adjustments
These are fundamental edits that apply to almost any photo.
- Brightness & Contrast: Adjust these to ensure details are clearly visible and your nails aren’t too dark or washed out.
- Exposure: Similar to brightness, this helps to lift or darken the overall image.
- Shadows & Highlights: Use these to recover detail in the darkest and brightest areas of your photo. Bring up shadows to reveal details and slightly reduce highlights to prevent glare.
Color Correction
Making sure your nail polish colors look true to life is crucial.
- White Balance: If your photo has a color cast (e.g., too yellow, too blue), use the white balance tool to correct it.
- Saturation & Vibrance: Use these sparingly to make colors more intense. Saturation affects all colors equally, while vibrance is more subtle and targets less saturated colors. Overdoing this can make your nails look unnatural.
Sharpening and Detail
Bring out the finest elements of your nail art.
- Sharpening: Apply a touch of sharpening to make edges and details crisper. Be careful not to over-sharpen, as it can create an unnatural, pixelated look.
- Noise Reduction: If your photo is grainy (especially if taken in low light), use noise reduction to smooth it out, but avoid applying too much, as it can soften details.
Helpful Apps and Software
- Mobile: Snapseed (free, powerful tools), Adobe Lightroom Mobile (freemium, excellent for color and exposure), VSCO (filters and editing tools).
- Desktop: Adobe Photoshop (professional, extensive features), Adobe Lightroom (excellent for batch editing and color correction), GIMP (free, powerful alternative to Photoshop).
When editing, always compare your edited photo to the original. Strive for enhancement, not alteration. For more advanced photo editing resources, check out guides from reputable sources like Adobe Photoshop basics which offer detailed tutorials.
Common Nail Art Photography Mistakes and How to Avoid Them
Even with the best intentions, a few common pitfalls can pop up. Being aware of them is the first step to acing your shots!
| Mistake | Why It’
|
|---|


