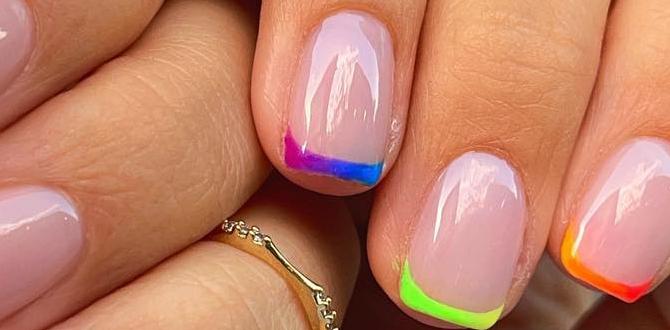
Tie dye nail designs are a fun and vibrant way to express yourself! This beginner-friendly guide will show you how to create stunning, swirled patterns with easy-to-follow steps and essential tools. Get ready for a groovy manicure that’s totally achievable at home.
Ever looked at those gorgeous, swirled tie-dye patterns and wished you could wear them on your nails? You totally can! Tie-dye is more than just a cool shirt; it’s a vibe, and bringing that groovy energy to your fingertips is surprisingly simple. Many find nail art intimidating, thinking you need super steady hands or fancy equipment. But guess what? You don’t! We’re going to break down exactly how to achieve those mesmerizing tie-dye nail designs, no matter your skill level. Get ready to unleash your inner artist and rock a manicure that’s as unique as you are.
This guide is packed with everything you need to know, from picking your colors to mastering those dreamy swirls. We’ll cover the essential tools you’ll want to have on hand and walk you through the process, step by simple step. By the end, you’ll feel confident and excited to create your own dazzling tie-dye masterpieces. So, let’s dive in and get those nails looking absolutely stunning!
What Are Tie Dye Nail Designs?
Tie dye nail designs are manicures that mimic the iconic look of tie-dyed fabric. Think vibrant, swirling patterns where different colors blend and overlap in a free-form, organic way. These designs capture the eclectic, retro spirit of traditional tie-dye but translate it beautifully onto the small canvas of your nails. They’re all about playful color combinations and creating unique, eye-catching looks.
Why You’ll Love Tie Dye Nail Designs
Tie dye nails are fantastic for so many reasons! They’re a super fun way to inject personality and color into your look. Plus, they’re incredibly versatile. You can go bold and bright with neons, opt for a softer pastel palette, or even create a more subtle tone-on-tone effect. The beauty of tie-dye is that no two designs are ever exactly alike, making each manicure a truly personalized creation.
- Expressive and unique: Each design is one-of-a-kind.
- Vibrant color play: Perfect for showcasing your favorite hues.
- Fun retro vibe: Embrace a bit of nostalgic charm.
- Achievable for beginners: Surprisingly forgiving and easy to learn.
- Mood-boosting: Bright colors and cheerful patterns can lift your spirits!
Essential Tools for Your Tie Dye Mani
Before we get our swirl on, let’s gather our supplies! You don’t need a professional salon setup to create amazing tie-dye nails. Most of what you need can be found at your local drugstore or beauty supply store. Using the right tools can make the process smoother and the results even better.
The Must-Haves:
- Nail Polish in Your Chosen Colors: Pick 2-4 colors that complement each other. Don’t be afraid to mix and match!
- Clear Top Coat: This seals your design and adds a glossy shine.
- Base Coat: Protects your natural nails and helps polish adhere better.
- Thin Nail Art Brush or Dotting Tool: For creating fine lines and connecting colors.
- Small Piece of Sponge (Cosmetic Sponge or Kitchen Sponge): This is your magic wand for creating the blended tie-dye effect.
- Rubbing Alcohol or Nail Polish Remover: For cleaning up mistakes and thinning polish if needed.
- Cotton Swabs (Q-tips): Essential for precise cleanup around the cuticles.
- Paper Towel or Palette: To dab off excess polish from your sponge.
- Optional: Small amount of water (for water marbling alternative)
Having these on hand will set you up for success. Remember, practicing with affordable polishes first can help you get the hang of the technique before you commit to your most prized shades.
Getting Started: Preparing Your Nails
Just like any great painting, a good nail design starts with a well-prepped canvas. Taking a few minutes to prepare your nails will make a huge difference in how your tie-dye design looks and lasts. It’s all about creating a smooth, clean surface for your colors to shine.
Prep is key to a long-lasting and beautiful manicure. Here’s what to do:
- Clean Your Nails: Start with clean, dry nails. Gently remove any old polish with nail polish remover. Wash your hands with soap and water to get rid of any oils.
- Shape Your Nails: File your nails to your desired shape and length. A smooth edge helps polish apply evenly.
- Push Back Cuticles: Gently push back your cuticles using an orange stick or cuticle pusher. This area needs to be tidy for a clean finish.
- Apply Base Coat: Apply one thin layer of your favorite clear base coat. Let it dry completely. This step is crucial for preventing staining and making your manicure last longer.
Once your nails are prepped and dry, you’re ready for the fun part – creating those beautiful tie-dye swirls!
How to Create Tie Dye Nail Designs: The Sponge Method (Step-by-Step!)
This is where the magic happens! The sponge method is incredibly beginner-friendly and gives you that authentic, swirled tie-dye look. It’s all about dabbing and blending. Don’t worry about perfection; the beauty of tie-dye is its imperfect, organic flow.
Step 1: Prepare Your Sponge
Take your cosmetic sponge or a clean piece of a kitchen sponge. Cut it into small, manageable pieces – about the size of a small square that can comfortably fit on your fingertip. You’ll likely want a few small pieces, as you’ll be using them to dab different colors.
Step 2: Apply Your First Color
Apply a layer of your lightest polish color to your nail. This will be your base within the design. Let it dry for about 30 seconds to a minute, so it’s not completely wet but still a little tacky. This tackiness helps the other colors adhere better to the sponge.
Step 3: Create Your Color Palette on the Sponge
This is the most exciting part! On your paper towel or palette, draw a few zigzag lines or dots of your chosen nail polish colors next to each other. Think about how you want them to blend. For example, you might do a line of blue, then a line of pink, then a line of yellow. Don’t overthink it; just get the colors down.
Step 4: Dab Onto Your Nail
Take one of your prepared sponge pieces. Gently press it onto the colors you laid out on your palette. You want to pick up a bit of each color onto the sponge. Then, lightly and quickly dab the sponge onto your prepared nail. You’re not pressing hard; you’re just gently tapping to transfer the colors and create a marbled effect. You can rotate the sponge slightly as you dab for a more varied pattern. Repeat this dabbing motion a few times, reapplying colors to the sponge as needed, until you achieve the desired intensity and swirl.
Tip: It’s better to start with lighter dabs and build up the color and intensity than to press too hard initially. You can always add more color!
Step 5: Refine and Blend (Optional)
If the colors aren’t blending as much as you’d like, you can gently dab the sponge (without adding more polish) over the edges where the colors meet. You can also use a very fine nail art brush dipped in a tiny bit of one of your colors to carefully draw thin lines or swirls to enhance the tie-dye effect. Some people also use a dotting tool dipped in clear polish to gently blend edges.
Step 6: Clean Up the Edges
This step is crucial for a professional look! Dip a cotton swab or a small cleanup brush into rubbing alcohol or nail polish remover. Carefully trace around your cuticle and the sides of your nail to remove any excess polish that got onto your skin. Be precise!
Step 7: Apply Top Coat
Once you’re happy with the design and the cleanup is done, apply a generous layer of clear top coat. This seals everything in, adds a beautiful shine, and smooths out any texture from the sponge. Make sure to cap the free edge of your nail by swiping the top coat brush along the tip to prevent chipping.
And there you have it! Your very own stunning tie-dye nail design, created by you. Isn’t that awesome?
Alternative Method: The Water Marbling Technique
If you want an even more intricate and fluid tie-dye look, water marbling is a fantastic technique. It takes a little practice but it’s incredibly rewarding. This method uses the way oil and water don’t mix to create beautiful, organic swirls right on your nail.
Understanding Water Droplet Dynamics
The principle here relies on surface tension and how pigments spread on water. When you drop polish onto filtered water that’s at room temperature, the oils in the polish cause it to spread out in a thin film. By carefully manipulating these films with tools, you can create captivating patterns. For best results, using polishes specifically designed for marbling can be helpful, as they tend to spread more evenly. You can learn more about the basic principles of fluid paint applications on surfaces from resources like this research article on droplet dynamics.
Water Marbling Steps:
- Prepare Your Water Cup: Fill a small cup or container with room temperature filtered water. Tap water can sometimes be too hard and affect how the polish spreads.
- Apply Protection: Apply a thick layer of cuticle protector (like a peel-off latex tape or old cuticle oil) around your nails. This makes cleanup incredibly easy!
- Drop Your Polish: Take your chosen nail polishes and carefully drop them, one after another, into the center of the water. You can also drip different colors around the first drop.
- Swirl the Pattern: Immediately after dropping, use a toothpick or a marbling tool to gently swirl the colors. Drag the tool through the polish to create your desired pattern. Don’t over-swirl, or the colors will become muddy.
- Dip Your Nail: Once you have a pattern you like, carefully dip your protected nail into the water where the colors are spread. Tilt your finger slightly so the polish film wraps around your nail.
- Remove Excess Polish: Gently pull your finger out of the water. Before the polish dries completely on your finger, carefully remove the excess polish from around your nail using the toothpick or your protected cuticle.
- Peel Off Protector: Once the polish on your nail is dry to the touch, carefully peel off the protective liquid latex or oil.
- Top Coat: Apply a clear top coat to seal the design.
Water marbling can be a bit messy at first, but with practice, you can achieve stunning, intricate designs that look professionally done.
Choosing Your Color Palettes
The colors you choose can completely change the feel of your tie-dye nails! Don’t be afraid to experiment. Here are some popular and inspiring palette ideas to get you started:
Classic Rainbow
Embrace the original tie-dye spirit with every color of the rainbow. This is bold, bright, and undeniably fun.
Colors: Red, orange, yellow, green, blue, purple.
Ocean Blues
A calming and beautiful combination that evokes the sea.
Colors: Different shades of blue (navy, sky blue, teal), white, and a touch of seafoam green.
Sunset Vibes
Capture the warm glow of a sunset on your nails.
Colors: Deep orange, bright yellow, coral, pink, and a touch of purple or deep red.
Pastel Dreams
Softer, more muted tones for a gentle, ethereal look.
Colors: Baby pink, mint green, lavender, pale yellow, and baby blue.
Neon Pop
For those who love to be seen! Bright, electric colors.
Colors: Neon pink, electric blue, highlighter yellow, lime green, and bright orange.
Monochromatic Magic
Using different shades and tones of a single color for a sophisticated take on tie-dye.
Colors: Light grey, medium grey, charcoal grey, and black, or varying shades of a single color like deep blues or greens.
Earth Tones
A more natural and grounded palette.
Colors: Olive green, mustard yellow, terracotta, brown, and cream.
Tips and Tricks for Perfect Tie Dye Nails
Even with the simplest techniques, a few pro tips can elevate your tie-dye nail game. These little secrets can help you achieve more professional-looking results and make the process even more enjoyable.
- Work in a Well-Ventilated Area: Nail polish fumes can be strong, so ensure you have fresh air.
- Don’t Over-Saturate the Sponge: Too much polish on the sponge can lead to muddy colors and a less defined pattern. A little goes a long way!
- Let Layers Dry Slightly: For the sponge method, ensure the base color is tacky but not wet, and let each dabbing layer set for a moment before adding another if building intensity.
- Clean Up Immediately: Don’t let polish dry on your skin. Cleaning up with a cotton swab dipped in remover while the polish is still wet makes a huge difference.
- Experiment with Sponge Texture: Different types of sponges (cosmetic puff vs. regular kitchen sponge) will give slightly different textures. Try them out to see which you prefer.
- Use an Old Top Coat for Blending: Sometimes dabbing a clean brush lightly into an old, slightly thicker top coat can help gently blend colors on the nail if needed, before the final top coat application.
- Practice Makes Perfect: Don’t get discouraged if your first attempt isn’t exactly what you envisioned. Keep practicing, and you’ll get better with each manicure!
- Consider Clear Polish for Blending: A tiny bit of clear polish on a fine brush can be used to gently swirl edges together for a softer look.
Common Tie Dye Nail Design Mistakes and How to Fix Them
We’ve all been there – a small mistake can feel like the end of the world for a manicure! But with tie-dye designs, there’s often a way to salvage and even improve the look. Here’s how to tackle common slip-ups:
Mistake 1: Colors Turned Muddy
Why it happens: Swirling too much in the water marble method, or pressing too hard and over-blending with the sponge.
Fix: If you catch it early, try using a skewer or fine brush to gently pull the colors apart again on the water surface. For the sponge method, you can sometimes use a cleanup brush dipped very lightly in clear polish to gently lift and reposition some of the color, or add a contrasting color in tiny swirls. Alternatively, accept the blended look or consider it a unique abstract design! A good top coat can sometimes smooth out and unify slightly muddy colors giving them a marbled effect.
Mistake 2: Polish Didn’t Transfer Well from Sponge
Why it happens: The base color on the nail was too dry, or the sponge didn’t pick up enough polish.
Fix: Reapply polish colors to your sponge and dab again. You can also try applying a thin, tacky layer of clear polish over the affected area of your nail to give the sponge colors something to adhere to, then dab again. For a more solid color fix, you can use a thin art brush to add color directly to the nail.
Mistake 3: Messy Cuticle Cleanup
Why it happens: Rushing the cleanup step, or using too much remover on the cotton swab.
Fix: Dip a clean cotton swab or a fine liner brush into nail polish remover. Gently and precisely trace around the edges of your nail to remove any stray polish. It’s easier to clean up multiple small bits than one large smudge. For stubborn bits, a small clean-up brush is invaluable.
Mistake 4: Uneven Pattern / Too Much Sponge Texture
Why it happens: Uneven pressure when dabbing, or using a sponge with too large a pore size.
Fix: A couple of light coats of top coat can often smooth out minor texture. If the pattern is very uneven, you can try dabbing very lightly with a clean sponge piece to blend or even an art brush with a similar color to fill in gaps. For a different texture, try a finer-pored cosmetic sponge next time. Remember, tie

