Therapy nails design is all about creating calming, beautiful nail art that promotes well-being. Think soothing colors, gentle patterns, and minimalist chic. These looks are simple, achievable, and designed to bring a little peace and self-care to your day.
Are you looking for a way to add a touch of tranquility to your everyday style? Sometimes, we just need a little something to make us feel good, and our nails can be a perfect canvas! But if you’re new to nail art or just feeling a bit overwhelmed by intricate designs, creating something beautiful and calming might seem tricky. Don’t worry! We’re going to break down the wonderful world of therapy nails design. You’ll discover simple, essential looks that are super easy to do yourself, bringing a bit of calm and creativity right to your fingertips. Let’s dive into creating your own little piece of nail art serenity!
What Are Therapy Nails Design?
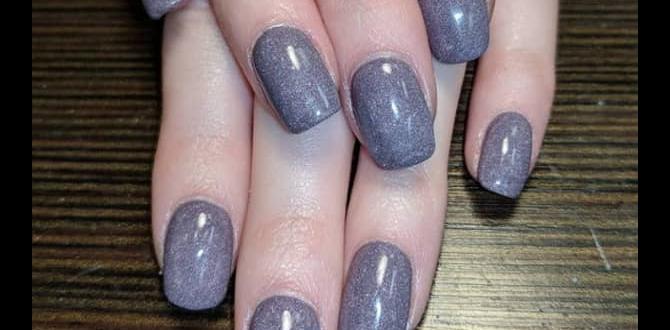
Therapy nails design, often called ‘calming nails’ or ‘mindful manicures,’ is a style focused on creating nail art that feels soothing, peaceful, and uplifting. It’s less about flashy trends and more about a gentle aesthetic that promotes a sense of well-being. These designs typically feature soft color palettes, minimalist patterns, and understated elegance. The goal is to create nails that are not only visually pleasing but also contribute to a feeling of calm and self-care. Think of it as a little dose of daily zen delivered through beautiful nail art.
The Core Principles of Therapy Nails
At its heart, therapy nails design is guided by a few key principles:
- Soothing Color Palettes: Utilizing colors that evoke a sense of calm and relaxation.
- Minimalist Aesthetics: Favoring clean lines, simple shapes, and uncluttered designs.
- Nature-Inspired Elements: Incorporating motifs like leaves, waves, or soft gradients.
- Focus on Self-Care: The act of painting and admiring your nails becomes a mindful, stress-reducing activity.
- Achievability: Designs are generally simple enough for beginners to recreate.
Genius Essential Therapy Nails Looks for Beginners
Ready to create some calm? These essential therapy nails designs are perfect for beginners. They’re easy to master and deliver maximum soothing style without needing advanced artistic skills.
1. The Soft Gradient Fade
A gradient, or ombre, effect is incredibly popular because it looks chic and sophisticated, but it’s surprisingly simple to achieve. This design uses soft colors that blend seamlessly.
Why it’s a Therapy Nail Essential:
- The smooth transition of colors is visually calming.
- It looks elegant and intentional, even when done simply.
- You can customize the color combination endlessly.
What You’ll Need:
- 2-3 shades of soft polish (e.g., pastel pink, lavender, sky blue, creamy white)
- Clear top coat
- A makeup sponge (the soft kind you use for foundation works great!)
- A small dish or piece of foil for polish
- Optional: Nail polish remover and an orangewood stick to clean up edges
How to Create the Soft Gradient Fade:
- Prep Your Nails: Start with clean, dry nails. Apply your base coat and let it dry completely. This protects your nails and helps the polish adhere better.
- Paint the First Color: Apply one of your chosen soft colors as a base coat. Let it dry fully. This will be the lightest shade or the foundation color.
- Prepare the Sponge: Take your makeup sponge and cut a small piece – just big enough to swipe across your nail a couple of times.
- Apply Polish to the Sponge: On your piece of foil or dish, paint a few stripes of your chosen polishes, side-by-side. Make sure the stripes touch slightly where they meet. For example, if you’re doing pink to white, paint a stripe of pink next to a stripe of white.
- Sponge the Gradient: Gently dab the sponge onto the stripes of polish, picking up the colors. Immediately and lightly dab the sponge onto your nail, starting from the cuticle area and working upwards towards the tip. You might need to dab a few times to build up the color.
- Build Up the Effect: Repeat steps 4 and 5, dabbing more polish onto the sponge and tapping it onto your nail, to achieve your desired color intensity and blend. Don’t press too hard; a gentle tapping motion is key.
- The Second Color (Optional): If you’re using three colors, repeat the process with the third shade, focusing on the tip of the nail.
- Clean Up: Dip an orangewood stick or a small brush into nail polish remover and carefully go around your cuticle and side walls to remove any excess polish for a clean finish.
- Seal the Deal: Once the gradient is dry, apply a layer of clear top coat. This not only protects your design but also smooths out the texture of the sponged polish, making the blend look even more seamless and glossy.
Remember, practice makes perfect! If your first attempt isn’t flawless, don’t fret. The beauty of this design is that slight imperfections can add to its unique charm. For more on nail prep, check out Mayo Clinic’s guide to nail care, which emphasizes the importance of starting with healthy nails.
2. The Minimalist Dot Accent
Sometimes, less is truly more. A single, well-placed dot can add a touch of sophisticated charm without being overwhelming. This is the epitome of understated elegance.
Why it’s a Therapy Nail Essential:
- The simplicity is incredibly calming and clutter-free.
- It’s a subtle yet stylish detail.
- Super fast to do, perfect for busy schedules.
What You’ll Need:
- Your favorite soft, calming polish color (e.g., muted beige, dusty rose, soft grey)
- A contrasting dot color (e.g., a slightly darker shade, metallic gold, or white)
- A dotting tool or a toothpick
- Clear top coat
How to Create the Minimalist Dot Accent:
- Base Coat: Apply your chosen calm base color to all your nails. Let it dry completely.
- Choose Your Placement: Decide where you want your dot. The most popular spots are near the cuticle or towards the tip of one accent nail (like your ring finger).
- Load Your Tool: Dip your dotting tool or the tip of a toothpick into the contrasting polish color. You only need a small amount.
- Place the Dot: Carefully place the dot onto your nail. Aim for a clean, round shape. If using a toothpick, you might need to reload it for each dot.
- Let it Dry: Allow the dot to dry thoroughly. This is important to prevent smudging when you apply the top coat.
- Top Coat: Apply a thin layer of clear top coat over all your nails to seal the design and add shine.
This design is fantastic for experimenting with different color combinations. Try a deep forest green dot on a muted sage green nail, or a soft gold dot on a creamy pastel. It’s all about adding that small, perfect detail.
3. The Serene Swirl
A gentle swirl or a marble effect can mimic natural patterns, bringing a sense of organic beauty and flow to your nails. It feels artistic without being complex.
Why it’s a Therapy Nail Essential:
- The flowing lines are soothing and reminiscent of natural elements like marble or water.
- It offers a bit more visual interest than a solid color while remaining calming.
- It’s a versatile design that works with many color palettes.
What You’ll Need:
- A base color (e.g., white, cream, or a soft pastel)
- 1-2 complementary swirl colors (e.g., soft grey, muted blue, pale pink, gold foil accents)
- A fine-tipped brush or a toothpick
- Clear top coat
- Optional: A small amount of acetone or nail polish remover
How to Create the Serene Swirl:
- Apply Base Coat: Paint your nails with your chosen base color and let it dry completely. A matte top coat can also be nice for this look if you want a softer finish.
- Add Swirl Lines: Using your fine-tipped brush or toothpick, carefully draw thin, wavy lines or abstract shapes onto your nails. You can do this on all nails or just an accent nail.
- Blend (Optional): For a marble effect, you can lightly feather the edges of the lines with a clean brush or toothpick before they dry completely. Alternatively, for a slightly blended look, you can use a dab of acetone on your brush and lightly brush over the lines – this makes the polish bleed slightly. Be very careful when using acetone near your skin!
- Add Accents (Optional): For extra flair, you can add tiny dots or a hint of metallic foil within the swirls.
- Let it Dry: Ensure the polish is completely dry.
- Top Coat: Apply a clear top coat to seal and protect your beautiful swirl design.
This technique is easily adaptable. You can create a creamy, marbled effect with white and grey, or a serene water ripple with blues and greens. It’s about embracing the flow!
4. The Gentle French Tip Update
The classic French manicure gets a calming makeover by softening the colors and shape of the tip.
Why it’s a Therapy Nail Essential:
- It’s a subtle nod to a timeless look, refined and soothing.
- Soft, diffused colors are less stark than traditional white tips.
- It elongates the nail and looks polished with minimal effort.
What You’ll Need:
- A sheer nude or pale pink polish for the base
- Soft colors for the tips (e.g., pastel lavender, creamy beige, muted sage green, pale grey)
- A fine-tipped brush or French tip guides (stickers)
- Clear top coat
How to Create the Gentle French Tip Update:
- Apply Base: Paint your nails with the sheer nude or pale pink polish. Let it dry.
- Create the Tip:
- Freehand with Brush: Dip your fine-tipped brush into your chosen soft tip color. Carefully paint a thin line across the very tip of your nail. Aim for a softer, rounded curve rather than a harsh straight line. You can also do a “baby French” which is an extremely thin line.
- With Guides: Place French tip guide stickers onto your nails, just below where you want your tip to be. Paint over the exposed tip. Let it dry slightly, then carefully peel off the sticker.
- Refine: If you made any mistakes, use a small brush dipped in polish remover to clean up the edges.
- Top Coat: Apply a clear top coat for shine and durability.
For an extra touch of uniqueness, try a “reverse French” where the color is applied at the cuticle line instead of the tip, or consider using a very subtle shimmer polish for the tips. For tips on picking gentle colors, consider consulting resources on color psychology for relaxation, like those discussed in various wellness articles from institutions like the National Institutes of Health, which often touch upon the calming effects of certain hues.
5. The Subtle Texture Play
Adding a touch of texture can make your nails feel more interesting while keeping the design simple. Think matte finishes or a subtle sugar-like effect.
Why it’s a Therapy Nail Essential:
- Tactile elements can be grounding and mindful.
- Matte finishes offer a sophisticated, soft look.
- It’s an easy way to elevate a solid color.
What You’ll Need:
- Your favorite solid, calming polish color
- A matte top coat (widely available)
- Optional: Fine glitter or iridescent flakies for a subtle shimmer
How to Create Subtle Texture Play:
- Apply Polish: Paint your nails with your chosen color. Let it dry completely.
- Add Matte Top Coat: Apply a layer of matte top coat over each dry nail. Let this dry completely. The matte finish transforms the shine into a soft, velvety look that is very calming.
- Add Texture (Optional): While the matte top coat is still wet on one nail, you can gently sprinkle a tiny amount of fine glitter or iridescent flakies over it. This creates a subtle, sparkling texture that catches the light softly. Be sparing!
- Seal (if adding texture): Apply a thin layer of regular glossy top coat only over the textured parts to secure them, or if you want the entire nail to be matte again, use a matte top coat over everything once the flakes are dry.
This is perfect for those who love a solid color but want a little something extra. The matte finish itself is a therapy for the eyes, minimizing glare and creating a peaceful visual experience.
6. The Leafy Outline
Simple, delicate outlines of nature-inspired shapes can add a touch of organic beauty. A single leaf outline is elegant and easy to achieve.
Why it’s a Therapy Nail Essential:
- Connects to nature, which is inherently calming.
- The outline is minimalist, avoiding boldness.
- It’s a simple graphic element that feels artistic.
What You’ll Need:
- A soft base color (e.g., nude, cream, light grey)
- A contrasting fine liner polish (e.g., black, dark green, metallic gold)
- A very fine-tipped nail art brush
- Clear top coat
How to Create the Leafy Outline:
- Apply Base Color: Paint your nails with your chosen soft base color. Let it dry completely.
- Draw the Outline: Dip your very fine brush into the contrasting liner polish. On an accent nail (or all nails, if you’re feeling adventurous!), lightly sketch the outline of a simple leaf. Think elongated oval with a pointed tip and a small stem.
- Refine the Shape: You can add a single central vein line if you like, but keep it very simple. The beauty is in the delicate outline.
- Let it Dry: Allow the outline to dry thoroughly.
- Top Coat: Apply a clear top coat to protect your minimalist leaf design.
This looks particularly lovely on a nude or pale pink base. It’s a gentle reminder of the outdoors brought to your fingertips.
Essential Tools for Therapy Nails Design
You don’t need a professional salon to create these beautiful designs! Here are some simple tools that will make your therapy nails journey much easier:
| Tool | What It’s For | Why It’s Great for Therapy Nails |
|---|---|---|
| Dotting Tools (Various Sizes) | Creating uniform dots of different sizes. | Perfect for minimalist dot accents; easy to control for precise placement. |
| Fine-Tipped Nail Art Brushes | Drawing thin lines, swirls, and outlines. | Essential for delicate designs like the leafy outline or soft swirls. Allows for precision. |
| Makeup Sponges | Creating gradient or ombre effects. | The easiest way for beginners to achieve smooth color blends for gradients. |
| Toothpicks | Creating small dots or swirling polish. | A readily available, budget-friendly alternative to dotting tools for small details. |
| Nail Polish Remover & Orangewood Stick/Small Brush | Cleaning up polish mistakes around the cuticles and edges. | Ensures a clean, polished look, making simple designs appear more professional and intentional. |
| Matte Top Coat | Transforming a glossy finish into a soft, velvety texture. | Instantly elevates solid colors and adds a sophisticated, calming aesthetic. |
| Base Coat & Top Coat | Protecting nails, smoothing surfaces, and sealing designs. | Crucial for any manicure, ensuring longevity and a professional finish, which contributes to the overall feeling of
|


