Therapy nails design focuses on minimalist, calming manicures using soft colors and subtle accents to promote a sense of peace and well-being. These effortless styles are perfect for anyone seeking a soothing, chic look that feels as good as it looks.
Ever find yourself scrolling through endless nail art ideas, feeling a little overwhelmed? You see intricate designs and bold colors, and while they’re stunning, they don’t always feel… you. Especially when you’re craving a little calm and serenity. That’s where therapy nails design comes in! It’s all about creating beautiful, understated manicures that bring a sense of peace to your day. Don’t worry if you’re new to this; I’m here to guide you through these simple, yet elegant styles. Get ready to discover how easy it is to achieve a look that’s both trendy and soothing.
In this guide, we’ll dive into the world of therapy nails, exploring their core principles and showcasing some of the most essential and effortless designs. You’ll learn what makes a manicure “therapeutic” and discover techniques you can easily recreate at home. We’ll cover everything from choosing the perfect soft shades to adding subtle touches that elevate your look. So, grab your favorite nail polish, and let’s get started on creating your own little piece of nail art tranquility!
What Exactly Are “Therapy Nails” Design?
Therapy nails design is more than just a pretty manicure; it’s a conscious choice to adorn your nails with styles that evoke feelings of calmness, balance, and mental well-being. Think of it as a visual form of self-care. These designs often incorporate:
- Soothing Color Palettes: Soft, muted, and nature-inspired hues like pastels, earth tones, whites, creams, and gentle grays.
- Minimalist Aesthetics: Simple lines, subtle patterns, and a focus on clean, uncluttered looks.
- Natural Textures and Finishes: Often leaning towards glossy, sheer, or matte finishes that feel organic and understated.
- Subtle Embellishments: If any, accents are usually small, like a tiny dot, a delicate shimmer, or a fine line, rather than loud charms or glitter.
The goal isn’t just to have beautiful nails, but to have nails that contribute to a feeling of peace and gentle joy. It’s about creating a visual reminder of mindfulness and self-compassion every time you glance at your hands.
The Core Principles of Therapy Nails
Before we jump into specific designs, understanding the underlying philosophy of therapy nails will help you adapt any idea to your personal style. These principles are your roadmap to creating truly therapeutic manicures.
1. Color Psychology: The Power of Soft Hues
Colors have a profound impact on our mood and emotions. Therapy nails leverage this by focusing on shades associated with tranquility and relaxation.
- Pastels: Think baby blue, mint green, soft pink, lavender, and pale yellow. These colors are gentle and calming.
- Neutrals: Cream, beige, taupe, soft gray, and classic white provide a clean, sophisticated, and grounding feel.
- Earth Tones: Muted browns, terracotta, olive green, and sandy beiges connect us to nature, promoting a sense of stability.
- Muted Jewel Tones: Occasionally, deeper but still softened jewel tones like dusty rose or muted teal can be used for a touch of subtle elegance.
The key is to avoid bright, jarring, or overly saturated colors. The effect should be soothing to the eye, much like a peaceful landscape or a gentle sunset.
2. Simplicity is Key: Less is More
Intricate, busy nail art can sometimes feel chaotic. Therapy nails embrace a “less is more” approach. This means focusing on clean lines, simple shapes, and uncluttered designs.
- Negative Space: Leaving parts of the nail bare enhances the minimalist feel and makes the design feel airy and light.
- One-Accent-Per-Hand Rule: If you choose to add an accent, consider limiting it to one nail per hand.
- Geometric Simplicity: Thin lines, simple dots, or subtle color blocking are perfect.
This simplicity not only looks good but also makes the designs incredibly easy to achieve, even for beginners.
3. Texture and Finish: Subtle Sophistication
The finish of your polish can dramatically change the overall feel of your manicure. For therapy nails, subtle and sophisticated finishes are preferred.
- Glossy: A classic high-shine finish always looks polished and clean.
- Matte: A velvety matte finish adds a modern, understated, and cozy feel.
- Sheer/Jelly: Translucent polishes give a delicate wash of color that looks natural and almost ethereal.
- Creamy: Opaque, smooth finishes in soft shades.
Avoid overly chunky glitters or holographic finishes that can be too distracting. The texture should enhance the soothing quality, not detract from it.
Essential Therapy Nails Design Ideas for Beginners
Ready to try it yourself? These designs are incredibly beginner-friendly and capture the essence of therapy nails. They require minimal tools and techniques, making them perfect for a relaxing DIY session.
1. The “Clean Slate” Manicure
This is the epitome of minimalist therapy nails. It’s about impeccable nail care and a single, flawless coat of a soft, neutral polish.
How to Achieve It:
- Prep: Start with clean, filed nails. Push back your cuticles gently using an orangewood stick or a cuticle pusher.
- Base Coat: Apply a good quality base coat to protect your natural nails.
- Color Application: Apply two thin coats of your chosen shade. Opt for a creamy white, a soft beige, a pale nude, or a sheer milky pink. Ensure even coverage.
- Top Coat: Finish with a high-shine top coat for a professional, glossy look that lasts.
Why it’s therapeutic: The extreme simplicity and clean finish create a sense of order and calm. It looks effortlessly put-together.
2. The “Soft Ombre” Effect
A very subtle gradient of color that blends seamlessly, creating a dreamy, flowing look.
How to Achieve It:
- Prep: Ensure your nails are prepped and base-coated.
- Base Color: Apply one coat of your lightest shade (e.g., a milky white or a very pale nude).
- Ombre Application: This can be done with a makeup sponge or a fine brush.
- Sponge Method: Lightly dab two complementary soft shades onto a makeup sponge. Gently press the sponge onto the nail, starting from the cuticle and moving upwards. You might need a few passes to build the gradient. Clean up any excess polish around the cuticle with a brush dipped in remover.
- Brush Method: Use a fine art brush dipped in a slightly darker soft shade. Gently blend it into the base color on the nail, working from the tip down.
- Clean Up: Carefully clean the skin around your nails.
- Top Coat: Seal with a glossy top coat.
Why it’s therapeutic: The gentle blending of colors mimics natural phenomena like sunsets or misty mornings, promoting a sense of softness and flow.
3. The “Tiny Dot” Accent
A single, perfectly placed dot is the ultimate minimalist accent. It draws the eye without being overwhelming.
How to Achieve It:
- Prep: Nails prepped and base-coated.
- Color: Apply your chosen soft base color (e.g., a pale gray, a soft sage green, or a creamy beige). Let it dry completely.
- The Dot: Using a dotting tool (or the tip of a bobby pin or toothpick), pick up a tiny amount of polish in a complementary or contrasting (but still soft) color, like a muted gold, a soft white, or a dusty rose.
- Placement: Place a single, neat dot either at the base of the nail (near the cuticle) or slightly off-center towards the tip.
- Top Coat: Apply a top coat, being careful not to smudge the dot.
Why it’s therapeutic: The precision and singularity of the dot create a focal point that feels intentional and calming. It’s a subtle pop of personality.
4. The “Sheer Wash” Manicure
These jelly-like finishes give a translucent, stained-glass effect that’s delicate and elegant.
How to Achieve It:
- Prep: Ensure your nails are perfectly filed and your cuticles are neat.
- Base Coat: Apply a clear or nude-toned base coat.
- Sheer Polish: Apply one to two coats of a sheer polish in a soft shade like a pale peach, a milky lavender, or a sheer rosy pink. The more coats, the deeper the color.
- Top Coat: Finish with a clear, high-gloss top coat.
Why it’s therapeutic: The light-diffusing quality of sheer polishes makes nails look naturally healthy and polished. It’s incredibly understated and chic.
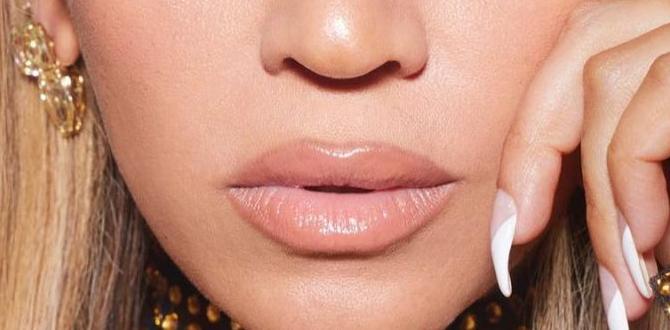
5. The “French Twist” with Soft Colors
A modern take on the classic French manicure, using muted shades instead of stark white.
How to Achieve It:
- Prep: Nails prepped and base-coated.
- Base Color: Apply a sheer nude, pale pink, or milky white polish to the entire nail. Let it dry.
- Tip Color: Using a fine art brush or a striping tool, carefully paint the tips of your nails with a soft shade like a pale peach, a muted lilac, or a soft dusty blue. You can also opt for a very thin, delicate line.
- Top Coat: Apply a top coat to seal the design.
Why it’s therapeutic: It offers the clean, structured look of a French manicure but with a gentler, more blended color profile that feels less severe.
Essential Tools for Effortless Therapy Nails
You don’t need a professional salon setup to create beautiful therapy nails. Here are a few key tools that will make the process smooth and enjoyable:
| Tool | Purpose | Beginner Tip |
|---|---|---|
| Nail File & Buffer | Shaping nails and smoothing the nail surface for a flawless finish. | Use a fine-grit file (180-240 grit) for natural nails. A buffer can smooth ridges and create a subtle shine. |
| Cuticle Pusher/Orangewood Stick | Gently pushing back and cleaning up the cuticle area for a neat appearance. | Be gentle! Always push, never cut your own cuticles unless you are trained. Moisturize cuticles first to make them softer. |
| Base Coat | Protects your natural nail from staining and helps polish adhere better. | Essential for all manicures, especially with lighter or nude shades. |
| High-Quality Polish in Soft Shades | The core of your therapy nails! Look for creamy, sheer, or muted tones. | Invest in a few good quality polishes in colors you find calming. Brands like OPI, Essie, and Zoya offer excellent shades. |
| Top Coat | Protects your manicure from chipping and adds shine or a matte finish. | A good top coat is key to making your therapy nails last longer. Quick-dry options are great for busy schedules! |
| Dotting Tool (Optional) | For creating precise dots, lines, or small embellishments. | Can be a simple metal tool with rounded ends or even a toothpick/bobby pin in a pinch! |
| Fine Art Brush (Optional) | For detailed work like thin lines or blending gradients. | A clean makeup brush or a small, precise paintbrush works well. |
| Nail Polish Remover & Cotton Pads | For cleaning up mistakes and removing old polish. | Use a non-acetone remover if your nails feel dry. Isopropyl rubbing alcohol can also be used for quick cleanups. |
DIY Care routine: The Foundation of Therapy Nails
Therapy nails are at their best when they sit on healthy, well-cared-for nails. Integrating a simple care routine enhances both the look and the therapeutic feel of your manicure.
Nail Health is Wealth
Taking care of your nails isn’t just about aesthetics; it’s a form of self-care that can be incredibly grounding. A healthy nail bed supports a beautiful polish application and prevents issues that can feel stressful.
- Moisturize Regularly: Dry, cracked cuticles and skin around the nails can be distracting and uncomfortable. Use a good cuticle oil or hand cream daily. Consider integrating this into your evening routine.
- Hydration from Within: Drinking enough water is crucial for overall health, including the health of your nails and skin.
- Protect Your Hands: When doing chores that involve water or harsh chemicals, wear gloves. This protects your manicure and your skin.
- Gentle Filing: Always file your nails in one direction. Sawing back and forth can weaken them. You can learn more about proper nail filing techniques from resources like the American Academy of Dermatology.
The Ideal Prep Steps
Proper preparation is non-negotiable for a long-lasting and beautiful manicure. Think of it as setting the stage for your miniature canvas.
- Cleanse: Start with clean nails. Remove any old polish thoroughly. Wash your hands to remove oils and dust.
- Shape: File your nails to your desired shape. For therapy nails, a classic squoval or a soft almond shape often complements minimalist designs best.
- Cuticle Care: Apply cuticle remover or oil. Gently push back your cuticles using an orangewood stick. This creates a clean canvas for polish and prevents lifting.
- Buffing (Optional): If your nails have ridges, a gentle buff can smooth them out, creating a perfectly even surface for polish.
- Clean Again: Wipe your nails with a lint-free cloth or a cotton pad with a bit of nail polish remover to ensure they are free from dust and oils.
- Base Coat: Apply a thin, even layer of your chosen base coat. Let it dry completely.
Elevating Your Therapy Nails with Subtle Accents
While simplicity is key, a few carefully chosen accents can add personality and a touch of sophistication to your therapy nails design without compromising its calming essence.
1. Fine Lines and Geometric Shapes
Thin, delicate lines can add structure and visual interest. Think of a single horizontal line across the nail, a vertical line up the center, or a few tiny triangles at the tip.
- Colors: Use a contrasting but muted color like a soft gold, a rose gold, a muted silver, or even a slightly darker shade of your base color.
- Placement: Keep it minimal – one accent nail is usually enough.
A study on the psychological effects of color and pattern suggests that simple geometric designs can indeed have a calming influence when executed thoughtfully. While not specifically about nails, the principle applies to visual stimuli promoting a sense of order.
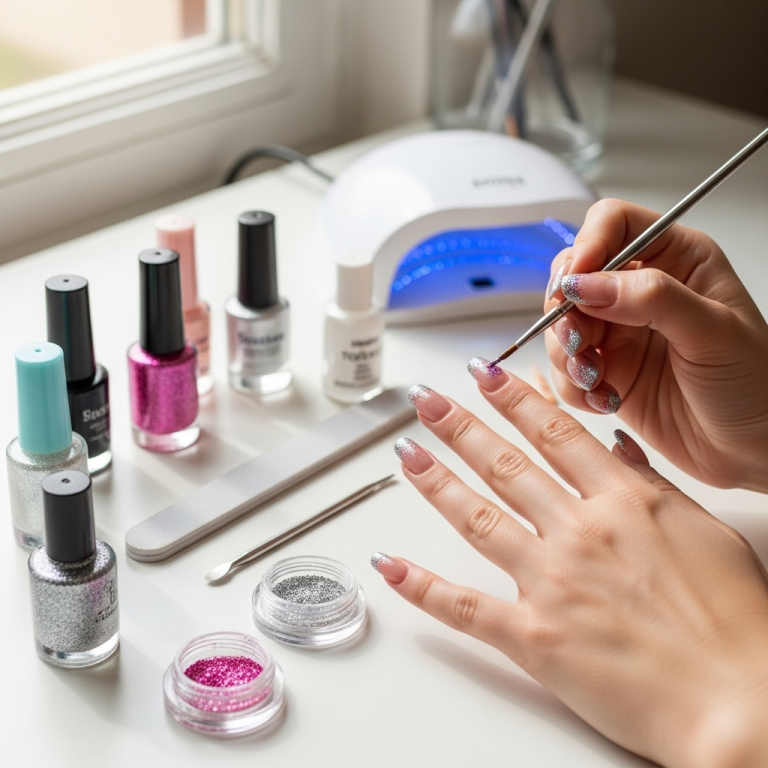
2. Delicate Glitter or Shimmer Accents
Not all glitter is loud! A very fine, iridescent shimmer or a subtle holographic glitter can add a hint of magic without being overpowering.
- Application: Apply a sheer polish with fine glitter, or dab a tiny amount of glitter polish onto the base of the nail or the free edge.
- Location: Consider a gradient effect with the glitter concentrated at the cuticle or tip.
3. Tiny Gems or Pearls
A single, tiny pearl or a micro-gemstone placed strategically can add a luxurious touch.
- Placement: Often looks best near the cuticle or as part of a very minimalist design on one accent nail.
- Adhesive: Use nail glue designed for embellishments or a dab of top coat to secure them.
4. Seasonal Touches
You can subtly tailor your therapy nails to the season.
- Spring: A hint of a soft floral outline or pastel French tips.
- Summer


