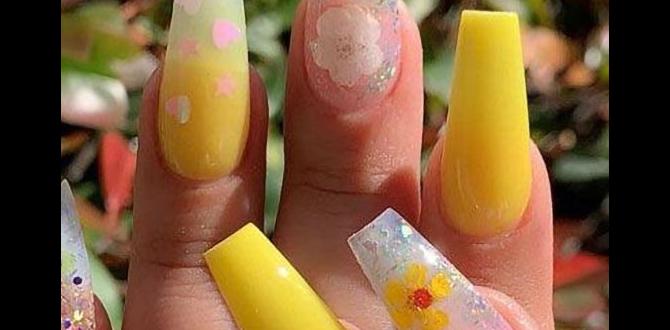
Terrazzo nail designs offer a playful and unique way to express your style, blending vibrant chips of color on a base coat for a look inspired by classic terrazzo flooring. They’re surprisingly easy to achieve and perfect for adding a pop of personality to any outfit.
Ever look at your nails and wish they had a little more… pizzazz? If you’re searching for a nail design that’s eye-catching, trendy, and versatile, you’ve landed in the right spot! Terrazzo nails are all the rage, giving you a fun way to wear a mosaic of colors right on your fingertips. Don’t worry if you’re new to nail art; we’re breaking down everything you need to know, from what terrazzo nails are to how you can create your own stunning looks at home. Get ready to fall in love with this artistic and chic manicure trend that’s perfect for expressing your unique style. Let’s dive into the vibrant world of terrazzo nails!
What Are Terrazzo Nail Designs?
Imagine the beautiful, speckled flooring you see in stylish homes and buildings. That’s terrazzo! Terrazzo nail designs mimic this decorative style by scattering small, colorful chips or flecks of polish onto a base color on your nails. It’s like having a mini piece of art that’s both sophisticated and fun. The beauty of this design lies in its randomness; no two nails will ever look exactly alike, making each manicure truly unique.
The original terrazzo composite material dates back centuries and was a clever way to reuse marble, quartz, and granite scraps. Today, the nail art version captures that same spirit of playful yet elegant composition. It’s a fantastic way to incorporate multiple colors into your manicure without committing to a complex pattern. Whether you prefer a subtle sprinkle or a bold burst of hues, terrazzo nails can be customized to fit your personal aesthetic.
Why Are Terrazzo Nails So Popular?
Terrazzo nail designs have skyrocketed in popularity for several fantastic reasons:
- Unique & Artistic: They offer a distinct look that stands out from typical solid colors or simple French tips. Each design is a miniature work of art.
- Versatile Color Palettes: You can adapt them to any color scheme. Think subtle pastels for spring, bright neons for summer, earthy tones for fall, or deep jewel tones for winter.
- Beginner-Friendly: While they look intricate, achieving a decent terrazzo effect is surprisingly achievable for beginners. It doesn’t require a steady hand for perfect lines or shapes.
- Customizable: From the base color to the size and color of the “chips,” you have complete control over the final look.
- Trendy & Chic: This design has been spotted on runways, social media, and celebrity nails, making it a must-try trend for fashion-forward individuals.
How to Create Terrazzo Nail Designs: A Step-by-Step Guide
Ready to get your hands on this trend? Creating terrazzo nails at home is fun and easier than you might think! Here’s a simple guide to help you achieve that stunning speckled look.
What You’ll Need:
Gathering the right tools is key to a smooth and successful manicure. Here’s what you’ll want to have on hand:
- Nail polish remover and cotton pads (for cleanup)
- Nail file and buffer
- Base coat polish
- Your chosen base color polish (e.g., white, black, nude, or pastel)
- Several accent polishes in various colors for the “chips”
- A detailing brush, toothpick, or dotting tool
- Top coat polish
- Optional: Cuticle oil
The Process:
- Prep Your Nails: Start by cleaning your nails thoroughly. Remove any old polish, trim and file them to your desired shape, and gently push back your cuticles. Buffing your nails lightly helps polish adhere better. Apply a thin layer of base coat and let it dry completely.
- Apply Your Base Color: Paint your nails with your chosen base color. Two thin coats are usually best for an opaque finish. Allow this layer to dry almost completely. It should be tacky but not wet to the touch; this helps the chips adhere.
- Create the Terrazzo Effect: This is the fun part! Here are a few methods:
- Toothpick/Dotting Tool Method: Dip the very tip of a toothpick or a small dotting tool into one of your accent polishes. Gently tap it onto your nail to create tiny flecks. Aim for random placement. Repeat with different colors, rinsing or wiping your tool between colors if needed. Don’t overdo it; less can be more!
- Detailing Brush Method: Load a thin detailing brush with a small amount of accent polish. Lightly flick the brush over your nail, or carefully dab it to create small specks. Work quickly and randomly with various colors.
- Splatter Method (for a bolder look): If you want a more abstract, scattered effect, you can use a slightly stiffer brush. Dip it into the polish and tap it against another surface or your finger (carefully!) to let tiny droplets fall onto the nail. Be prepared for a bit of mess with this one!
- Let it Dry: Once you’re happy with the distribution of your terrazzo chips, let the polish dry thoroughly. This can take a bit longer as you have multiple layers and small flecks. Be patient!
- Seal with Top Coat: Apply a generous layer of top coat over your entire nail. This will smooth out the texture (especially if you used the splatter method), protect your design, and give your nails a beautiful glossy finish. Make sure to cap the free edge of your nail by running the brush along the tip.
- Finishing Touches: Once the top coat is dry, apply a drop of cuticle oil around your nails to rehydrate the skin.
And there you have it! Your very own stunning terrazzo nails.
Variations and Creative Ideas for Terrazzo Nails
The beauty of terrazzo nails is their adaptability. You can play with the base color, the chip colors, and the overall intensity to create vastly different looks. Here are some stunning ideas to inspire your next manicure:
Classic White and Black Terrazzo
A timeless combination that’s always chic. Imagine a crisp white base with scattered black, grey, and perhaps a hint of white or metallic flecks. This look is minimalist yet impactful, perfect for everyday wear or a formal event.
Bold & Bright Terrazzo
Go all out with a vibrant base color like electric blue, hot pink, or a sunny yellow. Then, scatter a mix of neon or jewel-toned chips in contrasting or complementary colors. This is perfect for making a statement and showing off your playful side.
Pastel Dream Terrazzo
For a softer, more ethereal look, choose a pastel base color such as baby pink, mint green, or lavender. Sprinkle it with smaller chips in coordinating pastels, white, and maybe a touch of gold or silver for a hint of shimmer. These are gorgeous for spring and summer.
Monochromatic Terrazzo
This is a sophisticated take where the chips are in varying shades of the same color family as the base. For example, a deep navy base with lighter blues, teals, and maybe some white chips. It offers texture and depth without being overwhelmingly colorful.
Glitter Terrazzo
Add some sparkle! Use a glitter polish as your base, or incorporate glitter polishes as some of your “chips.” A clear or sheer base with a mix of colored glitter chips can look especially magical.
Nude and Neutral Terrazzo
A neutral base like beige, cream, or light grey is elevated with small chips in metallic tones (gold, silver, rose gold) and contrasting neutrals like black, white, or taupe. This is incredibly chic and professional.
Ombré Terrazzo
Combine the terrazzo effect with an ombré base. You could have a gradient of colors fading into each other, with the terrazzo chips scattered over the top. This adds another layer of artistry to the design.
Abstract Terrazzo
Experiment with less traditional chip shapes or an uneven distribution. You could even use a slightly larger, more abstract dispersal of colors for an artistic, painterly feel.
Terrazzo Nail Design Inspiration Gallery
Sometimes, seeing is believing! Here are a few visual ideas to spark your imagination. While we can’t show you images directly here, picture these:
- The Minimalist Chip: A clean nude base with just a few small, scattered chips of black, white, and a tiny hint of gold.
- The Maximalist Burst: A bright turquoise base with a generous scattering of pink, orange, yellow, and white chips, looking like a confetti explosion.
- The Earthy Tone Delight: A creamy beige base with chips of terracotta, mustard yellow, olive green, and deep brown.
- The “Chipped Glass” Look: A clear or sheer base with various sizes of iridescent or holographic chips, mimicking shattered light.
Tips for Long-Lasting Terrazzo Nails
Want your beautiful terrazzo design to stay looking fabulous? A few key steps can make all the difference:
- Proper Nail Prep: Ensure your nails are clean, dry, and free of oils or old polish. This is the foundation for any long-lasting manicure.
- Quality Base Coat: A good base coat not only protects your natural nail but also creates a smooth surface for polish adhesion.
- Allow Drying Time: Resist the urge to rush! Make sure each layer of polish, especially the base color and the chips, is sufficiently dry before applying the next step. For the base before adding chips, it should be tacky, not fully dry.
- Generous Top Coat: Don’t skimp on the top coat. Apply at least one, and sometimes two, good layers. Ensure you cap the free edge of your nail. This seals everything in and prevents chipping.
- Regular Maintenance: Gently buff any snags and reapply top coat every 2-3 days for added protection and shine.
- Be Gentle: Avoid using your nails as tools (like opening cans!). This puts unnecessary stress on the polish and increases the risk of chipping.
Tools and Techniques for Different Finishes
The tools you use can greatly impact the final look of your terrazzo nails. Here’s a quick breakdown:
| Tool | Technique | Result |
|---|---|---|
| Toothpick | Dab tip into polish, gently tap onto nail. | Small, precise chips. Great for beginners. |
| Dotting Tool (various sizes) | Use the ball end to pick up and place polish. | Consistent chip sizes. Good control. |
| Detailing Nail Art Brush (thin bristles) | Load brush with polish, flick or dab. | Fine speckles or larger, broader strokes depending on pressure and polish amount. |
| Stiff Brush (e.g., old toothbrush, stiff craft brush) | Load with polish, tap against a surface or pull bristles. | Random splatter effect. Bolder, more “splattered” look. Requires practice and can be messy. |
| Specialty “Speckle” Polishes | Apply as normal polish. | Pre-made speckles! Often come in clear or colored bases with flecks already inside. Very convenient. |
Experimenting with these different tools will help you discover your preferred method and achieve various terrazzo styles. For instance, a tiny bit of research into the history of true terrazzo flooring might inspire patterns. The original methods often involved cementitious binders, but the artistic interpretation for nails allows for endless creativity. Resources like the US Department of Energy Office of Scientific and Technical Information (while technical) highlights historical material uses that can indirectly inspire artistic patterns.
Terrazzo Nails vs. Other Speckled Designs
You might be wondering how terrazzo nails differ from other speckled or confetti-like nail art. While they share a similar speckled aesthetic, terrazzo nails often have a more refined and scattered look derived from the classic flooring style. Other speckled designs might involve:
- Confetti Nails: These typically use larger, more distinct pieces of glitter, foil, or shaped confetti pieces. The elements are often more visible and chunky.
- Speckled Polish (Pre-made): Polishes with fine speckles already mixed in. These can be great if you want a quick, uniform look.
- “Salt and Pepper” Nails: Usually refers to a black and white speckled design, often with a more uniform distribution than some artistic terrazzo styles.
Terrazzo nails aim to capture the essence of terrazzo flooring – a blend of irregular shapes and colors that feel organic and artfully composed. The key is the random, artful scattering of various colored flecks on a smooth base.
Frequently Asked Questions (FAQ)
Q1: Can I really do terrazzo nails at home if I’m a beginner?
A1: Absolutely! Terrazzo nails are one of the most beginner-friendly nail art designs. The randomness of the pattern means perfection isn’t required, and even a few well-placed specks can look fantastic. Just follow the steps, and you’ll be amazed at your results!
Q2: How long do terrazzo nails typically last?
A2: With proper application and care, including a good base and top coat, terrazzo nails can last as long as any other standard manicure, usually 1-2 weeks. Reapplying top coat every few days can extend their life.
Q3: What’s the best way to clean up stray polish when doing terrazzo nails?
A3: A fine-tipped brush dipped in nail polish remover is your best friend for precision cleanup around the cuticles and sidewalls. Cotton swabs can work too, but they might be a bit bulkier for detailed work.
Q4: Can I use gel polish for terrazzo nail designs?
A4: Yes, you can definitely use gel polish! The process is similar, but you’ll need to cure each layer (base coat, base color, and top coat) under a UV/LED lamp. For the chips, you can use gel polish dots or speckles and cure them with each color application, or apply them over a tacky gel top coat and then seal with a final gel top coat. Curing ensures durability.
Q5: Do I need a special polish for the chips?
A5: Not at all! You can use any regular nail polishes in various colors for your chips. Specialty “speckle” or “confetti” polishes also work great if you want a pre-mixed option.
Q6: How do I get the chips to be small and not look like blobs?
A6: Use the very tip of your toothpick or dotting tool, and only dip it into a small amount of polish. Practice tapping gently rather than pressing hard. Less polish on your tool means smaller, more delicate flecks.
Q7: Can I create terrazzo designs on artificial nails (like acrylics or gels)?
A7: Yes, absolutely! Terrazzo designs work beautifully on acrylic, gel, or dip powder nails. The application process is the same as on natural nails, but ensure your artificial nails are properly prepped and free of dust before you begin.
Conclusion
Terrazzo nail designs are more than just a trend; they’re a fantastic way to infuse your personal style into your look with artistry and flair. From subtle sophistication to bold, vibrant statements, the possibilities are truly endless. We’ve walked through what makes these designs so special, how you can easily create them yourself at home with simple tools, and explored countless creative variations to match any mood or occasion. Remember, nail art is all about self-expression, and the beauty of terrazzo lies in its unique, never-repeating patterns. So, don’t be afraid to experiment with colors, techniques, and tools. Grab your polishes, have fun with the process, and let your fingertips shine with your own stunning, custom terrazzo masterpiece. Happy polishing!


