Swirl nail designs are a fantastic way to add fun, effortless artistic flair to your manicure. These fluid, eye-catching patterns are surprisingly easy to create at home, even for beginners, offering a chic and personalized look that’s perfect for any occasion.
Feeling like your nails need a little something extra, but intimidated by complicated nail art? You’re not alone! Many of us love the idea of beautiful, unique nail designs but often get stuck with designs that are either too tricky to do ourselves or look a bit messy. But what if I told you there’s a super stylish and incredibly easy way to get gorgeous nails? Enter swirl nail designs! They give you that custom, artistic vibe without the stress. Get ready to discover how simple and fun it is to create these mesmerizing patterns right at home. We’ll walk through everything step-by-step, so you’ll be swirling like a pro in no time!
What Are Swirl Nail Designs?
Swirl nail designs are all about creating flowing, curved lines that mimic the look of gentle eddies, cosmic clouds, or classic marble patterns. Think of those beautiful marbled papers or the hypnotic patterns in a latte – that’s the essence of swirl nail art! They offer a sophisticated yet playful aesthetic that can be customized in countless ways with different colors, sizes, and intensities of swirls.
The beauty of swirl designs lies in their inherent fluidity. They don’t require perfect precision like geometric patterns, making them incredibly forgiving and adaptable. This means even if you’re just starting out with nail art, you can achieve stunning results. Plus, they work wonderfully on all nail lengths and shapes, from short and practical to long and elegant.
Why Are Swirl Nail Designs So Great for Beginners?
Let’s dive into why these designs are your new best friend in the nail art world:
- Effortless Charm: The organic nature of swirls means imperfections often look like part of the design, not mistakes.
- Versatility is Key: They can be subtle accents or the main event, bold or pastel, monochromatic or multi-colored.
- Minimal Tool Requirement: You don’t need a whole arsenal of fancy tools. A few basics will get you started.
- Quick to Execute: Once you get the hang of it, you can complete a full set of swirl nails surprisingly fast.
- Chic & Trendy: Swirl patterns have a timeless appeal and are always on-trend, giving your manicure a polished look.
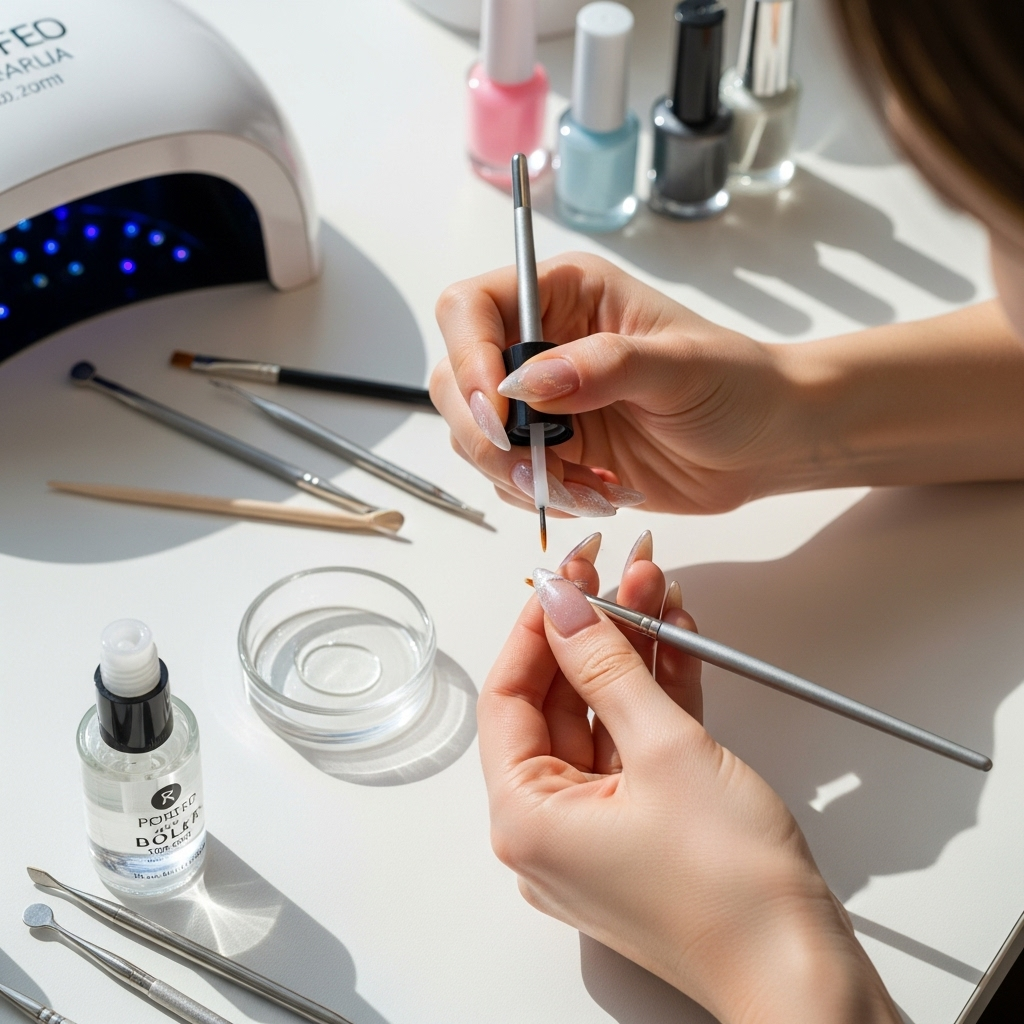
Essential Tools for Your Swirl Nail Art Journey
Before we start swirling, let’s gather your creative toolkit. You likely already have some of these items!
Nail Polish Essentials
- Base Coat: Protects your natural nails and helps polish adhere better.
- Top Coat: Seals your design, adds shine, and boosts longevity.
- Color Polishes: Choose at least two complementary or contrasting colors for your swirls.
- Quick-Dry Polish: Optional, but super helpful for speeding up the process.
The Swirling Tools
- Fine-Tipped Nail Art Brush: This is your primary tool for drawing clean, delicate swirls. Look for synthetic bristles that are firm but flexible. Many craft stores or beauty supply shops carry these.
- Dotting Tool: If you prefer a slightly different application or want to start with dots before swirling, a dotting tool with various tip sizes is fantastic.
- Toothpick or Orange Stick: A budget-friendly alternative for drawing thin lines or adjusting polish.
- Gel Polish & UV/LED Lamp (Optional): If you’re a fan of gel, this method offers incredible durability and a super-glossy finish.
Cleanup & Prep
- Nail Polish Remover: For tidying up any errant polish around your cuticles.
- Cotton Balls or Pads: To apply the remover.
- Cuticle Oil: To nourish your cuticles after you’re done.
- Nail File & Buffer: For shaping and smoothing your nails before you start.
Your Step-by-Step Guide to Effortless Swirl Nail Designs
Ready to create some magic? Let’s break down the process into simple, easy-to-follow steps. We’ll cover two popular methods: the freehand brush technique and the dotting tool method.
Method 1: Freehand Swirls with a Nail Art Brush
This is the most common and versatile way to achieve those beautiful swirls. It gives you the most control over the thickness and flow of your lines.
-
Prep Your Nails:
- Start with clean, dry nails. Remove any old polish.
- Shape your nails using a nail file.
- Gently buff the surface of your nails to create a smooth canvas.
- Apply a thin layer of base coat and let it dry completely. This is crucial for polish longevity and preventing staining.
-
Apply Your Base Color:
- Paint your nails with your chosen base color. This will be the background for your swirls.
- Apply two thin coats for full opacity, allowing each layer to dry thoroughly. A good base color can be a solid shade, a French tip, or even a sheer nude.
-
Load Your Nail Art Brush:
- Dip the tip of your fine-tipped nail art brush into your swirl color polish. You don’t need a lot – a small bead on the tip is perfect.
- Wipe off any excess polish on the rim of the bottle to avoid globs.
-
Draw Your Swirls:
- Starting near one edge of your nail, gently touch the brush to the nail surface.
- With a light touch, guide the brush in a curved or swirling motion. Focus on connecting the lines smoothly.
- Don’t aim for perfection! Wobbly lines add character. Think of continuous lines that ebb and flow.
- You can create full swirls, half swirls, or just wavy lines. Vary the size and placement for visual interest.
- If you run out of polish on your brush, reload it and continue from where you left off, or start a new element of the swirl.
-
Add a Second Color (Optional):
- If you’re using two swirl colors, you can either draw a second, thinner swirl alongside your first, or create a completely separate swirl.
- Alternatively, use the second color to add small dots or accents to complement the main swirl.
-
Clean Up Mistakes:
- Dip a small brush (an old, clean makeup brush works well) or a toothpick into nail polish remover.
- Carefully trace around your cuticles and sidewalls to remove any excess polish and sharpen the edges of your design.
-
Seal the Deal:
- Once your swirl design is completely dry (this is important!), apply a generous layer of top coat.
- Make sure to cap the free edge of your nails by running the brush along the tip. This helps prevent chipping and keeps your design looking fresh.
- Allow the top coat to dry completely. A quick-dry spray or drops can be a lifesaver here.
Method 2: Swirls with a Dotting Tool
This method is great if you prefer a slightly chunkier swirl or want to create a marbled effect by connecting dots.
- Prep and Base Coat: Follow steps 1 and 2 from Method 1.
-
Create Your Dots:
- Dip the tip of your dotting tool into your swirl color polish.
- Place a series of connected or overlapping dots onto your base color. Think of them as building blocks for your swirl.
- Don’t worry about size consistency; variation can look more organic.
-
Connect the Dots:
- Using the same dotting tool or a fine-tipped brush, gently connect the dots with thin lines.
- You can drag the polish from one dot to the next, creating a fluid, swirled effect.
- The goal is to blend the dots into a seamless swirl.
-
Refine and Add Details:
- Use a clean dotting tool or brush to smooth out the lines, add more dots, or create thinner swirls within the existing design.
- You can even use a toothpick to gently pull and blend the colors for a marbled look. Dip the toothpick in polish remover to clean it between swipes.
- Clean Up and Seal: Follow steps 6 and 7 from Method 1.
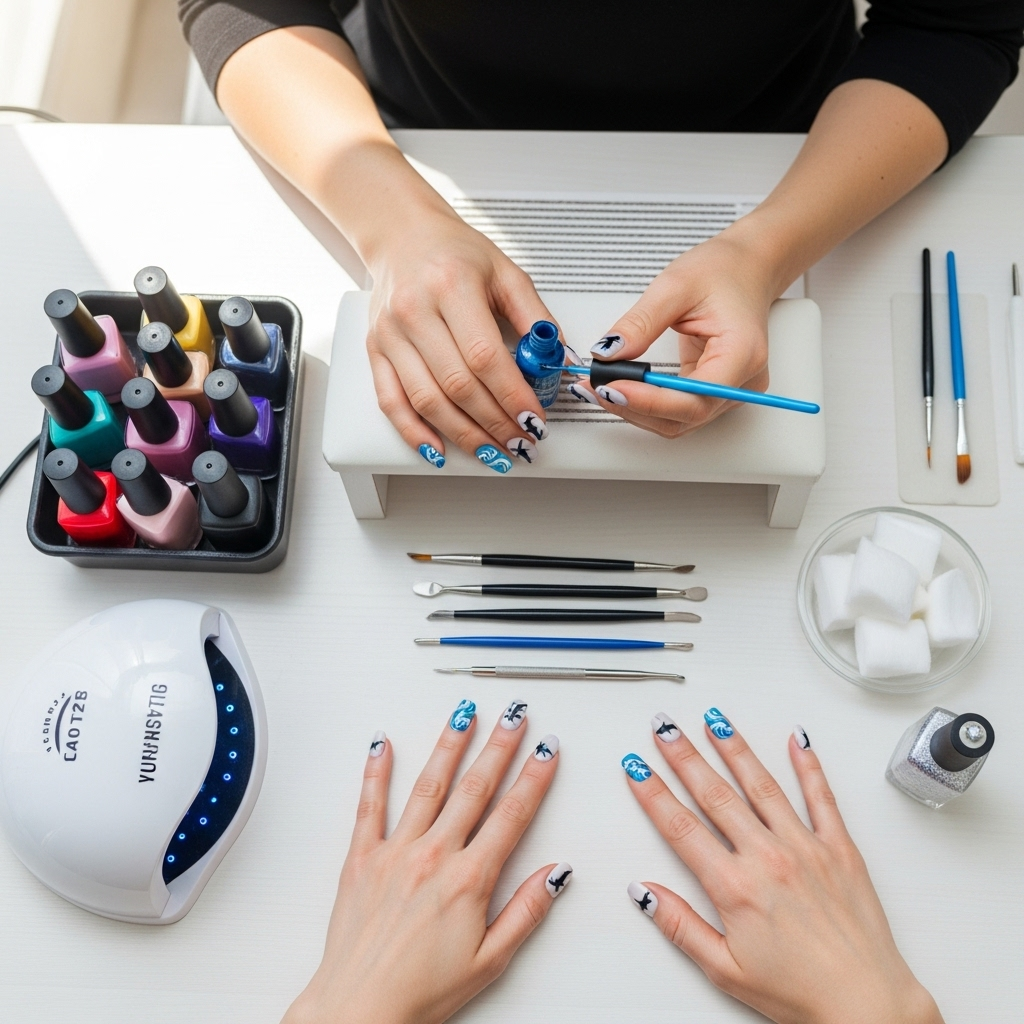
Creative Swirl Nail Design Ideas
Now that you know the basic techniques, let’s get inspired! Here are some popular and easy-to-achieve swirl ideas:
Classic Marble Swirls
This is probably what most people think of. Use two contrasting colors (like black and white, or navy and gold) and draw a continuous, flowing line across the nail. You can then use a toothpick or fine brush to gently pull the lines and blend them for a soft marble effect before the polish fully dries.
Color Block Swirls
Start with a base of one color. Then, create swirls using a second, complementary color. Or, paint your nail in two-toned blocks and have the swirls weave across the color divide.
French Tip Swirls
Instead of a traditional white French tip, paint a colored tip and then outline it with a thin swirl design in a contrasting or metallic color. You can also have a swirl design starting from the tip and flowing down the nail.
Accent Swirls
Love this design but don’t want it on every nail? Paint all nails in a solid color and then add a subtle swirl design on just one or two accent nails. This is a sophisticated approach.
Multi-Color Swirls
Combine three or more colors! Start with a base, then add swirls of two other colors. You can make them distinct or let them overlap slightly to create a more complex, layered look. Pastel shades often look beautiful in multi-color swirl designs.
Glitter Swirls
Use a glitter polish as your swirl color for an extra touch of sparkle. Metallic glitter polishes are especially stunning against matte or cream bases.
Minimalist Swirls
For a super understated look, use a nude or sheer base and a thin white or black line to create a delicate, single swirl on each nail. This is chic and professional.
Tips for Perfecting Your Swirls
Here are a few extra pointers to help you achieve salon-worthy results:
- Practice Makes Perfect: Don’t get discouraged if your first attempt isn’t flawless. Practice on a piece of paper or a nail tip first.
- Polish Consistency Matters: Use polishes that aren’t too thick or too thin. If a polish is too thick, it will be hard to draw fine lines. If it’s too thin, it might be too sheer.
- Work Quickly but Deliberately: Nail polish dries fast! You’ll want to draw your swirls while the base color is still a bit wet if you plan to blend, but not so wet that it becomes a muddy mess.
- Clean Your Brush: After each swirl or a few strokes, clean your nail art brush with polish remover to ensure crisp lines.
- Patience with Drying: Allow each layer to dry thoroughly before applying the next, especially before the top coat.
- Experiment with Pressure: Light pressure creates thin lines, while slightly more pressure can create thicker ones.
Swirl Nail Designs vs. Other Nail Art Trends
It’s always fun to see how different nail art trends stack up! Here’s a little comparison:
| Design Type | Difficulty for Beginners | Time Commitment | Versatility | Typical Tools Needed |
|---|---|---|---|---|
| Swirl Nail Designs | Easy to Moderate | 15-30 minutes | High (Endless color/style combos) | Nail polish, fine brush/dotting tool |
| Geometric Designs (Lines, Shapes) | Moderate to Difficult | 20-45 minutes | Moderate (Precision needed) | Strips, stencils, fine brush, steady hand |
| Floral Designs | Moderate to Difficult | 20-60 minutes | Moderate (Can be complex) | Fine brushes, dotting tools, patience |
| Ombre/Gradient Nails | Easy to Moderate | 15-30 minutes | Medium (Color blending) | Sponge, brush, multiple polishes |
| Sticker/Decal Art | Very Easy | 5-15 minutes | High (Pre-designed) | Tweezers, top coat |
As you can see, swirl nail designs hit a sweet spot for beginners looking for something stylish and achievable. They offer a great balance of creative expression and ease of execution that many other intricate nail arts require more practice to master.
Caring for Your Swirl Manicure
Once your beautiful swirl nails are complete, a little care can help them last longer and stay looking amazing:
- Wear Gloves: When doing household chores, washing dishes, or gardening, wear gloves to protect your nails from harsh chemicals and excessive moisture.
- Moisturize Regularly: Keep your hands and cuticles hydrated with lotion and cuticle oil. Healthy cuticles contribute to the overall health and appearance of your manicure.
- Avoid Using Nails as Tools: Resist the urge to scrape, pry, or open things with your nails. This can lead to chips and breaks.
- Reapply Top Coat: After a week or so, if your nails are still looking good but the top coat is losing its shine, apply another layer of top coat over your existing design.
- Quick Touch-Ups: If you notice a tiny chip or starting to lift, you can sometimes carefully fill it with a bit of your base color polish and a tiny bit of top coat.
For more information on maintaining healthy nails, consider checking out resources like the American Academy of Dermatology’s expert advice on nail care.
Frequently Asked Questions About Swirl Nail Designs
Q1: What is the easiest way to do swirl nail designs?
The easiest way is usually with a fine-tipped nail art brush, drawing thin, flowing lines. Don’t be afraid for them to be a little imperfect – that’s part of the charm!
Q2: Can I do swirl nail designs without a special nail art brush?
Yes! A toothpick or even a very fine-tipped regular paintbrush (ensure it’s clean and synthetic) can work in a pinch. A dotting tool is also great for creating the dots that you can then connect.
Q3: How do I prevent my swirl lines from looking messy?
Practice! Also, load your brush with just enough polish, wipe off excess, and work with a steady hand. Clean up any mistakes immediately with a brush dipped in nail polish remover.
Q4: What colors look best for swirl nail designs?
Any colors you love! Classic combinations include black and white, navy and gold, or pastels like pink and lilac. Contrasting colors make the swirls pop, while tonal colors create a softer look.
Q5: How long do swirl nail designs last?
With a good base and top coat, and proper care, swirl nail designs can last anywhere from 5-10 days, similar to a regular manicure. Using a quality quick-dry top coat can significantly improve durability.
Q6: Can I use nail polish stickers for swirls?
While there are nail wraps with swirl patterns, creating the design itself is typically done with polish and brushes. Stickers are more for applying a ready-made design.
Q7: My swirls look too thick. How can I make them thinner?
Use a brush with finer bristles and ensure you have only a tiny bead of polish on the very tip. Apply very light pressure when drawing the line. For extra thin lines, you can often go back with a clean brush and a tiny bit of your base color polish to refine the edges.
Conclusion