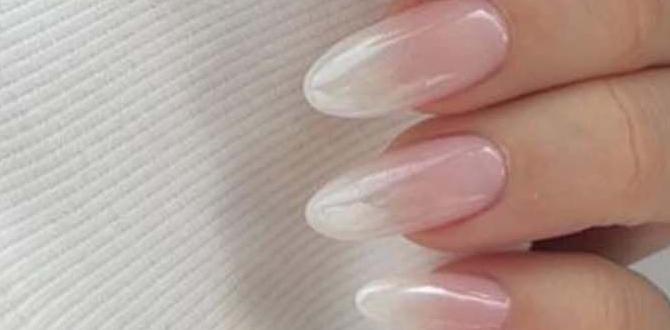
Superfood nail designs are an easy and fun way to add vibrant, nature-inspired flair to your manicure. Think bright colors and playful patterns that mimic your favorite healthy foods, achievable with simple techniques anyone can master.
Hey nail art lovers! Are you looking for a fresh, fun way to express yourself with your nails? Sometimes, nail design can feel a little complicated, leaving you wishing for something simpler yet super stylish. If you’ve ever admired colorful, eye-catching manicures and thought, “I could never do that!” – I’m here to tell you, you absolutely can! We’re diving into the delightful world of superfood nail designs. These are designs inspired by the amazing colors and patterns found in healthy, delicious foods. They’re all about bringing that vibrant, natural goodness right to your fingertips. Get ready to unleash your inner artist with looks that are as easy to create as they are beautiful to behold. Let’s get this colorful journey started!
What Are Superfood Nail Designs?
Superfood nail designs are exactly what they sound like: nail art inspired by the vibrant colors, textures, and patterns of nutrient-rich foods we love to eat! Think the deep greens of kale, the sunny yellow of lemons, the rich red of strawberries, or the speckled vibrancy of blueberries. These designs aren’t just pretty; they’re a fun way to celebrate a healthy lifestyle and bring a touch of natural beauty to your everyday look. They’re perfect for beginners because they often rely on simple shapes, color blocking, and playful patterns that don’t require advanced artistic skills.
The beauty of superfood-inspired nails lies in their versatility. You can go for a single accent nail featuring a tiny avocado, or embrace a full fruit salad on all your fingers! It’s all about translating the joy and color of healthy eating into wearable art.
Why Choose Superfood Nail Designs?
Beyond their undeniable cuteness and trendiness, superfood nail designs offer several fantastic benefits, especially for those just starting out with nail art.
- Accessibility for Beginners: Many designs mimic natural forms that are forgiving. A simple dot can be a blueberry, and a curved line can be a banana slice. Complex shading or intricate details aren’t usually required.
- Vibrant and Joyful: These designs naturally incorporate bright and cheerful colors. Nothing beats the mood-boosting power of a manicure that’s as lively as a summer fruit stand!
- Endless Inspiration: The natural world is your oyster (or your strawberry patch!). From exotic dragon fruit to everyday apples, the sources of inspiration are limitless, meaning you’ll never run out of new ideas.
- Affordable and DIY-Friendly: You don’t need a salon or expensive tools. A few basic nail polish colors and some simple application tools are all it takes to create stunning looks at home.
- Conversation Starters: Unique and playful, these designs are bound to get noticed and spark conversations. People love to see creative nail art that’s a little out of the ordinary!
- A Nod to Wellness: For many, these designs are a subtle and stylish way to show appreciation for healthy eating and a vibrant lifestyle.
Essential Tools for Your Superfood Nail Art Kit
You don’t need a professional kit to create amazing superfood nail designs. Here are some essential, beginner-friendly tools that will make your nail art journey a breeze:
- Base Coat: This is your foundation! It protects your natural nails from staining and helps your polish adhere better. A good quality base coat is crucial for a long-lasting manicure. You can find excellent options from brands like OPI or Essie. For more information on nail health and care, the American Academy of Dermatology offers great advice.
- Top Coat: Think of this as the protective sealant for your masterpiece. It adds shine, prevents chips, and extends the life of your design.
- Nail Polish in Various Colors: This is where the fun begins! You’ll want a palette that can represent your superfoods. Think greens, yellows, reds, blues, oranges, and pinks. Even a simple collection from brands like Sally Hansen or Wet n Wild can get you started.
- Dotting Tools: These are a nail artist’s best friend for beginners. They come in various sizes and are perfect for creating dots, small circles, and even simple flower petals. You can find affordable sets online or at most beauty supply stores.
- Thin Nail Art Brush: A fine-tipped brush is great for drawing thin lines, outlines, or adding small details. Look for synthetic bristles.
- Toothpick or Orange Stick: Don’t underestimate these! A toothpick can be used to create tiny dots, swirl colors, or clean up edges. Orange sticks are gentler for cuticle work and can also be used for applying small amounts of polish or glitter.
- Pillow or Paper Towel: For resting your hands and catching any stray drips.
- Nail Polish Remover and Cotton Swabs: For cleaning up mistakes. Cotton swabs, especially tapered ones, are excellent for precise cleanup around the nail edge.
Effortless Superfood Nail Design Ideas for Beginners
Ready to get your hands (and nails!) dirty? Try these super simple, super chic designs that are perfect for anyone new to nail art.
1. The “Berry Bliss” (Strawberry & Blueberry) Design
This design is all about sweet, juicy fruits!
What you’ll need:
- Red nail polish
- Light pink or white nail polish
- Green nail polish
- Black nail polish
- Toothpick or dotting tool
- Thin nail art brush
Easy Steps:
- Prep your nails: Apply a base coat and let it dry completely.
- Strawberry Fun: Paint your chosen accent nails (e.g., ring finger) with red nail polish. Let it dry. Then, using a toothpick or small brush, add a few tiny white seeds. For the tip of the strawberry, dab a little light pink or white polish to create a rounded shape.
- Blueberry Dots: On your other nails, paint them with blue nail polish. Once dry, use a toothpick or the smallest end of a dotting tool to create a few small black dots for a speckled effect, mimicking blueberries.
- Stem Detail (Optional): For the strawberries, use a thin brush and green nail polish to paint a small, leafy stem at the top.
- Seal the Deal: Apply a top coat to all nails and let them dry.
2. The “Citrus Zest” (Lemon & Lime) Design
Bright, cheerful, and incredibly easy, this design channels sunny vibes.
What you’ll need:
- Bright yellow nail polish
- Lime green nail polish
- White nail polish
- Black or dark green nail polish
- Toothpick or dotting tool
- Thin nail art brush
Easy Steps:
- Prep: Base coat, always!
- Lemon Wedge: Paint your nails a vibrant yellow. For an accent, let one or two nails dry, then use a thin brush to paint a white curve on one side of the nail. Then, use black or dark green polish to draw thin lines radiating from the white curve to create a segmented look. Alternatively, paint a simple yellow oval on a contrasting base color like white.
- Lime Slice: Use lime green polish on alternate nails. You can either paint the entire nail green or create simple circles with a dotting tool. To mimic the segments, use a toothpick to draw a few thin lines radiating from the center of the green circles.
- Finishing Touch: Apply your trusty top coat.
3. The “Avocado Love” Simple Design
This design is all about chunky, creamy goodness!
What you’ll need:
- Avocado green nail polish
- A lighter green or beige nail polish
- Brown or dark brown nail polish
- Black nail polish
- Dotting tool or toothpick
Easy Steps:
- Start Strong: Base coat is your friend.
- The Avocado Slice: Paint your nails a medium avocado green. Once dry, use your dotting tool or toothpick to dab a slightly lighter green or beige polish in a semi-circle at the base or side of the nail to represent the creamy flesh.
- The Pit: Using brown or dark brown polish, place a larger dot in the center of the lighter green section to mimic the pit.
- Clean Up: If the pit isn’t perfectly round, you can use a tiny bit of black polish to carefully define its edges.
- Seal: Apply a top coat for shine and protection.
4. The “Tropical Punch” (Pineapple & Kiwi) Simple Design
Fresh, vibrant, and bringing vacation vibes to your fingertips!
What you’ll need:
- Yellow nail polish
- Light brown or beige nail polish
- Green nail polish
- Black nail polish
- Dotting tool or toothpick
- Thin nail art brush
Easy Steps:
- Base Prep: Apply your base coat and let it dry.
- Pineapple Power: Paint your nails bright yellow. Let it dry. Then, using a thin brush and light brown or beige polish, paint a few faint, slightly curved vertical lines to give the pineapple texture. You can also add a small triangle at the top with green polish for a stem.
- Kiwi Slices: Paint your nails green. Once dry, use a dotting tool with black polish to create small, scattered dots in a ring to represent kiwi seeds. You can also use a toothpick to draw thin, radiating lines from the center for a slice effect.
- Final Seal: A good top coat will make these tropical beauties shine!
Beyond the Basics: Elevating Your Superfood Designs
Once you’re comfortable with the simple shapes, you can start adding little twists to make your superfood nail designs even more special.
Adding Texture and Detail
Subtle Shading: For fruits like strawberries or raspberries, you can add a touch of darker red polish to the base of the fruit shape to give it a little more depth, then blend softly with a toothpick. For citrus, a lighter yellow highlight can make it pop.
Outline Magic: Use a fine-tipped black or white nail art brush to outline your painted fruit shapes. This simple step can make your designs look much more polished and defined.
Seed Play: Instead of just dots, try using a very fine brush to draw tiny ‘x’ marks or even small, irregular shapes for seeds in berries or fruits like papaya.
Incorporating Other Elements
Leafy Accents: For fruit designs, a small, simple leaf painted with green polish can add a touch of realism and elegance.
Glitter Touches: A fine iridescent or gold glitter polish can be used sparingly to add a touch of sparkle, mimicking dewdrops or just for a bit of glam.
Abstract Swirls: Combine the colors of different superfoods (e.g., green and yellow) and use a toothpick to create gentle swirls for a more abstract, modern look.
Color Palettes Inspired by Superfoods
Getting your color palette right is key to making your superfood nail designs look authentic and appealing. Here’s a quick guide:
| Superfood | Primary Colors | Accent Colors | Design Ideas |
|---|---|---|---|
| Berries (Strawberry, Raspberry, Blueberry) | Rich Reds, Bright Pinks, Deep Blues, Purples | White (seeds), Black (seeds/outlines), Green (stems) | Dotted patterns, Simple fruit shapes, Speckled effects |
| Citrus (Lemon, Lime, Orange) | Bright Yellows, Lime Greens, Oranges | White (segments/highlights), Black (outlines/seeds), Dark Green (lime speckles) | Wedge shapes, Slice patterns, Color blocking |
| Tropical Fruits (Pineapple, Kiwi, Mango) | Golden Yellows, Oranges, Greens, Tan/Beige | Brown (texture), Black (seeds), White (highlights) | Textured lines, Seed patterns, Abstract color blends |
| Greens (Kale, Spinach, Avocado) | Various Greens (deep, vibrant, muted), Light Beige | Brown (avocado pit), Black (pit details), White (creamy texture) | Smooth base colors, Textured lines, Simple pit shapes |
| Other Fruits (Watermelon, Grapes) | Reds, Pinks, Greens, Purples | Black (seeds), White (rind), Darker shades for depth | Rind details, Seed dots, Ombre effects |
Tips for Long-Lasting Superfood Nail Designs
Even the simplest design looks best when it lasts! Here’s how to keep your superfood creations for as long as possible:
- Proper Nail Prep: Always start with clean, dry nails. Push back your cuticles gently and buff your nails slightly to create a smooth surface for polish adhesion.
- The Power of Base Coat: Never skip the base coat. It’s essential for preventing staining, especially with vibrant polishes, and provides a good grip for your color.
- Thin Coats are Key: Apply your nail polish in thin, even coats rather than one thick one. Two to three thin coats will dry faster and be less prone to chipping than a single thick coat.
- Cure Between Coats: Allow each layer of polish (base coat, color coats, art details, top coat) to dry mostly before applying the next. Patience is a virtue in nail art!
- Seal with Top Coat: Apply a generous layer of good-quality top coat. Ensure you cap the free edge of your nail – meaning, sweep the brush horizontally along the very tip of your nail. This prevents polish from lifting.
- Reapply Top Coat: If you notice your top coat starting to lose its shine or if you want to extend the life of your design by a few days, apply another layer of top coat mid-week.
- Be Gentle: Avoid using your nails as tools for scraping or prying. This is a quick way to chip or ruin your beautiful artwork.
- Moisturize: Keep your hands and cuticles moisturized. Healthy cuticles contribute to the overall appearance and longevity of your manicure. A good cuticle oil, like those from CND or OPI, can work wonders. While not directly for the polish, it keeps the surrounding skin looking neat, which enhances the nail design.
Troubleshooting Common Nail Art Issues
Even with the easiest designs, sometimes things don’t go perfectly. Don’t worry, these simple fixes can save your manicure:
- Smudged Polish: If you smudge a wet design, gently dab it back into place with a clean brush or toothpick. If it’s a bit too messy, use nail polish remover on a fine-tipped cotton swab to clean up the immediate area and carefully reapply the affected polish.
- Bumpy Texture: This usually happens from applying thick coats or not letting layers dry. If caught early, you might be able to smooth it slightly with the wet polish or a clean brush. If it’s dried, you might need to gently buff it down or, as a last resort, remove and redo.
- Uneven Lines: For lines that aren’t straight, don’t despair! You can often clean them up with a small brush dipped in nail polish remover. For straight lines, consider using nail stamping plates or striping tape for perfectly crisp results in the future (though these designs are meant to be effortless!).
- Polish Staining: If your nails have yellowed from colorful polishes and your base coat wasn’t enough, a nail whitening treatment or even a gentle buffing can help. Always double-check that your base coat is fully dry before applying color.
- Designs Not Sticking: Ensure your nail surface is clean and dry, and that you’re using a quality base coat. If you’re adding glitter or small nail art elements, ensure they’re applied to tacky (not fully dry) polish for better adhesion.

