Quick Summary: Learn how to create beautiful sunrise nail designs with easy, step-by-step tutorials! These simple yet stunning manicures blend warm colors to capture the magic of a new day, perfect for adding a touch of effortless beauty to your look. Get ready for a radiant glow on your fingertips!
Does the idea of a vibrant sunrise painted on your nails make you feel instantly happy? Maybe you’ve seen those gorgeous gradient manicures and thought, “I could never do that!” It’s true, sometimes nail art can look complicated, especially when you’re just starting out. But guess what? Achieving that beautiful sunrise effect is much easier than you think! We’re going to break it all down, step-by-step, so you can bring the warmth and color of a sunrise right to your fingertips. Get ready to glow!
Why Sunrise Nails Are Your Next Go-To Manicure
Sunrise nail designs are incredibly versatile and endlessly cheerful. They capture the stunning transition of colors as the sun peeks over the horizon – think soft yellows melting into vibrant oranges, fiery reds, and even hints of pink or gentle purple. It’s like bottling up that hopeful, beautiful moment of a new day and wearing it as nail art!
Here’s why these designs are perfect for everyone, especially beginners:
- Effortless Beauty: The blended colors naturally create a soft, gradient effect that looks polished and professional, even with imperfect lines.
- Color Versatility: You can play with the color palette to match your mood or any outfit. Go bold with fiery tones or soft with pastels!
- Mood Booster: The cheerful colors are like a mini dose of sunshine every time you look at your hands.
- Achievable for Beginners: With a few simple tools and techniques, you can create stunning results without needing advanced artistic skills.
- On-Trend: Gradient and sunset-inspired nails have been a popular nail trend for a while, and they never truly go out of style.
The Essential Tools for Your Sunrise Manicure
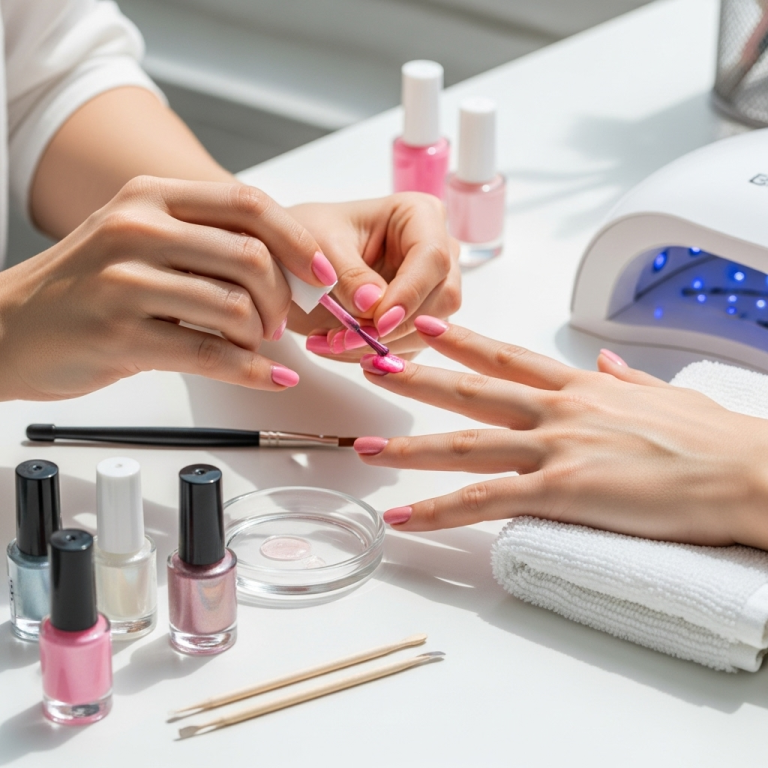
Before we dive into the fun part, let’s gather what you’ll need. Don’t worry; you probably have a lot of these items already! If not, they are easy to find at your local drugstore or beauty supply store.
Nail Polish Essentials:
- Base Coat: This protects your natural nails from staining and helps your polish adhere better. A good quality base coat is crucial for a long-lasting manicure.
- Top Coat: This seals your design, adds shine, and prevents chipping. Think of it as the protective shield for your beautiful art!
- Nail Polish Colors: This is where the sunrise magic happens! You’ll want a few colors that blend well together. Common choices include:
- A soft yellow (like a creamy pale yellow or a bright lemon)
- A vibrant orange (from peachy to a fiery tangerine)
- A warm pink or coral
- A deep red or even a touch of purple for the deeper sky effect
- White polish (great for blending and lightening colors)
Application Tools:
- Makeup Sponges: These are your secret weapon for creating a seamless gradient! Cosmetic wedges work best for this.
- Small Mixing Palette or Piece of Foil: For placing and mixing your polish colors before applying them to the sponge.
- Clean-up Brush or Cotton Swabs: For tidying up any polish that gets on your skin. An old, fine-tipped makeup brush works perfectly.
- Nail Polish Remover: To clean up the edges and tidy up your cuticles.
- Optional: Dotting Tool or Toothpick: For adding tiny details like sparkles or stars if you want to elevate your design.
Having the right tools makes the process so much smoother and the results so much better. It’s like having the right paintbrush for a painting!
Step-by-Step: Creating Your Sunrise Nail Design
Ready to bring the dawn to your nails? Follow these simple steps. We’re focusing on the sponge gradient technique, which is beginner-friendly and yields gorgeous results.
Step 1: Prepare Your Nails
Start with clean, dry nails. Push back your cuticles gently using an orangewood stick or a cuticle pusher. If you have any old polish on, remove it completely. You can also buff your nails lightly to create a smooth surface for the polish to adhere to. Always finish with a good base coat and let it dry completely.
Step 2: Map Out Your Colors
Think about the colors of a real sunrise. Often, it starts with a lighter shade at the horizon (which will be your nail tip or cuticle area) and gets darker or more intense as it moves up. For a classic sunrise, you might think:
- Yellow near the cuticle
- Orange in the middle
- Pink or red at the tip
Alternatively, you can think of the sun itself: a bright yellow circle on a pink or orange sky.
Step 3: Prepare Your Sponge
Cut a makeup sponge into small sections, about 1-2 inches square. You want a piece small enough to handle easily but large enough to get a few color stripes on. It’s a good idea to lightly dampen the sponge with water and squeeze out the excess – this helps the polish “stick” to the sponge rather than soak in too much, leading to a smoother blend.
Step 4: Apply Polish to the Sponge
On your foil or palette, apply stripes of your chosen nail polish colors, right next to each other. Don’t be shy with the polish – you need enough to transfer smoothly to your nail. For our example, let’s lay down a stripe of yellow, then an orange stripe next to it, and finally a pink stripe next to the orange. Make sure the colors are touching.
Here’s a visual guide to how your palette might look:
| Color 1 (Yellow) | Color 2 (Orange) | Color 3 (Pink) |
|---|---|---|
 |
 |
 |
(Note: Actual images of polish stripes would greatly enhance this section.)
Step 5: Dab Onto the Nail
Gently but firmly, dab the sponge onto your nail. Start at the cuticle (or whichever color you want there) and rock the sponge up and down slightly as you press it onto the nail. This helps blend the colors together seamlessly. You might need to re-apply polish to your sponge and dab a second or even third time to build up the color intensity and achieve a smooth gradient. For the best blend, press the sponge onto a clean section of your palette first to further meld the colors before hitting your nail.
Step 6: Repeat for More Intensity
If the colors aren’t vibrant enough or the blend isn’t quite right after the first dab, repeat! Reload your sponge with fresh color stripes and gently dab over the previous application. You can also press the sponge onto the palette again to ensure the colors are well-mixed before your final dabs on the nail. This layering is key to achieving depth and vibrancy.
Step 7: Clean Up the Edges
This is where your clean-up brush or cotton swab comes in handy. Dip your brush or swab into nail polish remover and carefully swipe away any polish that has gotten onto your skin or cuticles. This step makes a HUGE difference in how professional your manicure looks!
Step 8: Add a Top Coat
Once you’re happy with the gradient and your nails are dry, apply a generous layer of top coat. This will seal the design, smooth out any texture from the sponge, and give your nails a beautiful, glossy finish. A good top coat is essential for making your sunrise nails last longer and shine brighter.
Step 9: (Optional) Add Sparkle!
Want to add a little extra magic? Before the top coat fully dries, you can use a dotting tool or a toothpick to add tiny white dots for stars, or a few specks of glitter polish to mimic the sparkle of the morning sky. This is where you can truly personalize your design!
Alternative Sunrise Nail Techniques
While the sponge gradient is fantastic for beginners, there are other ways to achieve a sunrise effect. These might require a little more practice, but they offer different looks.
The Brush-Stroked Gradient
This method uses a regular nail polish brush to create the blend directly on the nail or on a separate surface.
- Apply your base coat and let it dry.
- Paint thin stripes of your chosen colors onto a clean, flat surface (like a silicone mat or piece of foil).
- Using a clean, dry nail brush, gently sweep across the stripes to blend them together.
- Quickly pick up the blended colors with your brush and apply to the nail by dabbing or gently sweeping.
- Clean up edges and add top coat.
This technique requires speed as nail polish dries quickly!
The Stamping Method
For those who love intricate designs, stamping can be a great option.
- Apply your base coat and a solid color polish (like white or nude) as a base.
- Use a stamping plate with a gradient or sky pattern.
- Apply one of your sunrise colors to the plate, scrape off excess, and stamp onto your nail using a stamper.
- Repeat with other colors, layering carefully or using different plates.
- Clean up and add top coat.
This method requires specific stamping tools but can create very precise results.
The Freehand Approach
If you have a steady hand, you can paint the colors on freehand.
- Apply base coat.
- Paint a stripe of your first color (e.g., yellow) on the nail.
- While the yellow is still wet, paint a stripe of the next color (e.g., orange) overlapping the yellow slightly.
- Continue with pink/red, overlapping the orange.
- Use a clean, slightly damp brush to gently blend the edges where the colors meet.
- Let dry, clean up edges, and apply top coat.
This requires patience and practice to get smooth blends.
Tips for Long-Lasting Sunrise Nails
You’ve worked hard to create these beautiful sunrise nails, so let’s make them last!
- Always Use a Good Base and Top Coat: We can’t stress this enough. They are the foundation and the finish that protect your manicure.
- Cap Your Free Edge: When applying your top coat, run the brush along the very tip (the free edge) of your nail. This seals the polish and prevents chipping from the edges.
- Avoid Harsh Chemicals: Try to wear gloves when doing household chores, especially when using cleaning products. These can break down nail polish.
- Moisturize: Keep your hands and cuticles moisturized. Dry cuticles can lead to hangnails and can make your manicure look less neat around the edges. Use cuticle oil daily.
- Be Gentle: Avoid using your nails as tools to open things or scrape surfaces.
Color Combinations to Inspire Your Sunrise
The beauty of sunrise nails is the endless color possibilities. Here are some combinations to get your creativity flowing:
| Sunrise Vibe | Color Palette Suggestions | Best For |
|---|---|---|
| Classic Dawn | Pale yellow, soft orange, coral pink | Everyday wear, soft and pretty look |
| Fiery Sunset | Bright yellow, vibrant orange, hot pink, deep red | Bold statement, evening events |
| Misty Morning | Creamy white, very pale yellow, light lavender, soft blue | Subtle, chic, and unique |
| Tropical Sunrise | Peach, mango orange, hot pink, a touch of turquoise | Fun and vibrant, vacation vibes |
| Golden Hour | Shimmery gold, soft peach, rose gold | Elegant and glamorous |
Experimenting with different shades will give you unique looks every time. Don’t be afraid to mix and match!
Frequently Asked Questions About Sunrise Nail Designs
Q1: How do I get the colors to blend smoothly on my nails?
A: The key is layering and using a makeup sponge. Apply your colors in stripes onto the sponge, then dab onto your nail. You may need to reapply polish to the sponge and dab again to build up the color and blend.
Q2: My sponge absorbed too much polish. What did I do wrong?
A: Try dampening your sponge slightly with water and squeezing out the excess before applying polish. This helps prevent too much polish from being absorbed, allowing more to transfer to your nail.
Q3: Can I use any kind of sponge?
A: Makeup wedges are ideal because they have a fine texture. Larger kitchen sponges can work but might create a chunkier effect. You can also try cosmetic puffs.
Q4: How long does a sponge gradient manicure typically last?
A: With good preparation (base coat), careful application, and a quality top coat, your sunrise nails can last anywhere from 5-7 days without chipping.
Q5: What if I don’t have all the specific colors for a sunrise?
A: Get creative! You can mix colors to achieve your desired shades. For example, mixing yellow and red creates orange. A little bit of white can also lighten colors to create softer hues.
Q6: How do I clean up the polish on my skin effectively without ruining the design?
A: Use a small, fine-tipped brush (an old eyeliner or concealer brush works well!) dipped in nail polish remover. Carefully trace around your cuticle line to remove excess polish. A Q-tip can also work, but a brush offers more precision.
Q7: Can I add glitter to my sunrise nails?
A: Absolutely! Glitter is a wonderful addition. You can apply a glitter polish over the entire design, or use a fine glitter polish with a dotting tool before your final top coat to add stars or a subtle shimmer.
Conclusion: Your Canvas Awaits!
See? Creating beautiful sunrise nail designs is totally achievable, even if you’re new to nail art. You have the tools, you have the techniques, and you have the inspiration! The beauty of this manicure lies in its forgiving nature and stunning visual impact. Whether you opt for a classic blend of yellow, orange, and pink, or experiment with cool-toned mornings, your nails will look like a work of art.
Remember, the most important part is to have fun and express yourself. Don’t aim for perfection on your first try; just enjoy the process of blending colors and seeing the magic happen on your fingertips. Grab your polishes, find your sponge, and let the warm, glowing colors of the sunrise bring some effortless beauty to your day. Happy painting!

