Sunflower nail designs are a cheerful and stylish way to brighten your look! These easy-to-follow ideas and tips will help you create stunning sunflower manicures, perfect for beginners and seasoned nail art lovers alike.
Love the idea of sunny, happy vibes on your fingertips but feel a little intimidated by nail art? You’re not alone! Creating beautiful sunflower nails can seem tricky, but with a few simple tricks and the right inspiration, you’ll be painting petals like a pro in no time. Get ready to turn your nails into a blooming garden of sunshine!
This guide is packed with stunning sunflower nail design ideas, easy step-by-step instructions, and essential tips to make your manicure shine. We’ll cover everything from minimalist blooms to eye-catching accents, ensuring you can find the perfect look to express your style. Let’s dive into the wonderful world of sunflower nails!
Why We Love Sunflower Nails
Sunflowers are more than just pretty flowers; they’re symbols of positivity, happiness, and warmth. They bring a burst of sunshine to any day, and bringing that feeling to your nails is an instant mood booster. Whether you’re heading to a summer picnic, a festive gathering, or just want to add a touch of cheer to your everyday routine, sunflower nail designs are a fantastic choice.
They’re versatile too! You can go for a bold, full-nail design, or opt for delicate accents that hint at the beauty of these golden blooms. Plus, the color palette is rich with possibilities – think vibrant yellows, earthy browns, lush greens, and even soft, muted tones for a more sophisticated take.
Essential Tools for Your Sunflower Nail Art
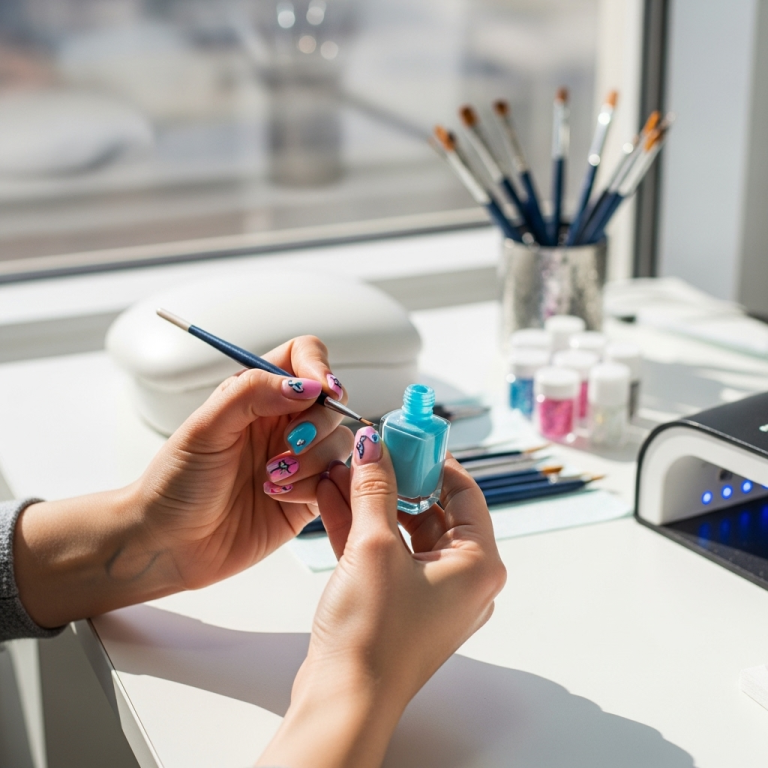
Before we get our hands (and nails!) dirty with creativity, let’s gather our toolkit. You don’t need a professional salon full of gadgets to create beautiful sunflower nails. Here are some beginner-friendly essentials:
- Base Coat: Protects your natural nails and helps polish adhere better.
- Top Coat: Seals your design and adds a glossy finish for lasting wear.
- Yellow Nail Polish: Your primary color for sunflower petals.
- Brown or Black Nail Polish: For the center of the sunflower.
- Green Nail Polish: For leaves and stems (optional).
- Thin Nail Art Brush (Liner Brush): Perfect for drawing details like petals, stems, and outlines. A size 0 or 00 is great for beginners.
- Dotting Tools: These have small metal balls at the tip and are excellent for creating perfect circles for the sunflower center or adding small details.
- Orange Stick or Cuticle Pusher: For cleaning up polish mistakes.
- Nail Polish Remover: Essential for corrections!
- Cotton Balls or Pads: To apply remover.
- Optional: Glitter polish, rhinestones, or accent stickers for extra sparkle.
Sunflower Nail Design Ideas for Every Style
Ready for some inspiration? Here are some of our favorite ways to rock sunflower nail designs, from simple to spectacular!
1. The Classic Sunflower Accent
This is a fantastic starting point for beginners. It’s all about one perfect sunflower on an accent nail!
How-To Steps:
- Prep: Apply a base coat to clean, dry nails.
- Color: Paint your accent nail (usually the ring finger) with a nice, opaque yellow polish. For the other nails, choose a complementary color like a soft green, a neutral beige, or a clean white. Let dry completely.
- Center: Using a dotting tool or the tip of your brown/black polish brush, create a small circle in the middle of your yellow nail. This is the sunflower’s center.
- Petals: With your thin nail art brush and yellow polish, carefully paint petal shapes radiating outwards from the center circle. Think of simple teardrop shapes or slightly curved strokes. Start with a few and add more as you go around. You can also use a slightly darker yellow or even a hint of subtle orange for depth within the petals.
- Details (Optional): With a darker shade of brown or a touch of black on your liner brush, add a few small dots within the brown center or a thin outline around the petals for definition.
- Seal: Once completely dry, apply a generous layer of top coat to all your nails to protect your artwork and give it a beautiful shine.
2. Minimalist Sunflower Outline
Love the sunflower aesthetic but prefer a more subtle look? This design uses fine lines for an elegant touch.
How-To Steps:
- Prep & Base: Apply base coat. Paint all nails in your desired base color – think nude, white, light grey, or even a soft pastel blue.
- Draw the Sunflower: Using a very fine liner brush and brown or black polish, draw a simple circle in the center of your accent nail.
- Outline Petals: With the same brush and yellow polish, draw thin, curved lines extending from the brown circle to create the outer edge of petals. Don’t worry about perfection; a slightly imperfect, hand-drawn look is part of the charm!
- Add a Stem (Optional): Use a thin green line to draw a delicate stem curving downwards.
- Seal: Finish with a clear top coat.
3. Full Bloom French Tips
A fun twist on the classic French manicure, where sunflowers bloom at the tips!
How-To Steps:
- Base: Apply base coat and your preferred nude or sheer pink polish to all nails. Let dry.
- Create the French Tip: Paint a standard French tip line using a bright yellow polish.
- Sunflower Centers: On the yellow tip, use your dotting tool or brush to add small brown or black dots where the petals will start.
- Petals: With a fine liner brush and yellow polish, carefully paint small, rounded petals along the edge of the yellow tip, connecting them to the brown centers.
- Leafy Accents (Optional): Add a small green leaf shape on the nail bed just below the yellow tip on one or two nails.
- Top Coat: Seal with a durable top coat.
4. Scattered Sunshine
This design is playful and perfect for a casual, cheerful vibe. Small sunflowers scattered across the nails.
How-To Steps:
- Base: Prep nails and apply a light, summery base color like sky blue, mint green, or a pale peach.
- Sunflower Centers: Using a small dotting tool, place scattered brown or black dots all over your nails. These will be the centers of your sunflowers.
- Petals: Take your fine liner brush and yellow polish. For each brown dot, paint a few small, curved yellow petals radiating outwards. Aim for a cluster of 5-7 petals per center.
- More Details (Optional): You can add tiny green leaves near some of the sunflowers, or even a super fine outline around some petals.
- Shine On: Apply your favorite top coat.
5. Gradient Petals
For those who want to add a bit more depth and dimension to their sunflowers, this gradient effect is stunning.
How-To Steps:
- Base: Apply base coat and your chosen base polish.
- Sunflower Centers: Create bold brown or black centers on your accent nails using a dotting tool.
- Layered Petals: Using your liner brush, start painting petals with a bright yellow polish. While the yellow is still wet (or after a quick dry depending on your polish formula), lightly dab a slightly deeper yellow or even a touch of orange near the base of the petals, blending it slightly upwards. This creates a sun-kissed, gradient effect.
- Definition: Once dry, you can use a fine black or dark brown line to add a subtle outline to some petals if desired.
- Seal: Finish with a long-lasting top coat.
6. Sunflower & Polka Dot Combo
A classic pairing that’s always a winner! This combines the fun of polka dots with cheerful sunflowers.
How-To Steps:
- Base: Apply base coat and a lovely light color, perhaps a pastel yellow or creamy white.
- Polka Dots: Using a dotting tool or the end of a pencil eraser dipped in a contrasting color (like navy blue, pink, or even black and white), create polka dots evenly across your nails.
- Accent Nail Sunflower: On one or two nails, paint a solid yellow base. Let it dry.
- Center & Petals: Add a brown center and yellow petals as described in the “Classic Sunflower Accent” tutorial.
- Tie it Together: You can add tiny flower centers or dots within the sunflower petals for extra detail, or even add a hint of green stem and leaf to your accent nail.
- Final Polish: Apply a protective top coat.
7. Muted & Chic Sunflowers
Who says sunflowers have to be bright? This design uses softer, more sophisticated tones.
How-To Steps:
- Base: Start with a base coat and a muted base color such as dusty rose, sage green, or a soft grey.
- Sunflowers in Soft Tones: For the sunflower, use a muted mustard yellow or a pale ochre for petals, and a deep taupe or charcoal grey for the center.
- Delicate Lines: Use a fine liner brush to create simple petal shapes. Keep the lines thin and the colors subtle.
- Subtle Accents: Instead of bright green, use a desaturated olive or moss green for any added leaves or stems.
- Finish: A matte top coat can enhance the sophisticated, muted look, or a glossy top coat for a classic finish.
Tips and Tricks for Perfect Sunflower Nails
Even with the best intentions and tutorials, nail art can sometimes be a little… unpredictable! Here are some pro tips to help your sunflower masterpieces turn out beautifully every time:
- Patience is Key: Allow each layer of polish to dry completely before moving on to the next step. This prevents smudging and makes the process much smoother.
- Less is More with Polish: Don’t overload your brush. A little polish goes a long way, especially with fine details. Wipe off excess on the edge of the bottle.
- Practice Your Strokes: If you’re new to nail art brushes, practice drawing lines and shapes on a piece of paper or a nail file first. This helps you get a feel for the pressure and control needed.
- Embrace Imperfection: Especially for beginner designs, a slightly wonky petal or an uneven line adds character! It shows your design is handmade and unique.
- Use a Clean-Up Brush: Keep a small brush (like an old, clean makeup brush or a dedicated nail art brush) dedicated to clean-up. Dip it in nail polish remover and gently swipe away any stray polish around your cuticle or sidewalls.
- Two Coats for Opaque Color: For vibrant yellows and browns, applying two thin coats of polish will give you a richer, more opaque finish than one thick coat.
- Consider Your Nail Shape: Long, almond-shaped nails are great for larger, intricate designs, while shorter, squarer nails might look best with smaller, scattered motifs or simple accent nails.
Popular Color Combinations for Sunflower Nails
While classic yellow and brown are iconic, sunflowers offer a surprising range of color palette possibilities. Here are some ideas to inspire you:
| Sunflower Element | Classic & Sunny | Modern & Chic | Boho & Earthy | Playful & Bright |
|---|---|---|---|---|
| Petals | Bright Yellow | Mustard Yellow, Pale Gold, Cream | Burnt Orange, Soft Peach, Ochre | Sunshine Yellow, Lemon Zest |
| Center | Chocolate Brown, Black | Taupe, Deep Grey, Dark Teal | Terracotta, Dark Olive | Deep Brown, Burgundy |
| Background/Base | White, Creamy Beige | Soft Grey, Dusty Rose, Sage Green | Earthy Brown, Deep Teal, Olive Green | Sky Blue, Mint Green, Pastel Pink |
| Accents (Leaves/Stems) | Leaf Green | Olive Green, Forest Green | Moss Green, Deep Jade | Emerald Green, Bright Lime |
Sunflower Nail Care Tips
To keep your beautiful sunflower nails looking their best, a little care goes a long way:
- Moisturize: Regularly apply cuticle oil and hand lotion to keep your nails and skin healthy and prevent dryness, which can cause polish to chip.
- Protect Your Polish: Wear gloves when doing household chores, especially washing dishes or cleaning. The harsh chemicals and prolonged water exposure can damage your manicure.
- Avoid Using Nails as Tools: Resist the urge to pry, scrape, or pick at things with your nails. This is a sure way to cause chips and breaks.
- Reapply Top Coat: For extra longevity, you can apply a fresh layer of top coat every few days, especially to the free edge of your nails.
- Gentle Removal: When it’s time to remove your polish, use an acetone-free remover to be gentler on your nails and cuticles. Soak a cotton pad, press it onto your nail for a minute, then gently wipe off.
Sunflower Nail Art and Durability
The durability of your sunflower nail designs largely depends on the quality of the products you use and how well you care for them. A good quality base coat and a strong, chip-resistant top coat are your best allies. Applying your top coat in thin, even layers, ensuring you cap the free edge of your nails (painting a thin line along the very tip), is crucial for sealing the design and preventing chips.
For painted nail art, especially with fine details, it’s essential to let each layer dry completely. Rushing this can lead to smudging, which compromises the design and its longevity. If you find your nail art is chipping within a day or two, consider investing in a higher-quality top coat or a gel top coat if you’re using gel polish. Proper nail preparation, including ensuring your nails are free of oils and dust, also plays a significant role in how long your manicure lasts. For more in-depth information on nail health and maintenance, you can always refer to resources like those provided by the American Academy of Dermatology Association for healthy skin, hair, and nails.
Frequently Asked Questions about Sunflower Nail Designs
Q1: Are sunflower nail designs hard to do for beginners?
Not at all! Many sunflower designs, like the classic accent nail or the minimalist outline, are very beginner-friendly. We’ve focused on simple techniques that are easy to master.
Q2: What colors work best for sunflower nail designs?
Classic yellow for petals and brown or black for the center are iconic. However, you can get creative with mustard yellows, oranges, peaches for petals, and various shades of brown, green, and even deep blues for the center and background.
Q3: How do I make my painted sunflower petals look realistic?
For more realistic petals, try layering colors (a lighter shade on top of a darker one), adding subtle shading with a darker color near the center, or using a fine brush to add vein-like details. Don’t be afraid to vary the shape and size of your petals.
Q4: Can I do sunflower nail art without special nail art brushes?
Yes! You can use the tip of a toothpick for small dots, a fine-tipped eyeliner brush (thoroughly cleaned) for lines, or even the edge of your regular polish bottle for some strokes. Dotting tools are relatively inexpensive and very helpful, though!
Q5: How long do DIY sunflower nail designs typically last?
With good preparation, quality polish, and a strong top coat, most painted nail art designs can last anywhere from 5-10 days before you start seeing minor wear and tear. Proper care, like wearing gloves for chores, extends this significantly.
Q6: Can I combine sunflowers with other nail art elements?
Absolutely! Sunflowers pair beautifully with simple polka dots, stripes, glitter, leaves, vines, or even other floral elements. Get creative and mix and match!
Q7: What kind of nails are best for sunflower designs?
Sunflower designs look fantastic on all nail shapes and lengths! Whether you have short, natural nails or long, sculpted ones, you can adapt these designs. Shorter nails might look best with smaller, scattered flowers, while longer nails can accommodate larger, more detailed blooms.

