Make a vibrant splash this summer with neon French nails! Master essential styles and simple application tips to achieve dazzling, eye-catching manicures that pop. Perfect for beginners, these bright and bold looks will elevate your summer style effortlessly.
Get ready to shine bright! Summer is the perfect season to experiment with bold, playful nail designs, and nothing says summer quite like neon French tips. These vibrant pops of color on the classic French manicure base are a fantastic way to express your personality and embrace the sunny vibes. If you’ve ever admired those electric, in-your-face neon looks but felt they were too complicated to try yourself, don’t worry! We’re going to break down everything you need to know, from the easiest styles for beginners to a few simple tricks that make the process totally doable. Let’s dive into the dazzling world of summer neon French nails and get your fingertips ready for sunshine!
Why Neon French Nails Are Your Summer Must-Have
Neon colors are back and brighter than ever, and they’re the ultimate way to inject some fun and energy into your look. The French manicure, a timeless classic, gets a supercharged update with these electric hues. Think of it as your favorite sophisticated style given a playful, summery makeover. Neon French tips are:
Eye-Catching: They instantly grab attention and add a pop of playful confidence to any outfit.
Seasonally Appropriate: Their brightness perfectly complements summer fashion, beach days, and outdoor parties.
Versatile: While bold, they can surprisingly go with a wide range of summer wardrobes, from casual shorts to chic dresses.
Fun! It’s a mood booster for your fingertips, and who doesn’t love that?
Essential Neon French Nail Styles for Every Beginner
Ready to get creative? Here are some of the most popular and easy-to-achieve neon French nail styles that are perfect for beginners. We’ll cover the classic approach and a few fun variations.
1. The Classic Neon Tip
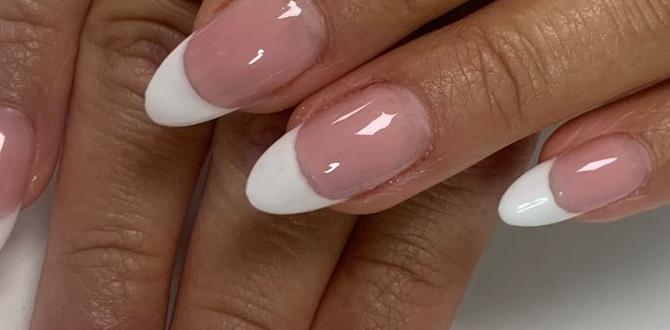
This is the foundational style and your perfect starting point. It’s a simple twist on the traditional French manicure, where the white tip is replaced with a vibrant neon shade.
How to Achieve It:
1. Prep Your Nails: Start with clean, shaped nails. File them to your desired shape (squoval, round, or almond are lovely). Push back your cuticles gently.
2. Base Coat: Apply a clear or nude-toned base coat. This protects your natural nail and provides a smooth canvas.
3. Apply Color: Paint your nails with your chosen nude or sheer pink polish. Let it dry completely.
4. Create the Tip: This is where the neon magic happens! You have a few options for getting a crisp line:
Freehand: Use a thin nail art brush dipped in your neon polish to carefully paint a curve along the free edge of your nail. This takes practice, but can be very rewarding.
Stencils/Strips: Use French tip guide stickers or nail tape. Apply the sticker just where you want the neon color to stop, paint over the tip, and carefully peel off the sticker while the polish is still slightly wet.
Stamping: Use a neon polish and a French tip stamper or stamping plate. This is a great way to get perfectly uniform tips.
5. Top Coat: Once the neon tips are dry, apply a generous layer of clear top coat to seal the design and add shine.
Beginner Tip: Don’t aim for perfection on your first try! Embrace the charm of slightly imperfect tips – they add character. Some nail art brushes are specifically designed for French tips, making the freehand approach much easier.
2. The Dual-Tone Neon Tip
Why settle for one neon when you can have two? This style combines two complementary or contrasting neon shades for an even more dynamic look.
How to Achieve It:
1. Prep and Base: Follow steps 1-3 from ‘The Classic Neon Tip’ (clean nails, base coat, nude/pink polish).
2. First Neon Layer: Apply your first neon color to the tips using your preferred method (freehand, stencils, or stamping). Let this layer dry completely.
3. Second Neon Layer: Now, apply a second neon color just above or below the first tip, or a slightly different shape. For example, you could have a neon pink tip and then add a thin neon yellow line just above it.
4. Seal It: Apply a clear top coat to lock in both colors.
Beginner Tip: Try pairing a bright pink with an orange, or a lime green with a hot yellow. Think about how colors look next to each other – this is a fun way to explore color theory on your nails!
3. The Neon Outline French
Instead of filling the entire tip, create a subtle yet striking effect by outlining the natural smile line or the tip itself with a neon color.
How to Achieve It:
1. Prep and Base: Prepare your nails and apply your base color as usual.
2. Outline: Using a very fine nail art brush dipped in your chosen neon polish, carefully trace the line of your French tip or the edge of your natural nail. You can do this on bare nails (with a clear base coat) or over a nude/pink polish.
3. Optional: Neon Accent: For more impact, you can add a thin neon line under a classic white tip, creating a multi-dimensional look.
4. Top Coat: Finish with a protective top coat.
Beginner Tip: A steady hand is key here. Rest your elbow on a stable surface. If freehanding is tricky, consider using a fine-tipped nail art pen for more control. You can find great resources on proper nail brush techniques online on sites like NailCareHQ, which offers fantastic tips for brush handling.
4. The Neon Accent French
This is for those who love a touch of neon but want to keep it a bit more understated. Apply the neon French tip to just one or two accent nails (like your ring fingers) and keep the rest of your nails in a classic nude or sheer color.
How to Achieve It:
1. Prep and Base: Prepare all nails.
2. Color Application: Apply your nude or sheer polish to all nails. Let dry.
3. Neon Tips: On your chosen accent nails, apply the neon French tips using any of the methods described above.
4. Top Coat: Apply top coat to all nails to ensure an even finish.
Beginner Tip: This is a super easy way to try out the trend without committing to neon tips on all ten fingers. It’s chic, modern, and very forgiving.
5. The Reverse Neon French
This is a cooler, edgier take where the color is applied to the cuticle area (the “moon” of your nail) instead of the tip.
How to Achieve It:
1. Prep and Base: Prepare your nails and apply a sheer or nude polish. Let it dry.
2. Create the Moon: Using a fine brush or a stencil, carefully paint a neon color along the cuticle line, creating a “half-moon” shape. You can opt for a perfect semi-circle or a more abstract crescent.
3. Top Coat: Seal with a top coat.
Beginner Tip: Use a small dotting tool to create small dots along the cuticle line and then connect them with a fine brush for a more controlled curve.
Tools & Supplies You’ll Need
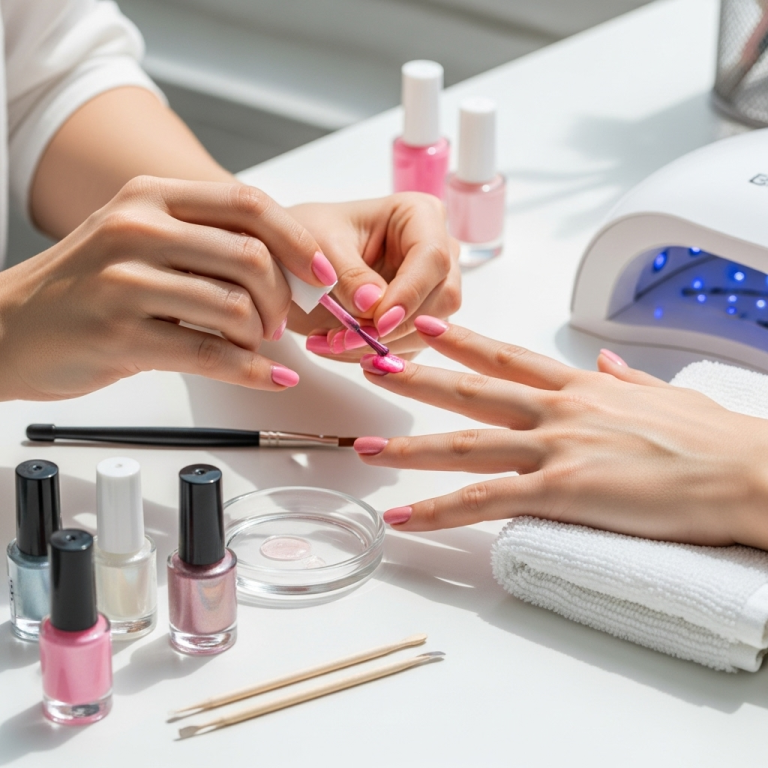
Gathering the right tools makes all the difference, especially when you’re starting out. Here’s a breakdown of what you’ll need for your summer neon French mani:
| Tool/Supply | Why You Need It | Beginner Tips |
|---|---|---|
| Nail Polish Remover | To clean nails and correct mistakes | Acetone-free removers are gentler on nails and cuticles. |
| Nail File | To shape your nails | Use a medium-grit file for shaping and a finer grit for smoothing. Always file in one direction to prevent splitting. |
| Cuticle Pusher/Orange Stick | To gently push back cuticles | Apply cuticle oil before pushing to soften them. Never cut your cuticles, as this can lead to infection. Mayo Clinic advises against cutting cuticles to avoid potential health risks. |
| Base Coat | Protects natural nails, prevents staining, and helps polish adhere | Look for strengthening or quick-dry formulas. |
| Nude/Sheer Pink Polish | Forms the base color of your French manicure | Choose a shade that complements your skin tone. |
| Neon Nail Polish (Your chosen colors) | The star of the show for your tips or accents | Quality neon polishes offer bolder color payoff. Opaque formulas are easier to work with. |
| Fine Nail Art Brush or Dotting Tool | For precise application of polish, especially for freehand tips or outlines | A pack with various brush sizes, including a very fine liner, is ideal. For dotting tools, start with a medium size. |
| French Tip Guide Stickers or Nail Tape | Helps create a clean, straight line for your tips | Ensure the sticker adheres well to prevent polish from bleeding underneath. |
| Top Coat | Seals your design, adds shine, and protects against chipping | A quick-dry or gel-like top coat can give a professional finish. |
Experiment with different types of neon polishes. Some are more vibrant in one coat, while others build up color better with two layers. Gel polishes offer incredible durability and shine but require a UV/LED lamp and specific removal process, which might be a step up from true beginner DIY. For now, stick to traditional polishes!
The DIY Application Process: Step-by-Step Guide
Let’s walk through a general application process that works for most beginners and styles. Remember, patience is your best friend!
Step 1: Nail Preparation is Key
Cleanse: Remove any old polish thoroughly. Wash your hands with soap and water and ensure nails are completely dry.
Shape: File nails to your desired length and shape. Gentle filing in one direction prevents snags.
Cuticles: Gently push back your cuticles using a cuticle pusher or an orange stick. If you have dry cuticles, apply a bit of cuticle oil first. Avoid cutting them.
Step 2: Base Coat Application
Apply a thin, even layer of your chosen base coat.
Let it dry completely. This step is crucial for a long-lasting manicure and to protect your natural nails from staining, especially with vibrant neon colors.
Step 3: Apply Your Base Color (Optional but Recommended)
For a classic French look, apply one or two thin coats of your nude or sheer pink polish.
Make sure each coat is fully dry before proceeding. This creates a clean canvas and makes the neon tips stand out beautifully.
Step 4: Creating Your Neon French Tips (Choose Your Method!)
Method A: Using Guide Stickers/Tape
1. Carefully place the French tip sticker/tape onto your nail, just below where you want the tip to begin. Press down firmly to ensure a good seal.
2. Dip your fine brush into the neon polish and carefully paint over the exposed tip of your nail. You can also dab the polish on.
3. While the neon polish is still slightly wet (but not pooling), gently and slowly peel off the sticker/tape. This is the trickiest part – if you peel too soon, it smudges; too late, and it might lift the polish.
4. Allow the neon tip to dry completely before moving on.
Method B: Freehand with a Fine Brush
1. Dip a clean, fine nail art brush into your neon polish. Wipe off any excess polish on the side of the bottle opening.
2. Rest your hand and brush on a stable surface for control.
3. Start by drawing a small “V” shape at the center of the nail edge, then connect the sides to form the curve. Alternatively, you can dot along the edge and then connect.
4. Clean your brush between strokes if needed, or use a fresh brush for touch-ups.
5. Let the neon tips dry thoroughly.
Method C: Stamping (Advanced Beginner)
1. Apply neon polish to your chosen French tip stamping plate design cavity.
2. Scrape off excess polish with a stamper cleaner card.
3. Immediately roll the stamper over the design to pick up the polish.
4. Align the stamper over your nail and gently roll it to transfer the design.
5. Let dry.
Step 5: The Second Coat (If Needed)
Some neon polishes are more opaque than others. If your first coat of neon isn’t as vibrant as you’d like, apply a second thin coat.
Ensure the first coat is dry before applying the second. Then, let the second coat dry completely.
Step 6: Top Coat Application
Once all your neon tips are completely dry, apply a generous, even layer of clear top coat over your entire nail.
This seals the neon color, protects your manicure from chips, and adds a beautiful glossy finish. Don’t forget to cap the free edge of your nails by running the brush along the very tip of your nails; this helps prevent chipping.
Step 7: Clean Up and Finishing Touches
Use a small brush dipped in nail polish remover to clean up any stray neon polish around your nail edges or cuticles.
Apply a drop of cuticle oil to rehydrate the skin around your nails.
Allow your manicure to dry for at least 15-30 minutes, or longer for optimal hardness, to avoid smudging.
Pro Tips for Neon French Nails That Last
Want to make your dazzling neon French tips last as long as possible? Here are some expert secrets:
Use a White Undercote for Extra Pop: For some neon polishes, particularly those that can look a bit sheer, applying a thin layer of white polish before* the neon can


