Summer nail designs tutorial offers genius ideas for effortless, on-trend manicures. Create vibrant, fun looks easily with simple steps and essential tools. Get ready for sunny vibes with these essential summer nail art looks!
Summer is here, and that means bright colors, fun patterns, and showing off those gorgeous nails! Sometimes, seeing all those amazing manicures online can feel a little overwhelming, especially if you’re just starting out with nail art. You might wonder, “How do they do that?” or “Can I really do this at home?” Well, I’m here to tell you, YES, you absolutely can! Nailerguy is all about making nail art fun and achievable for everyone.
This guide is packed with genius ideas and essential tips to help you create stunning summer nail designs. We’ll break down simple techniques, share what tools you’ll need, and guide you through a few standout looks. Get ready to transform your nails into tiny works of art that are perfect for soaking up the sun. Let’s dive into the fun!
Frequently Asked Questions About Summer Nail Designs
Got questions about creating the perfect summer nails? Here are some common ones answered to help you get started!
What are the easiest summer nail designs for beginners?
For beginners, simple designs like solid bright colors, accent nails with glitter or a single stripe, dot patterns, or even easy ombre effects are fantastic. They look chic without requiring a lot of intricate skill.
What are the essential tools for DIY summer nail art?
You’ll primarily need good quality nail polish in your chosen summer shades, a clear top coat, a base coat, and a few simple tools like dotting tools (or even toothpick tips!), a thin striping brush, and maybe some nail art stickers or gems for extra flair.
How do I make my nail polish last longer in the summer heat?
Start with a clean, oil-free nail surface. Use a good base coat and always finish with a high-quality, quick-drying top coat. Reapply the top coat every few days. Avoid exposing your nails to prolonged hot water or harsh chemicals, which can weaken polish.
Can I create summer nail designs with gel polish at home?
Yes! Gel polish can be great for longevity. You’ll need a UV/LED lamp and a gel top and base coat. The application is similar to regular polish, but curing under the lamp is crucial. Many summer designs translate beautifully to gel.
What colors are trending for summer nails 2024?
This summer, expect to see a lot of ocean blues, coral reefs, sunset oranges and pinks, lime greens, and classic whites and nudes, often with pops of metallic gold or silver. Think vibrant, tropical, and fresh!
How do I prevent smudging when I’m doing my own nail art?
Patience is key! Let each layer of polish or design dry completely before adding the next. A quick-drying top coat can also help “lock in” your design and reveal a glossy finish without smudging.
Essential Tools & Supplies for Your Summer Nail Designs
Before we jump into the fun designs, let’s make sure you have the right tools. Having these on hand will make your DIY nail art journey so much smoother. Don’t worry, you don’t need a professional salon setup to create amazing looks!
Nail Polish Essentials
- Base Coat: This protects your natural nails from staining and helps polish adhere better for longer wear. Look for strengthening or nourishing formulas if your nails need a little extra love.
- Color Polishes: This is where the fun begins! Gather a palette of vibrant summer shades. Think sunshine yellows, oceanic blues, coral reds, and leafy greens. Don’t forget pastels for a softer vibe and maybe a shimmery metallic for a pop.
- Top Coat: A good top coat seals your design, adds shine, and prevents chips. A quick-drying formula is a lifesaver!
- Quick-Dry Drops/Spray (Optional): If you’re always on the go, these can help speed up drying time significantly.
Nail Art Tools
- Dotting Tools: These come in various sizes and are perfect for creating polka dots, flowers, and intricate patterns. You can get a set easily, or even improvise with the tip of a toothpick or a ballpoint pen!
- Thin Striping Brush: Essential for drawing fine lines, geometric shapes, or delicate details.
- Nail Art Stickers/Decals: For a super quick and professional look, these are brilliant. Think tiny fruits, summer motifs, or glitter strips.
- Fine-Grit Nail File and Buffer: To shape your nails perfectly and create a smooth surface for polish.
- Cuticle Pusher/Orange Stick: To gently push back your cuticles for a neat finish. It’s important to prep your nail bed properly!
- Cotton Balls/Pads and Nail Polish Remover: For cleaning up mistakes and removing old polish.
Prep is Key: Get Your Nails Ready!
A great manicure starts with well-prepped nails. This simple step makes a huge difference in how your polish looks and how long it lasts. You can find more detailed information on proper nail care on resources like the American Academy of Dermatology’s guide to nail conditions, which often touches on healthy nail bed preparation.
- Clean: Make sure your nails are clean and free of any old polish or oils. Wash your hands thoroughly.
- Shape: File your nails to your desired shape. Soft squares, round, or almond shapes all look great in the summer.
- Cuticle Care: Gently push back your cuticles using a cuticle pusher or orange stick. Avoid cutting them unless absolutely necessary and you know what you’re doing, as this can lead to infection.
- Buff (Optional): Lightly buff the surface of your nails to create a smooth canvas. Don’t over-buff, as this can thin your nails.
- Apply Base Coat: Apply one thin layer of base coat and let it dry completely. This is your foundation for a lasting manicure.
Genius Summer Nail Designs Tutorial
Let’s get creative! Here are some of my favorite summer nail designs that are both trendy and surprisingly easy to do at home. We’ll cover a few different styles so you can pick what suits your mood and skill level.
Design 1: Tropical Sunset Ombre
This design mimics the breathtaking colors of a summer sunset. It’s a gradient effect that looks super professional but is achievable with a little practice.
What You’ll Need:
- Base Coat
- Yellow, Orange, and Pink nail polishes
- Gold glitter polish (optional)
- Clear Top Coat
- Cosmetic Sponge
Step-by-Step Tutorial:
- Prep: Apply your base coat and let it dry.
- Color Blocking: On a piece of plastic or a paper plate, draw stripes of yellow, orange, and pink nail polish side-by-side. Immediately dab a cosmetic sponge onto the polish, picking up the colors.
- Blotting: Gently dab the sponge onto your nail, starting from the cuticle upwards. You might need to re-apply polish to the sponge and dab a few times to build up the color and blend the transition.
- Repeat: Repeat this process for all your nails. Don’t worry if your first attempt isn’t perfect – the natural variation is part of the charm!
- Add Sparkle (Optional): Once the ombre is dry, apply a layer of gold glitter polish over the top for an extra sunset shimmer.
- Seal It: Apply a thick layer of clear top coat to smooth out the texture and seal the design.
Design 2: Fruit Punch Accent Nails
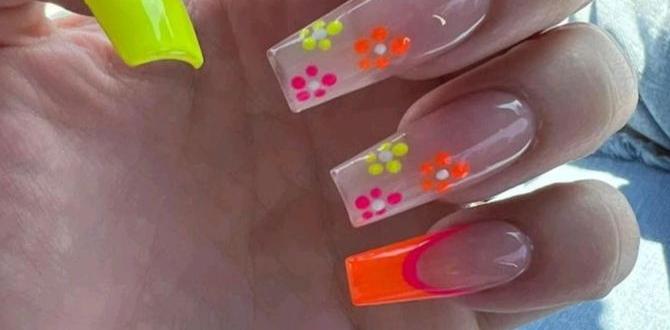
Bright, cheerful, and oh-so-summery! This design uses simple fruit motifs on a couple of accent nails, paired with a solid bright color on the others.
What You’ll Need:
- Base Coat
- A bright solid color polish (e.g., turquoise, coral, bright pink)
- White nail polish
- Red and Green nail polish
- Dotting tool or toothpick
- Clear Top Coat
Step-by-Step Tutorial:
- Prep: Apply your base coat to all nails.
- Solid Color: On your ring and middle fingers (or whichever you choose as accent nails), apply two coats of the bright solid color. Let it dry completely.
- Fruit Base: On your other nails (index and pinky), apply two thin coats of the bright solid color and let them dry.
- Strawberries (Accent Nails):
- Using a dotting tool or toothpick dipped in red polish, paint small rounded shapes on your accent nails. These are your strawberries.
- With a tiny dot of green polish, add a little leaf shape at the top of each strawberry.
- Use a toothpick with a dot of white polish to add tiny dots on the strawberries for texture.
- Pineapple (Alternative Accent Nail):
- Paint a diamond or oval shape with yellow polish.
- Use a brown or darker yellow polish and a thin brush to draw criss-cross lines for the pineapple texture.
- Add green leafy tops.
- Seal: Once all the art is dry, apply a clear top coat over all your nails to protect the designs and add shine.
Design 3: Ocean Waves and Dots
This design is inspired by the cool blues of the ocean and the fun of beach days. It’s minimalist but impactful.
What You’ll Need:
- Base Coat
- A light blue nail polish
- A darker blue or teal nail polish
- White nail polish
- A thin striping brush or dotting tool
- Clear Top Coat
Step-by-Step Tutorial:
- Prep: Apply your base coat.
- Ocean Base: Apply two coats of the light blue polish on all nails. Let dry completely.
- Wave Detail: With the darker blue or teal polish and your thin striping brush, carefully paint a wavy line across the top half or one edge of your nail. You can make it as thick or thin as you like.
- White Dots: Using a dotting tool or the tip of a toothpick dipped in white polish, create small dots along the dark blue wave line, or scattered across the nail, like sea foam or tiny bubbles.
- Seal the Deal: Apply a generous layer of clear top coat.
Design 4: Lemon Slice Mania
Zesty, bright, and utterly adorable. This design is perfect for adding a playful pop of color and fun to your fingertips.
What You’ll Need:
- Base Coat
- Yellow nail polish
- White nail polish
- Green nail polish (optional, for leaves)
- A thin striping brush
- Dotting tool or toothpick
- Clear Top Coat
Step-by-Step Tutorial:
- Prep: Apply your base coat.
- Yellow Base: Apply two coats of vibrant yellow polish to all your nails. Let them dry thoroughly.
- Lemon Slice Outline: With your thin striping brush and white polish, carefully outline a rounded shape on each nail or on your accent nails. This will be the outer peel of your lemon slice.
- Juicy Interior: Now, using a dotting tool or toothpick with white polish, carefully create a few curved lines within the yellow area, mimicking the segments of a lemon slice. You can also add a smaller white circle in the center for a focal point.
- Leaves (Optional): If you want to add a touch of green, use a fine brush with green polish to add tiny leaf shapes near the peel.
- Final Seal: Once everything is dry, apply a clear top coat to give your lemon slices a glossy finish and protect your hard work.
Design 5: Shimmering Seashell Elegance
For those who love a touch of glamour, this design uses subtle shimmers and perhaps a metallic accent to evoke the beauty of seashells. This one leans towards sophistication but is simple to execute.
What You’ll Need:
- Base Coat
- A pearlescent or shimmery polish (e.g., pale pink, iridescent white, or light gold)
- A metallic accent polish (e.g., gold, silver, or rose gold)
- A fine-tipped brush or dotting tool
- Clear Top Coat
Step-by-Step Tutorial:
- Prep: Start with a clean nail bed and apply your base coat.
- Shimmer Base: Apply two coats of your chosen pearlescent or shimmery polish. This creates a soft, ethereal base that catches the light beautifully.
- Seashell Swirls: Using the metallic accent polish and a fine-tipped brush, gently draw a delicate swirl pattern on one or two accent nails. Aim for a shape that naturally complements the nail, perhaps starting from the cuticle and curving towards the tip. You can also use a dotting tool to create small, shell-like curves.
- Subtle Shine: For an extra touch, you can add a few tiny metallic dots along the edge of the swirl or near the cuticle.
- Finishing Touch: Once dry, seal everything with a clear top coat. The shimmer base will enhance the metallic accents, creating a sophisticated and beach-inspired look.
Achieving Salon-Quality Results at Home
It’s easy to get discouraged if your first few attempts don’t look exactly like the photos. Remember, practice really does make perfect, and perfection isn’t always the goal – creativity and self-expression are! Here are some tips to help you get closer to that salon-quality finish:
Tip 1: Patience is a Virtue
This is the golden rule of nail art. Let each layer dry completely before applying the next. Rushing leads to smudges, globs of polish, and unevenness. Five minutes here and there can save you a lot of frustration.
Tip 2: Thin Layers are Better
Instead of thick, gloppy coats, apply multiple thin layers of polish. This allows for even drying and a much smoother finish. It’s especially important for base colors and for sealing your designs.
Tip 3: Clean-Up Crew
Keep a bottle of nail polish remover and a small brush (an old, clean makeup brush works wonders!) or cotton swab handy. Dip the brush or swab in remover to clean up any polish that gets on your skin around the nail. This makes a massive difference in the final look!
Tip 4: Experiment with Tools
Don’t be afraid to try different tools. Toothpicks are great for small dots, the tip of a bobby pin can make larger dots, and even a credit card corner can be used to create sharp lines. Check out this guide on beginner nail art tools for more ideas.
Tip 5: Embrace Imperfection
Sometimes, the charm of DIY nail art is its slightly imperfect, handmade feel. If a stripe isn’t perfectly straight or a dot is a little wonky, embrace it! It’s your unique creation, and that’s what makes it special.
Summer Nail Trends Checklist
Here’s a quick rundown of

