Summer Chrome French Nails: Effortless Chic for Everyone!
Want stunning, modern French tips this summer? Summer chrome French nails are the perfect way to get this trendy, eye-catching look with a shimmery twist. They’re easier to achieve than you think and add instant glam to any outfit. Get ready for a foolproof guide to creating these gorgeous nails at home and making your summer sparkle!
Hey there, gorgeous! It’s Lisa Drew from Nailerguy, and I’m so excited to dive into one of this season’s hottest nail trends: Summer Chrome French Nails! If you’ve seen those dazzling, iridescent French tips and thought, “Wow, that looks complicated,” I’m here to tell you it’s totally achievable, and we’re going to break it down together. Think effortless chic, a touch of magic, and a whole lot of summer vibes right at your fingertips. Let’s get your nails looking fabulous without any fuss!
What are Summer Chrome French Nails?
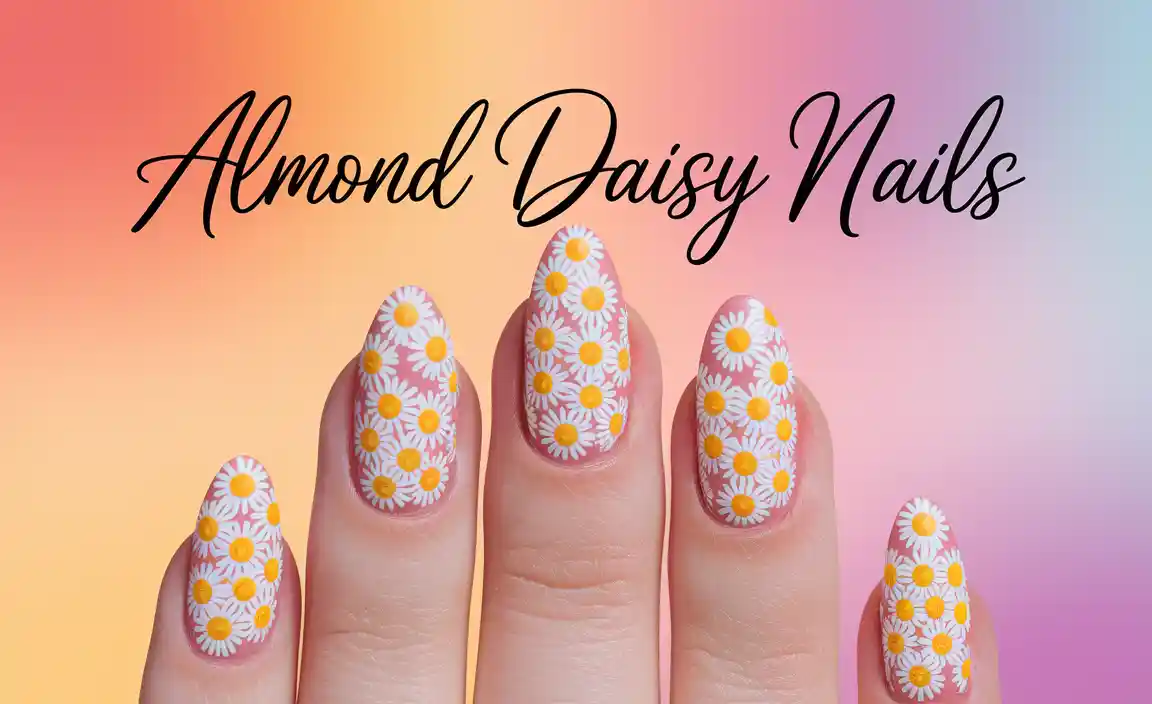
Summer chrome French nails are a modern take on the classic French manicure. Instead of the traditional opaque white tips, this style uses a sheer, often milky or nude base polish, topped with a shimmering, metallic chrome powder applied to the nail tips. This creates a beautiful, reflective, and futuristic halo effect that catches the light in the most mesmerizing way. It’s the perfect blend of timeless elegance and contemporary sparkle, making it ideal for summer vacations, parties, or just elevating your everyday look.
Why We Love Summer Chrome French Nails
This trend is a winner for so many reasons:
- Chic & Modern: It’s a fresh, updated version of a classic, offering a sophisticated yet playful look.
- Eye-Catching Sparkle: The chrome effect adds a dazzling shimmer that’s perfect for sunny days.
- Versatile: It complements a wide range of outfits, from beachy casual to evening elegance.
- Beginner-Friendly: While it looks advanced, it’s surprisingly DIY-able with the right tools and techniques.
- Customizable: You can play with base colors and chrome shades to create a unique look.
Getting Started: Essential Tools and Materials
Before we get our hands messy with glitter (the good kind!), let’s gather our supplies. Don’t worry if you’re new to this; I’ll explain what everything is for. Having the right tools makes the process so much smoother and gives you that salon-quality finish at home.
The Must-Have Kit for Chrome French Nails:
- Base Coat: Your regular, trusty base coat to protect your natural nails and help polish adhere.
- Sheer Base Polish: A milky white, sheer pink, or nude polish. This is key for that subtle, soft look.
- Color Polish for Tips (Optional): If you want a colored chrome line instead of just shimmer, you’ll need a thin layer of your chosen color.
- Chrome Powder: This is the magic ingredient! You can find it in various colors like silver, gold, iridescent white, or even pastels. A little goes a long way.
- Top Coat: A good quality, non-wipe top coat is essential for sealing everything in and giving that glossy shine.
- Gel Lamp (if using gel products): If your base polish and top coat are gel, you’ll need a UV/LED lamp to cure them.
- Silicone Applicator/Eyeshadow Sponge: These are perfect for smoothly applying the chrome powder.
- Cleaner Brush/Fan Brush: To gently brush away any excess chrome powder.
- Rubbing Alcohol or Nail Cleanser: For cleaning the nail surface before and after application.
- Cuticle Pusher/Orange Stick: To prepare your nail bed.
- Nail File & Buffer: For shaping and smoothing the nail surface.
Step-by-Step Guide: Creating Your Summer Chrome French Nails
Ready to create some magic? Follow these simple steps, and you’ll have stunning summer chrome French nails in no time. We’ll focus on the most popular method using chrome powder. Remember, practice makes progress, so don’t get discouraged if your first try isn’t perfect!
Step 1: Prep Your Nails
This is the foundation for any great manicure. Clean nails mean better polish adherence and a longer-lasting look.
- Remove Old Polish: Make sure there’s no leftover nail polish.
- Shape Your Nails: File your nails into your desired shape. Square, squoval, or almond all look great with this style.
- Push Back Cuticles: Gently push back your cuticles using a cuticle pusher. This creates a clean canvas.
- Buff the Surface: Lightly buff the surface of your nails to remove any shine and create a smooth base for the polish. Don’t over-buff; we just want to create a little grip!
- Cleanse: Wipe each nail with rubbing alcohol or a nail cleanser to remove dust and oils. Let them air dry completely.
Step 2: Apply the Base Polish
Now for the color. We’re going for that subtle, sophisticated look.
- Apply Base Coat: Apply a thin layer of your regular base coat and let it dry.
- Apply Sheer Polish: Apply one or two thin coats of your chosen sheer milky white, pink, or nude polish. Let each coat dry completely (or cure under your gel lamp if using gel polish). You want an even, translucent color.
Step 3: Create the French Tip Line
This is where we define the tip. There are a few ways to do this, but we’ll focus on a clean, brushed-on method.
- Apply Color (Optional): If you want a colored chrome effect (e.g., gold chrome on a pale pink tip), carefully paint a thin line of your chosen color polish along the free edge of your nail. If you want a shimmer-only effect on white or nude, you can skip this.
- Use a Stencil (Optional): For super-straight lines, you can use French tip stencils or a fine-liner brush. Carefully paint the tip, ensuring the line is clean.
- Let it Dry/Cure: Allow the color to dry completely. If using gel, cure it under your lamp. Crucially, for chrome powder application to work best, the polish needs to be tacky but not fully dry. This is often called a “sticky layer.” If you’re using regular polish, wait about 1-3 minutes after it feels dry. If using gel, cure it for a slightly shorter time than usual, or use a no-wipe top coat before applying the chrome. We’ll cover the “no-wipe top coat” method next, as it’s very popular.
Step 4: Apply the Chrome Powder
This is the fun, sparkly part!
- Choose Your Tool: Grab your silicone applicator or eyeshadow sponge.
- Dip into Powder: Gently dip the tip of your applicator into the chrome powder. You only need a tiny amount.
- Rub and Buff: Gently rub and buff the chrome powder onto the tip of your nail, focusing on the white or colored line you just created. Use a back-and-forth or circular motion. Apply gentle pressure.
- Cover the Tip: Ensure you cover the entire tip area where you want the chrome effect. The heat from your finger and the friction will help the powder adhere and create that smooth, reflective finish.
- Clean Excess: Use your cleaner brush or fan brush to gently sweep away any loose chrome powder. Be thorough!
Step 5: Seal Your Masterpiece
This locks in the shine and protects your design.
- Apply No-Wipe Top Coat: This is essential! Apply a thin layer of a no-wipe gel top coat over the entire nail, including the chrome tips. A regular top coat can smudge the chrome. Ensure you cap the free edge by swiping the brush along the very edge of your nail.
- Cure Under Lamp: Cure your nails under your UV/LED lamp according to the lamp’s instructions and your gel product’s recommendations.
- Second Layer (Optional): For extra durability and shine, you can apply a second thin layer of no-wipe top coat and cure again.
Step 6: Final Touches
Almost there!
- Clean Up Edges: If any polish got on your skin, gently clean it up with an orange stick dipped in a little nail polish remover.
- Apply Cuticle Oil: Finish by applying a nourishing cuticle oil to rehydrate your skin after the manicure process.
And voilà! You’ve got stunning summer chrome French nails. How fabulous do they look?
Choosing Your Chrome and Base Colors
The beauty of this trend is its adaptability. Here are some popular combinations to get you inspired:
Popular Chrome Powder Colors:
- Iridescent White/Pearl: The classic choice for a true, ethereal chrome French.
- Silver: For a sharp, futuristic, and very bright metallic look.
- Gold: Adds warmth and a touch of luxury. Rose gold is also a beautiful option.
- Holographic: Creates a rainbow shimmer effect.
- Pastels: Think pale pink, lavender, or mint chrome for a softer, summery vibe.
Base Polish Ideas:
- Milky White: Provides a clean, opaque-but-still-sheer canvas.
- Sheer Pink: Adds a subtle flush of color, very natural and delicate.
- Nude/Beige: Offers a sophisticated, understated base.
- Pale Pastels: A light peach, baby blue, or mint green can create a unique colored base.
Troubleshooting Common Chrome Nail Issues
Even with the best intentions, sometimes things don’t go perfectly. Don’t sweat it! Here are common hiccups and how to fix them:
Problem 1: Chrome Powder Not Sticking or Patchy
Why it happens: The base layer (polish or top coat) wasn’t “tacky” enough, or it was completely dry/cured. Or, you might be applying the powder too roughly.
Solution: Ensure your base layer is properly prepared. For regular polish, let it get tacky. For gel, try curing for a slightly shorter time, or use a specialized chrome base coat. When applying the powder, use gentle, buffing motions. Don’t press too hard.
Problem 2: Chrome Smudges or Looks Dull
Why it happens: You used a regular, wipe-off top coat. These contain solvents that lift and move the chrome pigment.
Solution: Always use a “no-wipe” gel top coat. This is non-negotiable for sealing chrome powders effectively. If you notice dullness, it might be from excess powder not being brushed off properly before top coat.
Problem 3: Chrome Powder Gets on the Base Polish/Cuticle Area
Why it happens: Either the initial application of polish extended too far, or the powder application wasn’t precise.
Solution: Be extra careful when applying your base polish and tip color. Use a fine brush or stencil for precision. After buffing the chrome, use a small brush (like a fluffy eye shadow brush) dipped in a tiny bit of alcohol to gently clean up any powder that landed where you don’t want it, before applying the top coat.
Problem 4: Streaky or Uneven Chrome Finish
Why it happens: Uneven application of the chrome powder, or not enough buffing. Also, if the base isn’t smooth, the chrome will highlight it.
Solution: Apply the chrome powder with consistent, gentle pressure all over the tip. Buff until smooth and reflective. Make sure your base colors are applied smoothly without bumps.
Alternative Methods for Chrome French Tips
While the chrome powder method is the most popular, there are other ways to achieve a similar, albeit often less intense, effect:
Method: Chrome Polish
How it works: Special nail polishes are formulated with metallic pigments that give a chrome-like finish. You’d apply this directly to the tips.
Pros: No extra powders or lamps needed if you’re using regular polish. Simple application.
Cons: May not have the same high-shine, mirror-like effect as powder. Can be less durable than gel.
Method: Chrome Transfer Foils
How it works: These are thin sheets of foil with a metallic design. You apply a special foil glue to the tip area, let it get tacky, and then press the foil onto it to transfer the design.
Pros: Can create intricate foil designs. Good for accent nails.
Cons: Applying a clean French tip LINE with foil can be tricky for beginners. The finish might be less smooth than powder.
Table: Comparing Chrome Application Methods
| Feature | Chrome Powder | Chrome Polish | Chrome Transfer Foils |
|---|---|---|---|
| Shine/Finish | High-shine, mirror-like, reflective | Metallic sheen, less mirror-like | Varies; can be very shiny, some patterns |
| Ease of Use (Beginner French Tip) | Moderate (requires practice for precision) | Easy | Difficult for precise French line |
| Tools Needed | Base/Top Coat (Gel recommended), Chrome Powder, Applicator, Lamp (for gel) | Base/Top Coat, Chrome Polish | Base/Top Coat, Foil Glue, Foil, Applicator |
| Durability | High (with gel) | Moderate (regular polish) to High (with gel systems) | Moderate to High (depends on glue/top coat) |
| Customization | High (various colors/bases) | Moderate (limited color options per polish) | High (if using patterned foils) |
Nail Care Tips for Extended Wear
You’ve got these gorgeous nails, let’s keep them that way! Proper nail care is key to making your manicure last longer and your natural nails stay healthy.
- Wear Gloves: When doing chores, especially washing dishes or using cleaning chemicals, wear rubber gloves. Water and harsh chemicals are the enemies of any manicure.
- Be Gentle: Avoid using your nails as tools. Don’t pick, scrape, or pry with them.
- Moisturize: Apply hand lotion regularly, especially after washing your hands. Keeping your skin hydrated also helps keep your cuticles healthy, which makes your manicure look neat.
- Rehydrate Cuticles: Use cuticle oil daily, or at least a few times a week. This prevents dryness and hangnails, making your manicure look fresh. You can learn more about the importance of cuticle care on resources like the American Academy of Dermatology Association’s guidance on nail health.
- Avoid Acetone (if possible): While acetone is effective for removing stubborn polish, it can be very drying to your nails and skin. If you can, opt for non-acetone removers.
Frequently Asked Questions About Summer Chrome French Nails
Q1: Can I do chrome French nails without a UV/LED lamp?
A1: Yes, you can, but it’s a bit trickier and the finish might not be as durable or mirror-like. You’ll need to use regular polish for your base and top coats. For the chrome powder to adhere, the base polish needs to be tacky but not fully dry. You might need to experiment with drying times. Using a no-wipe gel top coat over regular polish and then curing it with a lamp is also an option if you have one, but this isn’t a traditional “no-lamp” method. For the best, longest-lasting chrome effect, gel products and a lamp are recommended.
Q2: What’s the best chrome powder to buy for beginners?
A2: For beginners, an iridescent white or a pearl chrome powder is a fantastic starting point. They are very forgiving, offer a beautiful, subtle shimmer, and work well with most sheer base colors. They tend to look less stark than pure silver or gold if you’re worried about high shine.
<h3 id="faq-


