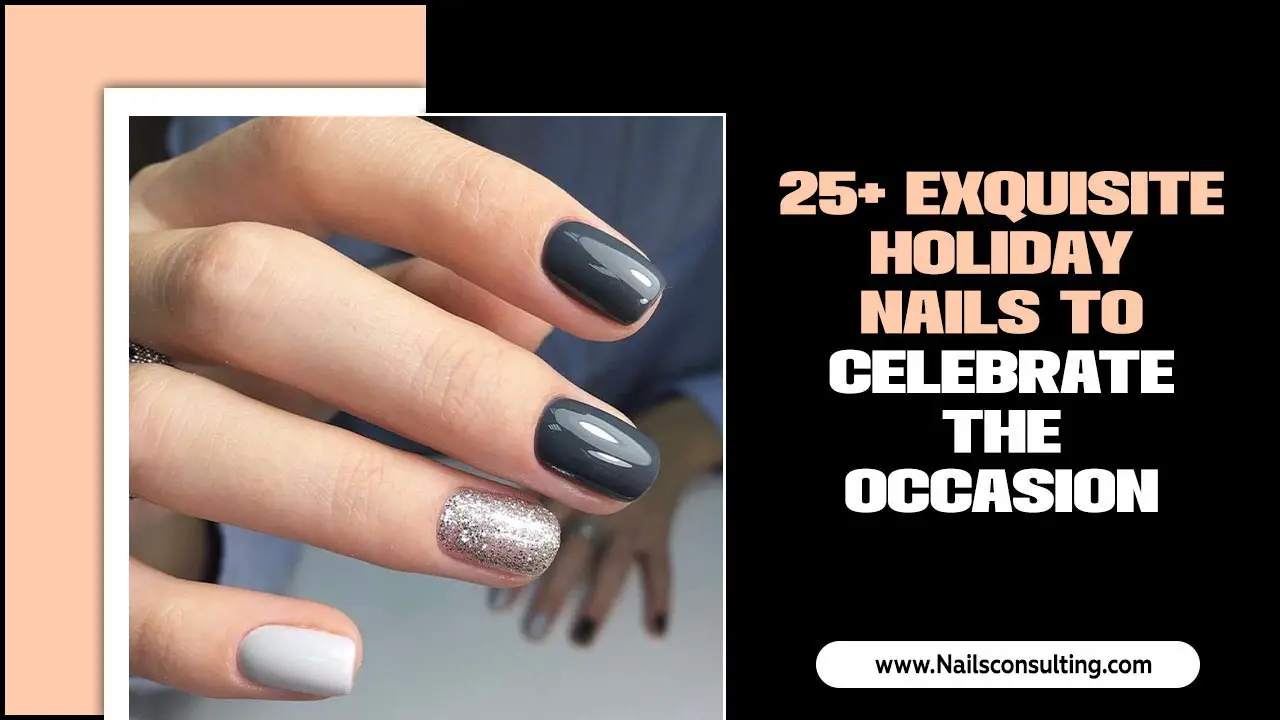
Suede nail art offers a unique, velvety texture that adds instant elegance and sophistication to any manicure. The technique is surprisingly simple, allowing beginners to achieve chic, plush-looking nails with a few key products and steps. Get ready to elevate your nail game with these beautiful and achievable designs!
Ever looked at a manicure and thought, “Wow, that looks so luxurious!”? Sometimes, it’s not just the color or the sparkle, but a special finish that really makes nails pop. Suede nail art is exactly that – a way to give your nails a soft, matte, and incredibly chic texture that feels as good as it looks. It’s the perfect way to make even a simple color feel super elegant and special, like a new favorite handbag or a cozy cashmere sweater for your fingertips. If you’re looking to try something new that’s a step up from your usual polish but still totally doable at home, you’ve landed in the right spot. We’re going to break down exactly how to get this posh nail look, from the tools you’ll need to some gorgeous design ideas. Get ready to discover your new favorite nail art trend!
Why We Love Suede Nail Art
Suede nail art is a total game-changer for anyone who loves a sophisticated and touchable nail finish. It brings a unique texture that’s soft, velvety, and instantly elevates your manicure. Unlike glossy finishes, suede offers a muted elegance that’s perfect for any occasion, from a casual day out to a fancy evening event. Plus, it’s surprisingly easy to achieve, making it an ideal choice for beginners looking to explore more advanced nail art techniques.
What You’ll Need: Your Suede Nail Art Toolkit
To create that perfect suede effect, you don’t need a whole salon’s worth of tools. A few key items will get you well on your way to a plush, elegant manicure. Think of these as your essential ingredients for nail art success!
The Must-Have Products:
- Your favorite nail polish: This will be your base color. Choose shades you love – the suede effect works beautifully with almost any color!
- A matte top coat: This is crucial for creating the suede look. It’s what transforms a regular polish into a velvety finish. Look for one specifically designed for a matte effect.
- Flocking powder or velvet powder: This is the magic ingredient that gives your nails the fuzzy, suede texture. It often comes in a fine powder form.
- Optional: Nail glue or gel adhesive: For some techniques, especially if you want to apply powder to specific designs, a bit of adhesive can be helpful.
Helpful Tools:
- Cuticle pusher and buffer: For preparing your nails.
- Small brush or fan brush: For gently dusting off excess powder.
- Tweezers: Handy for picking up small embellishments if you decide to add them.
- Orange wood stick or dotting tool: For creating specific designs if you’re not just going for an all-over suede effect.
The Basic Suede Nail Art Technique: Step-by-Step
Creating a full suede manicure is simpler than you might think! This method is perfect for beginners and gives you that gorgeous, plush finish all over your nails. Follow these simple steps, and you’ll have sophisticated suede nails in no time.
- Prep Your Nails: Start with clean, dry nails. Push back your cuticles and gently buff your nails to create a smooth surface. Apply your base coat and let it dry completely.
- Apply Your Base Color: Paint your nails with your chosen nail polish color. Apply one or two thin coats, depending on how opaque you want the color. Let the polish dry almost completely – it should still be a little tacky to the touch. This tackiness is key for the powder to adhere.
- Apply the Flattening Agent (Optional but Recommended): For an even smoother, more consistent suede effect, apply a thin layer of your matte top coat over the still-tacky polish. Do this carefully, as you don’t want to disturb the base color too much. This layer helps the flocking powder adhere evenly.
- Dip or Sprinkle the Powder: This is where the magic happens!
- Dipping Method: If you’re using a dipping dish or a clean surface, carefully dip your tacky nail directly into the flocking powder, ensuring it’s fully coated.
- Sprinkling Method: If you’re working directly over the bottle or a separate surface, gently sprinkle the flocking powder over your wet/tacky nail until it’s covered.
- Gently Press and Coat: Once the powder is on, gently press it into the nail with your fingertip or a clean tool to help it adhere. Make sure all areas are covered.
- Let it Set: Allow the powder to set for a minute or two.
- Dust Off the Excess: Using your small brush or fan brush, gently sweep away any loose powder from your nails and fingertips. Be thorough but gentle – you don’t want to remove the powder that has adhered.
- Seal (Optional but Advised for Longevity): Here’s a key tip from Nailerguy! To help your suede nails last longer and prevent the flocking powder from coming off too easily due to friction, apply another thin layer of the matte top coat. Apply it very carefully, barely touching the nail surface. You want to seal the powder without making it shiny. This step is tricky and requires a light hand, but it makes a big difference! Some people prefer to skip this step to maintain the purest suede texture, but it will be less durable.
Elegant Suede Nail Art Design Ideas for Beginners
Once you’ve mastered the basic technique, the fun really begins! Suede texture is stunning on its own, but you can also combine it with other elements or use it for intricate designs. Here are some elegant ideas to inspire you:
1. The Classic Monochromatic Suede
- Description: This is the simplest and perhaps most elegant way to wear suede. Choose a sophisticated color like deep burgundy, charcoal grey, navy blue, or even a soft blush pink. Apply the suede technique described above to all nails.
- Why it’s elegant: The matte finish of the suede combined with a rich, solid color creates an understated luxury that’s always in style. It’s chic, modern, and perfect for any outfit or occasion.
- Beginner Tip: Stick to one color and focus on perfecting the suede application. This solid base will really highlight the unique texture.
2. Suede French Tips
- Description: Give the classic French manicure a plush update. Paint your nails with a nude or sheer pink base. Once dry, use a fine brush and a contrasting polish color (or even a darker shade of your base color) to carefully paint the tips. After the tip color has dried slightly but is still tacky, gently apply flocking powder only to the tips. Dust off the excess. You can choose to seal the tips or leave them purely textured.
- Why it’s elegant: It’s a subtle yet striking blend of textures. The smooth base with the velvety tips adds a sophisticated twist to a timeless design.
- Beginner Tip: Use nail guides for a cleaner line on your tips, or practice freehand on a few nails first before moving to all ten.
3. Two-Tone Suede
- Description: This design uses two complementary or contrasting colors with the suede finish. You can create a half-and-half design (one color on one side of the nail, another on the other), a diagonal split, or use one color for the base and the second color for a subtle accent. For example, a matte black base with a matte silver accent nail, or a matte nude with a matte deep berry accent.
- Why it’s elegant: The interplay of the two suede textures creates visual interest and depth. It’s a modern and stylish way to incorporate multiple colors while maintaining a sophisticated vibe.
- Beginner Tip: For a half-and-half or diagonal design, use clean tape to section off the nail after the first color is dry, then apply the second color and its suede powder to the un-taped section.
4. Suede Accent Nail with Glossy Design
- Description: This is a fantastic way to highlight the suede texture. Paint all your nails with your chosen color using the full suede technique and matte top coat. On one accent nail (like your ring finger), apply your desired nail art design over a dry base coat using a contrasting glossy top coat or a sticky gel polish. This could be simple dots, stripes, a floral outline, or even a marble effect.
- Why it’s elegant: The contrast between the velvety matte suede and the shiny gloss creates a luxurious and high-fashion look. It’s a sophisticated way to experiment with finishes.
- Beginner Tip: Practice the glossy design on an easy surface like paper first. Use dotting tools or thin brushes for precise application.
5. Suede with Minimalist Embellishments
- Description: Sometimes, less is more! Apply the suede technique to all your nails. Then, on one or two accent nails, add a single, delicate embellishment like a tiny rhinestone, a small pearl, or a miniature stud placed precisely at the cuticle or on a corner of the nail. You can adhere these with a tiny dab of nail glue or gel.
- Why it’s elegant: The soft suede texture provides a beautiful backdrop for a single, sparkling or pearlescent accent. It keeps the look refined and chic without being over the top.
- Beginner Tip: Place embellishments while the last layer of top coat (matte or glossy) is still wet, or use a tiny dot of nail glue. Tweezers make placement much easier!
Tips for Perfecting Your Suede Nails
Achieving salon-quality suede nails at home is definitely within reach! With a few expert tips, you can ensure your flocking powder sticks, your texture is flawless, and your manicure lasts.
- Patience is Key: Don’t rush the drying times between coats. Ensure the base polish is tacky for the powder to adhere properly.
- Work in Thin Layers: When applying polish or the matte top coat (especially the top coat for sealing), thin layers are your friend. Thick coats can smooth out the suede texture or take too long to dry.
- Control the Environment: Try to do your nails in a well-ventilated area, but avoid strong drafts or fans that can blow the powder away before it adheres.
- Gentle Dusting: Use a very soft brush and sweep away the excess powder with light, gentle strokes.
- The Sealing Dilemma: As mentioned, sealing with a matte top coat can increase durability but may slightly reduce the pure “fluffiness” of the suede. Test on one nail to see which you prefer. A very light hand is crucial if you choose to seal.
- Clean Up as You Go: Wipe off excess powder from your fingers and surrounding skin before it sets.
- Storage Matters: Store your flocking powder in an airtight container to prevent it from clumping or picking up moisture.
Troubleshooting Common Suede Nail Art Issues
Even with the best intentions, you might run into a snag or two when trying out suede nail art. Don’t worry, these common issues are usually easy to fix!
| Problem | Possible Cause | Solution |
|---|---|---|
| Powder not sticking/adhering | Nail polish not tacky enough. | Ensure the base polish is still slightly sticky when you apply the powder. You might need an extra coat of polish or wait less time for it to dry. |
| Uneven or clumpy texture | Applying powder too thickly or unevenly. / Applying too much sealant on top. | Apply powder in a thin, even layer. Gently press it into the tacky polish. If sealing, apply the matte top coat very thinly and gently. |
| Suede texture rubbing off too quickly | Not sealing correctly, or skipping the sealing step entirely. / Excessive friction. | Apply a careful, thin layer of matte top coat to seal the powder. Be mindful of activities that can cause friction on your nails. |
| Powder getting on undesired areas | Lack of precision during application. | Use a small brush to carefully dust off excess powder. For designs, use tape or nail shields to protect areas you don’t want powder on. |
| Matte top coat makes it shiny again | Using a regular glossy top coat instead of a specialized matte one. / Applying the matte top coat too heavily. | Always use a dedicated matte top coat. Apply it in an extremely thin layer, just enough to seal without adding shine. |
Beyond the Basics: Advanced Suede Techniques
Ready to take your suede nail art to the next level? Once you’re comfortable with the core method, you can explore some more intricate and stunning designs. These techniques build upon what you already know!
Gradient Suede
Create a beautiful ombre effect by blending two colors over the nail before applying the flocking powder. You can use a makeup sponge to blend colors on the nail, or use a technique where you apply patches of color and then blend them with a brush. Once blended and still tacky, apply your flocking powder over the entire nail for a seamless, velvety gradient.
Texture Blocking
This involves using tape or stencils to create distinct sections of different textures. For example, one part of the nail could be a full suede finish, while another section might be left glossy, or decorated with glitter or chrome powder. The sharp lines between textures create a bold, modern look.
3D Suede Accents
Instead of just powder, you can use flocking fibers directly. Apply a strong nail glue or gel adhesive to your nail in a design pattern. Then, carefully place the flocking fibers onto the adhesive using tweezers. This creates raised, textured elements. You can mix these with painted designs or other embellishments for a truly unique, tactile manicure.
Suede Cuticle Art
A very chic and modern look is to have a clean, glossy nail with just a thin line or half-moon of suede texture along the cuticle area. This requires precision but is incredibly striking. You might use a fine brush to apply adhesive only to the cuticle area, then carefully tap flocking powder onto it.
The Science Behind the Suede Finish
It might seem like magic, but the suede nail art effect is rooted in a simple scientific principle: adhesion and particle size. The flocking powder consists of tiny, short fibers. When applied to a still-tacky surface (like partially dried nail polish or a layer of matte top coat), these fibers adhere and stand up slightly, creating the characteristic fuzzy texture. The matte top coat is formulated with particles that scatter light, preventing a shiny reflection and giving that soft, velvet-like appearance. For those interested in the science of materials, understanding how adhesion forces work with different particle types can lead to even more innovative nail art applications. Resources like guides on polymer science basics from educational institutions can offer insights into how such powders interact with adhesives.
FAQs about Suede Nail Art
What is suede nail art?
Suede nail art is a type of manicure that gives nails a soft, velvety, matte texture that resembles the finish of suede fabric. It’s achieved by applying flocking powder or velvet fibers onto a tacky surface of nail polish.
Can beginners do suede nail art?
Yes, absolutely! The basic all-over suede technique is very beginner-friendly. It requires a few key products and some careful application, but it’s quite forgiving and easy to master with practice.
How long does suede nail art last?
With proper application and care, suede nail art can last anywhere from a few days to a week or more. Sealing the flocking powder with a thin layer of matte top coat can help extend its lifespan, though it might slightly alter the texture. Avoiding excessive friction also helps.
What kind of nail polish do I need for suede nail art?
You can use almost any nail polish color as your base. The crucial product is a good quality flocking powder or velvet powder and a matte top coat to achieve the suede effect.
Can I use regular top coat for suede nail art?
You’ll need a matte top coat to create and seal the suede effect. A regular glossy top coat will simply make the flocking powder shiny and lose the desired velvet texture.
What if my flocking powder doesn’t stick?
This usually happens if the base polish isn’t tacky enough. Ensure your nail polish is still slightly sticky to the touch when you apply the powder. You might need to let it dry slightly less, or apply a very thin, slightly tacky layer of matte top coat first before the powder.
How do I clean up suede nail art mistakes?
For loose powder, a soft


