Sudoku nail designs are a fun, geometric way to express your creative side on your fingertips. These smart and stylish looks are surprisingly easy to achieve, offering a unique twist on classic patterns with a simple number grid. Perfect for beginners and seasoned nail artists alike, they’re a must-have for anyone looking to add a playful, intellectual flair to their manicure.
Hey nail lovers! Ever feel like your nails are just begging for a little extra brainpower and a whole lot of style? You’re in the right place! Today, we’re diving into the seriously cool world of Sudoku nail designs. Think of those satisfying logic puzzles – we’re bringing that same clever charm and geometric appeal right to your fingertips. It might sound intimidating, but trust me, creating these looks is more about playing with lines and shapes than solving a complex puzzle. We’re going to break down exactly how you can get these genius designs, making them super accessible, even if you’re just starting your nail art journey. Ready to transform your nails into miniature masterpieces? Let’s get started!
Why Sudoku Nails Are Your Next Obsession
Sudoku nails are more than just a trend; they’re a celebration of geometric beauty and playful intellect. These designs tap into the universally recognized grid of the Sudoku puzzle, translating it into a chic and eye-catching manicure. Unlike intricate floral patterns or detailed portraits, Sudoku designs rely on clean lines, bold squares, and strategic color blocking. This makes them incredibly versatile and surprisingly simple to execute, even for those who consider themselves “nail art beginners.”
The appeal lies in their modern aesthetic. They can be minimalistic and chic with a monochrome palette, or bold and vibrant with contrasting colors. They’re perfect for adding a pop of personality without being overly flashy. Plus, who doesn’t love a nod to a beloved brain game? It adds a fun, conversational element to your look.
The Genius Behind the Grid: Understanding Sudoku Nail Designs
At its core, a Sudoku nail design is inspired by the 9×9 grid of the Sudoku puzzle. However, when translated to nails, we often simplify this concept. Think of it as using square or rectangular blocks, lines, and sometimes numbers to create a pattern that evokes the puzzle. You don’t need to (and usually can’t!) fit a full 9×9 grid on a single nail. Instead, artists pull elements from the puzzle’s structure:
The Grid: This is the most common element. You’ll see nails sectioned off into smaller squares or rectangles.
Color Blocking: Different colored squares within the grid create visual interest.
Number Accents: Some designs might feature a single number, or strategically placed numbers, reminiscent of the puzzle.
Lines and Divisions: The strong horizontal and vertical lines of the grid are a key design component.
This adaptable concept means there’s a Sudoku nail design for everyone, from minimalist lovers to those who enjoy a bit more complexity.
Getting Started: Your Essential Sudoku Nail Toolkit
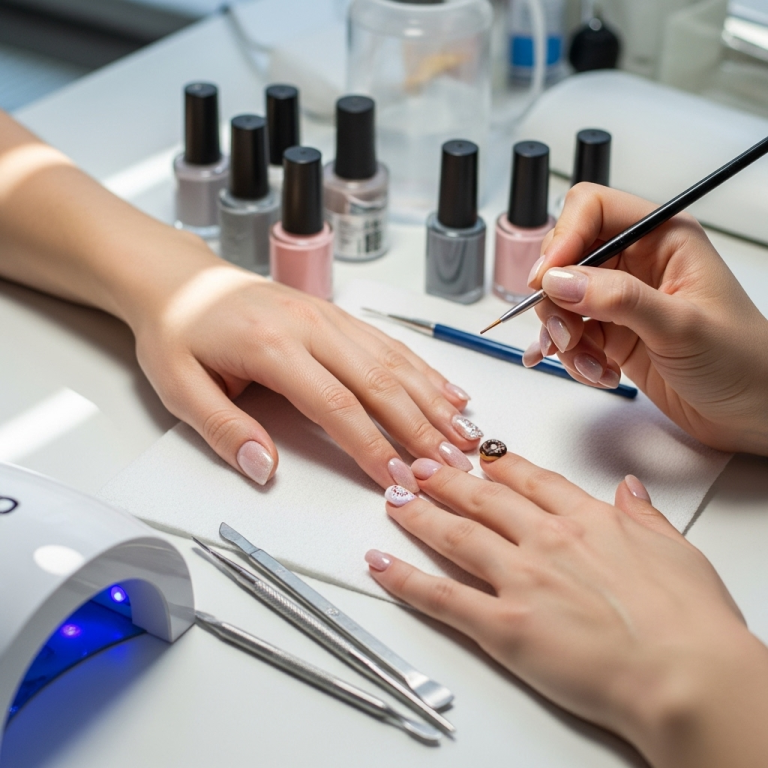
Before we dive into the fun, let’s make sure you have the right tools. Don’t worry, you don’t need a professional salon setup. Many of these can be done with items you might already have or can easily find.
Must-Have Nail Polish & Tools:
Base Coat: Essential for protecting your natural nails and helping polish adhere.
Top Coat: Seals your design, adds shine, and makes your manicure last longer.
Nail Polish Colors: Choose at least two contrasting colors for a classic Sudoku look. Neutrals, brights, or even metallics all work!
Fine-Tipped Nail Art Brush: This is your main tool for drawing lines and filling colors. A brush with a very thin, precise tip is ideal.
Dotting Tool (Optional): Great for placing small dots or filling in tiny squares if you don’t want to use a brush.
Nail Polish Remover & Cotton Swabs: For correcting any little mistakes.
Clear Nail Tape or Striping Tape (Optional): For creating super crisp lines.
Cuticle Pusher or Orangewood Stick: For any prep work and cleanup.
Here’s a quick look at some great brushes for nail art: NailPro’s Guide to the Best Nail Art Brushes offers an excellent overview of what to look for.
Step-by-Step: Crafting Your Own Sudoku Nail Designs
Ready to get creative? Let’s break down a few beginner-friendly Sudoku nail design ideas. We’ll start with the most basic grid and then explore some variations.
Design 1: The Classic Grid Mani
This design is all about simple squares and clean lines. It’s a fantastic starting point.
Prep:
- Start with clean, dry nails.
- Apply a thin layer of base coat and let it dry completely.
- Apply your chosen base color (this will be the background of your grid). Two thin coats are usually best for even coverage. Let the polish dry until it’s no longer tacky.
Creating the Grid:
- Take your fine-tipped nail art brush and your contrasting polish color.
- Decide on your grid pattern. For a simple look, you could divide each nail into four equal squares (like a 2×2 grid), or nine smaller squares (a 3×3 grid) on a feature nail like the ring finger.
- For a 2×2 grid: Start by drawing a horizontal line across the middle of your nail, and then a vertical line down the middle. Gently go over them to make the lines bold and defined.
- For a 3×3 grid: You’ll need to draw two horizontal lines and two vertical lines, spaced evenly, to create nine small squares. This requires a steady hand! Don’t stress if they aren’t perfect; that’s part of the charm.
- Let the grid lines dry completely.
Adding Dimension (Optional):
- Once the grid lines are dry, you can add color to some of the squares.
- Use your brush or a dotting tool to fill in alternating squares with a different color, or the same color as your base but a slightly different shade for subtle contrast.
- You could also fill in squares with a metallic polish or even a glitter polish for a pop!
Finishing Touch:
- Once all the polish is completely dry, apply a generous layer of top coat to seal the design and add that beautiful shine.
Design 2: The Abstract Sudoku
This version is more free-form and forgiving. It uses the idea of the Sudoku grid without strict adherence to perfect lines.
Prep:
- Apply base coat and then your main polish color as described above. Let it dry thoroughly.
Creating the Abstract Grid:
- Using your fine-tipped brush and a contrasting color (or multiple colors), draw “imperfect” lines across your nails. Think of them as wobbly, uneven divisions rather than perfect straight lines.
- Don’t aim for symmetry. Some lines can be short, some long, some can intersect at odd angles. The goal is to create a sense of fragmented squares or blocks.
- Fill in some of these “abstract squares” with solid color, or leave them as negative space (the base color showing through).
- You can also add small dots or dashes within some of the sections for extra detail.
Finishing Touch:
- Apply your top coat once everything is dry.
Design 3: Sudoku with Number Accents
This design directly references the puzzle by adding numbers.
Prep:
- Complete the prep steps as in Design 1.
Creating the Grid with Numbers:
- Create a simple grid on one or two accent nails (like your ring and middle fingers). A clean 3×3 grid works well here.
- Once the grid is dry, use a very fine brush and black or white polish to write a single number (e.g., 1-9) in a few of the squares. Choose numbers that have visual appeal.
- On your other nails, you can opt for a solid color, a simple grid without numbers, or just a few abstract lines.
Finishing Touch:
- Apply top coat when all elements are fully dry.
Tips for Sharper Lines and Cleaner Designs
Achieving that crisp, polished look is key to making your Sudoku nails pop. Here are some pro tips to help you get there:
Sharpen Your Skills:
Steady Your Hand: Rest your wrists on a stable surface. You can also brace your pinky finger against the nail you’re working on.
Wipe Off Excess Polish: Before drawing a line, wipe most of the polish off your brush onto the lip of the bottle or a lint-free wipe. This prevents blobs and allows for finer control.
Work in Thin Layers: It’s better to build up color or lines with multiple thin coats than one thick, messy one.
Use Tape for Perfection: For incredibly straight lines, consider using nail striping tape. Apply polish, let it dry completely, then carefully apply strips of tape to create your grid. Fill in the areas between the tape and paint over the tape. Once the new polish is almost dry, gently peel off the tape. This creates super sharp divisions.
Clean as You Go: Keep your cotton swabs dipped in nail polish remover handy. Dip the tip and carefully clean up any smudges or wobbly lines before they dry completely.
Practice Makes Perfect: The more you practice drawing lines and creating patterns, the steadier your hand will become.
Exploring Different Sudoku Nail Styles & Color Palettes
The beauty of Sudoku nail designs is how adaptable they are to different aesthetics. Here’s how you can play with colors and styles:
Color Palette Ideas:
Monochrome & Chic: Black and white, shades of grey, or navy and cream offer a sophisticated, minimalist vibe.
Bold & Bright: Electric blue, hot pink, and lime green create a playful, energetic look perfect for summer.
Earthy Tones: Terracotta, olive green, mustard yellow, and beige for a grounded, stylish appearance.
Pastel Power: Soft blues, pinks, lilacs, and mint green for a sweet and delicate Sudoku design.
Metallics & Glitters: Gold, silver, or rose gold lines, or fully glitter-filled squares, add instant glam.
Style Variations:
Full Grid: Covering multiple nails with a consistent grid pattern.
Accent Nail Focus: Applying the main Sudoku design to just one or two nails, keeping the others simple or solid.
Partial Grids: Only incorporating sections of a grid, or disconnected lines, for a more abstract feel.
Ombré Grids: Filling squares with an ombré effect, blending two colors.
Matte Finish: Opt for a matte top coat for a modern, velvety texture that makes geometric lines stand out even more.
Sudoku Nail Designs: Quick Comparison Table
To help you decide which Sudoku nail design might be best for you, here’s a quick comparison:
| Design Type | Complexity | Best For | Key Features |
| :—————— | :——— | :————————————- | :———————————————- |
| Classic Grid | Easy | Beginners, Minimalists | Clean lines, even squares, simple color blocks. |
| Abstract Sudoku | Easy-Medium| Creative souls, those who like whimsy | Imperfect lines, free-form shapes, unique. |
| Number Accents | Medium | Puzzle enthusiasts, playful statement | Grid with strategically placed numbers. |
| Tape-Assisted Grids | Easy | Those seeking ultra-crisp lines | Perfect, sharp divisions achieved with tape. |
Beyond the Grid: How to Make Your Sudoku Nails Truly Mandate
These designs are incredibly versatile and pair well with other nail art elements. Don’t be afraid to experiment!
Elevating Your Sudoku Manicure:
Negative Space: Leave some squares or sections completely clear for a contemporary, airy feel.
Textured Polishes: Use a crackle polish within some squares, or a sand texture polish for contrast.
3D Elements: Add tiny studs or rhinestones at the intersection of lines for a bit of bling.
French Tip Twist: Incorporate a grid pattern into the French tip itself, with the grid lines forming the white (or colored) tip.
Color Transitions: Instead of solid blocks, fill squares with a gradient of colors.
The Longevity and Maintenance of Your Sudoku Nails
Like any nail art, the lifespan of your Sudoku design depends on a few factors, primarily how well you prep your nails and the quality of your top coat.
Nail Care Tips:
Proper Prep is Paramount: Ensuring your nails are clean, dry, and free from oils is critical for polish adhesion. A good base coat is non-negotiable.
Generous Top Coat: Apply a good quality, non-smudging top coat. Two thin layers are often better than one thick one. Ensure it covers all the polish and art, including the tips of your nails to “cap” them. This seals the design and prevents chipping.
Avoid Harsh Chemicals: Wear gloves when doing dishes or using cleaning products, as these can break down polish quickly.
Reapply Top Coat: If you notice your top coat starting to lose its shine, you can apply another thin layer every few days to refresh the look and add protection.
Gentle Filing: If you need to file your nails, do so gently to avoid snagging and lifting the polish design.
With good care, your Sudoku nail designs can last anywhere from 5-10 days, with many people extending this even further simply by being mindful of their hands.
Frequently Asked Questions About Sudoku Nail Designs
Q: Are Sudoku nail designs difficult for beginners?
A: Not at all! The basic grid design is quite simple, involving drawing lines. You can start with just a few lines and build up complexity as you get more comfortable. There are many easy variations.
Q: What are the best colors to use for Sudoku nail designs?
A: Contrasting colors work best to make the grid stand out. Classic black and white, or bolder pairings like blue and yellow, are popular. However, any color combination you love will work!
Q: How do I get clean, straight lines for my Sudoku grid?
A: The key is a fine-tipped brush, wiping off excess polish, and having a steady hand. For perfect lines, nail striping tape is a game-changer. Remember to clean up mistakes with a cotton swab and remover.
Q: Can I do Sudoku nail designs on short nails?
A: Absolutely! On shorter nails, you might opt for a simpler 2×2 grid or just a few intersecting lines rather than a full 3×3. Even a single bold line can evoke the Sudoku theme.
Q: How long do Sudoku nail designs usually last?
A: With proper application, including a good base and top coat, Sudoku nail designs can last about 5-10 days. Reapplying top coat every few days can help extend their wear.
Q: Do I need special nail polish for Sudoku designs?
A: No, regular nail polish works perfectly. You’ll benefit most from a highly pigmented polish for good coverage and polishes that dry to a smooth finish. A good quality nail art brush is more important than special polish.
Conclusion: Unleash Your Inner Game Master with Sudoku Nails!
So there you have it – your complete guide to the genius and must-have world of Sudoku nail designs! We’ve explored why these geometric patterns are so captivating, gathered the essential tools, and walked through easy-to-follow steps to create your own stunning manicures. From the classic clean grid to more abstract interpretations, the possibilities are as endless as the puzzles themselves.
Remember, nail art is all about self-expression. Don’t be afraid to play with colors, try different patterns, and embrace the perfectly imperfect. Whether you’re a seasoned nail art pro or just dipping your toes into DIY manicures, Sudoku nails offer a fun, accessible, and incredibly stylish way to elevate your look. Grab your favorite polishes, find a comfy spot, and let your creativity shine. Your fingertips are now ready to tackle any puzzle – and look fabulous while doing it! Happy painting!

