Succulent nail designs offer a unique and charming way to bring a bit of nature’s beauty to your fingertips. These designs mimic the intricate patterns and soft hues of popular succulents, creating a chic and eye-catching manicure. Easy to adapt for beginners, these designs are simple yet stunning, perfect for expressing your style.
Have you ever looked at those gorgeous, layered leaves of a succulent plant and thought, “I wish my nails could look that cool”? You’re not alone! Succulent nail designs have become incredibly popular because they’re unique, elegant, and surprisingly easy to achieve. Forget complicated art; we’re talking about simple techniques that give you a stylish, nature-inspired manicure. If you’re new to nail art and feeling a little intimidated, don’t worry! We’ll break down exactly how to create these beautiful designs, covering the essential tools and simple steps to get you glowing with confidence and gorgeous nails.
Why Succulent Nails Are a Must-Try Trend
Succulents are loved for their beautiful geometry, diverse textures, and calming presence. Translating these qualities to nails gives you a manicure that’s both trendy and timeless. They’re sophisticated enough for a special occasion but chill enough for everyday wear. Plus, the color palette – from soft greens and dusty blues to rosy pinks and earthy browns – is incredibly versatile and flattering.
Essential Tools for Your Succulent Nail Journey
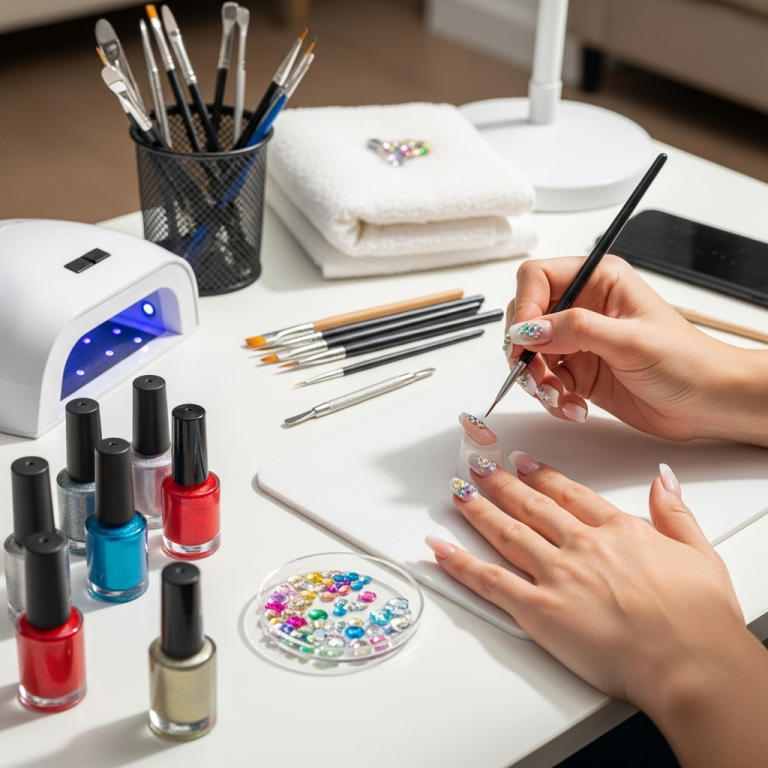
Before we dive into the fun part, let’s gather your nail art toolkit. You don’t need fancy equipment; most of these items are probably already in your beauty stash!
- Base Coat: Protects your natural nails and helps polish adhere better.
- Top Coat: Seals your design and adds a brilliant shine.
- Nail Polish in Various Colors: Think soft greens, dusty blues, creamy whites, muted purples, and a touch of pink or peachy tones.
- Dotting Tools: These come in various sizes and are perfect for creating small, circular shapes that mimic succulent leaves or buds.
- Thin Nail Art Brush or Liner Brush: For drawing finer lines and details.
- Sponge or Makeup Sponge: Great for creating gradient effects and softer textures.
- Tweezers: Useful for placing small embellishments if you decide to add them.
- Clean-up Brush or Cotton Swabs: For tidying up any polish that gets on your skin.
- Nail Polish Remover: Essential for those little oops moments.
Understanding Succulent Nail Design Elements
What makes a nail design look like a succulent? It’s all about capturing the plant’s essence:
- Layering: Succulents often have petals or leaves that overlap. Recreate this by layering colors and shapes.
- Curves and Swirls: The natural form of succulents involves gentle curves.
- Color Blending: Subtle gradients of color, especially on the “leaves,” add depth.
- Small Details: Tiny dots or lines can represent dew drops or the delicate edges of petals.
- Natural, Earthy Tones: Leaning into muted, natural colors enhances the organic feel.
Beginner-Friendly Succulent Nail Design Tutorials
Let’s get creative! Here are a few simple designs to get you started.
Design 1: The Simple Succulent Bud
This design focuses on creating a small, layered bud shape.
- Prep Your Nails: Start with clean, dry nails. Apply a base coat and let it dry completely.
- Apply Base Color: Paint your nails with a light, neutral color like a soft cream or a pale green. Apply two thin coats for even coverage and let them dry.
- Create the Bud: Using a fine-tip brush or a dotting tool, dab a small amount of a slightly darker green or teal polish in the center of your nail, slightly towards the cuticle. This will be the core of your bud.
- Add Layers: With the same darker color, use your brush to gently draw a curved line or a C-shape around the central dab, starting from one side and curving towards the other, slightly overlapping the center. Think of creating a soft petal.
- Build Depth: Use a slightly lighter shade of green or even a hint of white. Apply this in similar curved strokes around the previous layer, making each new “petal” slightly larger and less curved, fanning outwards.
- Refine with a Lighter Tone: For a final touch of dimension, add a very thin line of a pale green or white polish along the outer edge of your outermost “petals.”
- Finishing Touches: Once your design is completely dry, apply a generous coat of top coat to seal everything in and add shine.
Design 2: The Gradient Leaf
This design uses a sponge to create a soft, blended effect on individual “leaves.”
- Base and Prep: Apply your base coat and then paint your nails with a creamy off-white or light beige polish. Let it dry fully.
- Prepare Your Sponge: Cut a small piece of a makeup sponge.
- Apply Polish to Sponge: Dab a bit of your main succulent colors (e.g., a sage green and a dusty blue) side-by-side onto the sponge. Don’t overdo it.
- Stamp the Leaf Shape: Gently press the sponge onto your nail, angling it slightly to create an elongated, leaf-like shape with blended colors. You might need to reapply polish to the sponge for each nail or even multiple stamps per nail to get the desired effect.
- Refine with a Brush: Once the stamped color is dry, use a thin nail art brush and a slightly darker green. Outline the stamped shape with delicate, curved lines to define the leaf. You can also add a thin, central vein.
- For Multiple Leaves: If you want to create the look of several leaves clustered together, simply repeat the stamping and outlining process, placing the next “leaf” slightly overlapping the first.
- Seal It: Apply a top coat once everything is dry.
Design 3: The Echeveria Bloom
This design mimics the iconic rosette shape of an Echeveria succulent.
- Foundation: Start with a nude, pale pink, or light gray base polish and let it dry.
- Center Point: Using a small dotting tool and a medium green polish, place a small dot near the base of your nail, slightly off-center.
- First Petal Layer: With a slightly darker green or a teal color, use your finest brush. Starting from one side of the dot, draw a thin, upward-curving stroke that arcs over the dot and ends on the other side. This is your first “petal.”
- Second Petal Layer: Using an even darker green or a muted purple hint, create another curved stroke that mirrors the first but is slightly larger and overlaps the edges of the previous one.
- Continue Building: Keep adding curved strokes, alternating colors slightly (e.g., a touch of dusty rose on the edges of a green petal) and increasing the size of each new layer, fanning them outwards. The key is to make them look organically layered, not perfectly uniform.
- Final Touches: A tiny highlight of white at the very tip of a petal can add a touch of realism.
- Top Coat: Once dry, apply your top coat for a smooth, polished finish.
Tips for Polishing Your Skills
As you practice, keep these tips in mind to elevate your succulent nail game:
- Color Palette Matters: Stick to muted, earthy, and pastel shades for an authentic succulent look. Avoid neons or overly bright colors unless you’re going for a stylized interpretation.
- Practice Makes Perfect: Don’t get discouraged if your first attempts aren’t salon-perfect. Nail art takes practice!
- Use a Clean-Up Brush: A small brush dipped in nail polish remover is your best friend for cleaning up any wobbly lines or polish on your skin.
- Layering is Key: Even with simple designs, layering colors and shapes adds depth and makes them look more realistic.
- Less is More: You don’t need to cover your entire nail with intricate details. Sometimes, a single, well-placed succulent element is more impactful.
- Experiment with Textures: Consider matte top coats for a more natural, powdery succulent appearance.
Choosing Your Succulent Colors: A Palette Guide
The right colors are crucial for that authentic succulent vibe. Here’s a guide to help you pick:
| Succulent Type/Inspiration | Primary Colors | Accent Colors | Effect |
|---|---|---|---|
| Echeveria / Rosette | Sage Green, Dusty Blue, Muted Teal | Pale Pink, Soft Lavender, Cream | Layered, petal-like shapes; soft gradients. |
| Sempervivum (Hens and Chicks) | Olive Green, Earthy Brown, Muted Burgundy | Coral, Dusty Rose, Beige | Tight, layered centers with slightly more defined outer leaves. |
| Sedum / Stonecrop | Jade Green, Seafoam Green, Grey-Green | Peach, Terracotta, Light Yellow | Often more delicate and less dense than Echeverias. |
| Haworthia / Zebra Plant | White, Off-White, Light Grey | Dark Green, Black (for stripes) | Focus on stripes and geometric patterns. |
Maintaining Your Succulent Manicure
To keep your stunning succulent nails looking fresh for as long as possible:
- Apply Top Coat Regularly: A fresh layer of top coat every 2-3 days can refresh the shine and add protection.
- Moisturize: Hydrate your cuticles and hands daily with cuticle oil and hand cream. Dry skin can make even the prettiest nails look dull.
- Be Gentle: Avoid using your nails as tools. For example, don’t open cans or scratch labels.
- Wear Gloves: When doing household chores, especially washing dishes or cleaning, wear rubber gloves to protect your polish from harsh chemicals and prolonged water exposure.
When to Seek Professional Help
While many succulent nail designs are beginner-friendly, some intricate patterns might be challenging. If you’re aiming for hyper-realistic 3D succulent effects or complex airbrushed gradients, consider visiting a professional nail technician. Reputable salons often have artists skilled in detailed work, and they have access to specialized tools and products. You can also use sites like the Professional Beauty Association to find licensed professionals in your area.
Frequently Asked Questions About Succulent Nail Designs
Q1: Are succulent nail designs difficult for beginners?
A1: Not at all! The beauty of succulent nail designs is their adaptability. Simple designs using dots and curved lines are very beginner-friendly. You can start with basic shapes and gradually try more complex layering as you gain confidence.
Q2: What are the best nail polish colors for succulent designs?
A2: Think natural, earthy, and muted tones. Popular choices include sage green, dusty blue, muted teal, olive green, creamy white, soft lavender, beige, and hints of peachy pink or coral. Avoid overly bright or neon colors for a classic look.
Q3: How do I make my succulent nail art last longer?
A3: Ensure you use a good base coat and a quality top coat. Apply a refresh of top coat every few days. Keep your hands moisturized and wear gloves when doing chores to protect your nails from damage and chemicals.
Q4: Can I combine succulent designs with other nail art?
A4: Absolutely! Succulent designs pair beautifully with minimalist accents like simple metallic lines, tiny gold studs, or even a subtle glitter accent nail. Some people also like to combine them with other nature-inspired elements like subtle floral outlines or tiny leaf details on accent nails.
Q5: Do I need special nail art tools?
A5: While dedicated dotting tools and fine-tip brushes make it easier, you can start with what you have. A toothpick can work as a makeshift dotting tool for small dots, and a regular fine brush from an art store (cleaned thoroughly) can be used for lines. However, investing in a basic set of dotting tools and liner brushes is highly recommended for better control and results.
Q6: How can I get a smooth, blended look on the “leaves”?
A6: A small makeup sponge is your best friend for this! Dab two complementary colors onto the sponge and then gently press it onto the nail to create an ombre or gradient effect. You can then refine the edges with a fine brush if needed.
Q7: What kind of top coat works best?
A7: A high-shine, quick-dry top coat is generally best for sealing in designs, adding gloss, and protecting your artwork. For a more natural, organic look, you can opt for a matte top coat instead, which mimics the powdery finish of some real succulents.
Your Succulent Nail Art Journey Awaits!
And there you have it! Creating stunning succulent nail designs is achievable, enjoyable, and a fantastic way to express your personal style. By gathering the right tools, understanding the core elements of these designs, and practicing a few simple techniques, you can transform your nails into miniature works of art. Remember to embrace the process, have fun experimenting with color palettes, and don’t be afraid to let your creativity bloom. Whether you choose a simple bud, a blended leaf, or a detailed rosette, your succulent-inspired manicure is sure to be a conversation starter and a beautiful reminder of nature’s enduring charm, right at your fingertips.

