Discover easy, stylish nail art designs perfect for beginners! Elevate your manicure game with simple techniques and chic looks that you can create at home. Unleash your creativity and express yourself with beautiful, on-trend nails that will make heads turn.
Ever look at perfectly painted nails and wish you could achieve that same polished look? You’re not alone! Many of us admire intricate nail art but feel intimidated, believing it’s too complicated to do ourselves. The good news is, creating stylish nail art is totally achievable, even if you’re just starting out. Forget those frustrating salon trips and expensive treatments; we’re going to dive into the world of easy, beautiful nail designs that you can master right at your fingertips. Get ready to transform your nails into mini works of art!
Your Starter Pack to Stylish Nail Art: Easy Designs for Beginners
Welcome, nail art lovers! I’m Lisa Drew, your guide here at Nailerguy, and I’m thrilled you’re here to explore the fun and creative world of nail art. My goal is to make nail care and design accessible and enjoyable for everyone. You don’t need to be a pro artist to have gorgeous nails. With a few basic tools and some simple techniques, you can recreate stunning looks that express your unique style. Let’s dive into some essential, beginner-friendly designs that will boost your confidence and your nail game!
Why Nail Art? More Than Just Pretty Polish
Nail art is a fantastic way to express your personality and add a touch of flair to your everyday look. It can be a fun creative outlet, a way to match your nails to a special occasion, or simply a way to brighten your mood. Plus, with DIY nail art, you have complete control over the style, colors, and most importantly, the cost! Mastering a few basic techniques opens up a world of possibilities for personalized manicures.
Essential Tools for Your Nail Art Journey
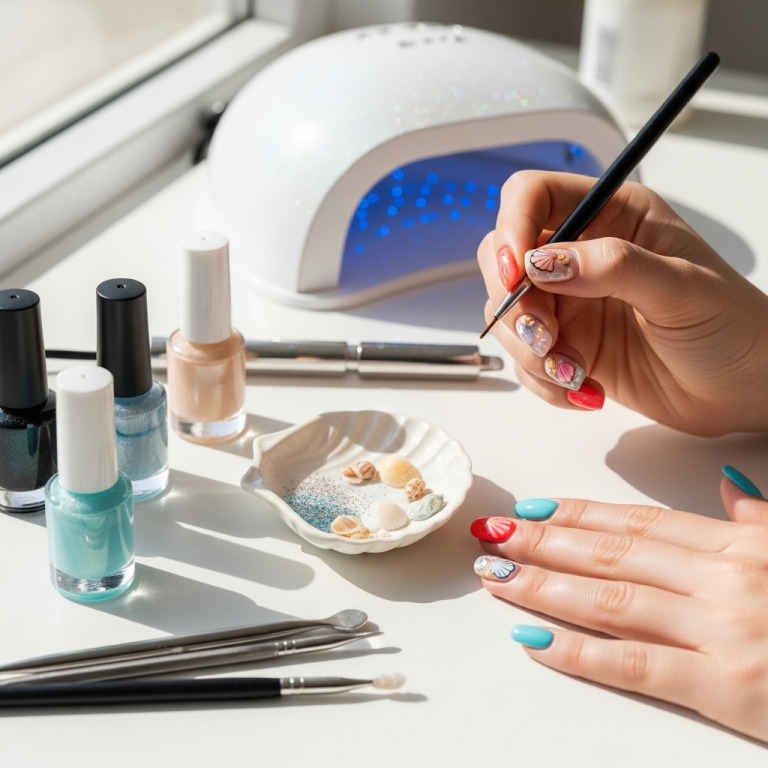
Before we jump into the designs, let’s gather the essentials. You don’t need a professional kit to start. A few key items will have you well on your way to creating beautiful nail art. Investing in good basic tools will make the process much smoother and more enjoyable.
Must-Have Nail Art Supplies
- Base Coat: Protects your natural nails and helps polish adhere better.
- Top Coat: Seals your design and adds shine, making your manicure last longer.
- Nail Polish Colors: Start with a few of your favorite colors.
- Dotting Tools: These come with various ball sizes at the tip, perfect for creating dots and simple patterns. You can find great starter sets for a reasonable price.
- Fine-Tipped Detail Brush: Essential for drawing lines, swirls, and small accents. A clean eyeliner brush can even work in a pinch!
- Toothpicks or Balled-Up Aluminum Foil: Great for creating unique texture effects or simple dots if you don’t have dotting tools yet.
- Nail Polish Remover: For cleaning up mistakes and removing old polish.
- Cotton Swabs or Pads: For precise cleanup around the cuticles.
- Nail Files and Buffers: For shaping your nails and creating a smooth surface.
Optional (But Helpful!) Tools
- Striping Tape: For creating sharp, clean lines and geometric designs.
- Stencils: Pre-cut designs that you paint over for instant patterns.
- Gems, Glitter, or Studs: For adding a little extra sparkle and dimension.
- Nail Art Pens: These offer a pen-like application for easier line work and detailing.
Beginner-Friendly Nail Art Designs: Step-by-Step
Now for the fun part! Let’s explore some stylish nail art designs that are perfect for beginners. We’ll break down each design with simple steps so you can follow along easily.
1. The Classic Polka Dot Manicure
Polka dots are timeless and incredibly easy to create. They add a playful touch to any outfit and are a staple in any nail art beginner’s repertoire.
Materials Needed:
- Base coat
- Two or three nail polish colors (one for the base, one or two for dots)
- Dotting tool (or toothpick)
- Top coat
Steps:
- Prep Your Nails: Start with clean, dry nails. Apply a base coat and let it dry completely. This protects your nails and helps the polish last longer.
- Apply Base Color: Paint your nails with your chosen base color. Apply two thin coats for even coverage and allow each coat to dry thoroughly.
- Create the Dots: Dip the ball end of your dotting tool into one of your contrast polish colors. Gently press the tip onto your nail to create a dot. Clean your dotting tool with a bit of nail polish remover on a cotton pad between dots, especially if you’re using multiple colors.
- Pattern Play: You can create uniform dots all over, or mix up the sizes by using different ends of your dotting tool or even a toothpick. For a more random look, vary the spacing. For a uniform look, try to keep the dots evenly spaced.
- Add More Colors (Optional): If you’re using multiple dot colors, repeat step 3 with your other colors, ensuring you clean your tool in between.
- Let it Dry: Allow the polish dots to dry completely. This is crucial to prevent smudging.
- Seal the Deal: Apply a generous coat of top coat over your entire nail. This will smooth out the texture of the dots and give your manicure a beautiful, lasting shine.
2. The Simple Stripe Design
Stripes offer a chic and sophisticated look. They can be as simple or as detailed as you like. For beginners, we’ll focus on thick, easy-to-manage stripes.
Materials Needed:
- Base coat
- Two contrasting nail polish colors
- Fine-tipped detail brush (or a toothpick with a clean, sharp edge)
- Top coat
- Optional: Striping tape
Steps (Without Striping Tape):
- Prep and Base Coat: Apply a base coat to clean nails and let it dry.
- Apply First Color: Paint all nails with your first polish color. Let it dry completely.
- Create the Stripes: Dip your fine-tipped brush into your second polish color. Hold your brush at a slight angle and carefully draw a stripe across your nail. You can go vertically, horizontally, or diagonally. Don’t worry if it’s not perfectly straight; a slightly imperfect stripe can look charming!
- Clean Up: If you make a mistake, use a cotton swab dipped in nail polish remover to gently clean up the edges.
- Add More Stripes (Optional): If you want multiple stripes, ensure the first stripe is dry before adding another parallel stripe.
- Seal and Shine: Once all stripes are completely dry, apply a top coat to seal the design and add gloss.
Steps (With Striping Tape):
- Prep and Base Coat: Apply a base coat and let it dry.
- Apply First Color: Paint nails with your first polish color and let it fully dry.
- Apply Striping Tape: Carefully place a strip of nail art striping tape onto the dried polish. Press down firmly along the edges to ensure a clean seal. You can place it anywhere – across the nail, diagonally, or even in sections.
- Apply Second Color: Paint over the striping tape and the rest of the nail with your second polish color. Make sure to cover the tape completely.
- Peel Off Tape: While the second color is still slightly wet (but not runny), carefully peel away the striping tape. Do this gently to avoid lifting the polish underneath.
- Dry and Seal: Let the polish dry completely, then apply a top coat.
Pro Tip: For the best results with striping tape, ensure your base color is completely dry and hard. Peeling the tape while the top layer is slightly wet is key to a crisp line!
3. The Gradient (Ombre) Effect
Ombre nails, or gradient nails, create a beautiful blend of colors. It looks impressive but is surprisingly easy to achieve with a makeup sponge!
Materials Needed:
- Base coat
- Two or three coordinating nail polish colors
- Makeup sponge (a regular cosmetic sponge works well)
- Top coat
- Aluminum foil or plastic palette
- Paper towel or cotton pad for cleanup
Steps:
- Prep and Base Coat: Apply your base coat and let it dry.
- Apply First Color: Paint your nails with the lightest color you’re using. Let it dry. This provides a smooth base for the gradient.
- Create the Gradient on Foil: On a piece of aluminum foil or a plastic palette, paint a few thick stripes of your chosen colors, right next to each other. For example, if you’re doing a pink to purple gradient, paint a stripe of pink, then a stripe of purple next to it.
- Sponge the Colors: Lightly dab the makeup sponge onto the stripes of polish on the foil. You want to pick up both colors onto the sponge.
- Dab Onto Nails: Gently dab the sponge onto your nail. Start from the cuticle and dab upwards towards the tip of the nail. You may need to re-apply color to the sponge and dab multiple times to build up the gradient effect.
- Blend and Refine: For a smoother transition, you can use a clean part of the sponge or a different sponge to gently blend the colors.
- Clean Up: Use a cotton swab dipped in nail polish remover to carefully clean up any polish that got onto your skin or cuticles.
- Add the Second Color (Optional): If your gradient looks a bit too light, or you want to deepen the effect, you can repeat steps 3-5. Alternatively, if you want a different color to lead, you can apply your second chosen polish to the nail first (step 2) and then sponge over it.
- Seal the Look: Once the gradient is dry, apply a generous top coat. This will help meld the colors together further and give your nails a beautiful, glossy finish.
Tip: Cut your makeup sponge into smaller pieces for better precision and easier cleanup.
4. The Accent Nail with Glitter
Sometimes, all you need is a little sparkle! An accent nail is a fantastic way to add a touch of glamour without being overwhelming, and glitter polishes are usually very forgiving.
Materials Needed:
- Base coat
- Your favorite nail polish color
- Glitter nail polish
- Top coat
Steps:
- Prep and Base Coat: Apply base coat to clean nails and let dry.
- Apply Main Color: Paint all your nails (except for one, your accent nail) with your chosen polish color. Let it dry.
- Glitter Accent: On your accent nail, apply the glitter nail polish. You can do a full glitter nail, or just coat the tip. For a diffused glitter look, start with the brush at the tip of the nail and gently drag it down, applying less polish as you move towards the cuticle.
- Add More Layers (Optional): If one coat of glitter isn’t enough, let it dry for a minute and add another coat.
- Top Coat: Once the glitter polish is dry, apply a top coat to all your nails, including the accent nail. A top coat over glitter can sometimes be a bit textured, so you might want to apply two coats of top coat for a super smooth finish.
Why it’s great for beginners: Glitter polishes are very forgiving. Even if your base color isn’t perfectly applied, the glitter can help mask any minor imperfections. Plus, glitter is always festive!
5. Simple Geometric Shapes
Geometric designs, like simple triangles or squares, can look super modern and chic. Using tape is the easiest way to get clean edges.
Materials Needed:
- Base coat
- Two different nail polish colors
- Nail art striping tape
- Top coat
- Small nail scissors or cuticle nippers for tape
Steps:
- Prep and Base Coat: Apply base coat and let dry.
- Apply First Color: Paint all nails with your first polish color. Let it dry completely.
- Apply Tape for Shapes: Cut small pieces of striping tape. For a triangle, you might use three small pieces to form a triangle shape, or for a simple square, use four pieces. Place the tape pieces onto the dry polish to create your desired shape. Ensure the tape is pressed down firmly along all edges.
- Apply Second Color: Paint over the tape and any exposed nail with your second polish color. Make sure you cover the tape completely.
- Peel Tape: While the second color is still wet, carefully peel away the tape pieces using tweezers or your fingers. Slow and steady wins the race here to avoid smudges.
- Dry and Seal: Let the polish dry completely, then apply a top coat to seal the design.
Consider this: You can create half-moon shapes by applying tape just above the cuticle and painting the rest of the nail, or create diagonal blocked sections!
Nail Care Tips to Keep Your Canvas Healthy
Beautiful nail art starts with healthy nails. Taking good care of your nails ensures they are strong, smooth, and ready for any design!
- Moisturize: Keep your cuticles and hands hydrated with a good cuticle oil or hand cream. This prevents dry, flaky skin around your nails.
- File Correctly: Always file your nails in one direction to prevent them from splitting. Mentioned in the NHS guide to nail problems, irregular filing can lead to damage.
- Give Nails a Break: If you wear polish constantly, give your nails a break every so often to let them breathe and recover.
- Buff Gently: Use a nail buffer to smooth out ridges and add shine, but don’t overdo it, as this can thin your nails.
- Healthy Diet: A balanced diet rich in vitamins and minerals can contribute to strong, healthy nails.
Maintaining Your Masterpiece
You’ve done a fantastic job creating your stylish nail art! Here’s how to make it last:
- Reapply Top Coat: Every 2-3 days, apply another thin layer of top coat to refresh the shine and protect your design.
- Be Gentle: Try to avoid using your nails as tools to open things or scrape surfaces.
- Moisturize Regularly: Keeping your hands and cuticles hydrated also helps protect your manicure from drying out and chipping.
Common Nail Art Questions for Beginners
Q1: What’s the best way to clean up polish mistakes?
A1: A small brush (like an old eyeliner brush) or a clean cotton swab dipped sparingly in nail polish remover is perfect for precise cleanup around your cuticles and sidewalls. Dab gently to lift away excess polish.
Q2: How do I make my nail polish dry faster?
A2: Apply polish in thin coats, as thick coats take longer to dry. You can also use quick-dry top coats or drying drops designed for this purpose. Avoiding heat sources like hot water or hairdryers on a hot setting can also help prevent smudging.
Q3: My dots or lines are not smooth. What am I doing wrong?
A3: This could be because your polish is too thick, or you’re using too much polish on your tool. Try thinning your polish with a nail polish thinner (not remover, as that breaks down the formula) and use less polish on your dotting tool or brush. Also, ensure your base polish is fully dry before adding details.
Q4: Can I use regular makeup brushes for nail art?
A4: Yes, you can! Clean, dense makeup brushes are great for blending gradient effects. Fine-tipped brushes, like those in some eyeliner brushes, can also be carefully cleaned and used for detail work. Just ensure they are thoroughly cleaned after nail use.
Q5: How do I prevent smudging when applying a top coat?
A5: Ensure your nail art design is completely dry before applying the top coat. If you’re worried about smudging, you can “cap” your polish by running the brush along the free edge of your nail. If you notice a slight smudge, gently correct it with a clean brush and a tiny bit of top coat.

