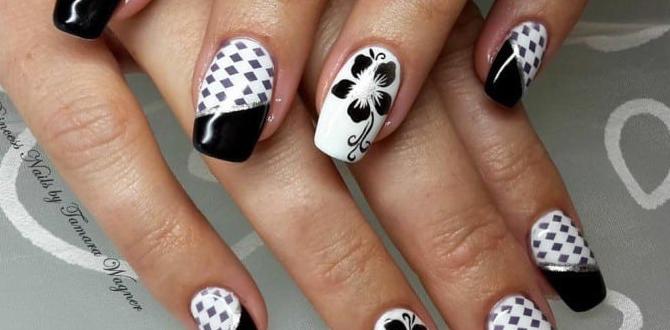
Studio Ghibli nail designs are a magical way to bring your favorite animated worlds to your fingertips! This guide breaks down simple, beautiful ways for beginners to create enchanting Ghibli-inspired manicures, transforming your nails into tiny works of art bursting with charm and wonder, no matter your skill level.
Ever look at your bare nails and wish they had a little more enchantment? Studio Ghibli films are filled with breathtaking visuals, from whimsical creatures to serene landscapes. Wouldn’t it be amazing to carry a piece of that magic with you every day? Many of us dream of having gorgeous, themed nails but feel intimidated by complex designs. You might think intricate nail art is only for the pros, leaving you with plain nails. But Ghibli nail art doesn’t have to be daunting! We’re going to explore super simple, yet stunning, ways to create your own Studio Ghibli nail magic, perfect for anyone starting out. Get ready to unlock your inner artist and give your nails a touch of beloved Ghibli charm!
Unlocking Studio Ghibli Nail Design Magic: A Beginner’s Guide
Studio Ghibli movies are more than just films; they’re experiences. They transport us to worlds brimming with imagination, unforgettable characters, and a sense of wonder. From the soot sprites of Spirited Away to the gentle forest spirit of My Neighbor Totoro, these iconic images are perfect inspiration for beautiful nail art. Creating Ghibli nail designs is a fantastic way to showcase your love for these timeless stories and add a playful, creative touch to your everyday style. Don’t worry if you’re new to nail art – we’ll cover everything from essential tools to easy-to-follow techniques that will have you creating charming manicures in no time!
Why Studio Ghibli Nails?
Studio Ghibli aesthetics lend themselves beautifully to nail art. The distinct color palettes, unique character designs, and evocative atmospheres offer endless possibilities for creative expression. Whether you’re inspired by a specific character, a memorable scene, or the overall feeling of a film, Ghibli nails are a delightful way to:
- Express Your Fandom: Show off your love for these beloved animated classics.
- Add a Touch of Whimsy: Bring a bit of magic and storytelling to your daily life.
- Boost Your Confidence: Beautiful, personalized nails can make you feel more put-together and creative.
- Practice Your Skills: Start with simple designs and gradually build up to more intricate patterns as your confidence grows.
- Spark Conversation: Unique nail art often catches the eye and leads to fun chats about your favorite movies.
Essential Tools for Your Ghibli Nail Art Journey
Getting started with nail art, especially themed designs, is much easier with the right tools. You don’t need a professional salon’s worth of equipment! Here are some absolute essentials that will set you up for success:
Must-Have Nail Art Supplies:
- Base Coat: Protects your natural nails and helps polish adhere better.
- Top Coat: Seals your design, adds shine, and prevents chipping.
- Nail Polish Colors: Choose a range of colors inspired by your chosen Ghibli film.
- Detail Brushes: Thin brushes are crucial for drawing lines, small shapes, and fine details. Look for sizes like 00, 0, or 1.
- Dotting Tools: Perfect for creating small dots, eyes, or textured effects. They come in various tip sizes.
- Toothpicks or Fine-Pointed Tweezers: Useful for picking up small embellishments like glitter or tiny rhinestones.
- Nail Polish Remover & Cotton Pads: For clean-up and correcting mistakes.
- Lint-Free Wipes: To clean brushes and the nail surface without leaving fuzzy bits behind.
Optional, but helpful, tools include:
- Nail Art Palette or Clean Surface: A small palette or even a piece of plastic wrap to mix colors or hold small amounts of polish.
- UV/LED Lamp and Gel Polish: For a longer-lasting finish, but traditional polish works wonderfully too!
For a comprehensive guide on nail care and tool basics, check out resources like the NHS guide on nail care, which offers foundational advice on keeping your nails healthy.
| Tool | Purpose in Ghibli Nail Art | Beginner-Friendly Tip |
|---|---|---|
| Detail Brushes | Drawing character outlines, fine lines (like Totor’s whiskers), small details. | Start with simple lines and dots. Practice on paper first! |
| Dotting Tools | Creating eyes, rounded shapes, subtle textures (soot sprites, little leaves). | Use the larger dotting tool for Totor’s belly or smaller ones for subtle accents. |
| Nail Polish Colors | Recreating film palettes (e.g., Totoro’s earthy tones, Kiki’s sky blues). | Focus on 2-3 key colors from a film for a cohesive look. |
| Base & Top Coats | Protecting nails, making polish last longer, adding shine. | Always apply a base coat before color and a top coat after the design is dry. |
Easy Studio Ghibli Nail Design Ideas for Beginners
Let’s dive into some super achievable designs inspired by the most beloved Ghibli films. You’ll be amazed at what you can create with a little patience and these simple ideas!
1. My Neighbor Totoro: Simple & Adorable
Totoro is a fan favorite, and his design is wonderfully beginner-friendly! His chunky, furry shape and friendly smile translate perfectly to nails.
Totoro Simple Dots Design:
- Prep: Apply a base coat and let it dry.
- Base Color: Paint all nails a soft, medium grey. Apply a second coat if needed and let it dry completely.
- Totoro Tummy: Using a white polish and a dotting tool (or the tip of a toothpick), create a large, rounded white belly shape on one or two accent nails.
- Eyes: With a fine-detail brush or a small dotting tool and black polish, add two small black dots above the white belly for eyes.
- Whispers of Whiskers: Using a very fine black detail brush, add two tiny, curved lines extending from the eye area for whiskers. Keep them subtle!
- Top Coat: Once everything is completely dry, apply a clear top coat to seal your design.
Color Palette Inspiration: Grey, white, black, forest green (for leaf accents).
Leafy Accent Nails:
- On the remaining nails, use a dark green polish to paint simple, elongated leaf shapes. You can even dab on a lighter green with a dry brush technique for depth.
- Alternatively, paint these nails solid forest green or a muted earthy brown.
2. Kiki’s Delivery Service: Chic & Sky-High
Kiki’s world is full of charm, from her black cat Jiji to the iconic red bow. These elements are easy to translate into elegant nail art.
Jiji the Black Cat Silhouette:
- Prep: Apply base coat.
- Base Color: Paint your nails a cute pastel blue or lavender, evoking the sky. Two coats are usually best. Let dry.
- Jiji Silhouette: With a fine-detail brush and black polish, carefully paint a simple cat silhouette on an accent nail. Focus on the outline of Jiji’s head and ears. You don’t need to fill it in perfectly; a stylized outline is charming and easier.
- Optional: Yellow Eyes: For a subtle pop, add two tiny yellow dots for Jiji’s eyes.
- Kiki’s Red Bow: On another accent nail, paint a small, simple red bow shape. A few strokes with a very fine brush can create a lovely bow.
- Top Coat: Seal with a clear top coat.
Color Palette Inspiration: Pastel blue, lavender, black, red, white (for bow highlight).
3. Spirited Away: Mysterious & Whimsical
The world of Spirited Away offers rich imagery, from the iconic lanterns to the mischievous soot sprites.
Soot Sprite Accent Nails:
- Prep: Apply base coat.
- Base Color: Choose a deep, rich color like midnight blue, plum, or even a charcoal grey for your main nails.
- Soot Sprites: Using a black polish and a small dotting tool or the tip of a toothpick, create little black dots on an accent nail.
- Adding Character: Dip a very fine-detail brush into white polish and carefully add a tiny white dot in the center of some soot sprites to give them a hint of eyes and dimension.
- Optional: Starry Night: For extra magic, add a few tiny white dots or speckles around the soot sprites to mimic stars.
- Top Coat: Apply a clear top coat to finish.
Color Palette Inspiration: Deep blue, plum, charcoal, black, white, accents of red or gold.
Themed Color Block:
- Another simple idea is to color-block your nails using the film’s palette. For example, alternate between a deep blue, a muted pink, and a creamy white.
- You can add a tiny single white dot on one nail to represent a “star” from that world.
4. Ponyo on the Cliff by the Sea: Aquatic & Joyful
Ponyo’s vibrant underwater world and her adorable fish form make for bright and cheerful nail designs.
Ponyo’s Fishy Fun:
- Prep: Apply base coat.
- Base Color: Paint your nails a bright, ocean blue or a sunny coral.
- Ponyo’s Shape: On an accent nail, use a fine brush and white polish to paint a simple, rounded fish shape. Think of Ponyo’s plump, happy form.
- Adding Color: Use red or orange polish to paint a small fin and tail. Add two tiny black dots for eyes.
- Water Droplets: Using a clear polish or a slightly lighter blue, add a few small, scattered “droplets” over your accent nail for a watery effect.
- Top Coat: Seal with a top coat.
Color Palette Inspiration: Ocean blue, coral, red, orange, white, black.
Sparkling Sea Nails:
- Apply your base blue or coral polish.
- While the polish is still slightly wet, lightly sprinkle fine iridescent glitter over the nails for a shimmery, sea-like effect.
- Once dry, add your accent nail design.
Looking for more color inspiration? Check out this guide on Ghibli color palettes to find the perfect hues for your designs.
Mastering Basic Nail Art Techniques for Ghibli Magic
Even the simplest Ghibli nail designs rely on a few fundamental nail art techniques. Practicing these will elevate your creations!
1. The Art of the Dot
Dots are the building blocks of so many cute designs, from Totoros’ bellies to soot sprites’ eyes. A dotting tool is your best friend here.
- How-to: Dip the ball end of your dotting tool into a small amount of polish on your palette. Gently press the polish onto your nail to create a clean, round dot.
- Beginner Tip: Start with larger dots for filler shapes and use the smallest tip for fine details like eyes. If you don’t have dotting tools, the rounded end of a toothpick works too!
2. Simple Lines & Outlines
Creating outlines or drawing simple shapes is key for characters like Jiji or adding subtle details.
- How-to: Load your fine-detail brush with a small amount of polish. Start with light pressure and draw your line, gradually increasing pressure for thicker lines or decreasing for thinner ones.
- Beginner Tip: Practice drawing straight lines, curves, and simple shapes (like a simple cat ear or bow) on a piece of paper or a nail art practice sheet first. Don’t be afraid to use the side of your detail brush for broader strokes.
3. Creating Clean Shapes
For elements like Totoro’s belly or Ponyo’s body, you’ll need to create smooth, rounded shapes from one color.
- How-to: Using your dotting tool or a medium-sized brush, carefully place and spread the polish to form the desired shape. You can build up the shape by adding polish in small increments.
- Beginner Tip: Work slowly and don’t overload your brush or tool with polish. It’s easier to add more than to remove excess. Let each layer dry slightly before adding more to prevent smudging.
4. The “Two-Tone” or “Color Block” Effect
This is perhaps the easiest way to incorporate Ghibli themes, using distinct color palettes.
- How-to: Simply paint different nails in solid colors that reflect a film’s theme, or divide a single nail into sections using different colors.
- Beginner Tip: Use nail tape or decals for perfectly straight lines if you find freehand color blocking tricky. Or, simply alternate solid colors on your fingers for an easy, thematic look.
5. Adding Subtle Accents
Sometimes, a tiny detail is all you need to tie a design together.
- How-to: Use a very fine brush to add small dots, lines, or even tiny dots of glitter.
- Beginner Tip: Even adding a single white dot for an eye on a black silhouette or a tiny pink blush spot on Totoro’s cheeks can make a big difference.
Caring for Your Ghibli Nail Art
Once your masterpiece is complete, you’ll want to keep it looking fresh for as long as possible!
- Always Use a Top Coat: This is non-negotiable! A good quality top coat seals your design, adds shine, and protects against chipping. Reapply every couple of days if needed, especially if your nails are getting a lot of wear and tear.
- Be Gentle: Avoid using your nails as tools. Try not to pick at dried polish or scratch surfaces with your nail art.
- Moisturize: Keep your cuticles and hands hydrated with cuticle oil and hand cream. Healthy nails and skin make your nail art look even better! This also prevents dryness that can lead to chips.
- Avoid Harsh Chemicals: When cleaning or doing household chores, wear gloves. Certain cleaning products can dull or lift nail polish.
- Touch-Ups: If a small chip occurs, you can sometimes fix it by carefully filing the edge smooth and applying another layer of top coat, or even a tiny bit of your base color and then top coat.
For more in-depth nail care, the American Academy of Dermatology Association offers excellent advice on nail health.
Troubleshooting Common Ghibli Nail Art Woes
Even with the best intentions, nail art can sometimes be tricky. Here are a few common issues and how to fix them:
| Problem | Solution |
|---|---|
| My lines are wobbly or uneven. | Use a firmer grip on your brush, rest your pinky on a stable surface, and use thin, flowing strokes rather than choppy ones. Practice on paper! If a mistake is fresh, use a brush dipped in nail polish remover to clean it up. |
| My dots are not perfectly round or have “tails.” | Don’t “drag” the polish off the nail; lift cleanly. Dip your dotting tool into polish on your palette regularly, rather than trying to spread too much at once. Clean excess polish from your dotting tool between dots. |
| My design smudged when I applied the top coat. | This usually means your polish wasn’t fully dry! Be patient. You can also try a “floating” top coat technique: apply a thin layer of top coat without d
|

