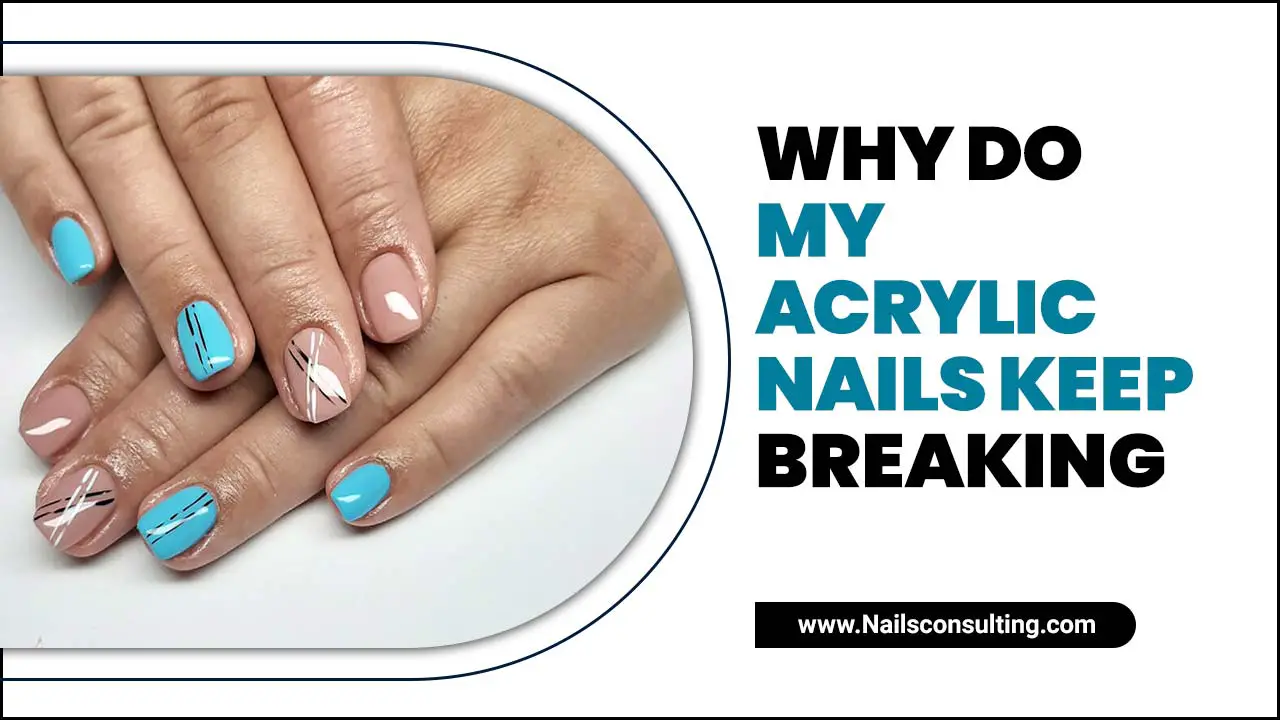
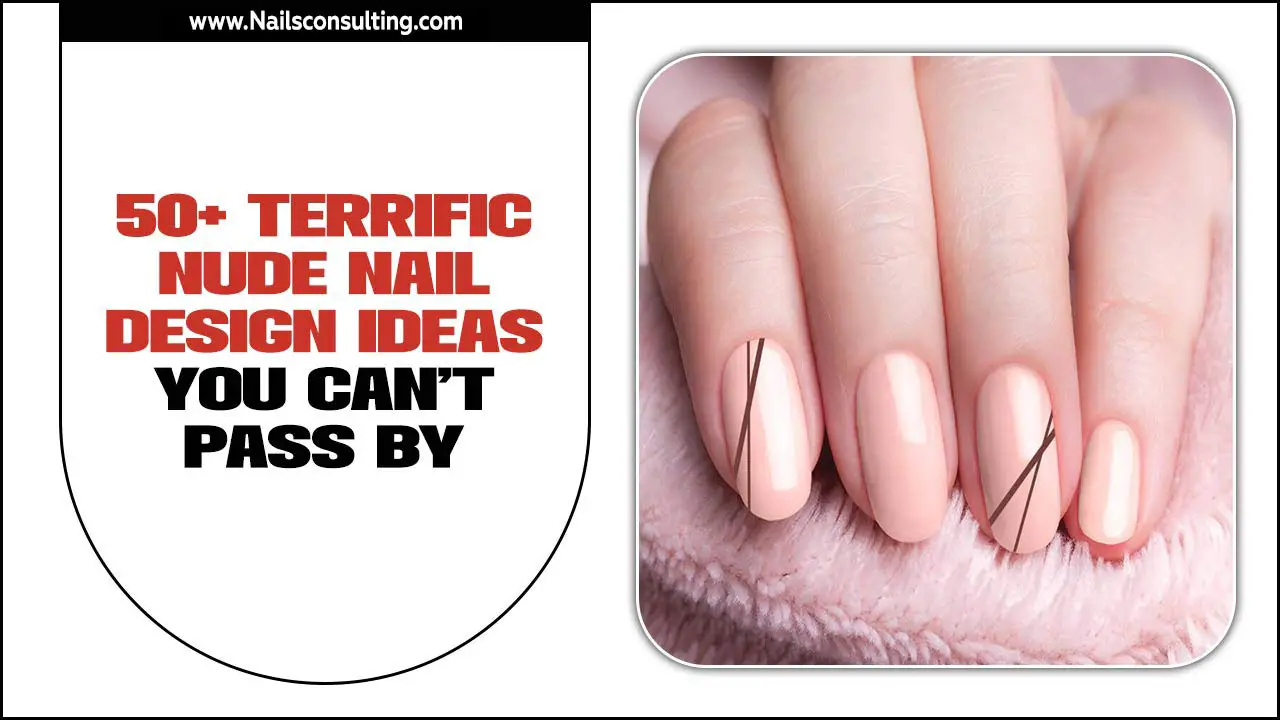
Stripe tape nail designs offer a simple, stylish way to elevate your manicure, creating clean lines and chic patterns with minimal effort, perfect for any skill level.
Want nails that look professionally done without the fuss? Stripe tape nail designs are your secret weapon! They’re surprisingly easy to master, even if you’re just starting out with nail art. Forget messy freehand attempts; this technique gives you crisp, sharp lines every time. Let’s dive into how you can create these stunning looks at home.
What Are Stripe Tape Nail Designs?
Stripe tape nail designs, also known as striping tape manicures, utilize thin, adhesive tape strips to create precise geometric patterns on your nails. Think clean lines, French tips, half-moon designs, or even intricate grids. This method is perfect for adding a touch of modern elegance to your nails without needing a steady hand or advanced artistic skills.
Why Choose Stripe Tape for Your Nails?
There are so many reasons why this technique has become a go-to for nail enthusiasts:
Simplicity: It’s incredibly beginner-friendly.
Precision: Achieves sharp, clean lines that are hard to replicate freehand.
Versatility: Endless design possibilities, from minimalist to bold.
Speed: Significantly faster than intricate hand-painted designs.
Affordability: The tools are inexpensive and readily available.
Durability: When applied correctly over a fully dried polish, the tape itself doesn’t damage your manicure.
Essential Tools for Stripe Tape Nail Designs
Before we get started with the how-to, let’s gather your supplies. Having the right tools makes all the difference!
Here’s what you’ll need:
- Nail Polish: Your base color(s) and your accent color(s).
- Stripe Tape: This is the star of the show! It comes in various colors (silver and gold are classics) and widths. You can find it at most beauty supply stores or online retailers. Look for fine, flexible tape designed specifically for nail art.
- Top Coat: A good quality top coat is crucial for sealing your design and adding shine.
- Tweezers or a Wax Pencil/Dotting Tool: To easily pick up and place the tape.
- Nail Clippers or Scissors: To cut the tape to the desired length.
- Cuticle Pusher or Orange Stick: To ensure the tape is firmly adhered to the nail.
- Rubbing Alcohol or Nail Polish Remover: To clean your nails before starting.
Getting Started: Prepping Your Nails
A flawless manicure starts with proper nail preparation. This step ensures your polish lasts longer and your designs look their best.
- Cleanse: Start by removing any old polish using nail polish remover and cotton pads. Give your nails a quick wipe-down with rubbing alcohol or nail polish remover to remove any oils. This helps the polish adhere better.
- Shape: File your nails to your desired shape.
- Cuticle Care: Gently push back your cuticles. You can also trim any hangnails if needed.
- Base Coat: Apply a thin layer of base coat. This protects your natural nails from staining and provides a smooth surface for your polish. Let it dry completely.
Step-by-Step: Creating Your First Stripe Tape Nail Design
Ready to create some magic? Let’s walk through a simple stripe design. This guide will focus on creating clean, parallel stripes, a fantastic starting point for beginners.
Step 1: Apply Your Base Color
Paint your nails with your chosen base color. Apply two thin coats for full, even coverage. The most important thing here is to let each coat dry completely. If your polish is still tacky, the tape will lift it, and your design will be ruined. Patience is key! A good rule of thumb is to wait at least 5-10 minutes between coats and another 10-15 minutes after the final coat before applying the tape. You can even use a quick-dry top coat over your colored polish (but before the tape) to speed up the drying process.
Step 2: Apply the Stripe Tape
This is where the fun begins!
- Cut the Tape: Using your nail clippers or sharp scissors, cut a piece of stripe tape slightly longer than your nail. This makes it easier to handle.
- Position the Tape: Carefully peel the tape off its backing. Place one end of the tape at the edge of your nail, where you want your first stripe to begin. Use your tweezers or dotting tool to help guide it precisely.
- Adhere the Tape: Gently press the tape onto your nail, smoothing it down to ensure it lies flat and adheres well. Pay special attention to pressing down firmly along the edges to prevent polish from seeping underneath. Use your cuticle pusher or orange stick to really seal the edges, especially at the free edge of the nail.
- Repeat for More Stripes (Optional): If you want multiple stripes, repeat the process, leaving a gap for your next piece of tape. Ensure enough space between tapes for contrast. Remember to press them down firmly!
Step 3: Apply Your Accent Color
Now it’s time to add your accent color over the tape.
- Paint the Stripes: Carefully paint the areas between the tape lines with your accent color. You can also paint over the entire nail if you’re going for a reverse effect or want to cover the base color. Apply thin, even coats.
- Let it Dry (Crucial!): Allow this coat of polish to dry completely. This is another critical step. If the polish isn’t fully dry when you remove the tape, you risk smudging your design. Again, waiting at least 10-15 minutes is recommended. Some people even use a quick-dry spray at this stage.
Step 4: Remove the Tape
This is the moment of truth!
- Gentle Removal: With your nails fully dry, carefully peel off the stripe tape using your tweezers. Start at one end and pull gently and slowly, keeping the tape parallel to your nail surface to avoid lifting any polish.
- Clean Up (If Needed): If any polish has seeped under the tape, you can use a small brush dipped in nail polish remover to carefully clean up the edges.
Step 5: Apply Your Top Coat
The final flourish!
- Seal the Design: Apply a generous, even layer of top coat over your entire nail. This seals in your design, adds a beautiful glossy finish, and protects your manicure from chipping.
- Let it Dry: Allow your top coat to dry completely.
Congratulations! You’ve just created a professional-looking stripe tape nail design.
Beyond Basic Stripes: Creative Stripe Tape Nail Design Ideas
Once you’ve mastered the basic parallel stripe, the possibilities are endless! Here are some ideas to inspire your next manicure:
1. Geometric Grids
Apply tape in horizontal and vertical lines to create a checkerboard effect. You can alternate colors between the grids for a more dynamic look.
2. French Tips with a Twist
Instead of a curved smile line, use tape to create sharp V-shaped or straight-across French tips. You can also use tape to create negative space French tips by taping off a section and painting the rest.
3. Half-Moon Manicures
Place tape at the base of your nail to create a clean line, then paint the rest of your nail. Removing the tape reveals a sharp half-moon design. You can also use circular stickers or the edge of tape to create the curve first.
4. Angled Stripes
Experiment with applying tape at different angles across your nail for a more dynamic, modern feel.
5. Color Blocking with Tape
Use tape to divide your nail into different color-blocked sections. This is a great way to combine multiple colors harmoniously.
6. Metallic Accents
Use metallic stripe tapes (like gold, silver, or rose gold) as accents over a solid base color. These add an instant touch of glamour.
7. Ombre with Tape
Apply your ombre effect first, let it dry, then use tape to create sharp lines separating colors or to create stripes of varying ombre shades.
Table: Stripe Tape Widths and Design Applications
| Tape Width | Common Uses | Beginner Friendliness |
| :——— | :———- | :——————– |
| Ultra Fine (0.5mm – 1mm) | Intricate geometric patterns, fine accent lines, creating negative space. | Moderate – requires precision. |
| Fine (1mm – 2mm) | Classic parallel stripes, sharp French tips, dividing sections. | High – versatile and forgiving. |
| Medium (2mm – 3mm) | Bold stripes, creating thicker color blocks, defining larger sections. | High – very visible and easy to work with. |
Choosing the right tape width can dramatically change the look of your design. Ultra-fine tape is perfect for detailed work, while wider tapes are great for bolder statements.
Troubleshooting Common Stripe Tape Nail Problems
Even with this easy method, you might run into a snag. Here are some common issues and how to fix them:
Polish Smudging When Removing Tape: This usually means the polish wasn’t fully dry. Next time, wait longer, or use a quick-dry spray. If it happens, don’t despair! You can often fix minor smudges carefully with a small brush and nail polish remover, or even by applying a thick layer of top coat over the smudged area while it’s still slightly wet.
Polish Seeping Under the Tape: This occurs when the tape isn’t pressed down firmly enough, especially at the edges. Ensure you use your cuticle pusher or orange stick to seal every edge of the tape before applying polish. Ensure the tape itself is applied smoothly without any air bubbles.
Tape Lifting Polish When Removed: This is another sign of not-quite-dry polish. If you notice this, try gently pressing the lifted polish back down with your orange stick and then quickly applying a thick layer of top coat to seal it.
Tape Not Sticking Well: Make sure your nails are clean and free of oils and lotion. Sometimes, if your nail polish has a very slick finish, the tape might have trouble adhering. A light buffing of the dried polish before tape application can help, but be gentle!
Tips for Achieving Flawless Stripe Tape Nails
Quality Over Quantity: Invest in good quality stripe tape. Cheap tape can be brittle or leave adhesive residue.
Seal the Deal: Always use plenty of top coat, especially over the edges where the tape was. This is your insurance policy against lifting and chipping.
Don’t Rush: The biggest mistake is rushing the drying time between coats and before tape removal. Patience here pays off big time!
Practice Makes Perfect: Your first attempt might not be salon-perfect, and that’s totally okay! The more you practice, the better you’ll become.
Consider Nail Polish Types: Matte polishes can be a bit trickier with tape as they absorb moisture, potentially making them lift more easily. Glossy finishes are generally more forgiving for this technique.
The Benefits of Using Adhesive Nail Tape
Adhesive nail tape, like stripe tape, can work wonders for your manicures. Beyond just stripes, it offers a variety of benefits:
Clean Lines: As we’ve discussed, it creates impossibly clean lines for French tips, geometric designs, and more.
Precision Placement: It’s much easier to control the placement of tape than freehand drawing.
Speed and Efficiency: Saves significant time compared to intricate hand-painting.
Variety of Finishes: Available in colors, glitters, and even holographic finishes to add flair.
Design Versatility: Can be used for more than just stripes – think outlines, borders, or even as a stencil for negative space designs.
Durability: When applied correctly over fully dry polish, the tape itself is quite durable during the application process.
For more information on nail care and polish longevity, check out resources from reputable sources like the American Academy of Dermatology for general nail health. They offer excellent advice on keeping your nails and cuticles healthy, which is the foundation for any beautiful nail art.
Table: Stripe Tape vs. Freehand Stripes
| Feature | Stripe Tape Designs | Freehand Stripes |
| :—— | :—————– | :————— |
| Ease of Use | Very Easy (Beginner Friendly) | Moderate to Difficult (Requires Practice) |
| Precision | High (Sharp, Clean Lines) | Moderate to Low (Can be prone to wobbles) |
| Speed | Faster for sharp lines | Can be slow for intricate patterns |
| Cost | Low (Tape is inexpensive) | Minimal (Polish and brush) |
| Design Complexity | Excellent for geometric & sharp designs | Good for artistic & flowing designs |
| Mess Factor | Low | Can be higher due to drips/blobs |
As you can see, stripe tape offers a clear advantage for beginners seeking precise, sharp lines without the steep learning curve of freehand painting.
Frequently Asked Questions About Stripe Tape Nail Designs
Q1: What kind of polish works best under stripe tape?
A: Any nail polish can work, but it’s crucial that it is completely dry* before applying the tape. Avoid very thick or gloopy polishes as they take longer to dry and are more prone to lifting.
Q2: Can I reuse stripe tape?
A: No, stripe tape is typically a one-time use product. It’s designed to adhere strongly and is usually removed along with some of the painted polish. Trying to reuse it will likely result in uneven adhesion and a messy design.
Q3: How do I remove sticky residue from stripe tape?
A: If your tape leaves a sticky residue, you can usually remove it with a cotton pad lightly dampened with rubbing alcohol or nail polish remover. Be very gentle to avoid disturbing the painted design.
Q4: Can I put stripe tape over glitter polish?
A: Yes, but glitter polish can be tricky because the glitter particles create an uneven surface. Ensure the glitter polish is fully dry and smooth. You might need to press the tape down extra firmly, and even then, a little glitter might stick to the tape. Always apply your top coat generously to smooth everything out.
Q5: How long does a stripe tape manicure typically last?
A: With proper application and a good top coat, a stripe tape manicure can last as long as any other regular nail polish manicure, typically 5-7 days, depending on your nail care habits and the quality of the products used.
Q6: Are there any risks of damaging my nails with stripe tape?
A: When used correctly and with proper removal, stripe tape is safe. The main risk of damage comes from peeling off the tape too aggressively, especially if the polish underneath isn’t fully dry, which can lift your polish or even your natural nail layers. Always remove it gently.
Conclusion
Stripe tape nail designs are an absolute game-changer for anyone looking to add a touch of sophisticated style to their nails without a lot of stress. From simple, elegant lines to more complex geometric patterns, this technique empowers you to create salon-worthy looks right at your fingertips. Remember to take your time, let each layer dry thoroughly, and have fun experimenting with different colors and patterns. Your nails are a canvas for self-expression, and with stripe tape, creating beautiful art has never been more accessible. So grab your tape, your favorite polishes, and get ready to wow yourself and everyone you meet with your stunning new manicure!


