Strawberry milk nails offer a soft, creamy, and subtly pink hue that’s perfect for a natural yet polished look. This beginner-friendly manicure trend is easy to achieve at home with minimal supplies. Follow our simple guide to get that coveted sweet and chic strawberry milk vibe on your fingertips.
Are you dreaming of nails that look like they just dipped into a delicious glass of strawberry milk? That soft, dreamy pink shade is totally in, and guess what? You can totally rock it at home! It’s a super simple trend that makes your nails look polished and sweet. Don’t worry if you’re new to at-home manicures; we’ll walk you through everything. Get ready to discover how easy it is to achieve this adorable look. What you’ll learn today is how to get perfect strawberry milk nails without a fuss.
Frequently Asked Questions about Strawberry Milk Nails
What exactly are strawberry milk nails?
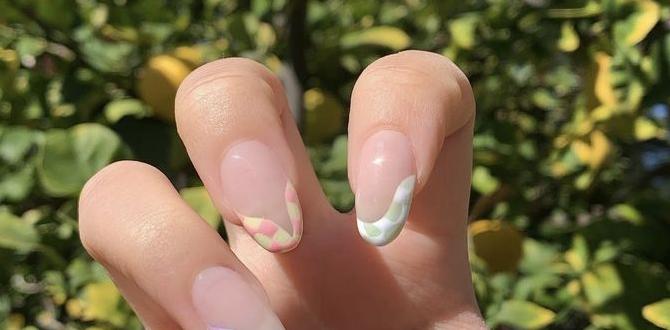
Strawberry milk nails are a manicure style characterized by a muted, creamy pink color. It mimics the natural flush of healthy nails with a touch of milky opacity, giving a soft, subtly sweet, and sophisticated appearance.
Are strawberry milk nails hard to do at home?
Not at all! They are considered one of the easiest nail trends to recreate at home. The look primarily involves a sheer or semi-sheer pink polish, making it very forgiving for beginners.
What kind of nail polish colors should I look for to create this look?
Look for polishes labeled as “sheer pink,” “milky pink,” “blush pink,” or “nude pink.” Sometimes, you can achieve the effect by mixing a classic pink polish with a clear top coat to sheer it out, or by layering a semi-sheer pink. A touch of white can also add to the ‘milky’ effect.
How long do strawberry milk nails typically last?
Like any typical nail polish manicure, strawberry milk nails can last anywhere from 3-7 days, depending on the quality of the polish used, application technique, and how well you care for your hands and nails. Using a good base coat and top coat can help extend their life.
Can I add other nail art elements to strawberry milk nails?
Absolutely! While the simple shade is lovely on its own, you can add subtle touches like a tiny white dot, a thin gold stripe, or even a touch of glitter for a bit of sparkle. Keep it minimalist to maintain the soft aesthetic.
Is this trend suitable for all nail shapes and lengths?
Yes! The beauty of the strawberry milk nail shade is its versatility. It looks gorgeous on short, natural nails, long almond shapes, square manicures, and everything in between. It’s a universally flattering color.
What Exactly Are Strawberry Milk Nails?
Imagine the most delightful sip of a creamy, sweet strawberry milkshake on a warm day – that’s the essence of strawberry milk nails! This popular nail trend features a soft, milky pink hue that’s both subtle and chic. It’s not a bright, bold pink, nor is it a sheer jelly pink. Instead, it’s a beautifully balanced shade that looks like pink lemonade blended with creamy milk. It embodies a modern, minimalist aesthetic that’s easy to wear and incredibly flattering. Think clean, sophisticated, and undeniably pretty with just a hint of sweetness.
This shade is perfect for anyone who loves a “my nails but better” look. It’s the ideal choice for those seeking a polished finish without being overly flashy. Whether you’re heading to the office, a casual brunch, or even a special event, strawberry milk nails offer a touch of elegance that complements any outfit. It’s a versatile shade that can be dressed up or down, making it a go-to for many!
Why You’ll Love Strawberry Milk Nails: The Sweet Perks
This trendy manicure isn’t just about looks; it’s about a feeling! Strawberry milk nails offer a delightful blend of style and simplicity that makes them a favorite among nail enthusiasts and beginners alike. Let’s dive into why this trend is so irresistible.
- Universally Flattering: The soft, milky pink shade is incredibly versatile, looking beautiful on all skin tones. It enhances natural nail color with a gentle, flattering flush.
- Effortlessly Chic: This look is the epitome of understated elegance. It’s chic, polished, and never goes out of style, making it perfect for any occasion.
- Beginner-Friendly: The semi-opaque nature of the polish means minor imperfections are easily hidden. It’s forgiving and simple to apply, making it an excellent choice for DIY manicures.
- Mood-Boosting: There’s something inherently cheerful and sweet about this color. It adds a happy, optimistic touch to your day.
- Low Maintenance: Unlike bold colors or intricate designs, a chipped strawberry milk nail is often less noticeable, meaning fewer touch-ups and a longer-lasting polished appearance.
- Customizable: While the classic shade is divine, you can easily tweak it by adjusting the opacity for a sheerer or more opaque look, or even adding a hint of shimmer.
Getting Started: Your Strawberry Milk Nail Toolkit
Before we dive into the step-by-step application, let’s gather the essential tools and materials. Having everything ready beforehand makes the process smooth and enjoyable. Don’t worry, you likely have most of these items already!
Essential Nail Care and Preparation Items
- Nail Polish Remover: To clean any old polish and prep the nails. Opt for an acetone-free remover if you have dry cuticles.
- Cotton Pads or Balls: For applying the nail polish remover.
- Nail File: To shape your nails to your desired length and style. For a softer look, slightly rounded edges work beautifully.
- Nail Buffer: To smooth out any ridges on the nail surface and create a nice shine before polish application. A 3-way buffer is great for beginners!
- Cuticle Pusher or Orangewood Stick: To gently push back the cuticles for a clean nail bed.
- Cuticle Oil (Optional but Recommended): To moisturize your cuticles after pushing them back.
The Star Players: Strawberry Milk Polish Essentials
This is where the magic happens! You have a couple of ways to achieve the perfect strawberry milk shade.
- Your Strawberry Milk Polish: This could be a polish specifically marketed as “strawberry milk,” “milky pink,” “blush pink,” or a semi-sheer nude pink. Look for creamy finishes.
- OR, A Combination Approach:
- A classic pink nail polish
- A good quality clear top coat
- A touch of white nail polish (optional)
Pro Tip: If you can’t find a perfect “strawberry milk” shade, a great trick is to mix a little bit of your favorite pink polish with a clear top coat on a clean surface (like a palette or even a piece of foil) to achieve your desired level of sheerness. You can also add a tiny dot of white polish to the mix for that extra milky opacity!
Application & Finishing Touches
- Base Coat: Crucial for protecting your natural nail and helping polish adhere better.
- Top Coat: Seals your manicure, adds shine, and helps prevent chipping. A quick-drying top coat is a lifesaver for busy bees!
- A clean workspace: A well-lit area with paper towels or a disposable mat to protect surfaces.
Step-by-Step Guide: Achieving Perfect Strawberry Milk Nails
Ready to get that sweet, signature strawberry milk look? It’s easier than you think. Follow these simple steps, and you’ll have beautiful, trendy nails in no time!
Step 1: Prep Your Nails for Perfection
A flawless manicure starts with clean, well-prepared nails. This step is key to making your polish look smooth and last longer.
- Remove Old Polish: If you have any old nail polish on, soak a cotton pad with nail polish remover and gently wipe each nail until it’s completely clean.
- Shape Your Nails: Use your nail file to gently shape your nails. For a soft, elegant look that complements strawberry milk nails, try a rounded or soft square shape. File in one direction to avoid weakening the nail. You can learn more about nail shaping at resources like the American Academy of Dermatology’s guide on nail care.
- Gentle Cuticle Care: Apply a tiny drop of cuticle oil (if using) to each cuticle and gently push back the skin with a cuticle pusher or orangewood stick. Be gentle – you’re not cutting anything, just tidying up.
- Buff for Smoothness: Take your nail buffer and gently buff the surface of each nail. Focus on smoothing out any ridges. This also gives your nails a slight natural sheen and helps the base coat adhere better.
- Cleanse: Give your hands a quick wash with soap and water to remove any dust or residue from filing and buffing. Ensure your nails are completely dry.
Step 2: Apply Your Base Coat
A good base coat is non-negotiable for a healthy manicure and long-lasting color. It acts as a protective barrier between your natural nail and the colored polish, preventing staining and creating a smooth canvas.
- Apply one thin, even layer of your chosen base coat to each nail.
- Make sure to cap the free edge of your nail by running the brush lightly along the tip. This helps prevent chipping.
- Let the base coat dry completely. This usually takes about 60 seconds.
Step 3: Achieve the Strawberry Milk Hue
This is the fun part! Here’s how to get that perfect strawberry milk shade, whether you have a dedicated polish or are creating your own blend.
Method A: Using a Dedicated Strawberry Milk Polish
- Apply First Coat: Apply one thin, even coat of your “strawberry milk” or milky pink polish to each nail. This might look a little streaky or sheer, and that’s okay!
- Let it Dry: Allow the first coat to dry for at least 1-2 minutes. A perfectly applied polish needs a proper drying time between coats to avoid smudging.
- Apply Second Coat: Apply a second thin, even coat. This coat should build up the color to that beautiful, creamy, semi-opaque strawberry milk look. If you want it more opaque, a third thin coat might be needed.
Method B: Creating Your Own Strawberry Milk Mix
If you don’t have a specific polish, you can easily create the shade yourself!
- Prepare Your Palette: On a clean, flat surface like a nail art palette, a piece of foil, or even a disposable paper plate, place a small amount of your favorite classic pink polish.
- Add Clear Top Coat: Add a generous amount of clear top coat to the pink polish. Start with a 1:1 ratio (one part pink, one part clear) and mix well with a clean brush or toothpick. This will sheer out the pink.
- Adjust for Opacity: Test your mixture on one nail. If it’s still too sheer, add a bit more pink polish. If it’s too opaque, add more clear top coat. For that “milky” effect, you can also add a tiny dot of white polish to your mix. Keep mixing until you achieve the desired creamy, soft pink, subtly opaque shade.
- Apply Your Custom Shade: Once you’re happy with your custom blend, apply it to your nails as you would any normal polish, following the same two- coat process as in Method A.
Important Note: If you are mixing polish, it’s best to mix enough for your entire manicure. Try to replicate the exact ratio if you need to add more mid-manicure, although pre-mixing the full amount is ideal.
Step 4: Apply Your Top Coat
This is the final step that seals in your beautiful color and adds that gorgeous glossy finish strawberry milk nails are known for.
- Allow your final coat of colored polish to dry for at least 2-3 minutes.
- Apply one to two thin, even layers of your favorite high-shine top coat. Like the base coat, make sure to cap the free edge of your nails to seal the color and prevent chips.
- If you have one, a quick-drying top coat is a fantastic investment. It dramatically cuts down on drying time and prevents smudges.
Step 5: Dry and Moisturize
Patience is a virtue, especially when it comes to drying nail polish!
- Air Dry: Allow your nails to air dry completely. This can take anywhere from 10-20 minutes or longer, depending on the products used. Avoid touching anything during this time.
- Quick Dry (Optional): If you used a quick-dry top coat, the polish will typically set much faster.
- Cuticle Care: Once your nails are fully dry, apply a richer cuticle oil and massage it into your cuticles and the surrounding skin. This keeps your nails healthy, prevents dryness, and makes your manicure look even more professional.
Congratulations! You’ve just created beautiful strawberry milk nails.
Tips for Making Your Strawberry Milk Nails Last
You’ve put in the effort to create a gorgeous mani, so let’s keep it looking fresh for as long as possible! Here are some handy tips to extend the life of your strawberry milk nails:
- Be Gentle: Avoid using your nails as tools. Opening cans, scraping off stickers, or doing harsh scrubbing can chip even the best manicures.
- Wear Gloves: When doing household chores like washing dishes or cleaning, always wear rubber gloves. This protects your hardworking hands and your polished nails from harsh chemicals and prolonged water exposure.
- Reapply Top Coat: Every 2-3 days, apply an additional layer of top coat. This helps refresh the shine and adds an extra protective layer, significantly reducing the chance of chips and wear.
- Moisturize Regularly: Keep your hands and cuticles hydrated. Dryness can make polish brittle and more prone to chipping. Apply hand cream throughout the day and cuticle oil before bed.
- Avoid Hot Water Soaks: Prolonged soaking in hot tubs or long, steamy showers can soften your nail polish, making it more susceptible to damage.
- Fix Small Chips Promptly: If you notice a tiny chip, you can often fix it by gently filing it smooth and applying a touch of top coat. For slightly larger chips, you might need to carefully apply a thin layer of your strawberry milk polish followed by top coat.
Troubleshooting Common Issues
Even the best nail artists run into little hiccups sometimes! Don’t worry, these are common and easy to fix. Here are a few issues you might encounter and how to solve them:
| Problem | Solution |
|---|---|
| Streaky application | Most sheer polishes can be streaky. Apply thin, even coats and allow each to dry completely before applying the next. Three thin coats are often better than two thick ones for a smooth finish. Ensure your polish is not too old or dried out; if it is, consider adding a drop of nail polish thinner. |
| Bubbles in the polish | Bubbles usually occur when polish is applied too thickly or when it’s applied to damp nails or in very humid conditions. Apply polish in thin coats. Avoid ‘shaking’ your polish bottle, as this introduces air; instead, gently roll the bottle between your hands. Ensure nails are completely dry before applying polish. |
| Polish is too sheer/opaque | If your polish isn’t quite the right shade: for too sheer, add another thin coat. For too opaque, try applying one coat over a sheer pink or mix it with more clear polish (see Method B in the steps). Sometimes, achieving the perfect shade requires experimentation!
|

